
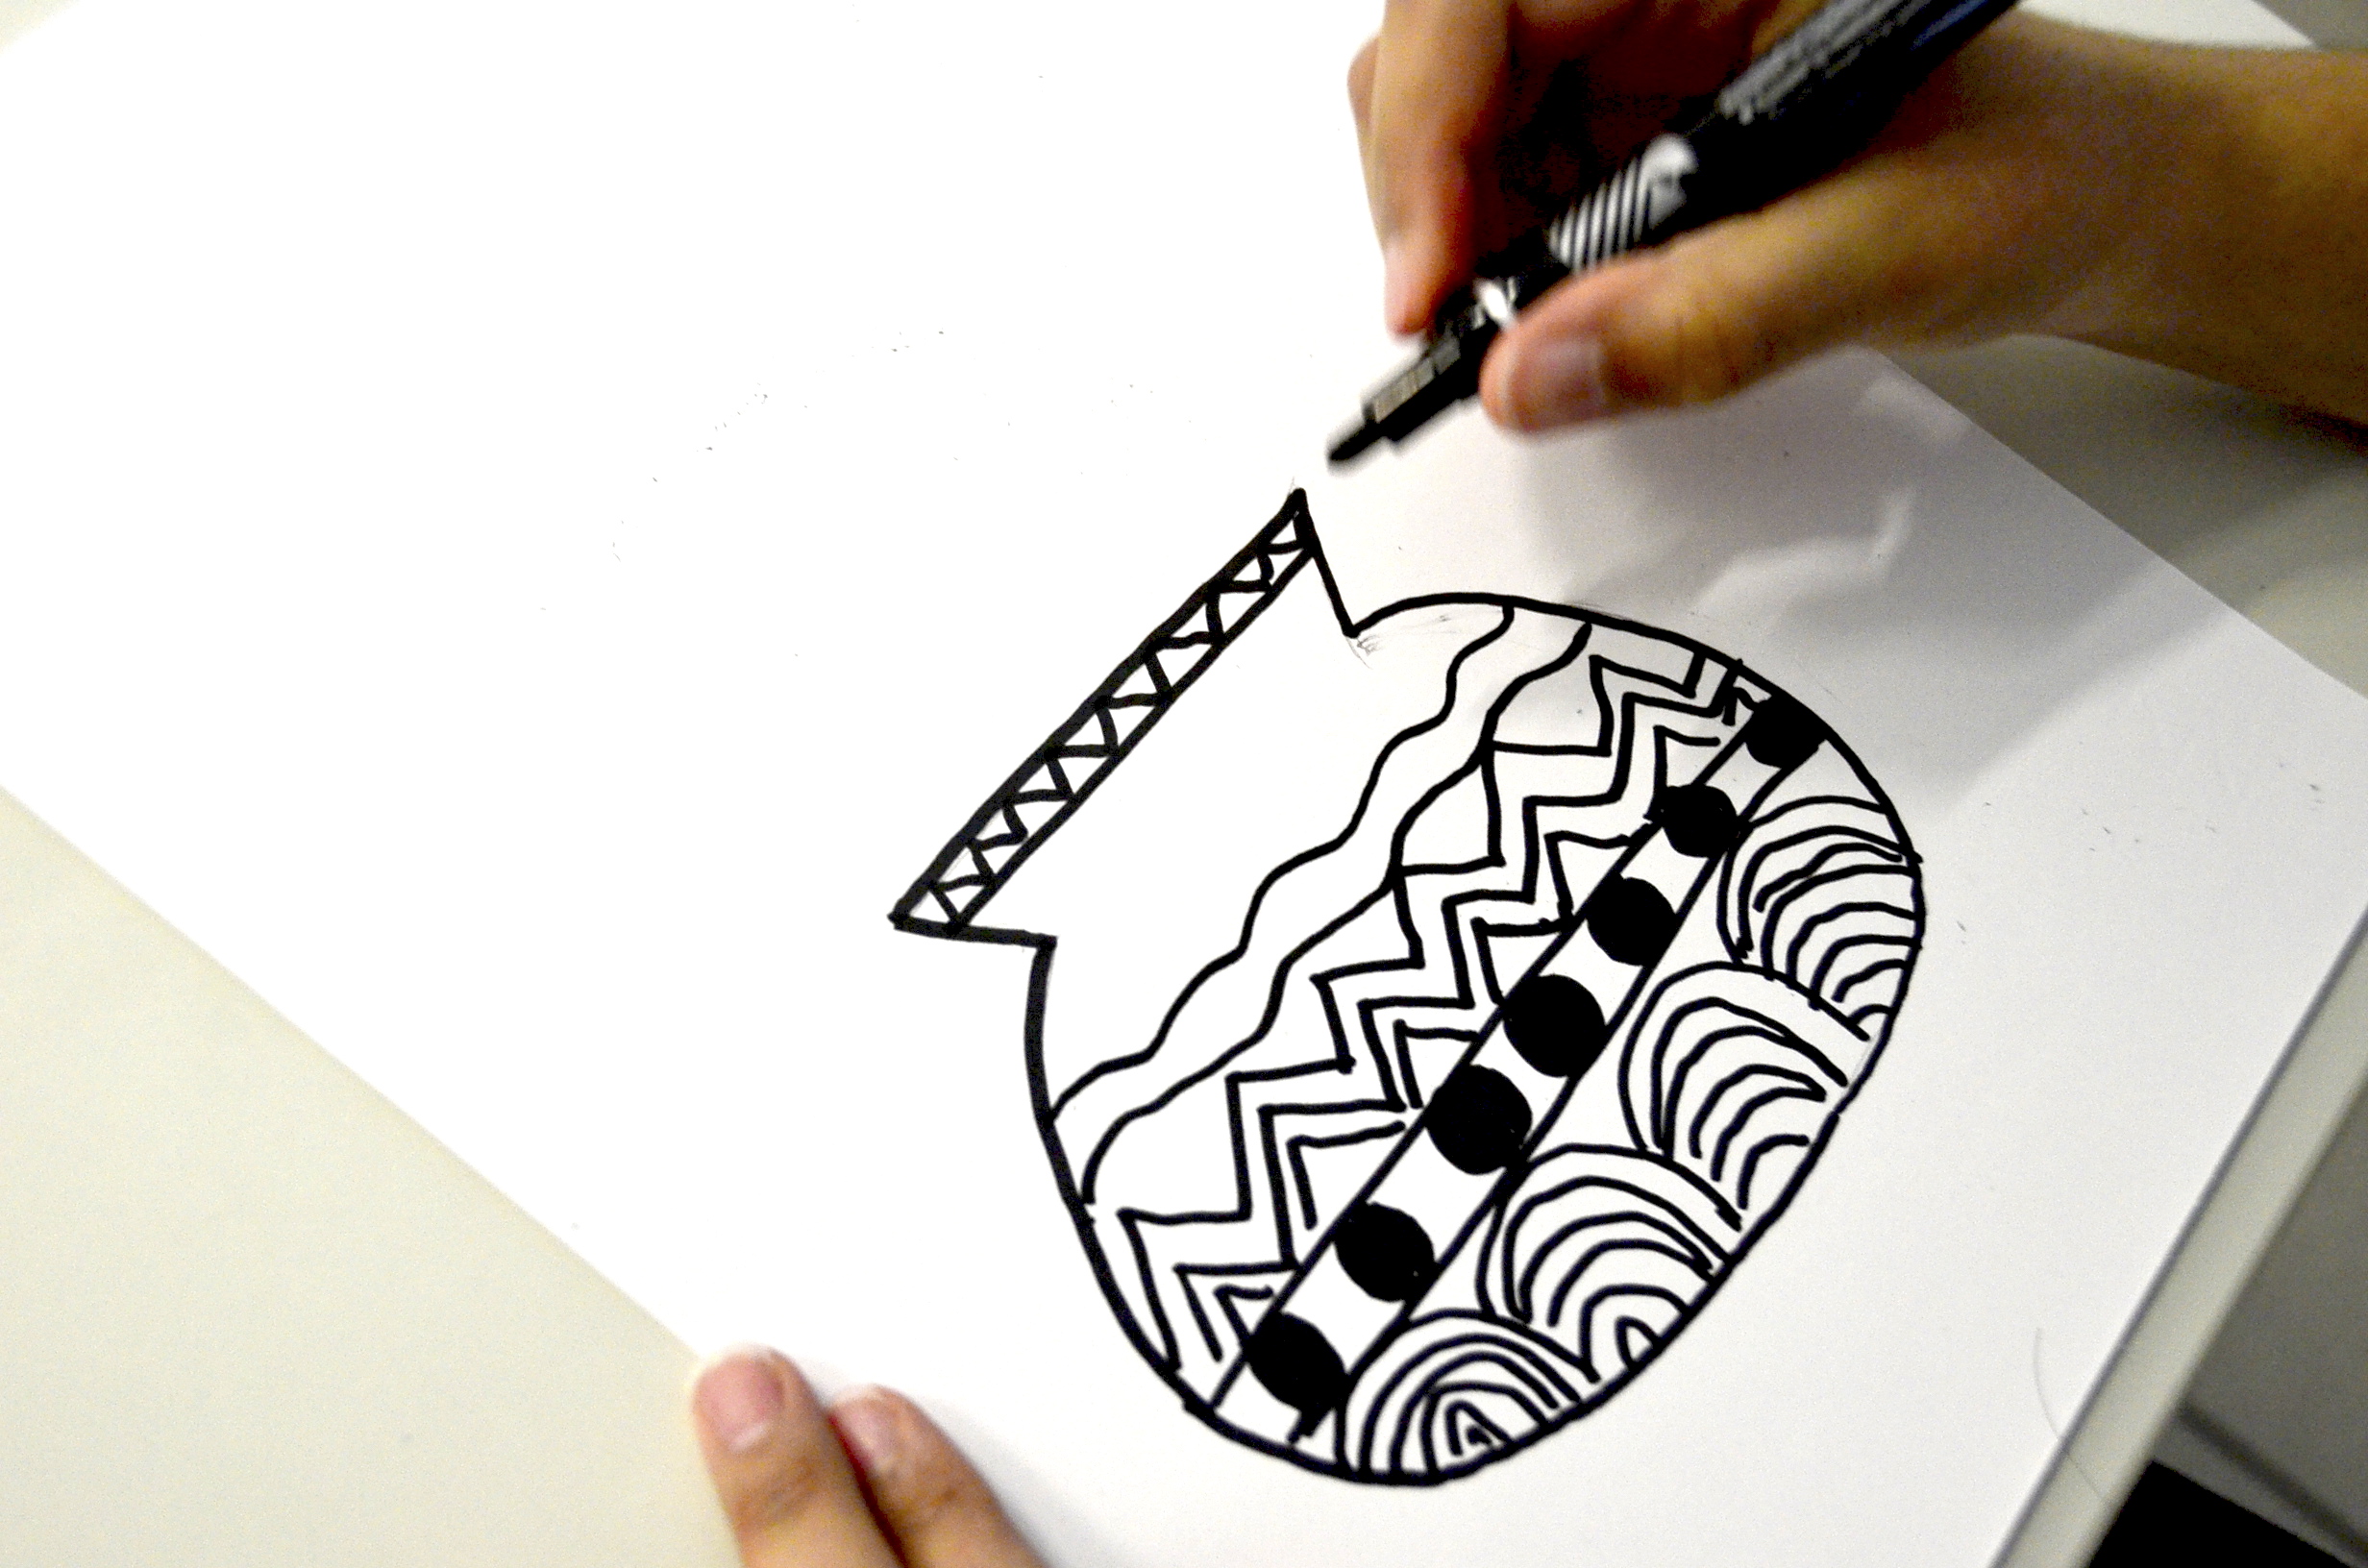
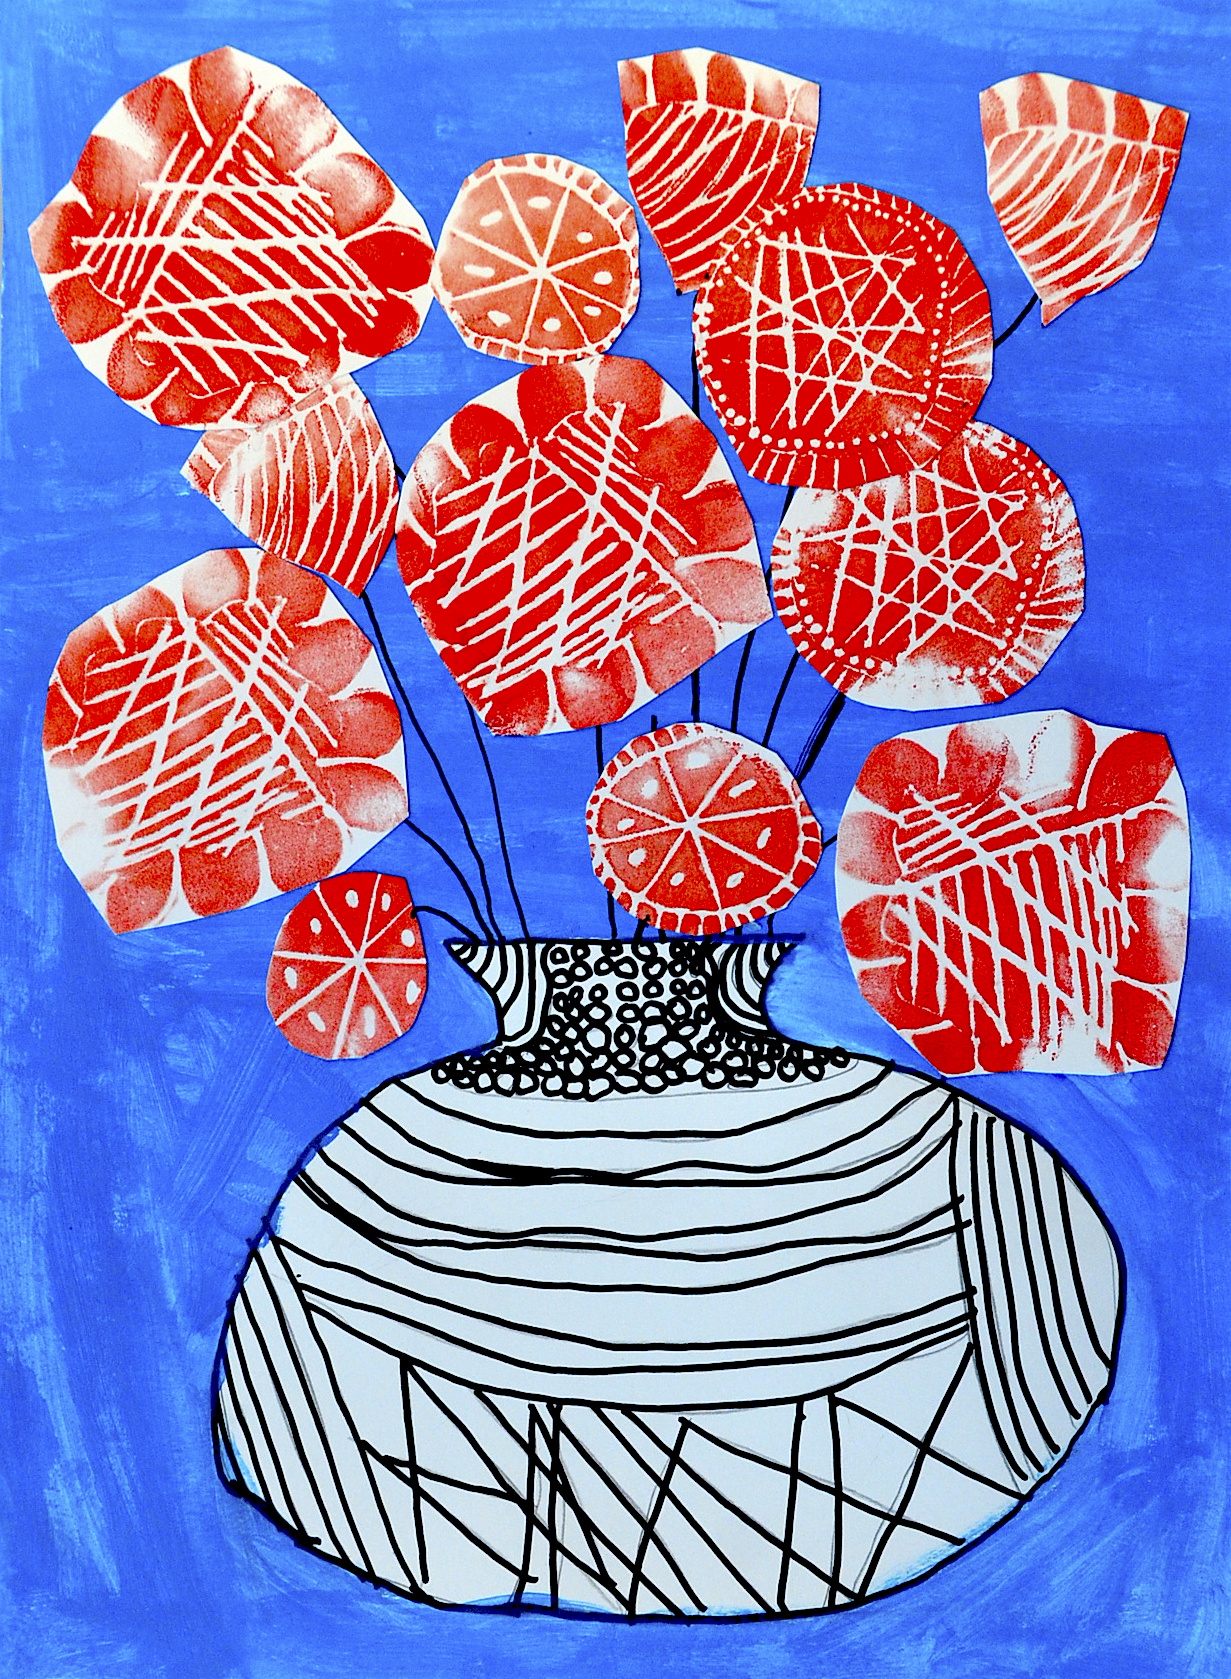
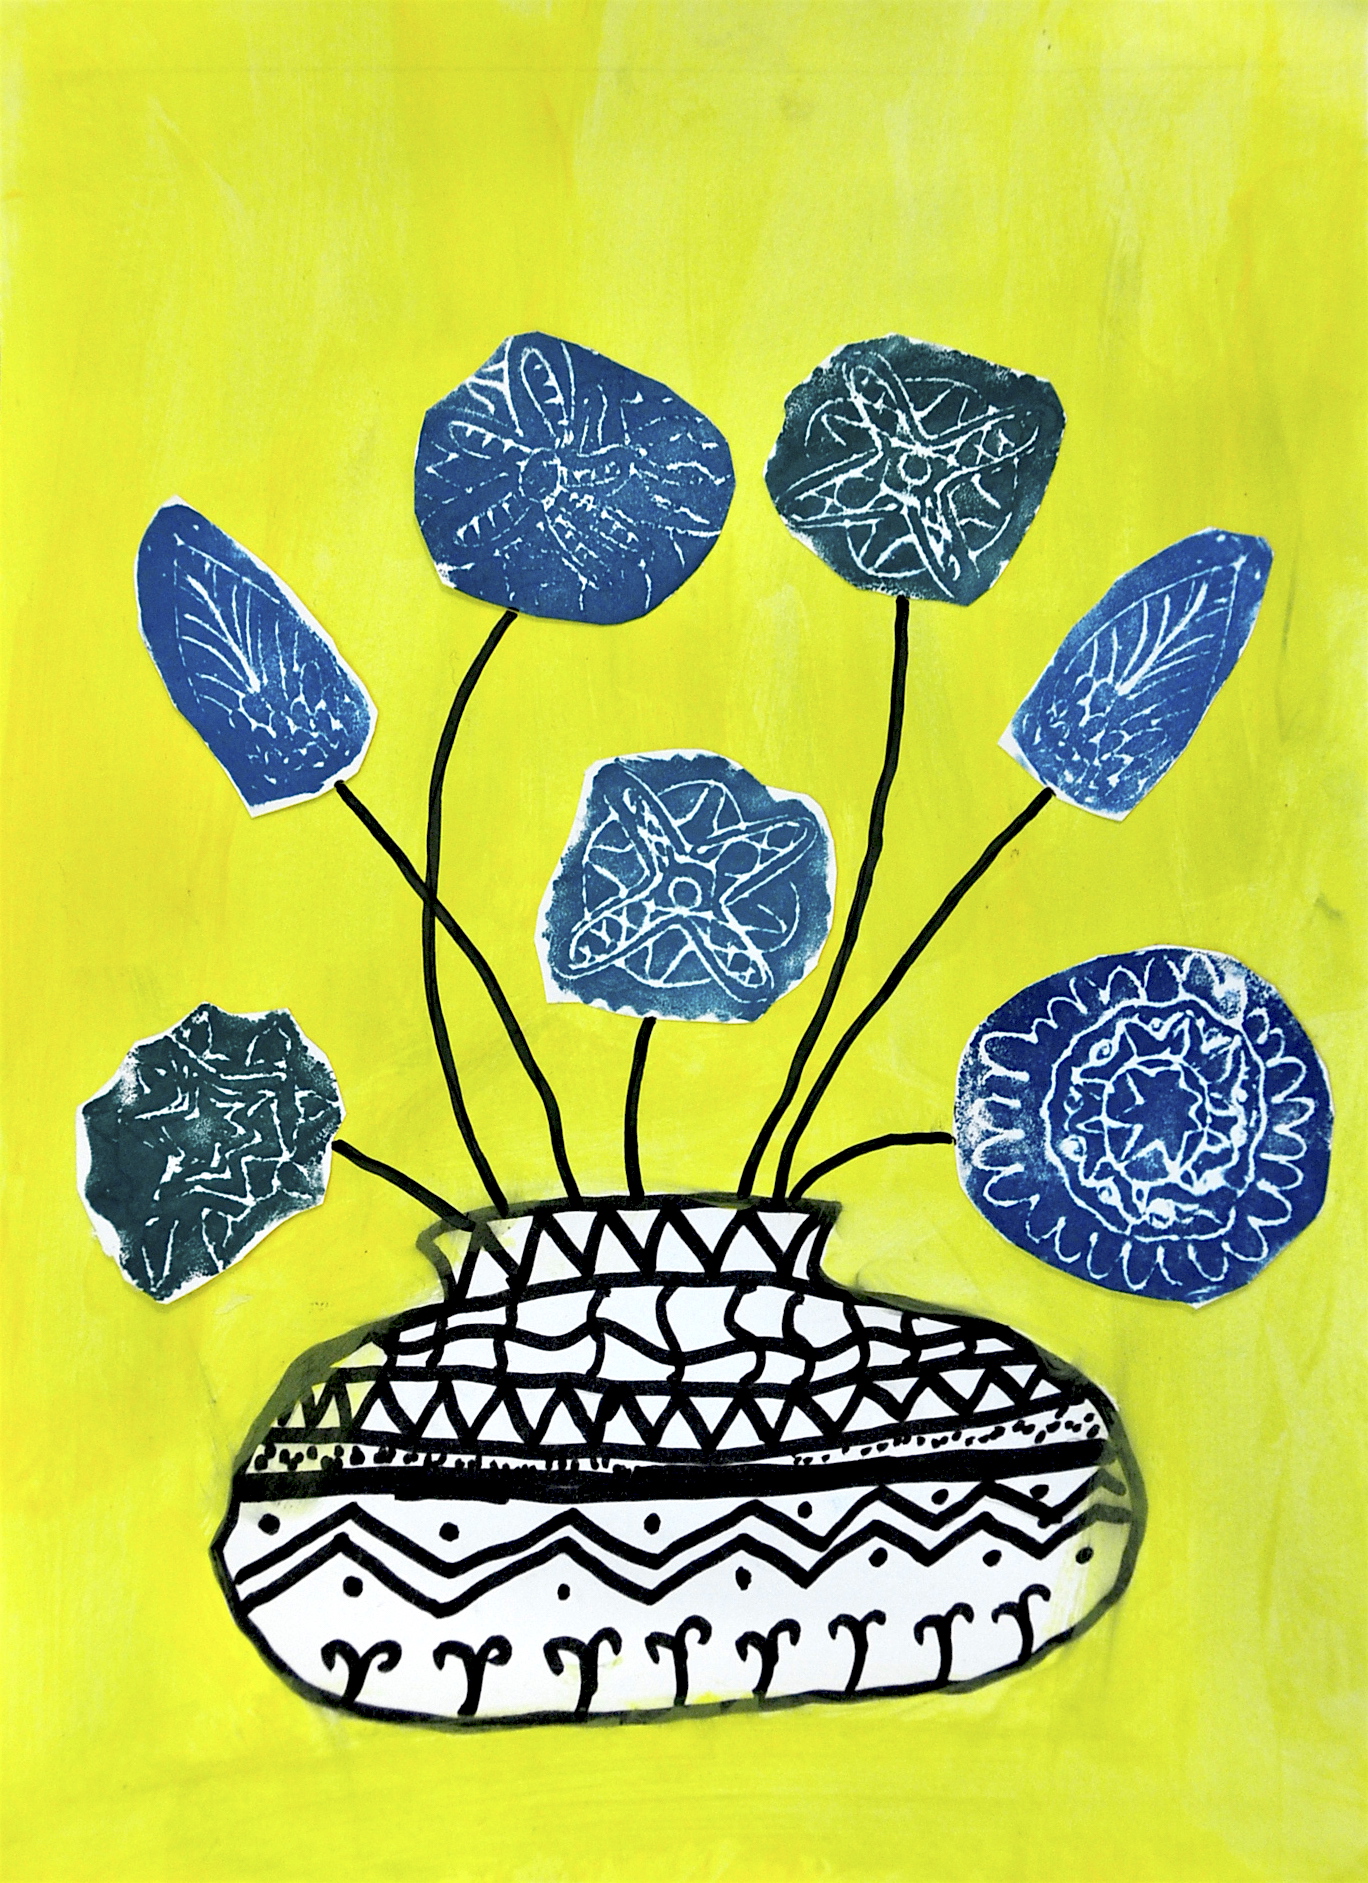
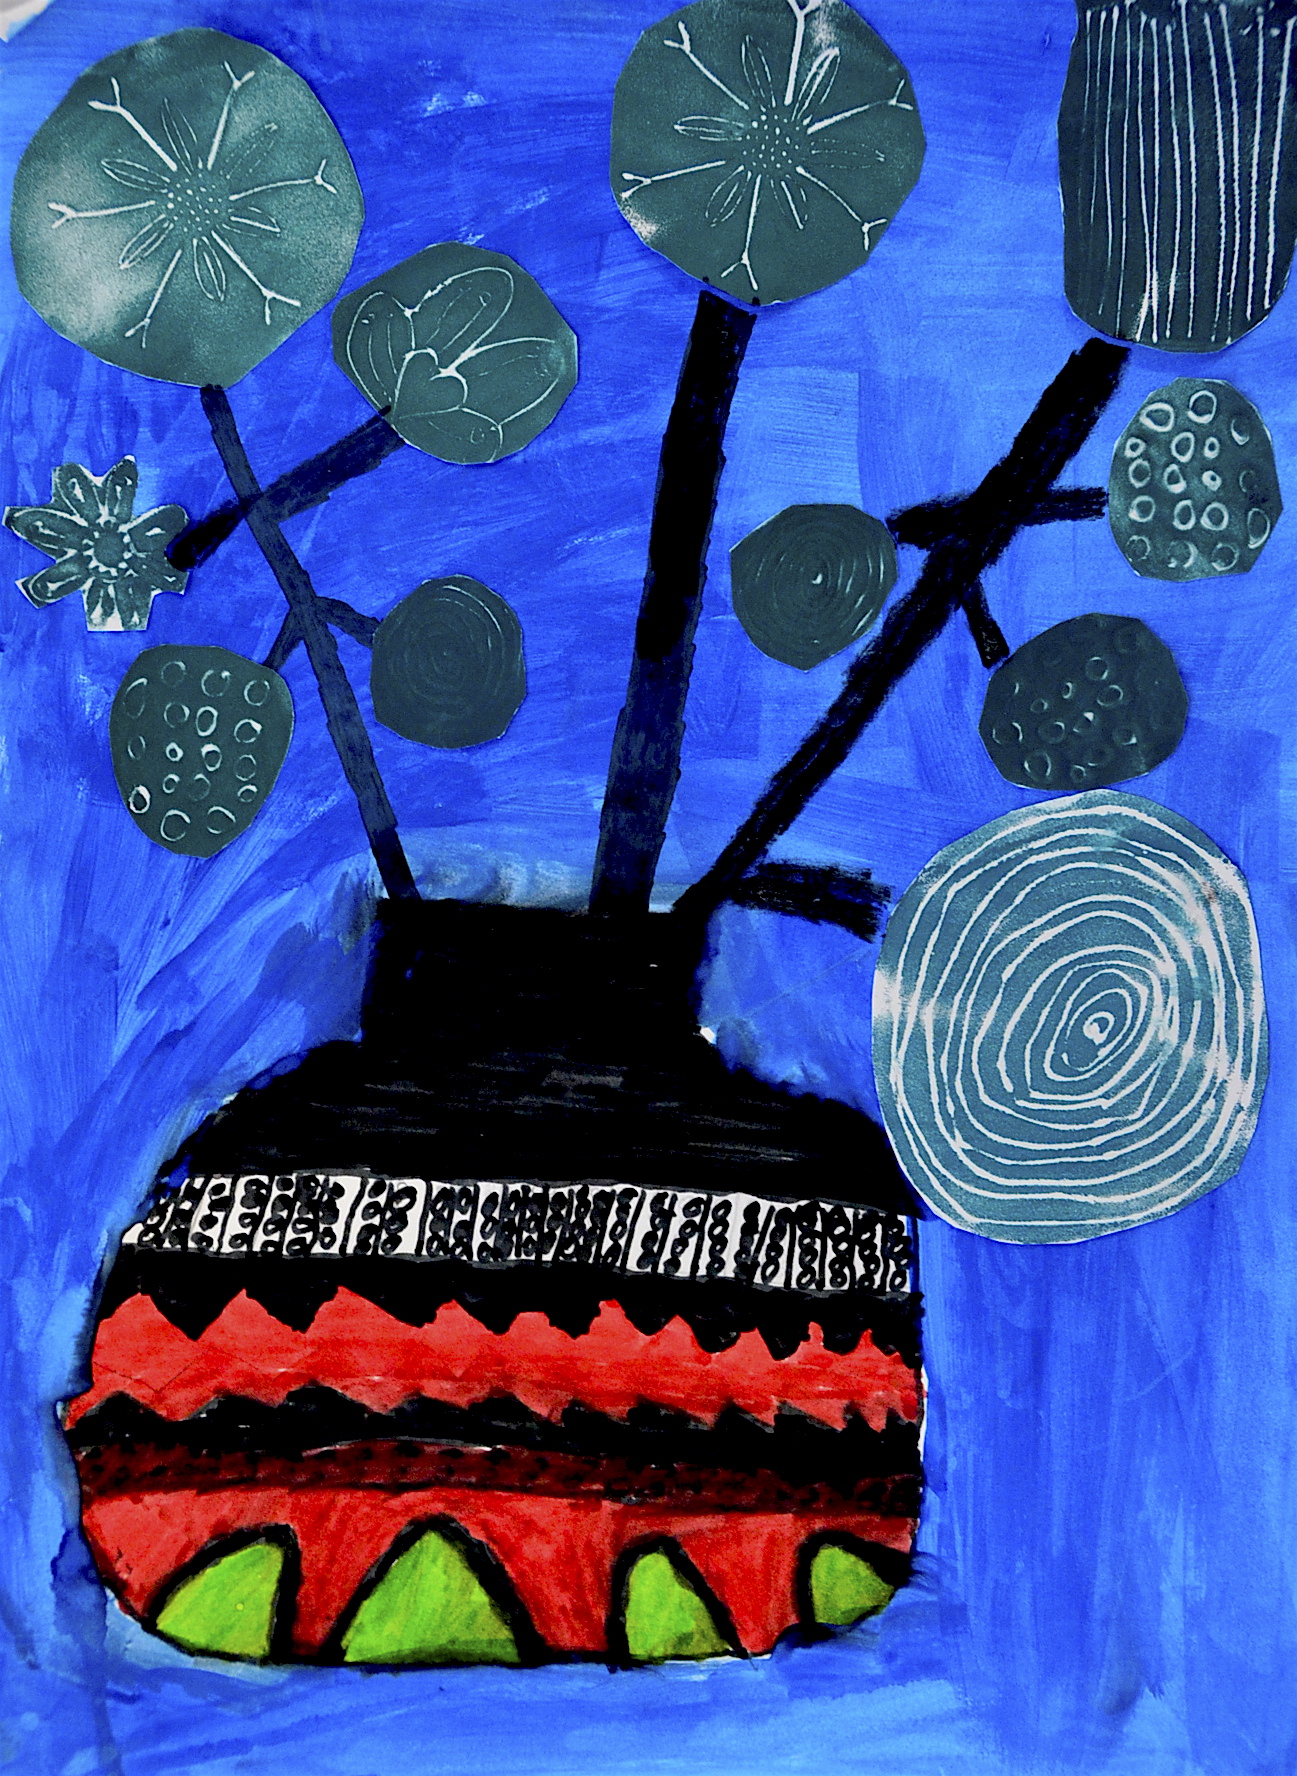
We have already worked with this interesting material that can be etched, cut, shaped, glued, colored and printed. We used the craft foam sheets for printing, because it’s cheap, it’s suitable to be engraved, inked and printed in easy, simple steps. This time with Grade 6th students, we created some printing plates in flower shapes, inspired by works of the great illustrator and artist Lisa Congdon.
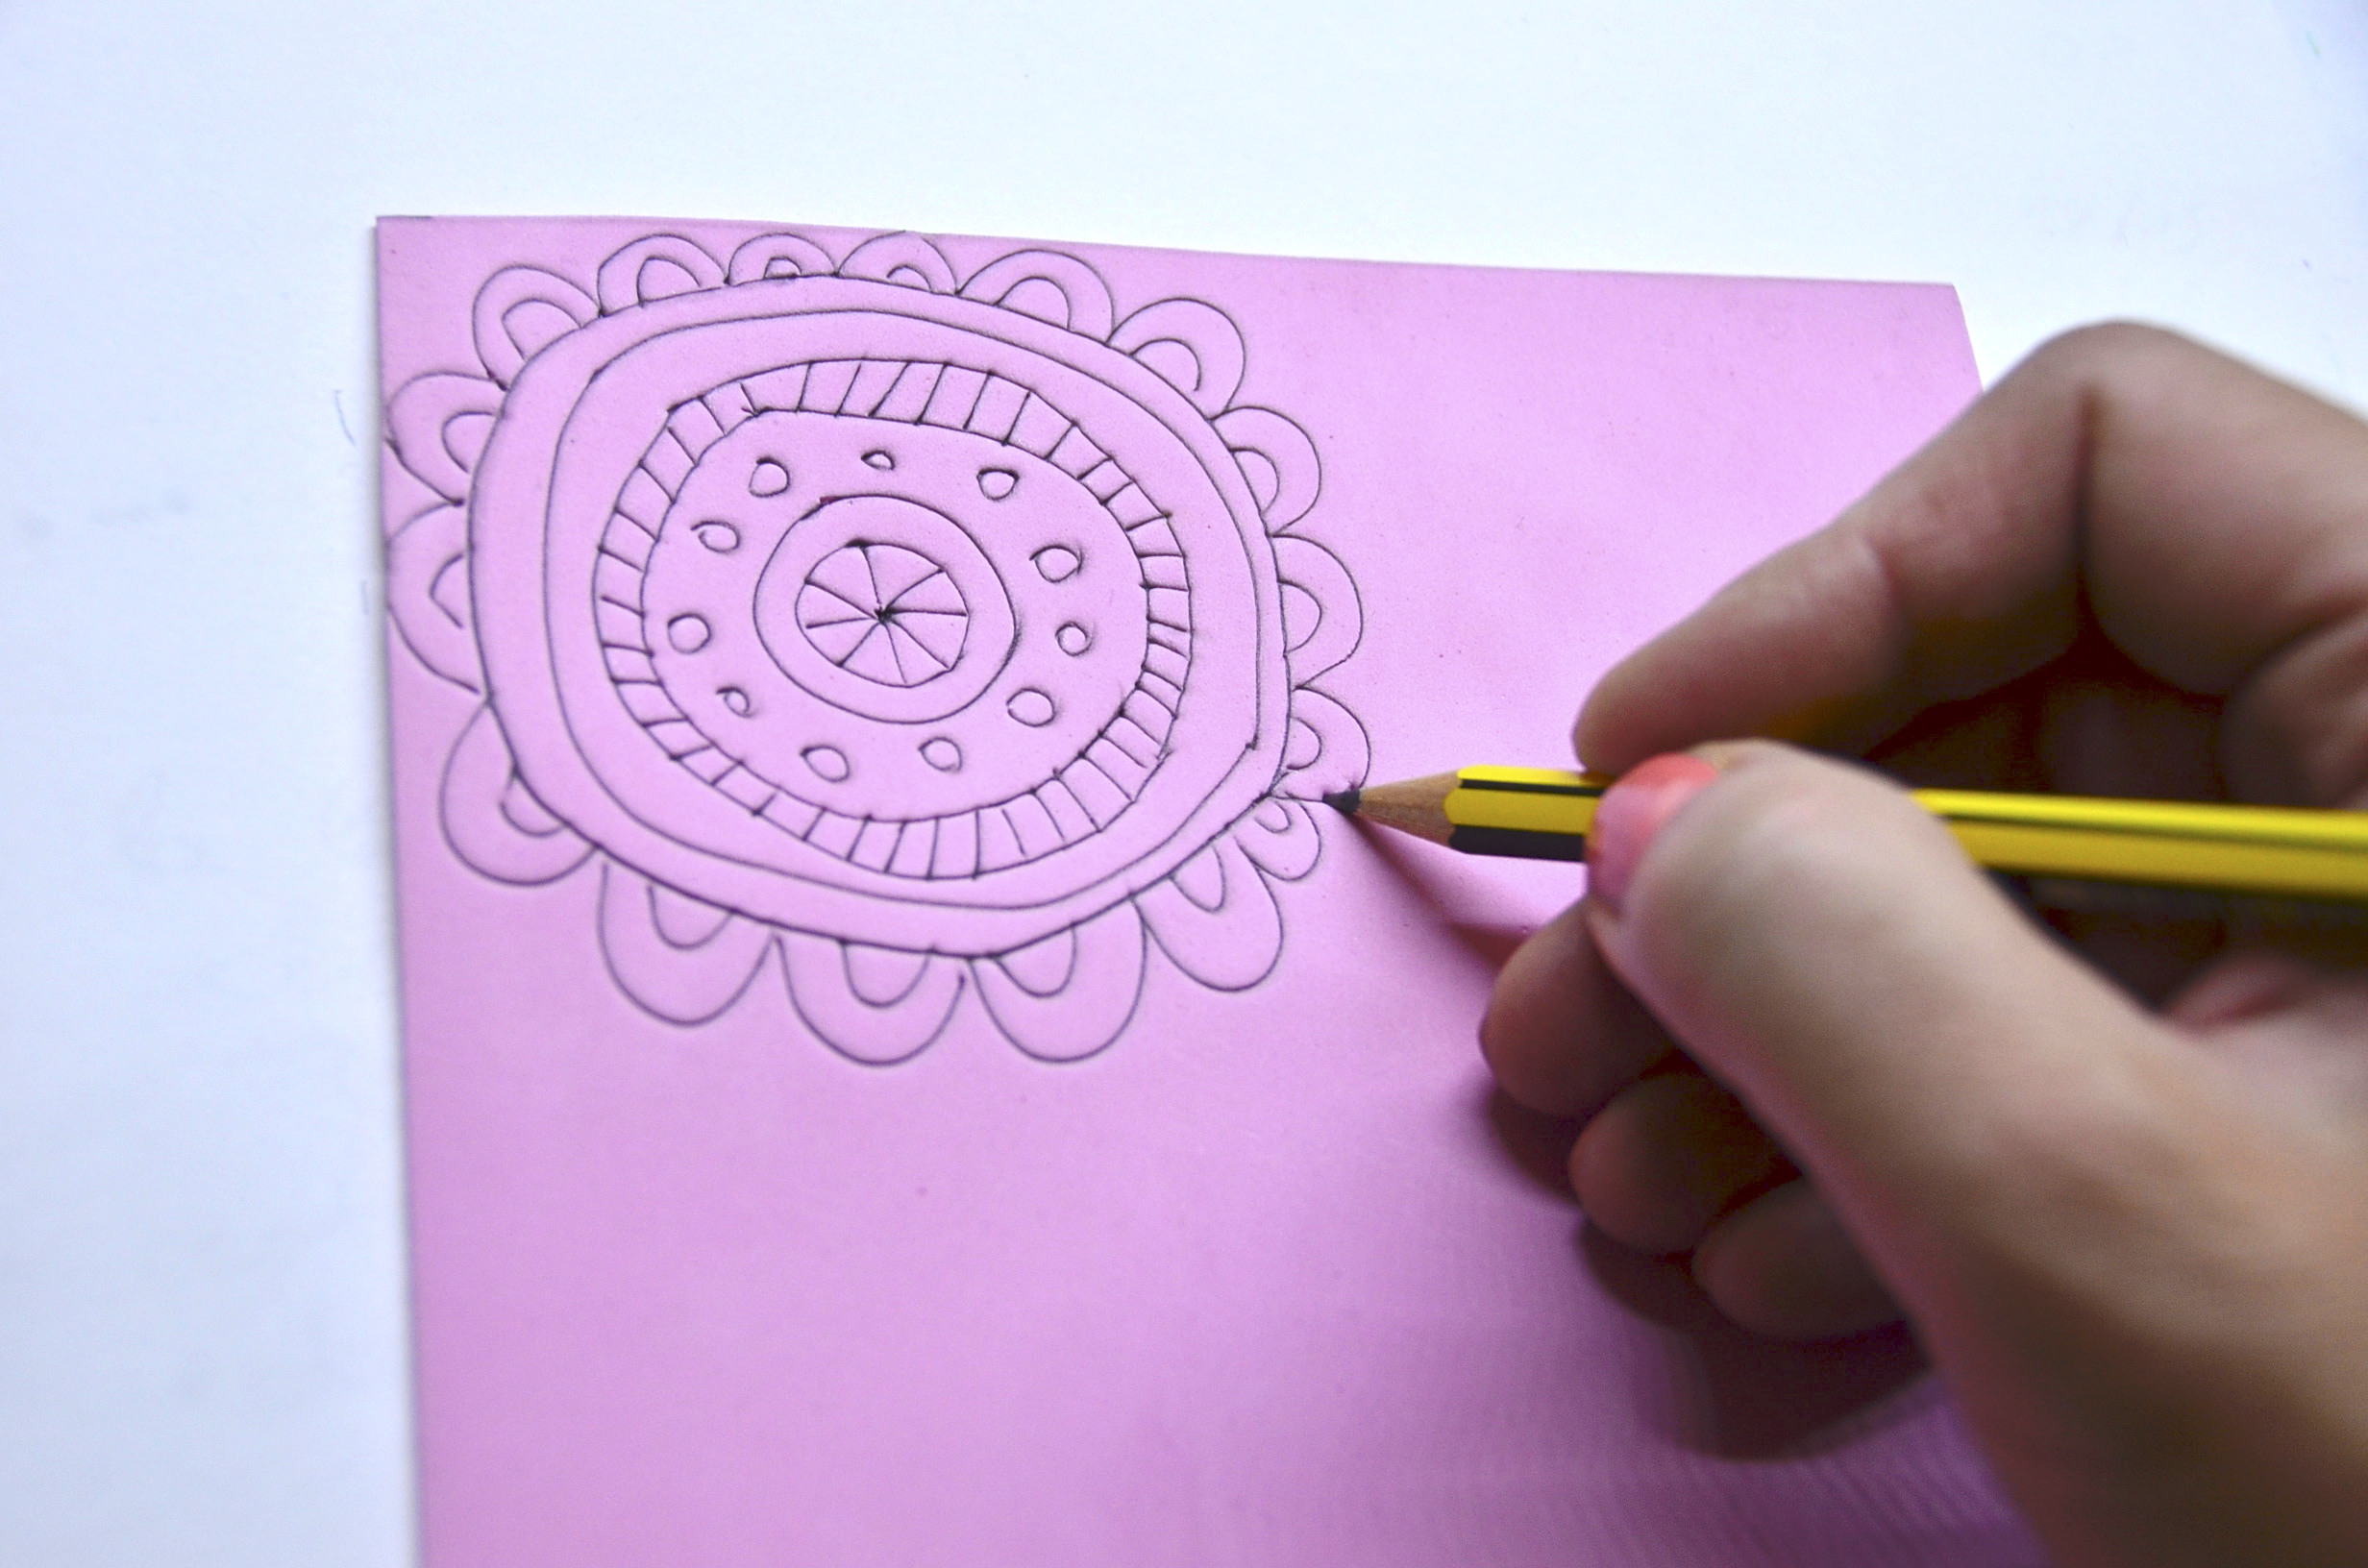
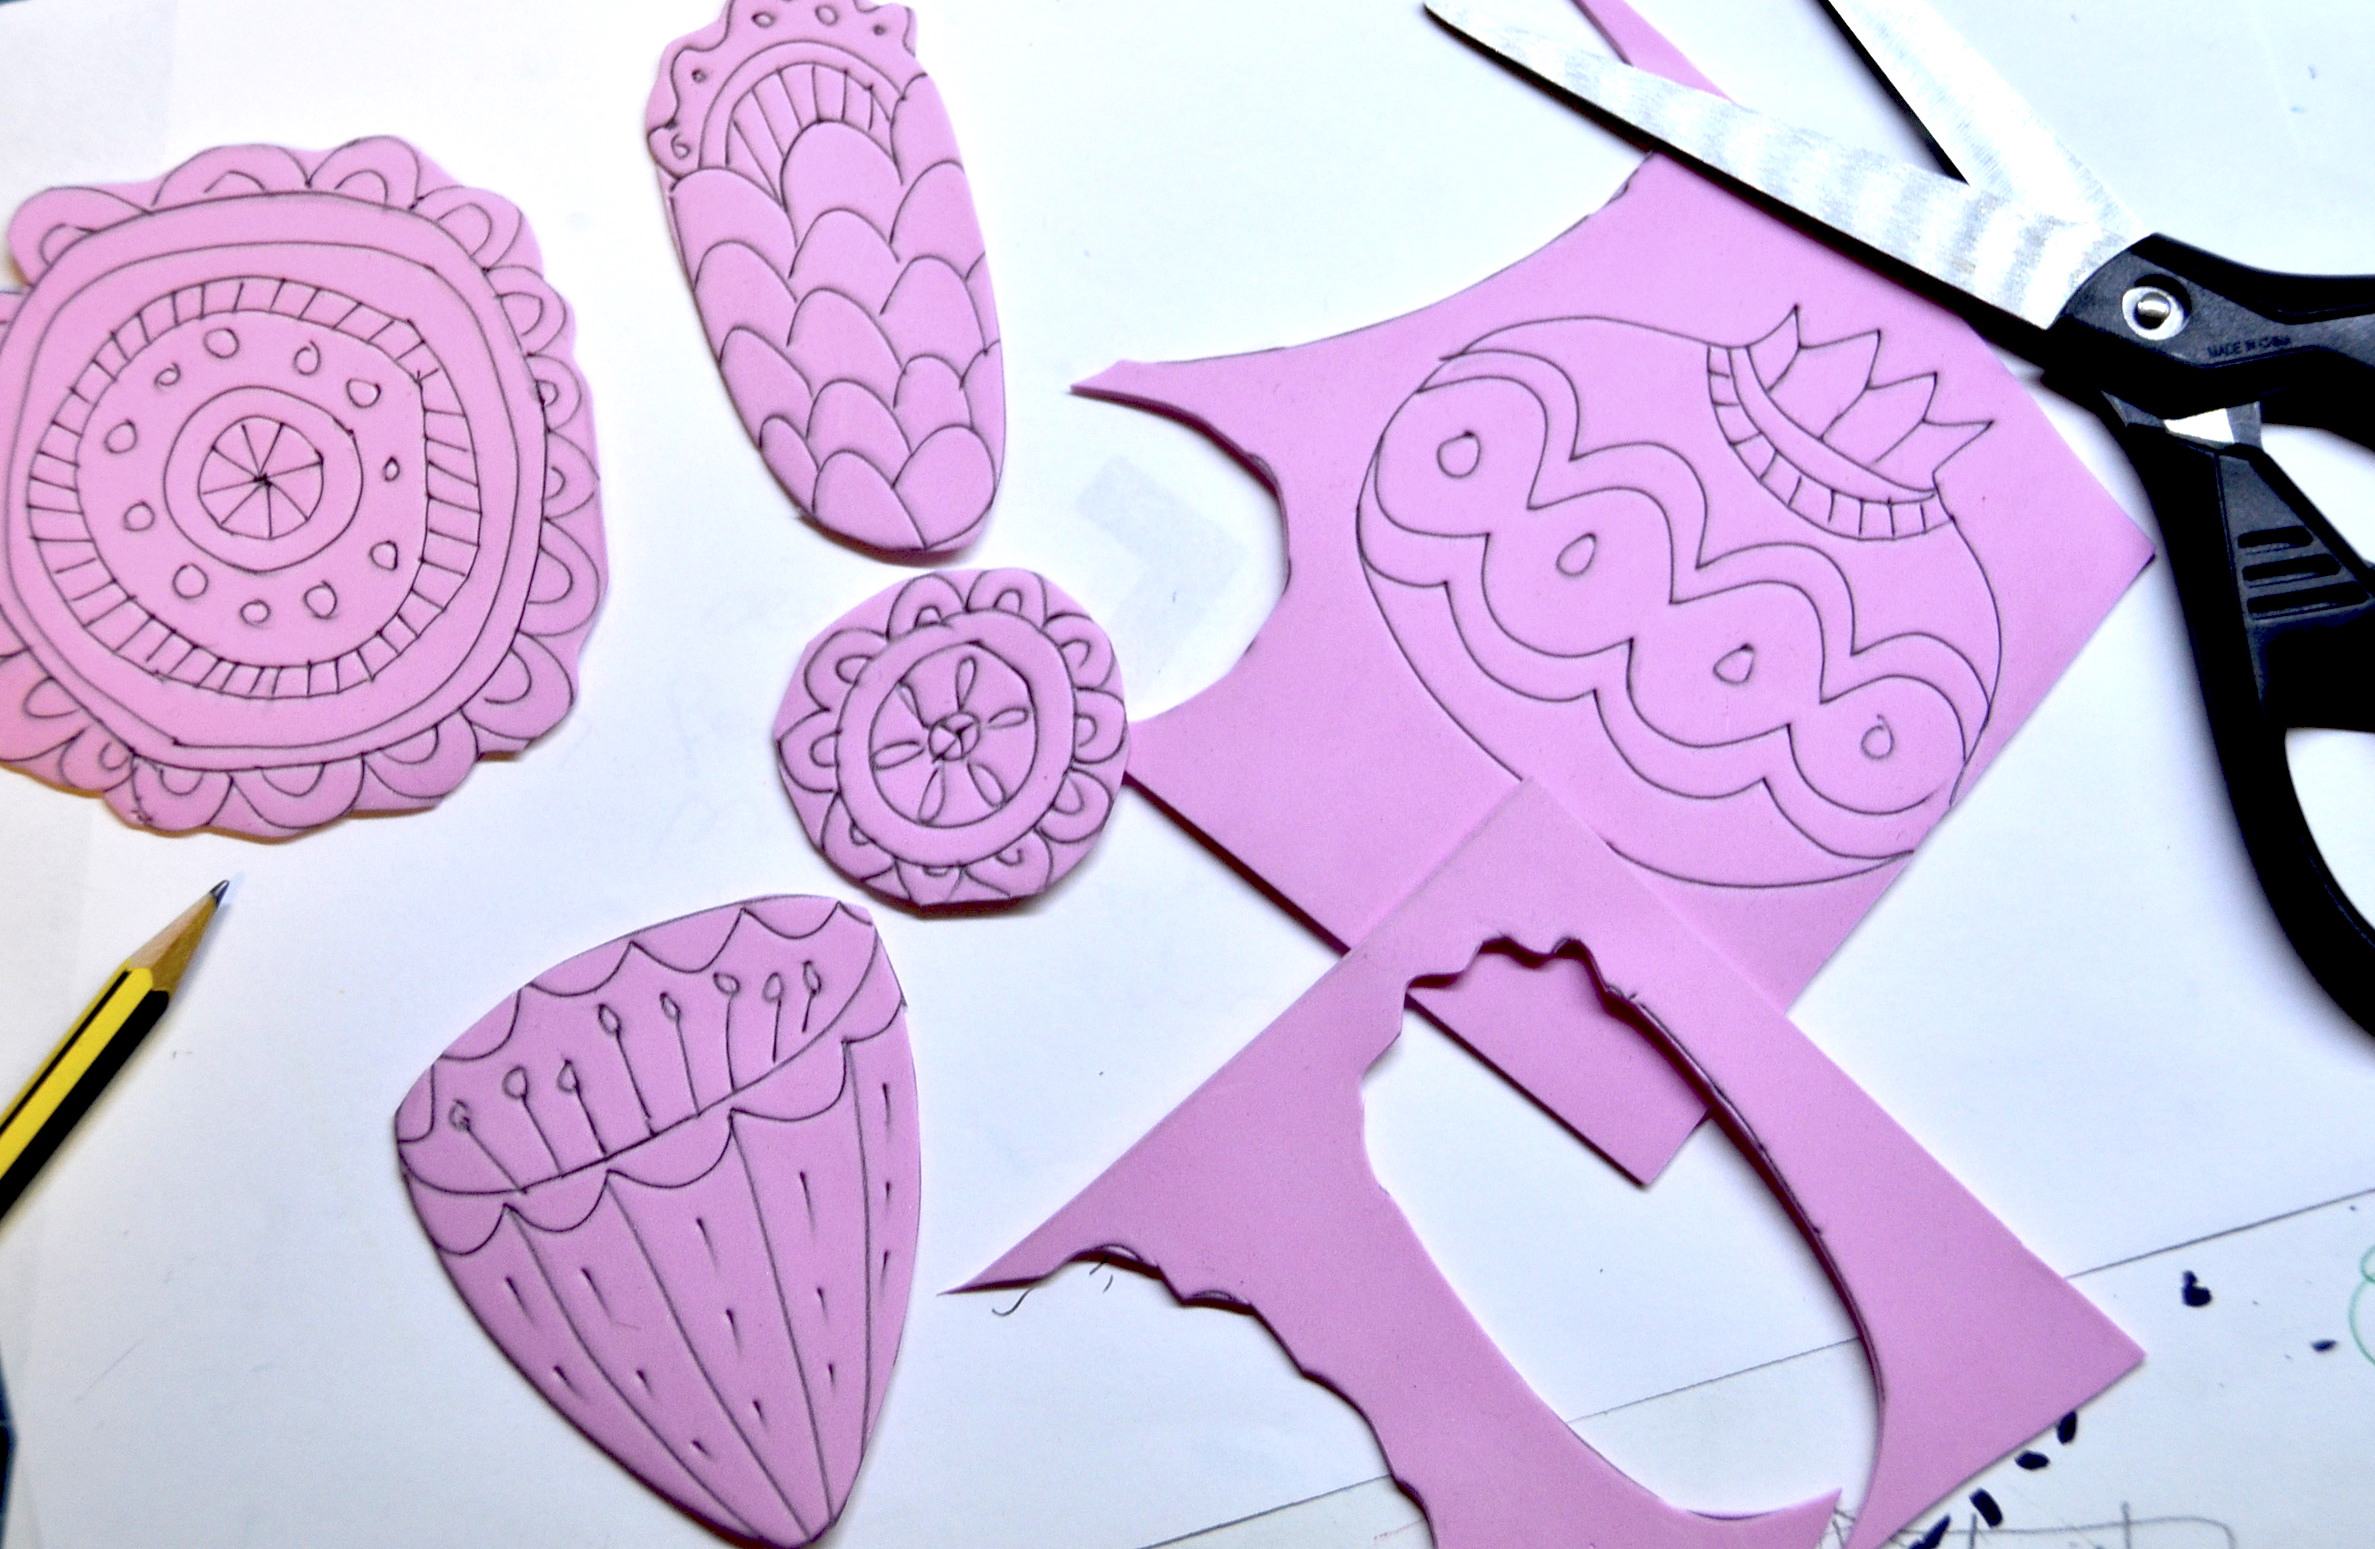
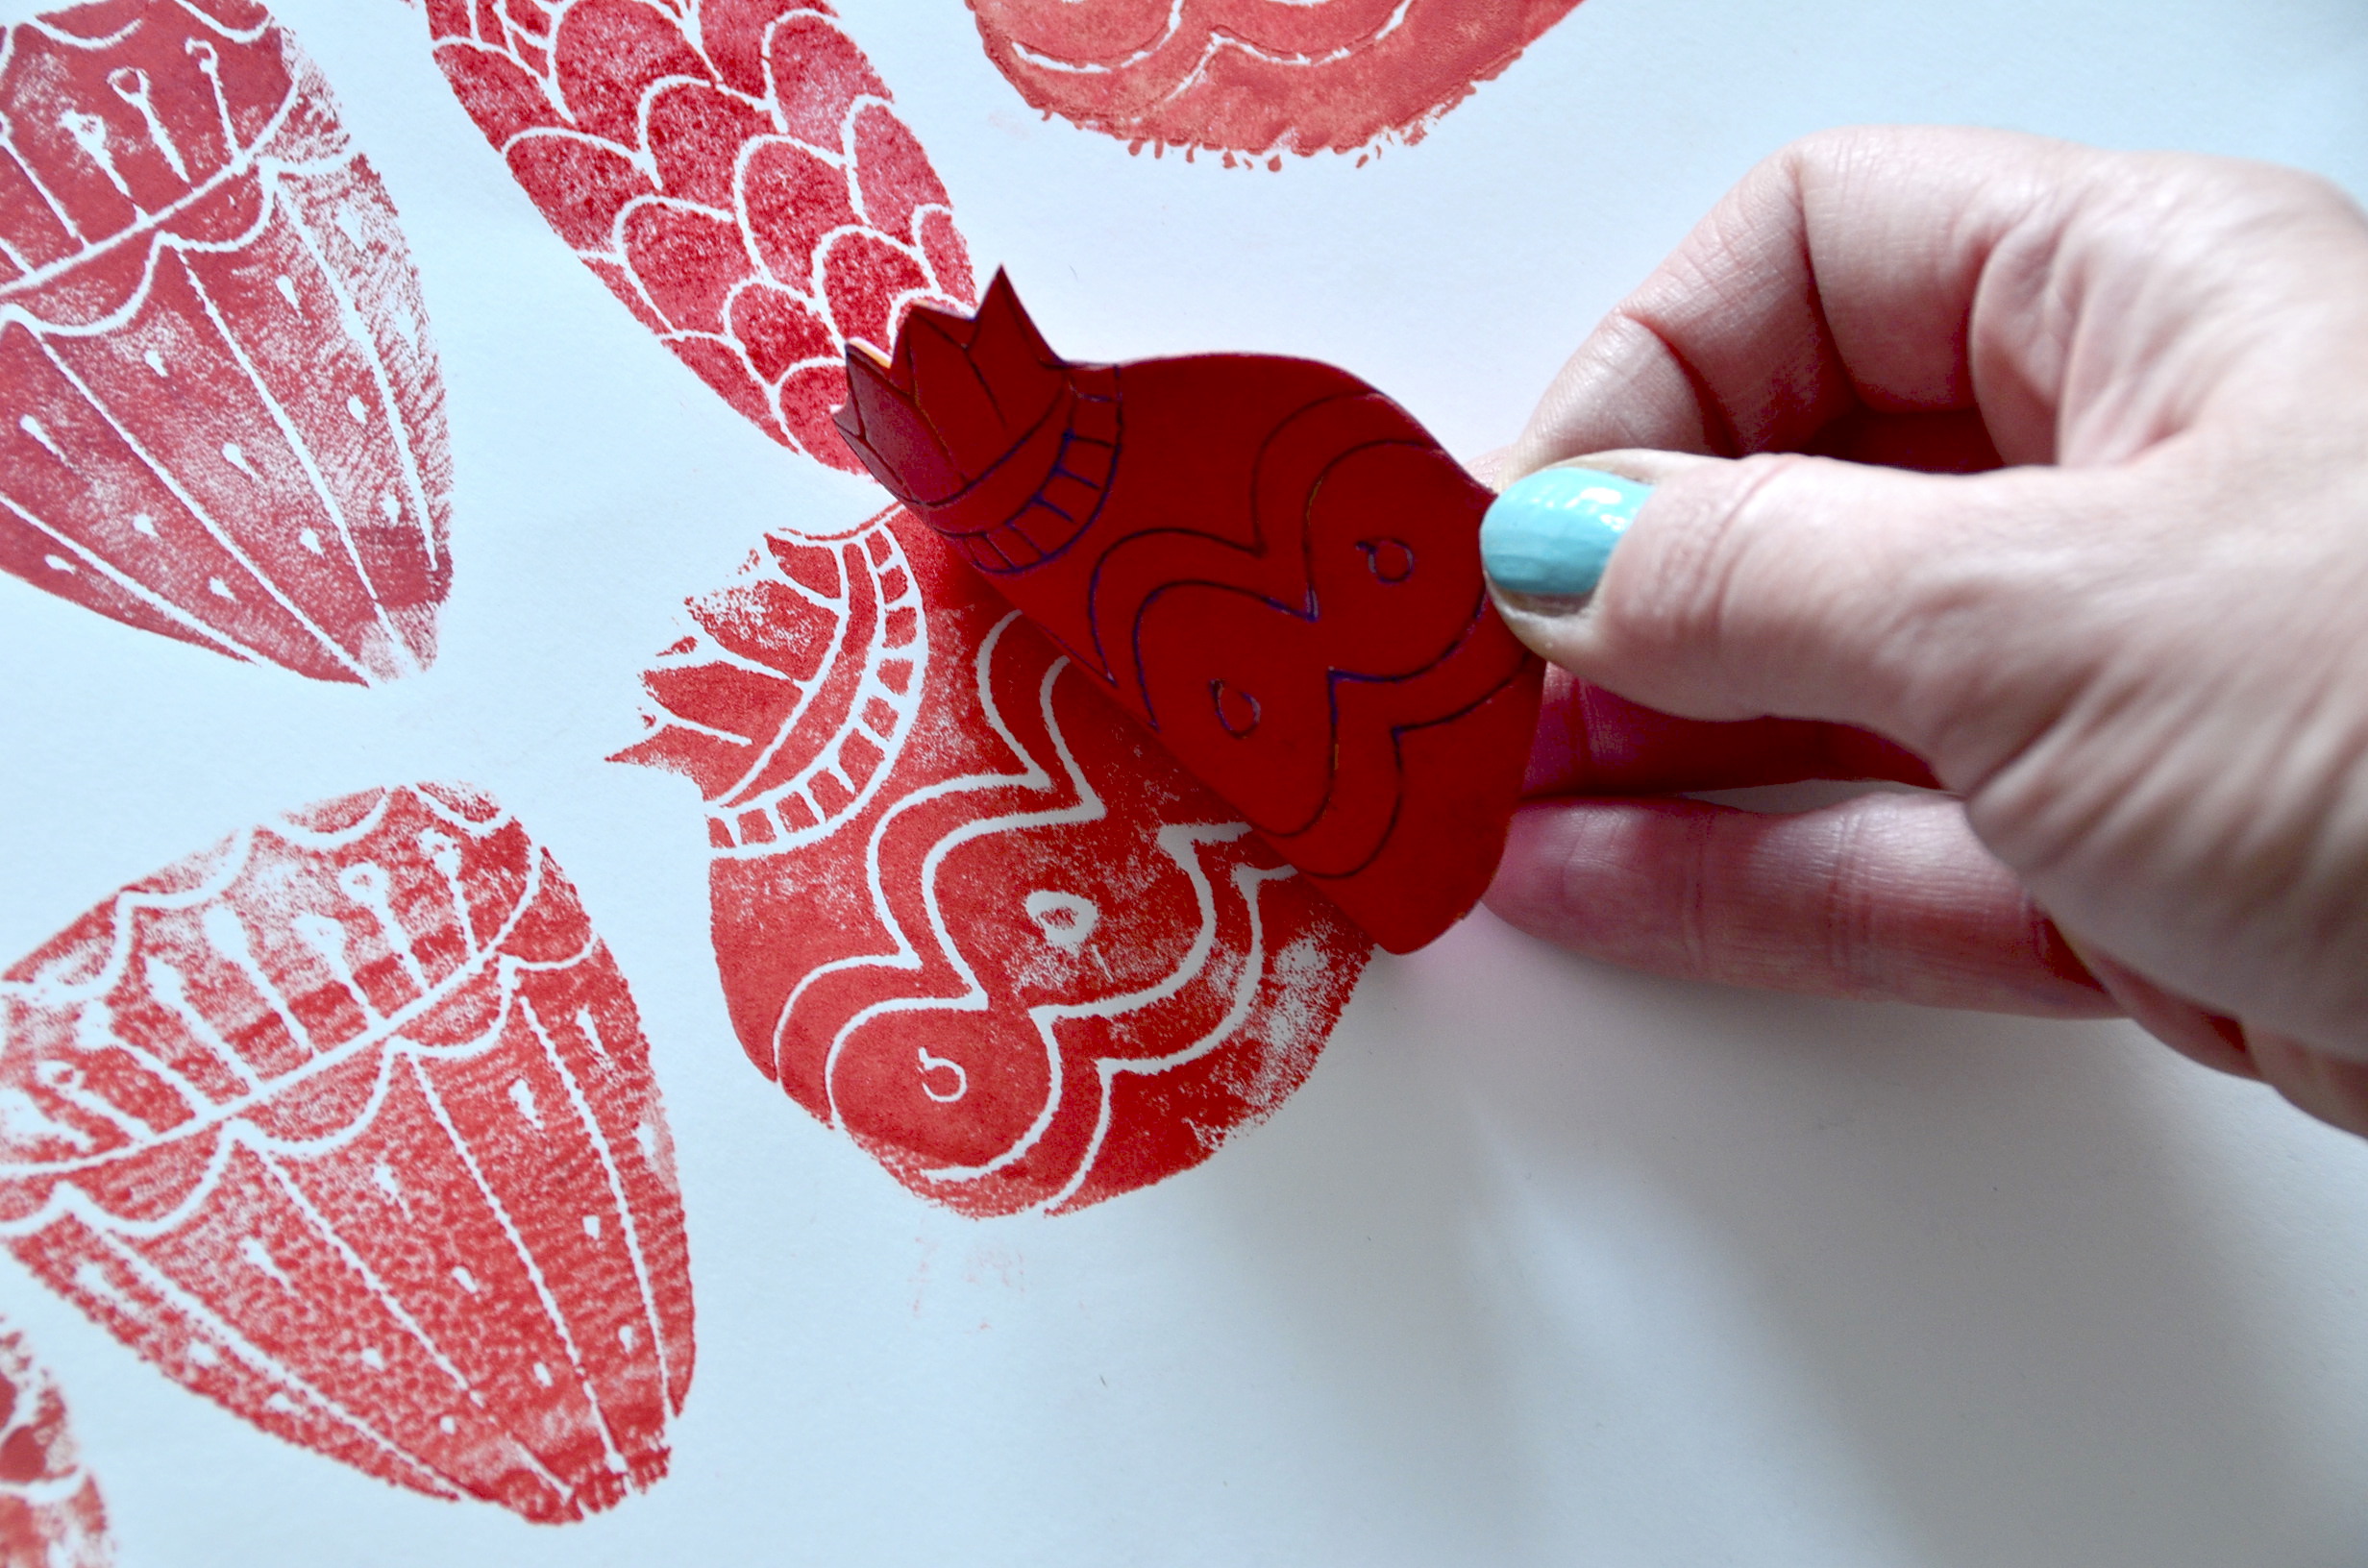
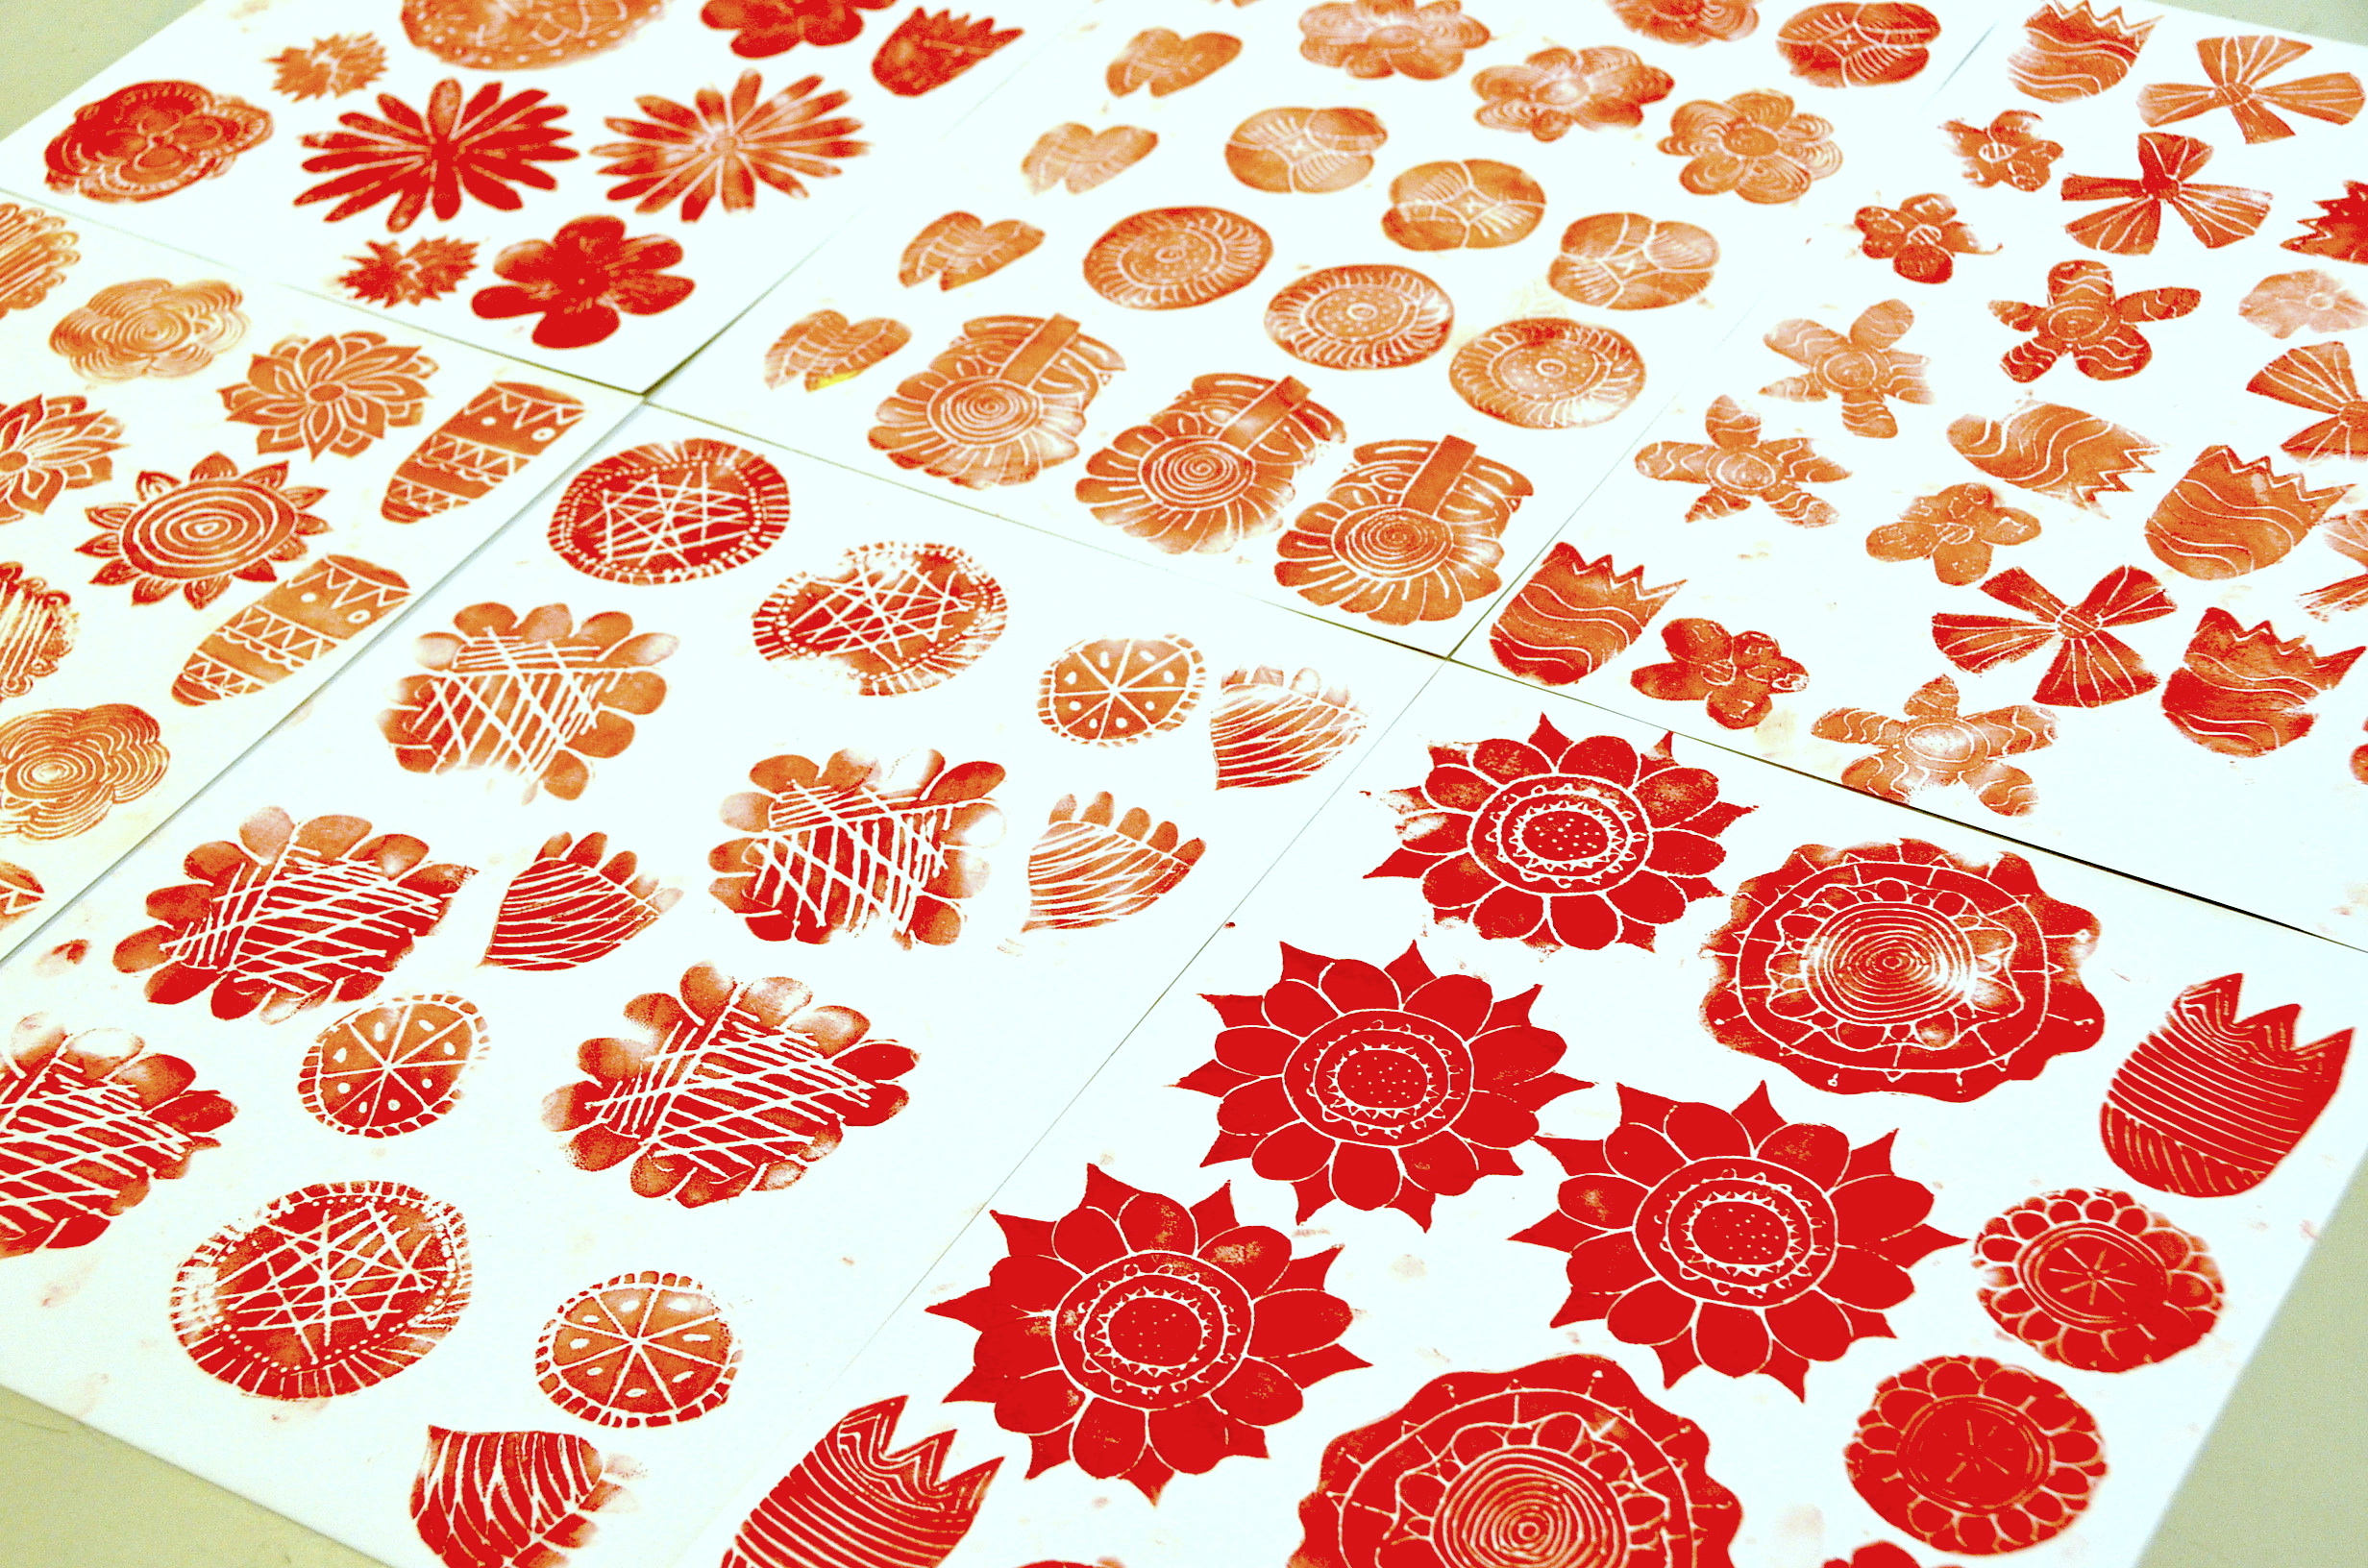
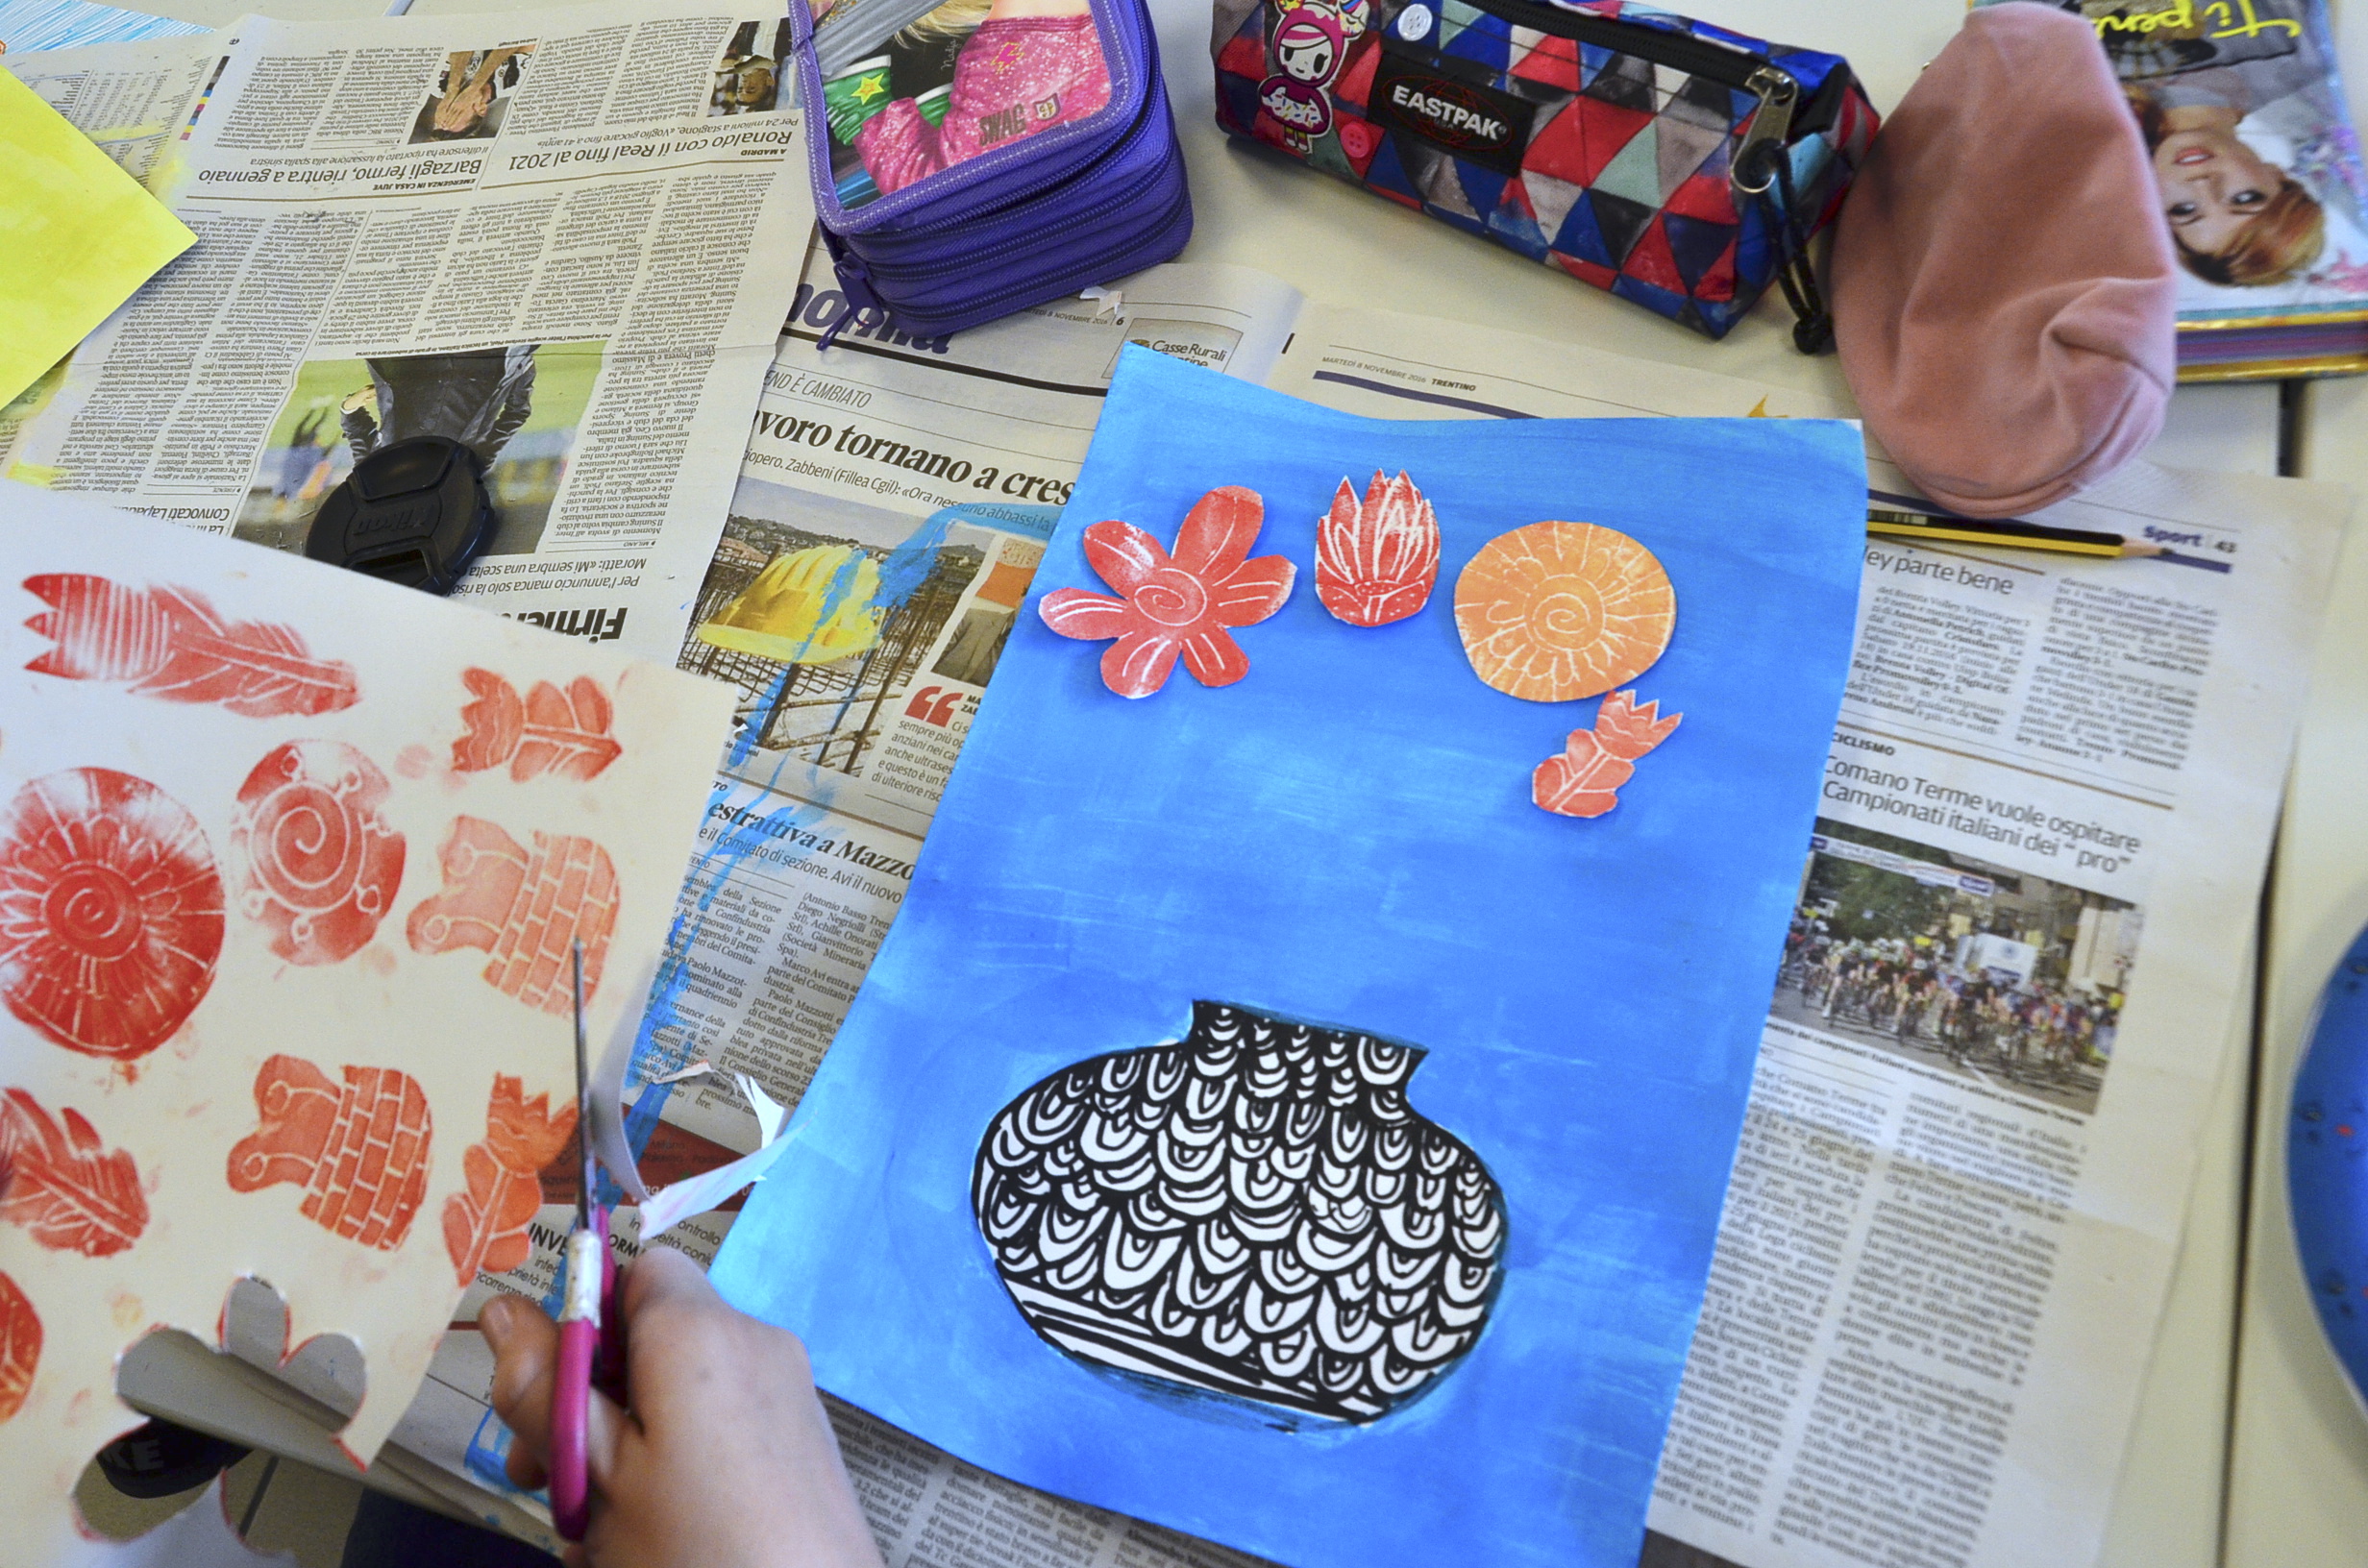
First we sketched some flowers on paper and then we etched the craft foam with a sharp pencil. After that we cut out the flowers creating some printing plates ready to be printed. Subsequently the printing plates have been inked with lino printing ink, using a lino roller. Finally the inked printing plates have been pressed on white paper with a spoon and our prints were ready.
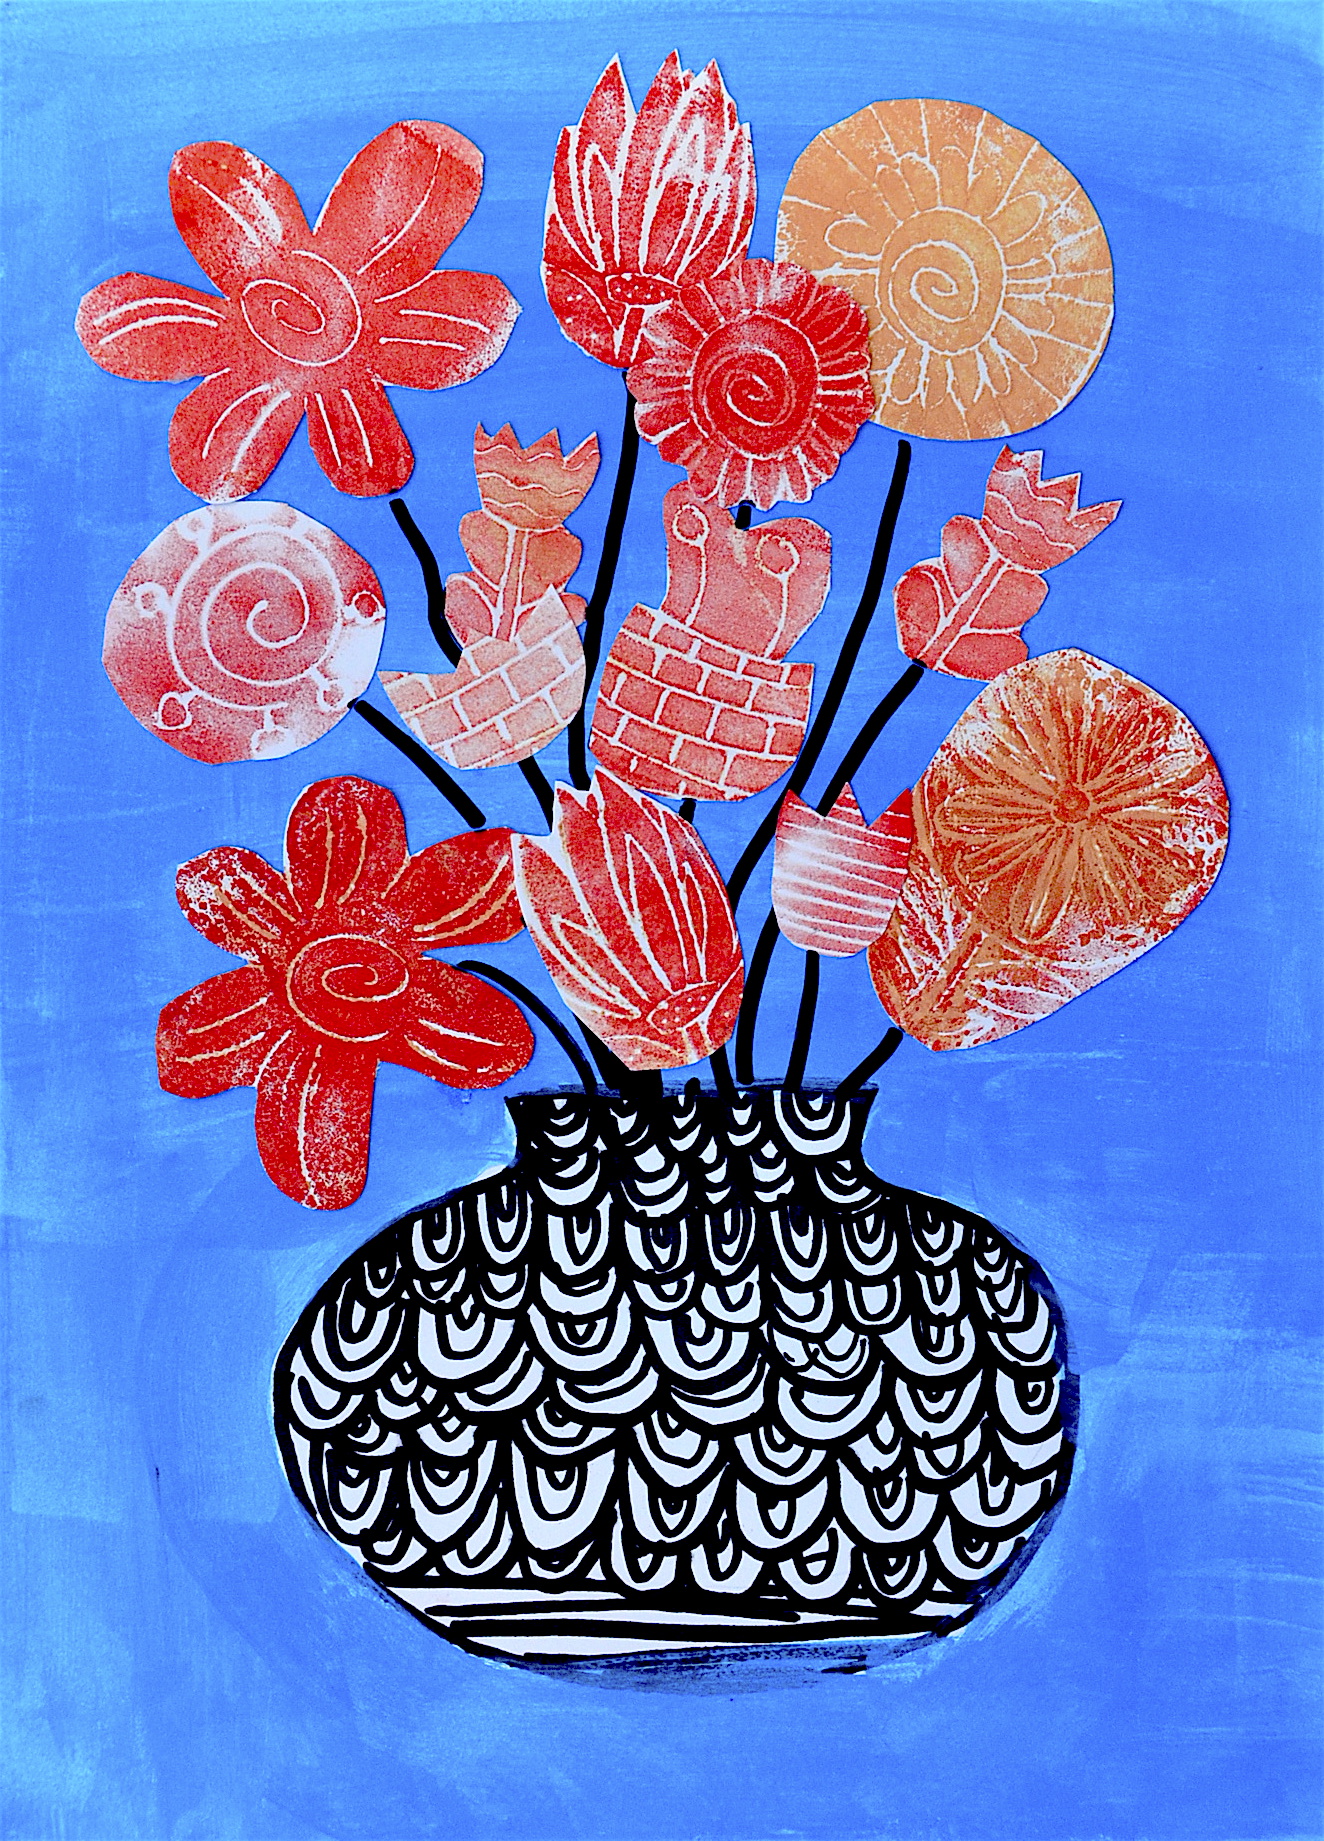
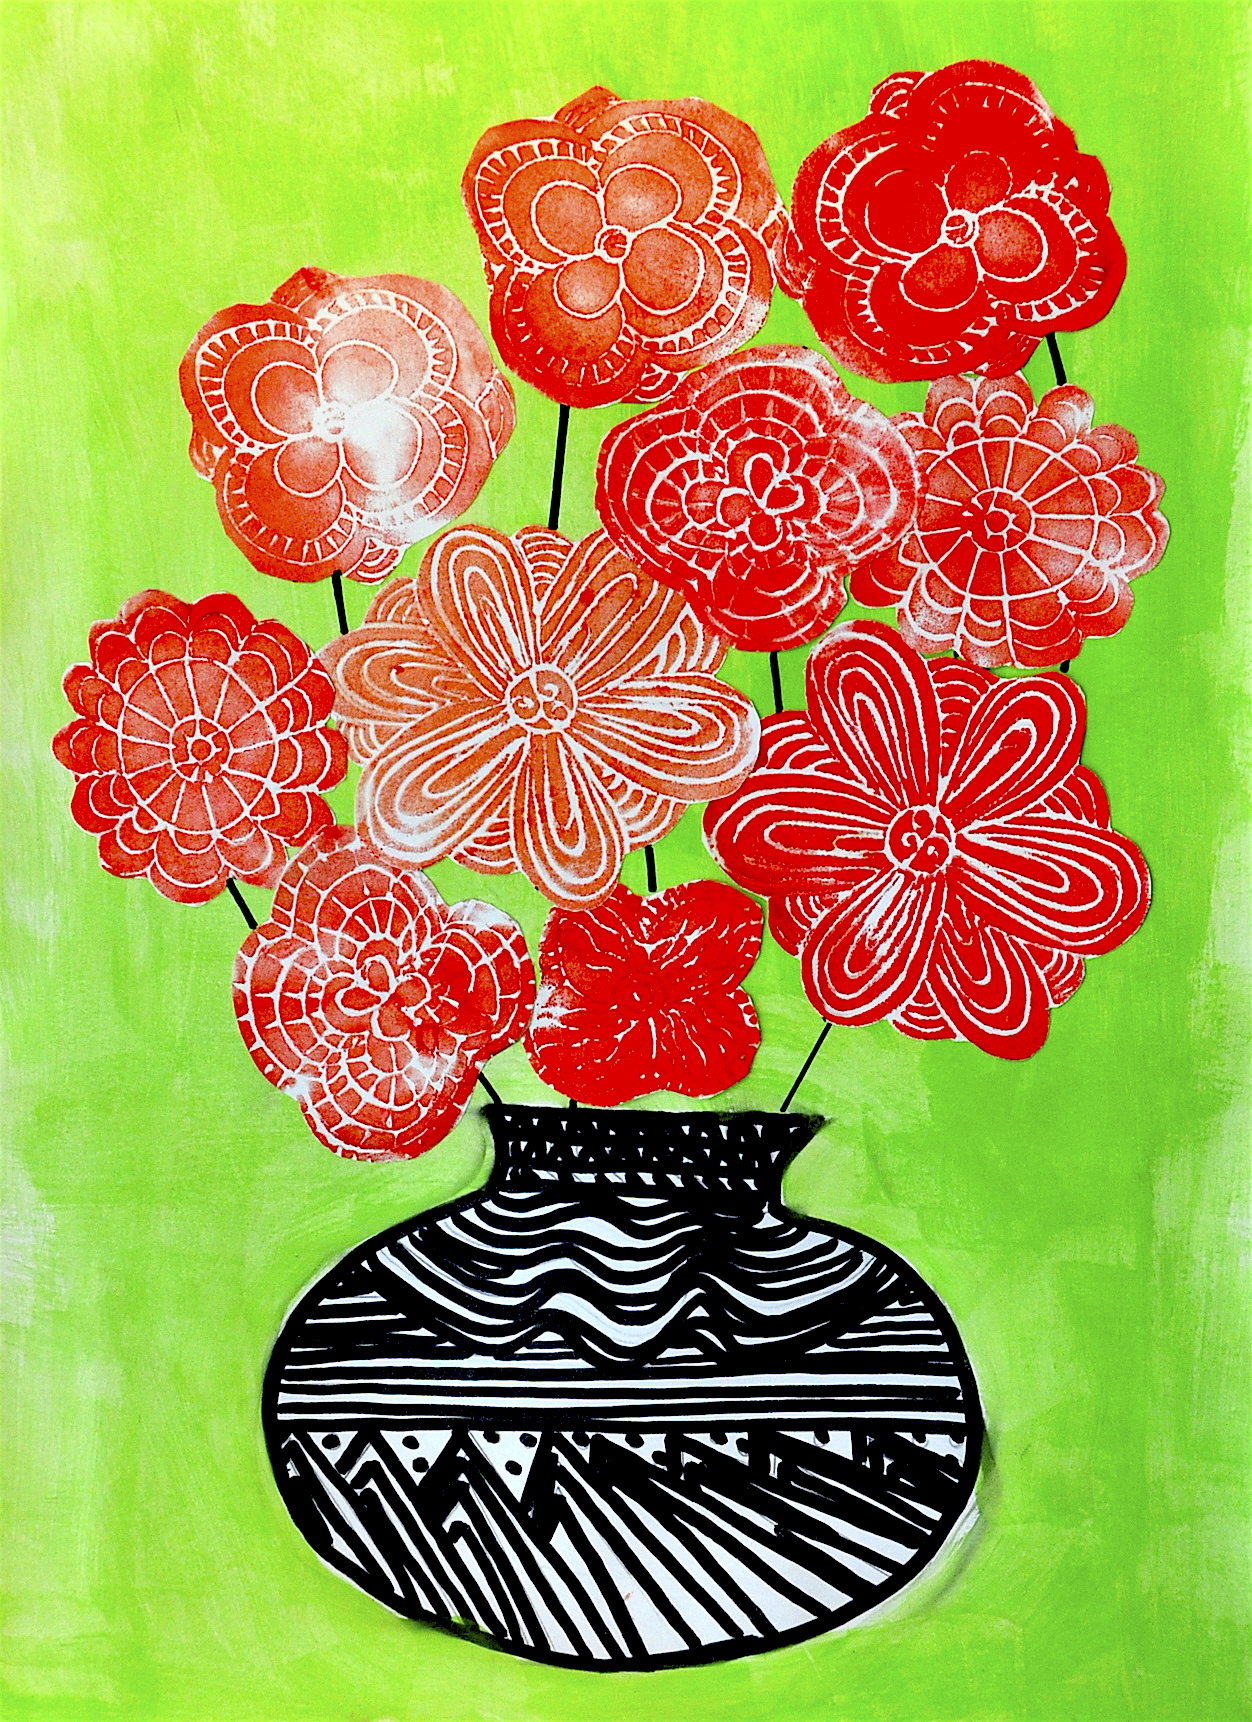
After printing we drew a vase with a black marker on a drawing sheet, and then we painted the background with a solid color, different from the color of flowers. In the last step we cut out the printed flowers and pasted them on the painting. Finally we drew some stems between the flowers and the vase with a black marker, to complete the work.


I am so excited to find you. I also teach K-8 and am always looking for ideas for the older kids. Love your art lessons.
Hi Mary, nice to meet you! Where are you from? I’m pleased to meet art teachers around the world! Thanks for your comment, keep in touch 🙂
Beautiful. The kids must be so proud of their work. The results are sure to grow their confidence in their art making and beyond!
Thanks for your comment Donna! Of course kids were so proud and satisfied of their work! The most interesting step for them was definitely the printing process 🙂
We tried a first grade version and it turned out great – thanks for another inspiring idea!
Love both versions, Miriam and Hope! Will definitely be trying with one of my Grades (K-4th). thanks for the inspiration. DLanzsage
Hi Darcy! Kids will enjoy printing! 😉
Thanks Hope!Enjoy printing! 🙂
I love these! I am an artist and the director of a children’s ministry. I love to incorporate Art into every lesson that I create and this is a great example of what can be done with foam printing! Thank you so much for the beautiful idea.
Thanks for your comment Wendy! I hope you and your children will try printing with foam, you and your children will be proud of the result 🙂
Very cool project. Thanks for sharing. How long would you say these took to complete? Trying to figure out how many class periods to allow?
Hi Jackie. When I did it with my students the whole work took 4 hours. First we drew the flowers on paper, then we engrave the foam (1 hour). After that we cut out and printed the printing plates on paper (1 hour or more, depend on how many prints you do). Subsequently we prepared the background on a drawing sheet: before we have drawn the vase and then we have painted the background in a solid color with tempera or acrylic painting (1 hour or more, depend on the decorations of the vase). The last step was to cut out the printed flowers, past them on the painting and draw the stem with a black marker. Let me know if you need more information about this work, and enjoy it! 🙂
I know it’s fun to draw your own designs. But I have used my Cricut machine to cut out patterns on the same mterial too, doing the same thing, using them as a stamp.
I’m sure the outcome is amazing! you had a great idea, using cut out patterns, I would like to see your work! Thanks for sharing your idea, keep in touch 😉
What type of paint would you recommend for painting the background paper
I used acrylic paint
I love to do printing lessons with my classes. I teach at a local arts center ages 5-9. Where did you get the foam sheets for printing? Are they specifically labeled ‘for printing?’
Thanks! Missy Ward
In italian language is gomma crepla or gomma Eva, in English is Eva foam, Fommy, Moosgummi… it’s NOT specific for print, you can find in the artcraft shops