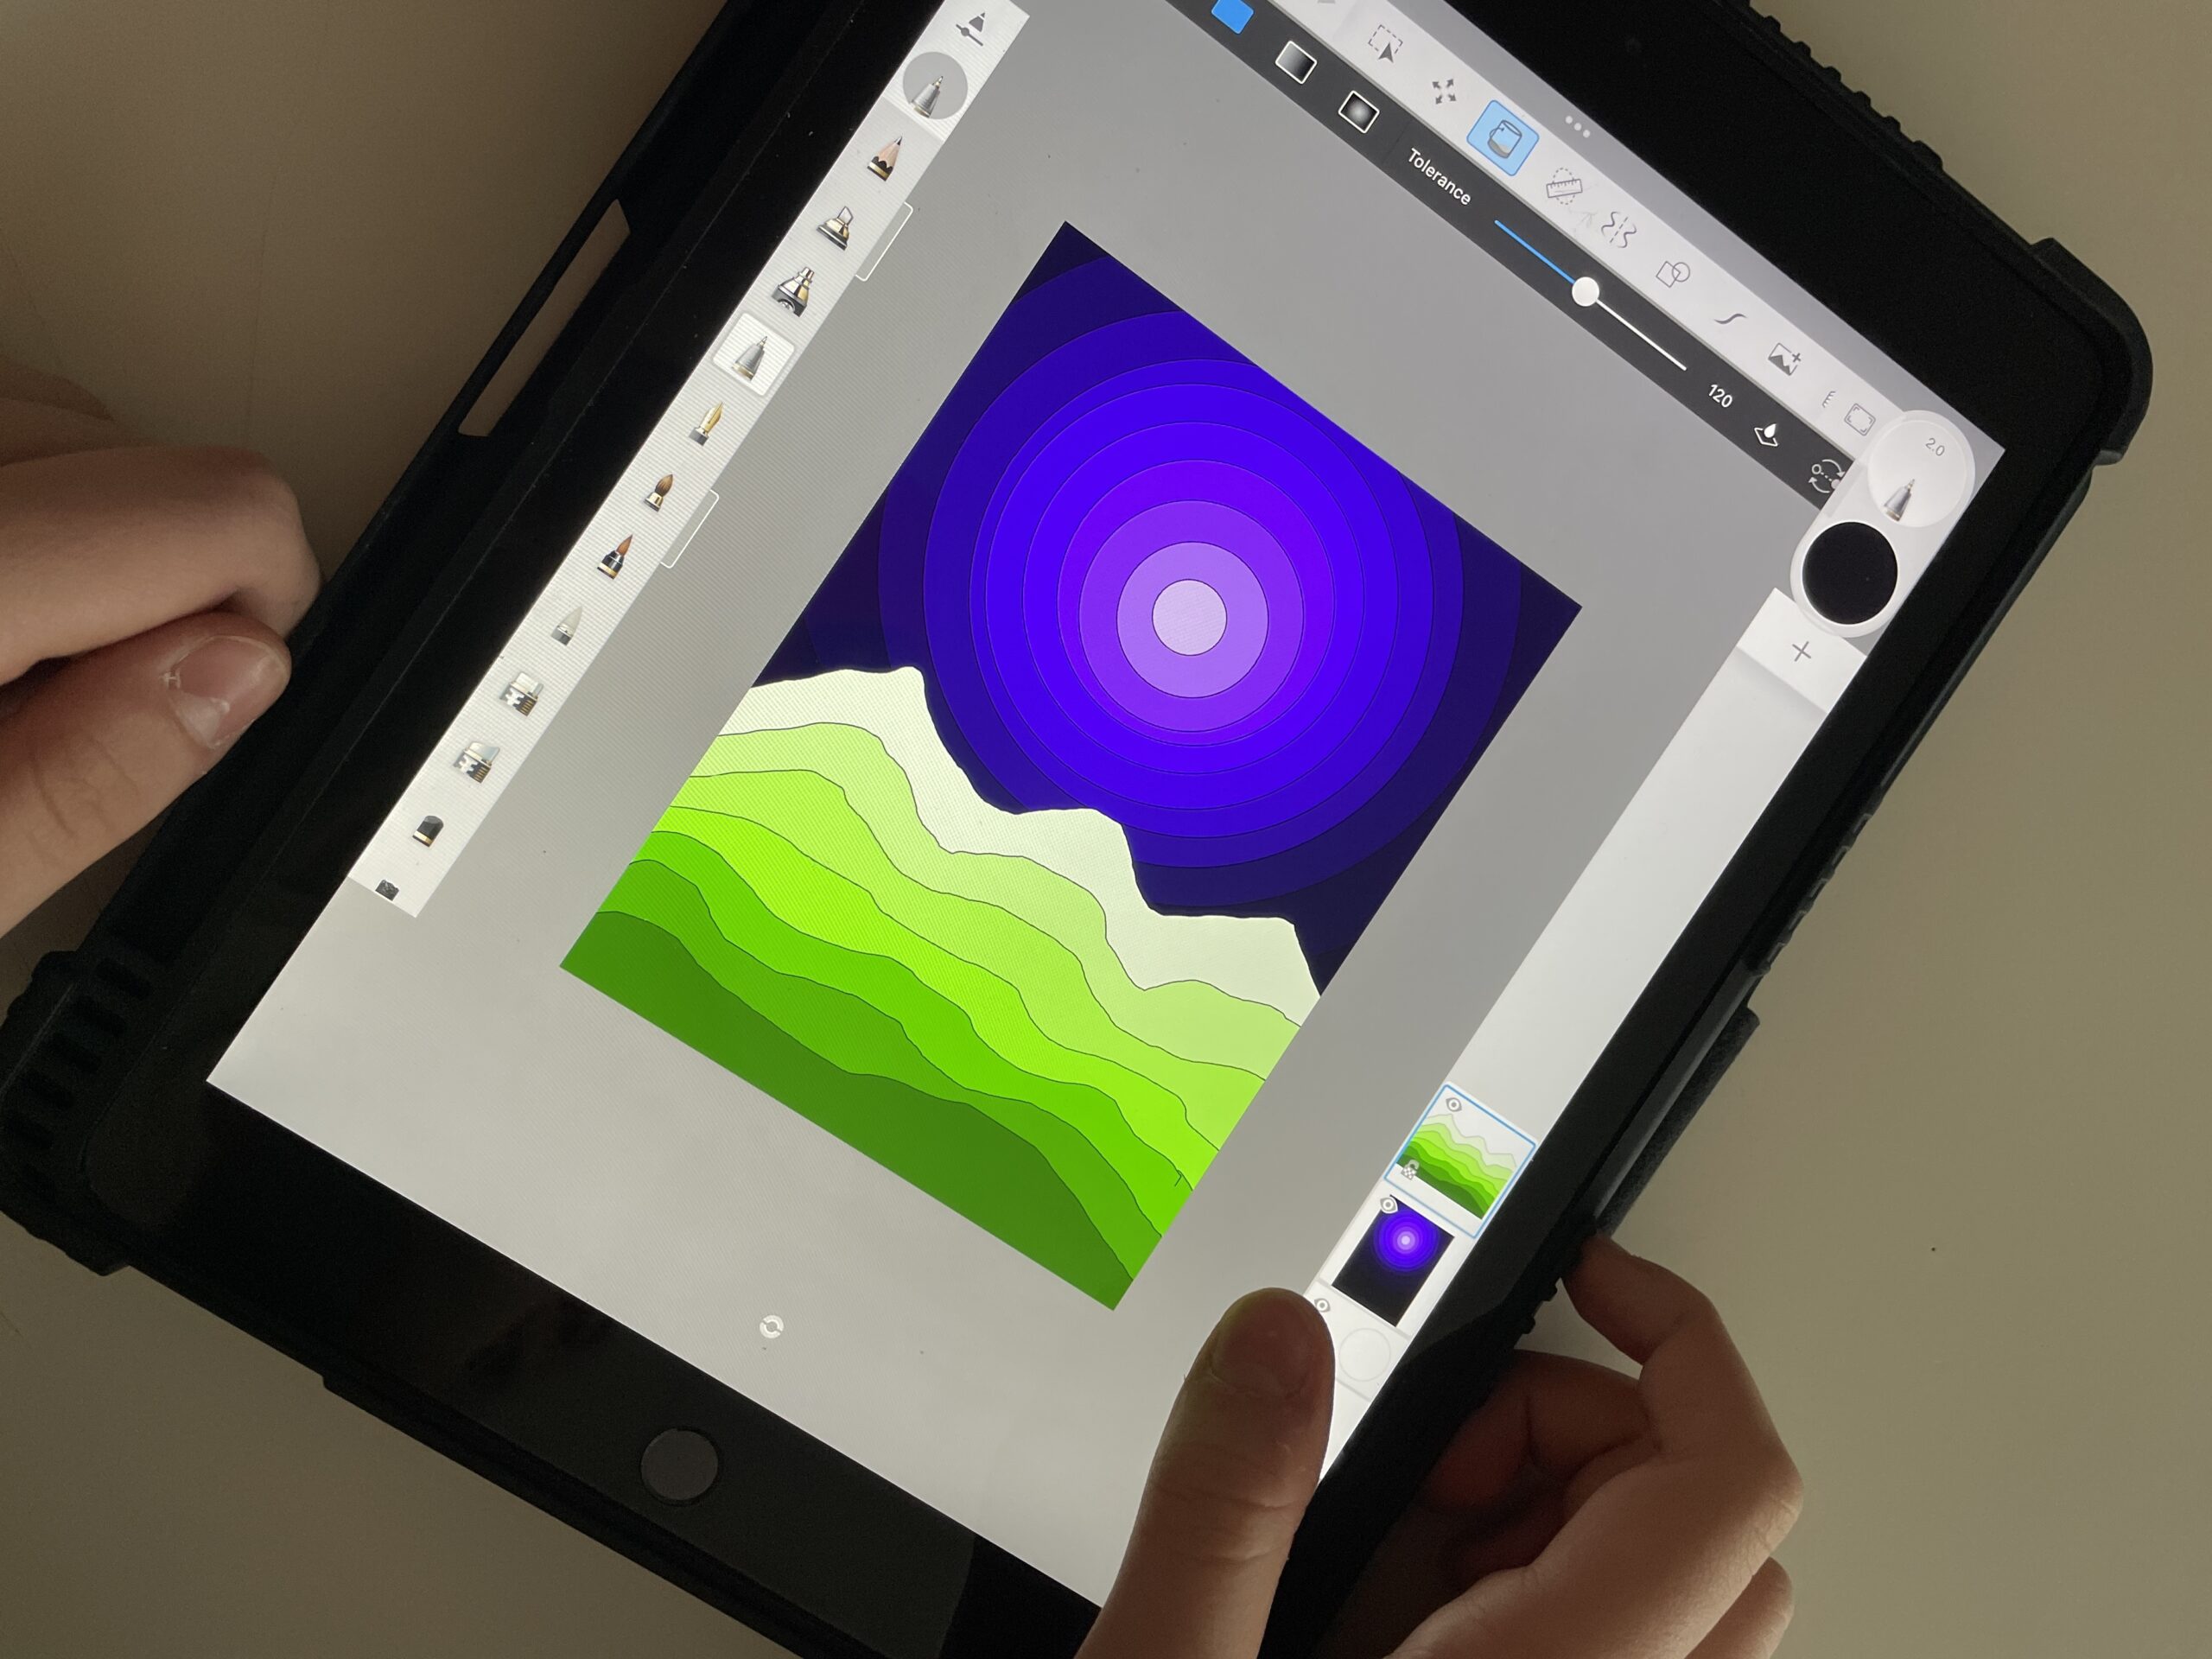
To make these digital drawings we used the Sketchbook App on the iPad. We are fortunate to be able to use these devices provided by the school. We can explore the possibilities of digital drawing to learn how to use these tools.
The Sketchbook APP can be downloaded for free on the iPad and allows you to create drawings with layers equipped with blending and grouping modes, and offers a wide range of brushes and highly flexible effects. All with a fairly sober, clean and intuitive interface, suitable for starting the approach to digital drawing.

You can also draw directly with your fingers on the screen with great ease.
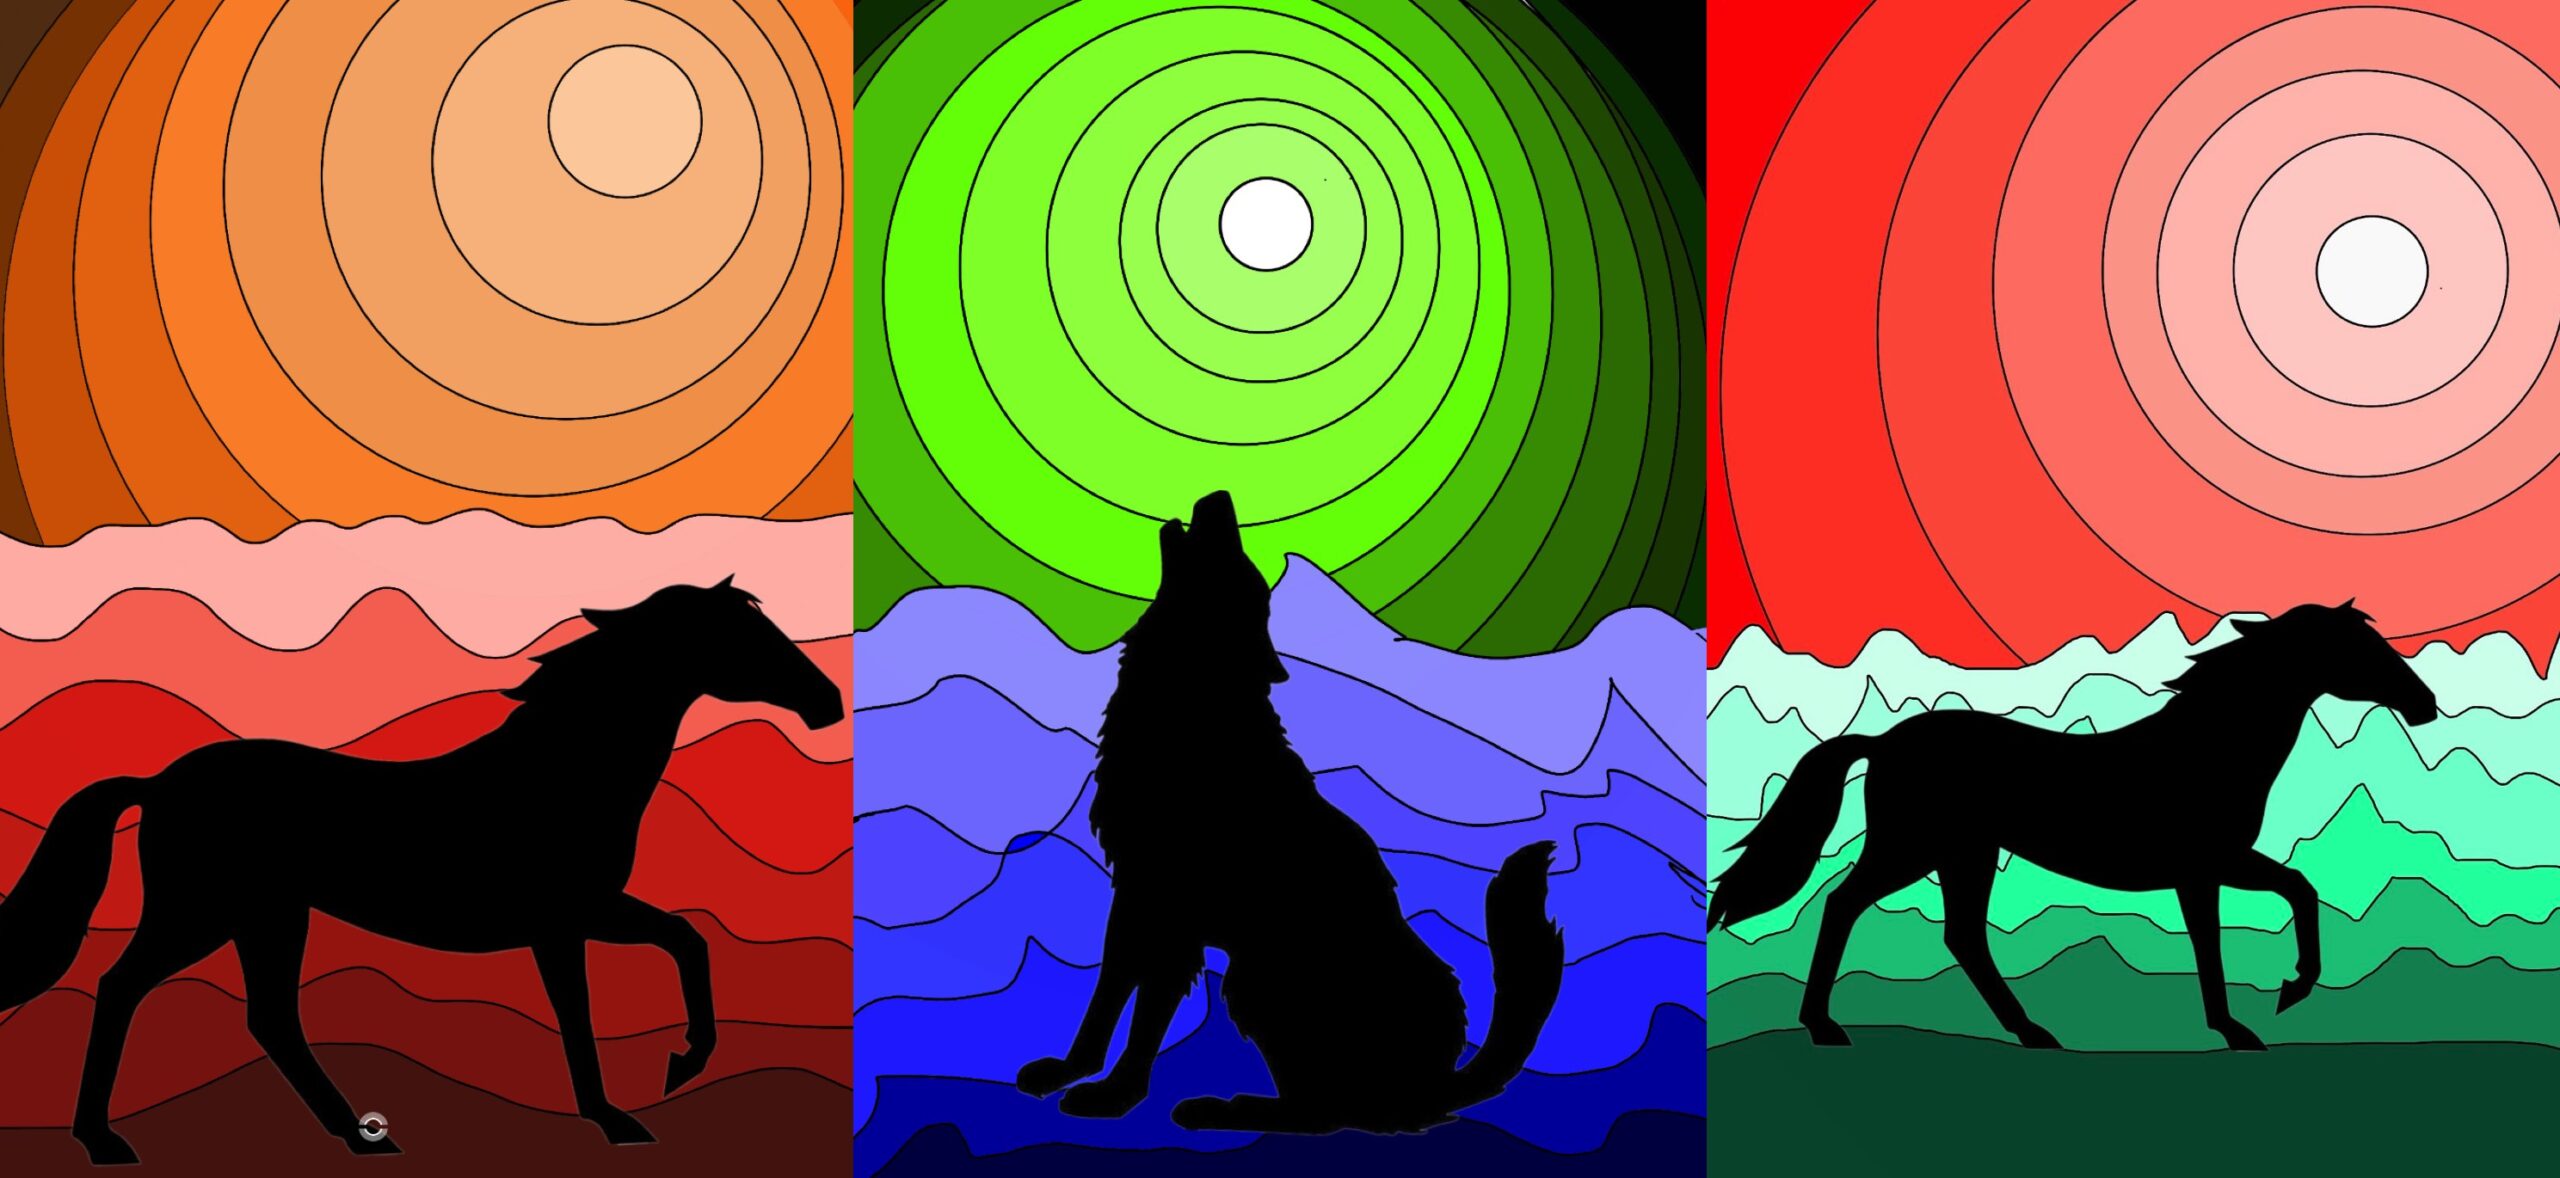
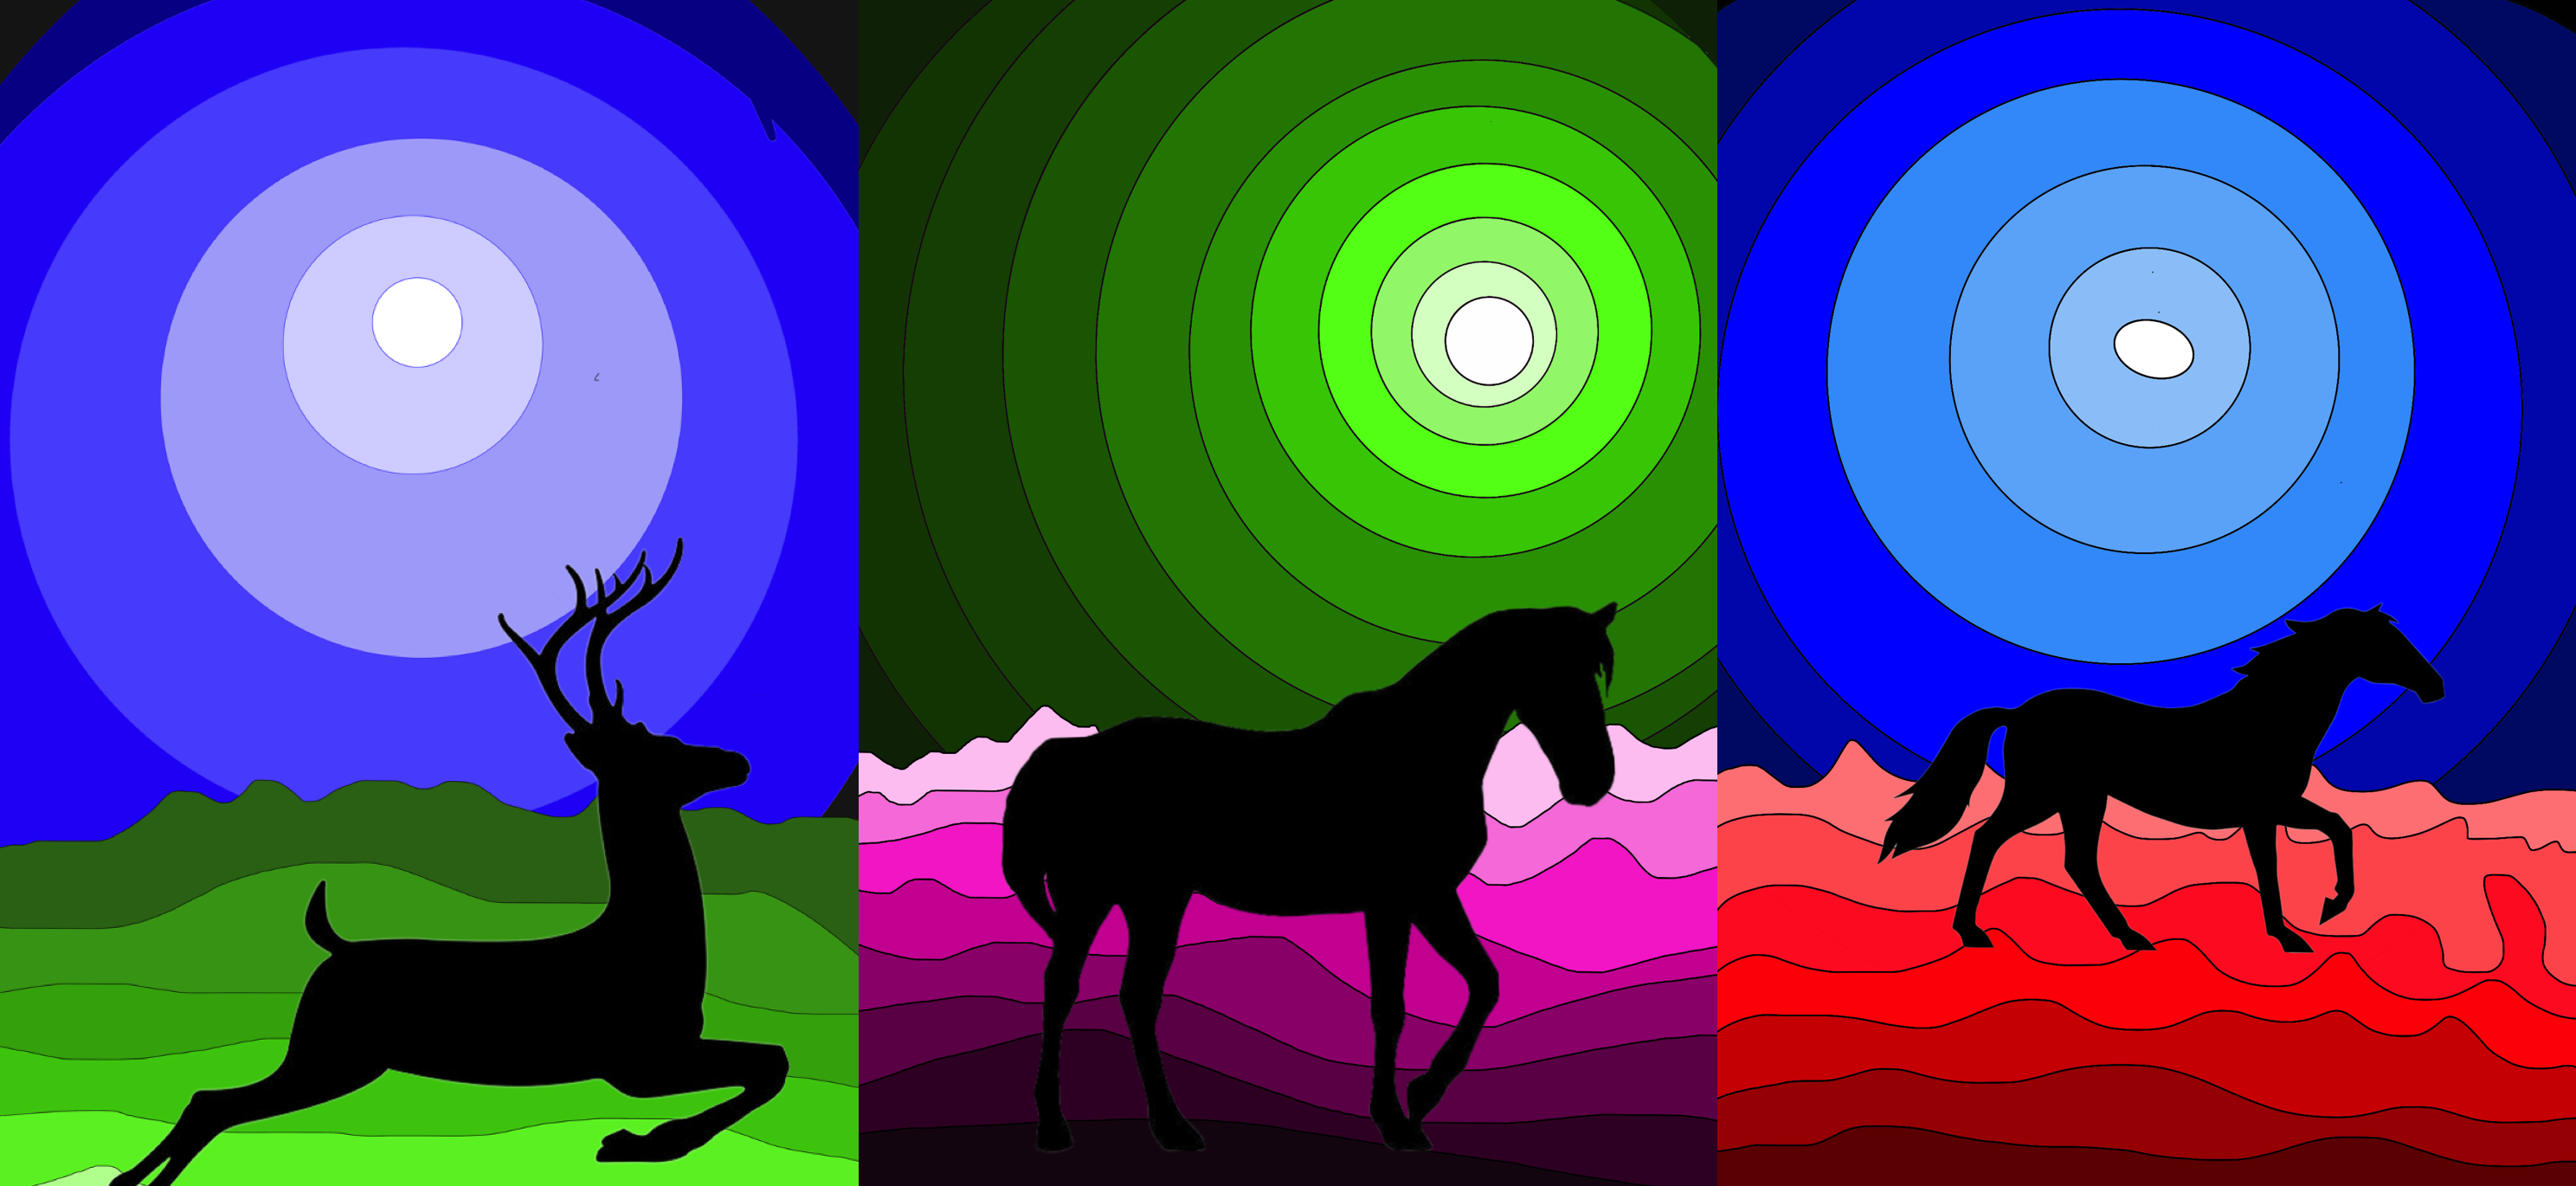
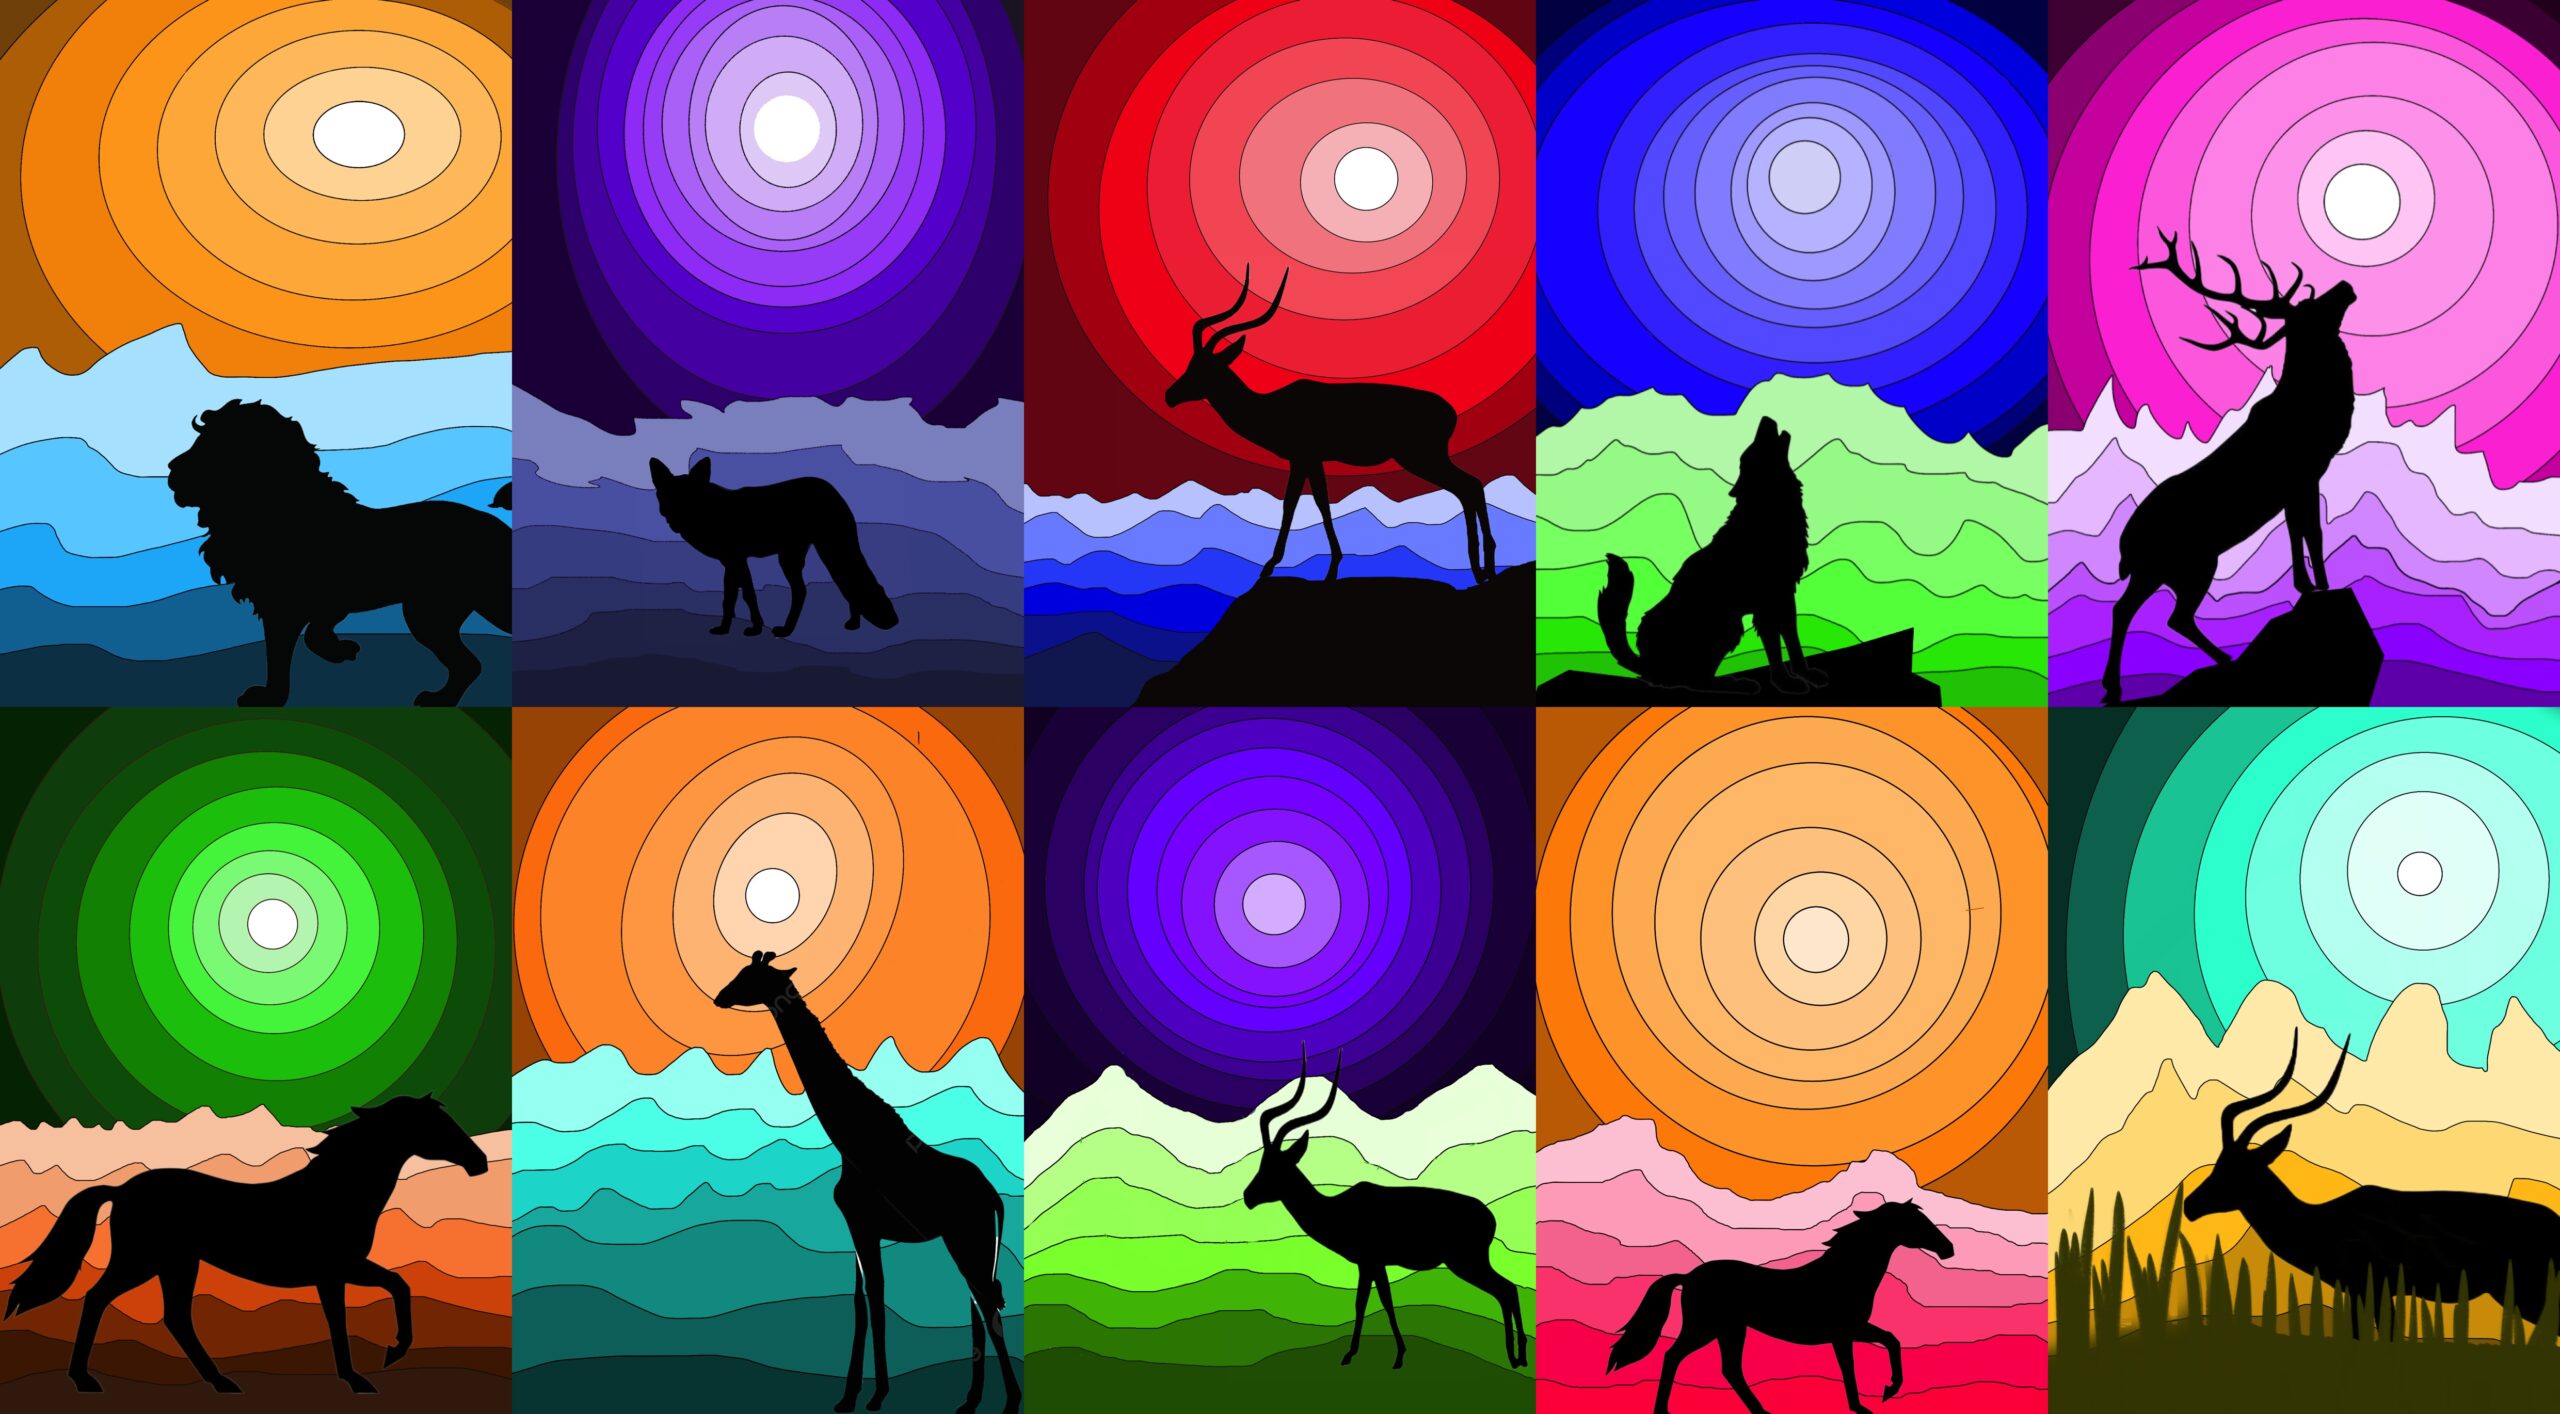
With the sixth grade students we studied the topic of tonal gradations (value scale of colors): in order to experiment the digital palettes and their possibilities, we drew fantastic landscapes.
First we created a new drawing with a rectangular format (screen) used vertically.
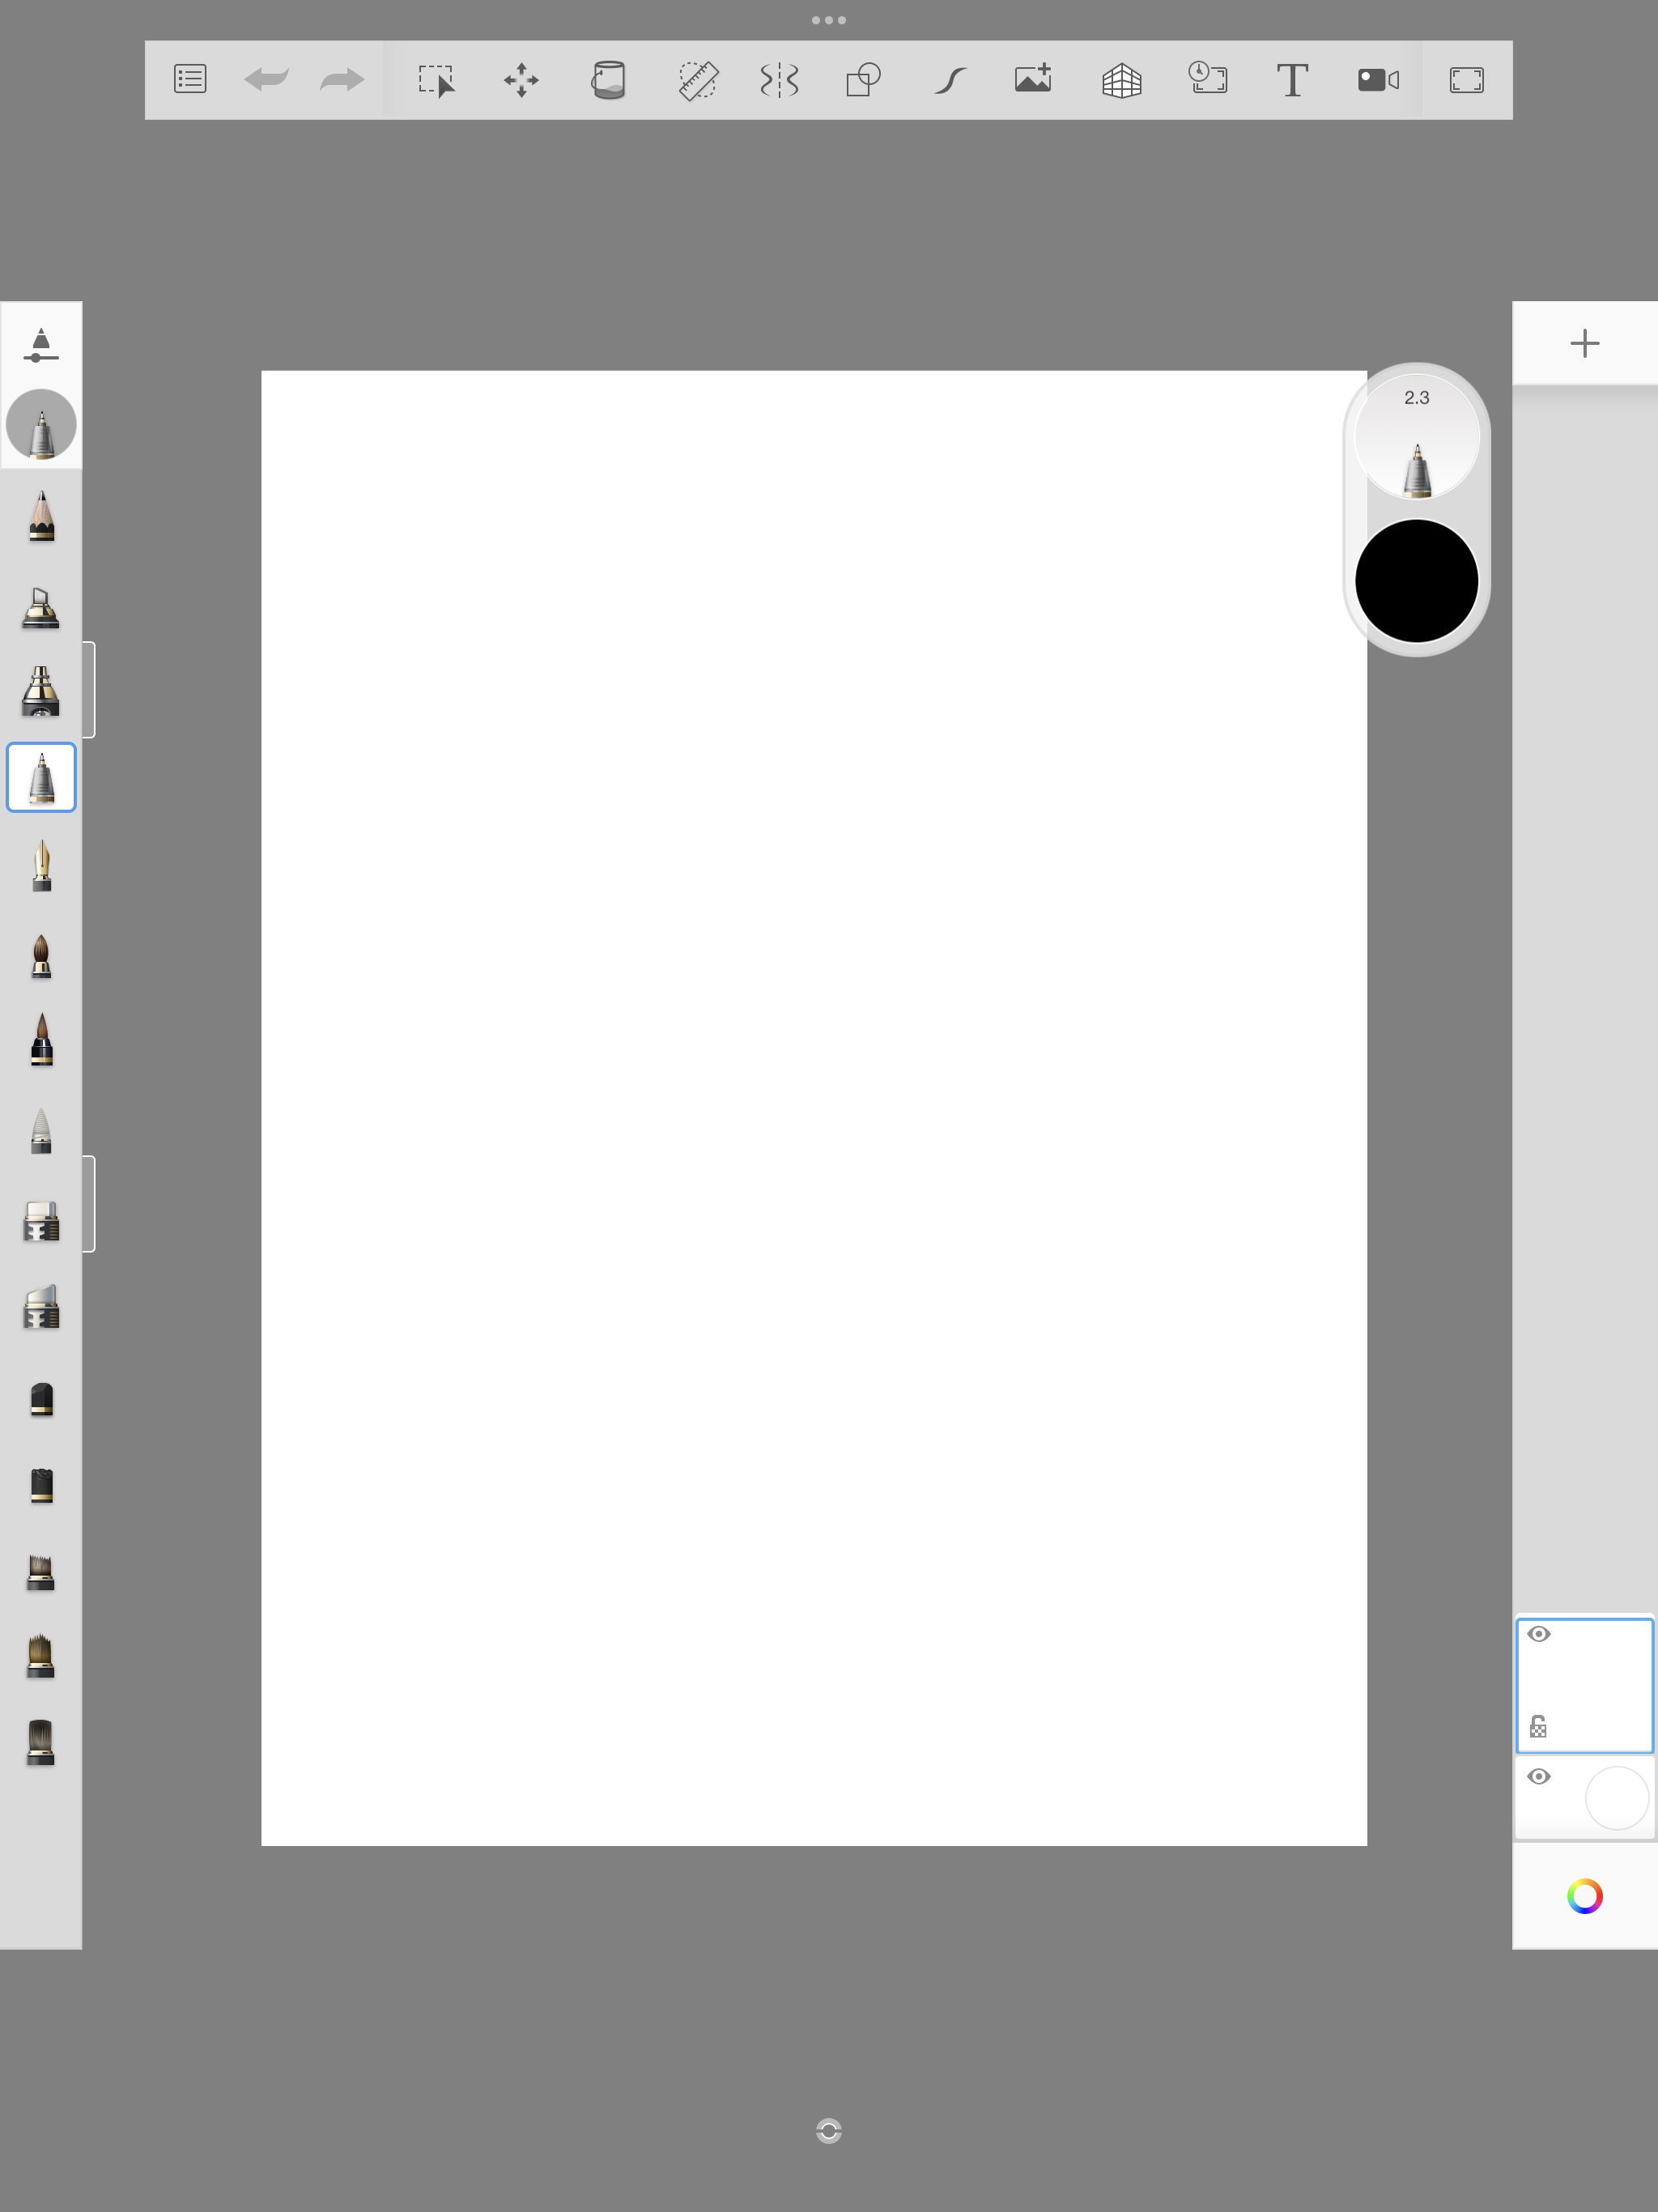
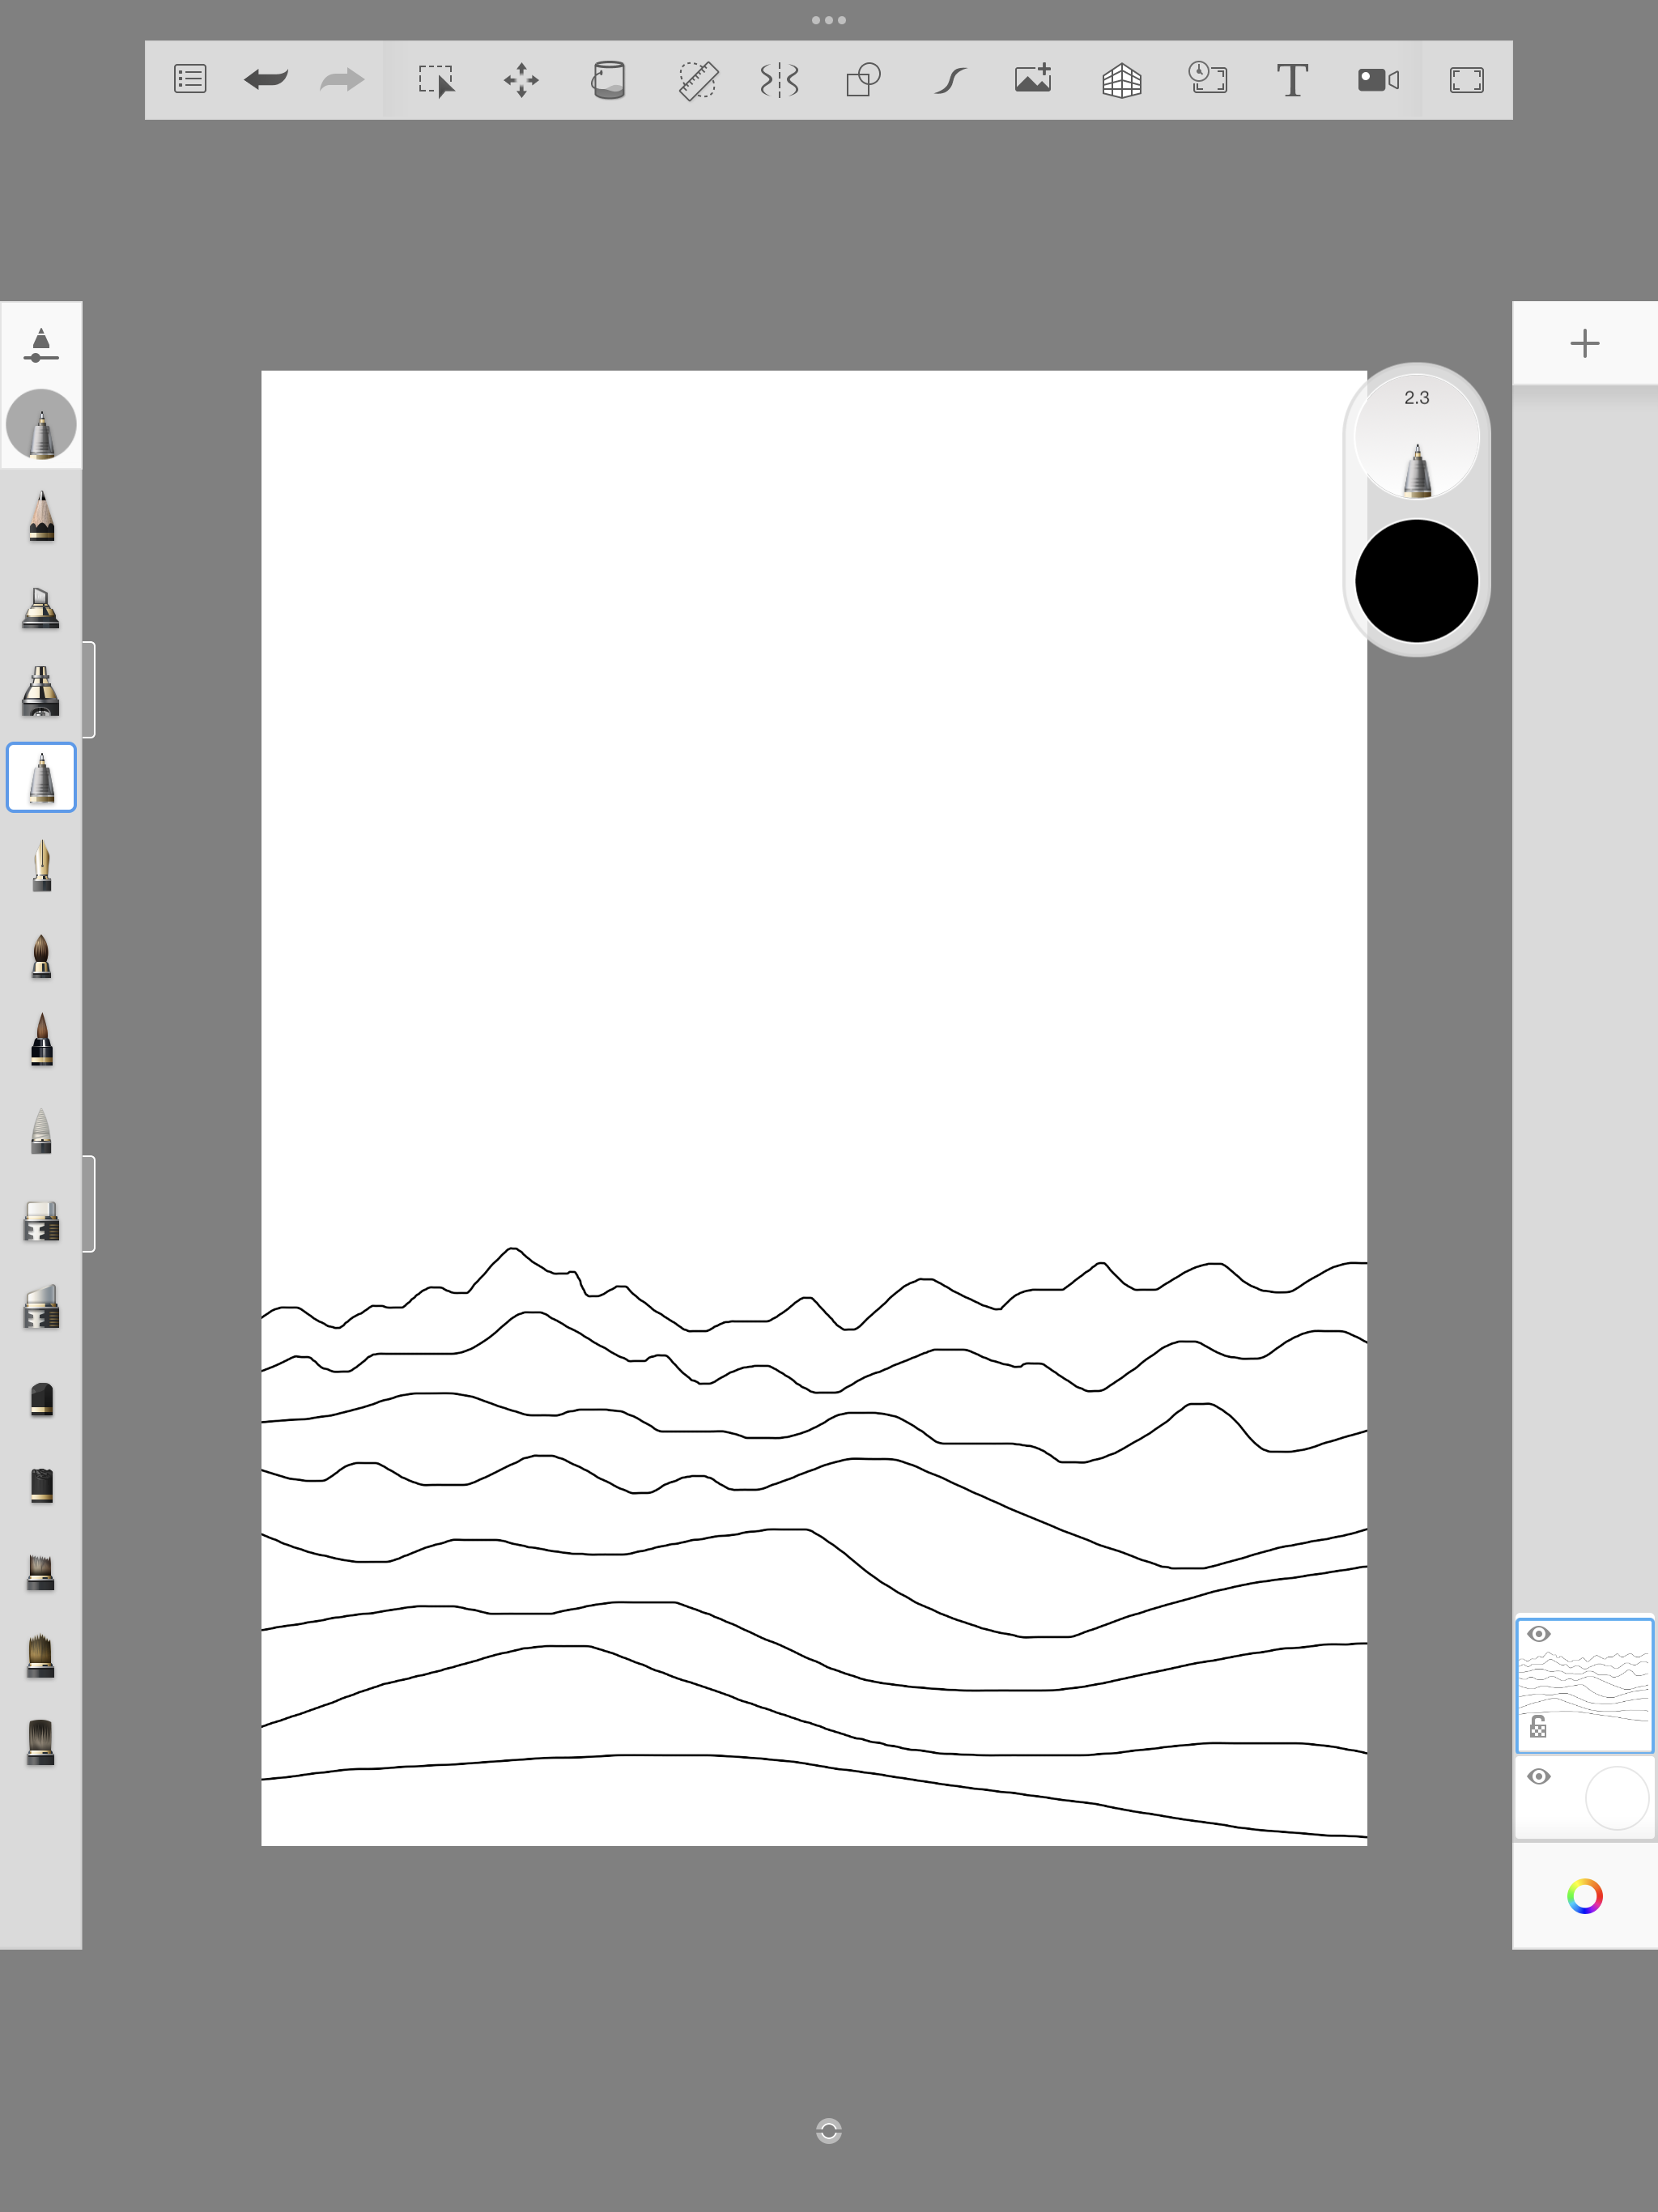
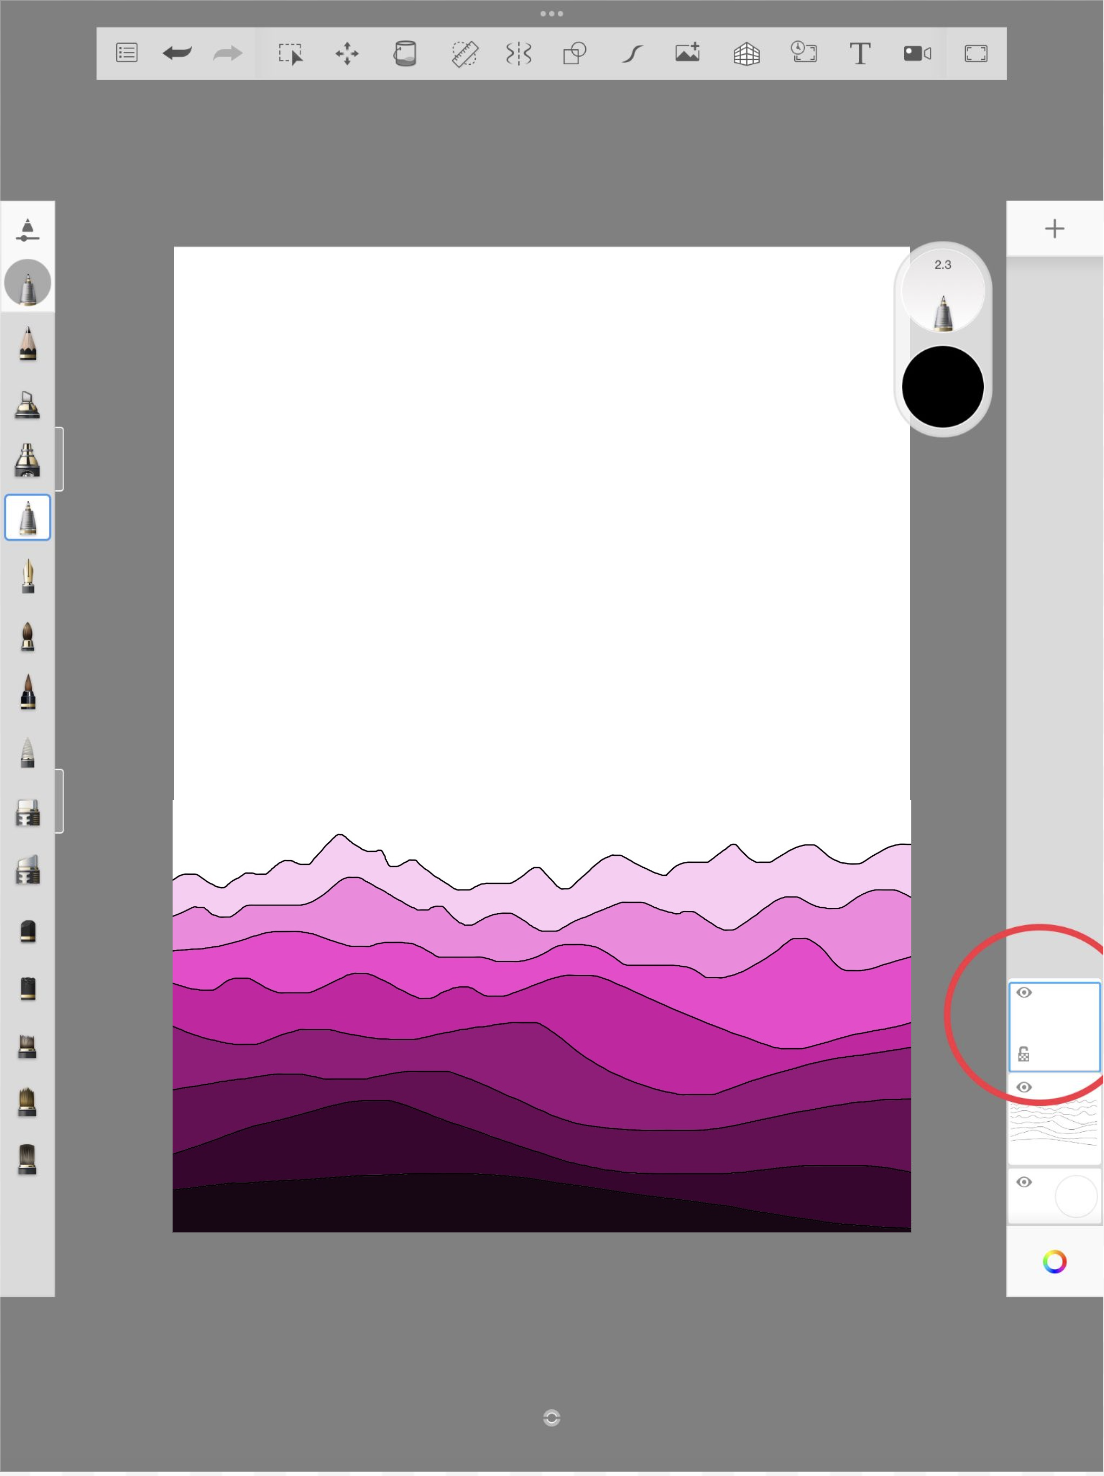
We started on the first level by drawing with the technical drawing pen (size 2.3 and black color) a series of hills and mountains in the distance.
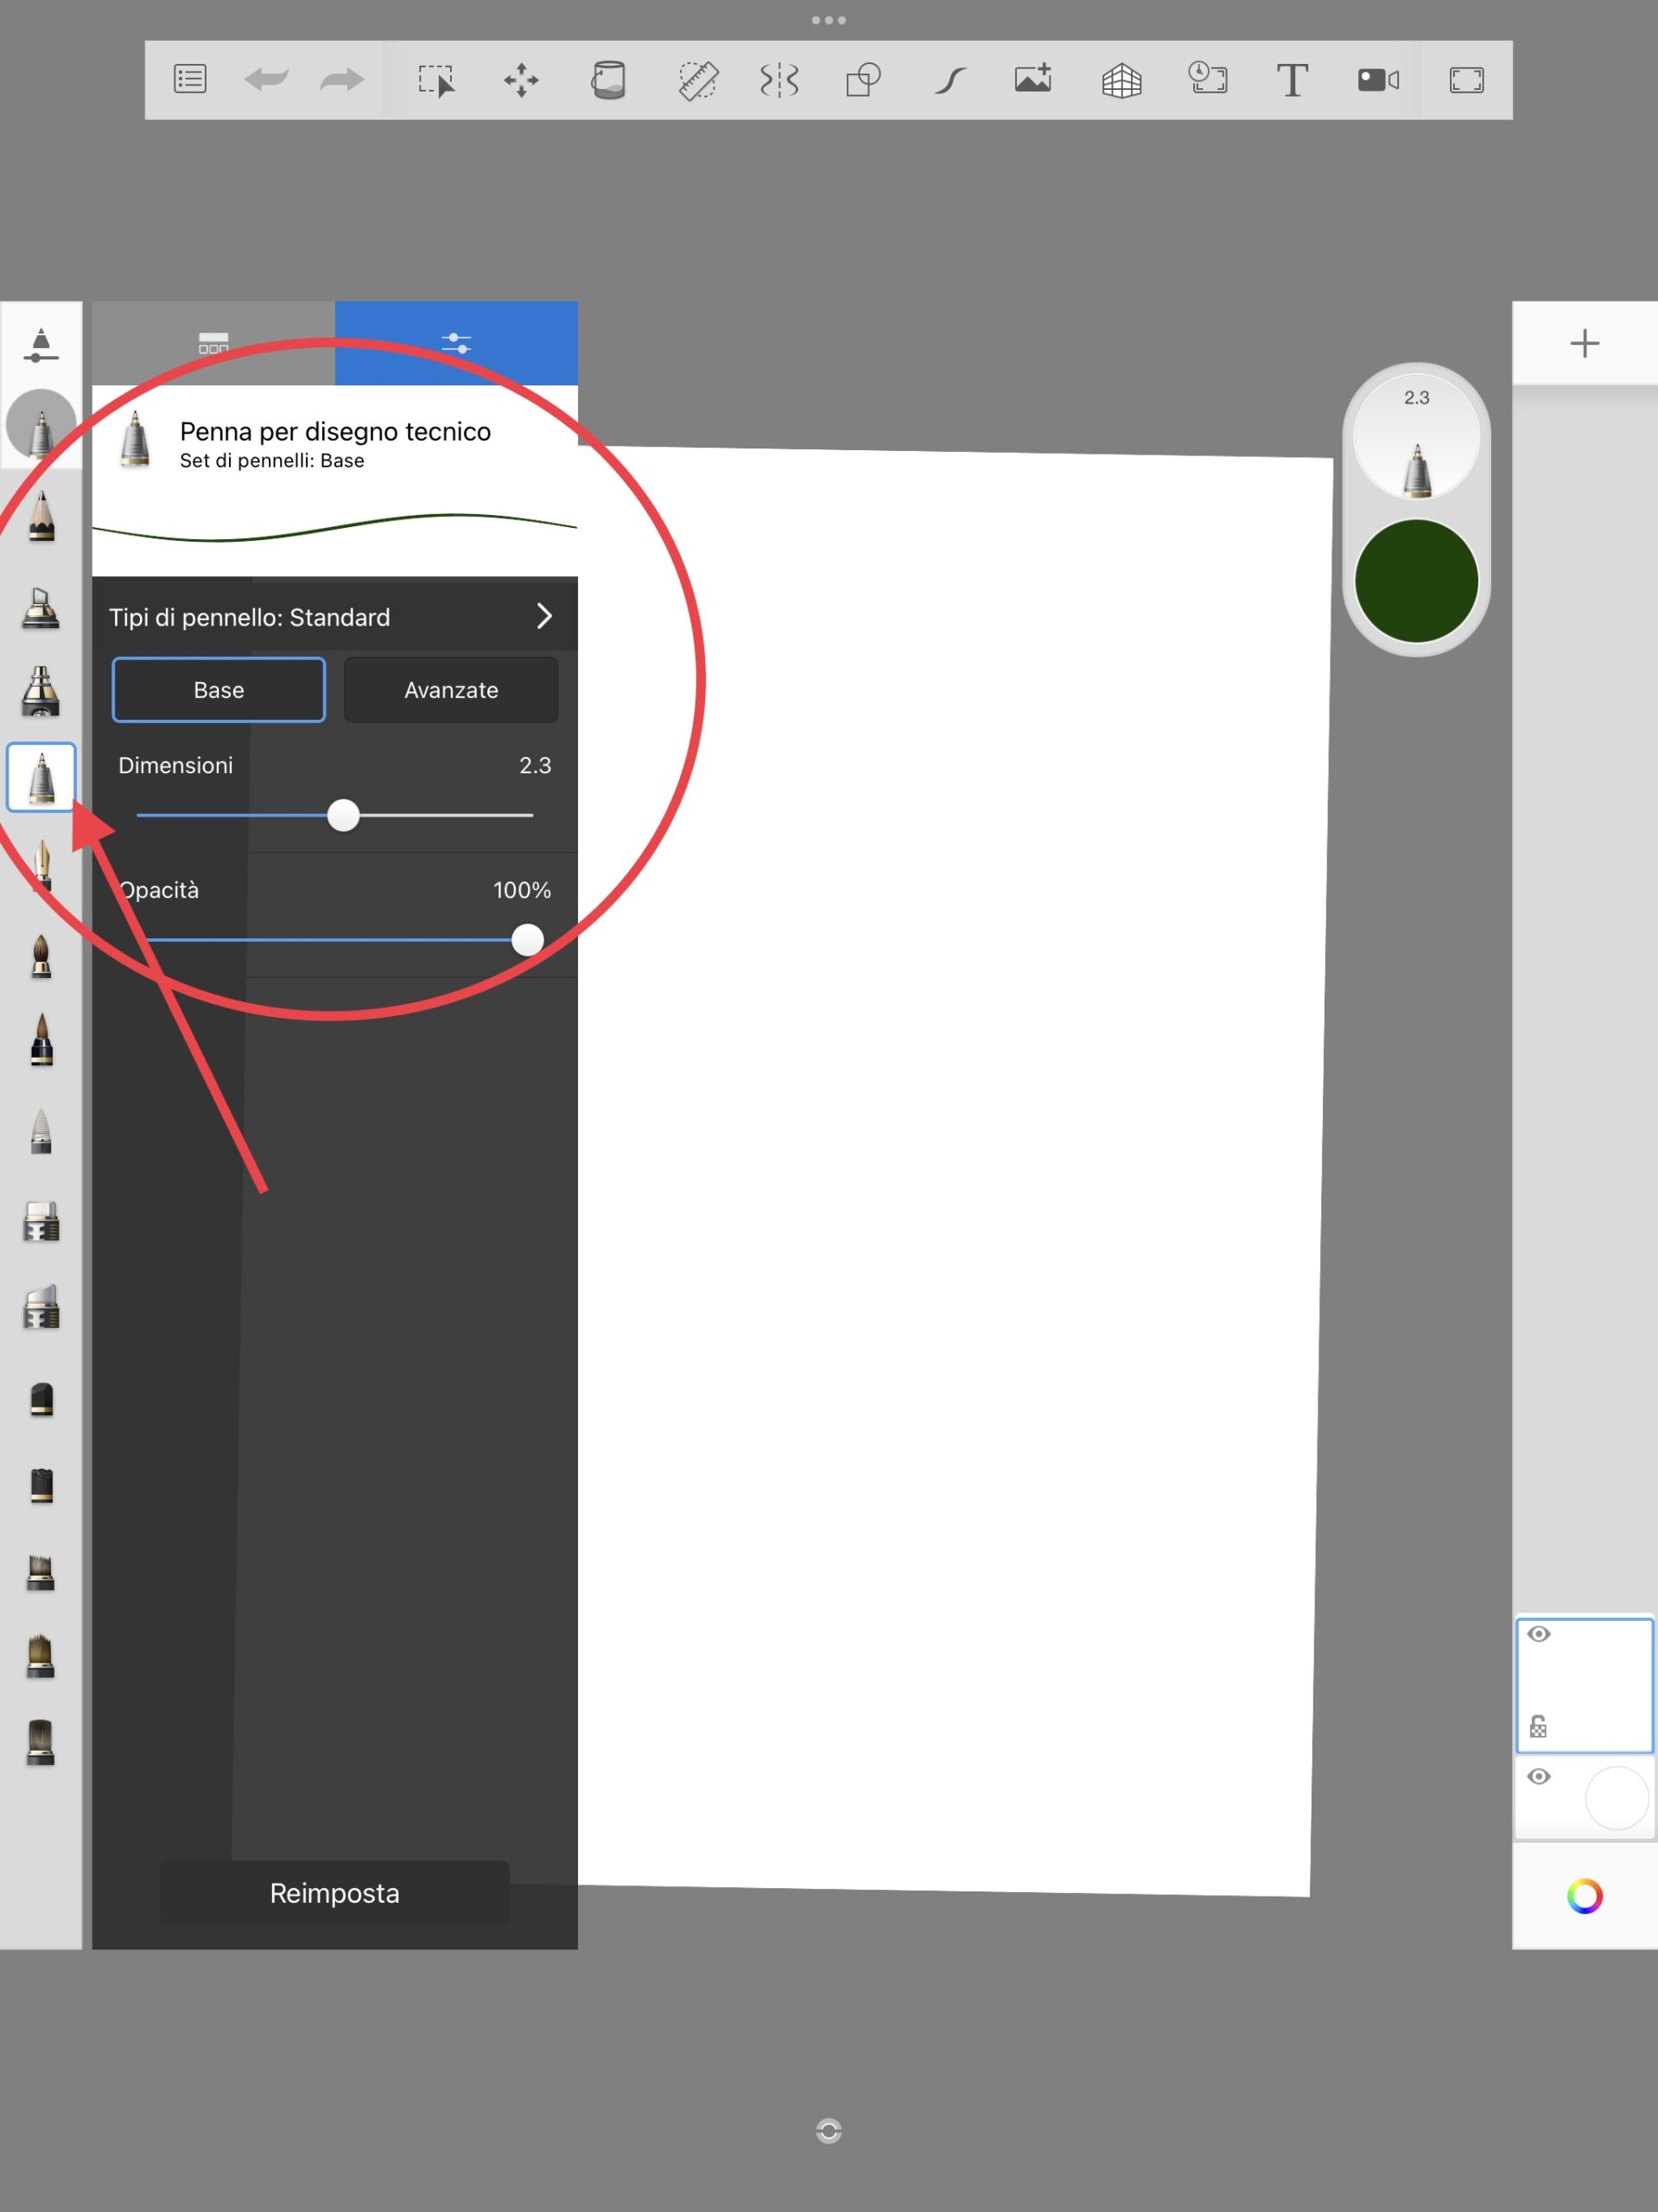
We drew 7-8 lines taking care to start the drawing from the outside of the “sheet” and always ending the line outside the drawable area, this to ensure we create CLOSED AREAS, easy to fill with the “bucket” tool . In fact, every time a line remains open, the area to be filled is not delimited and the color leaves the line filling the entire sheet.
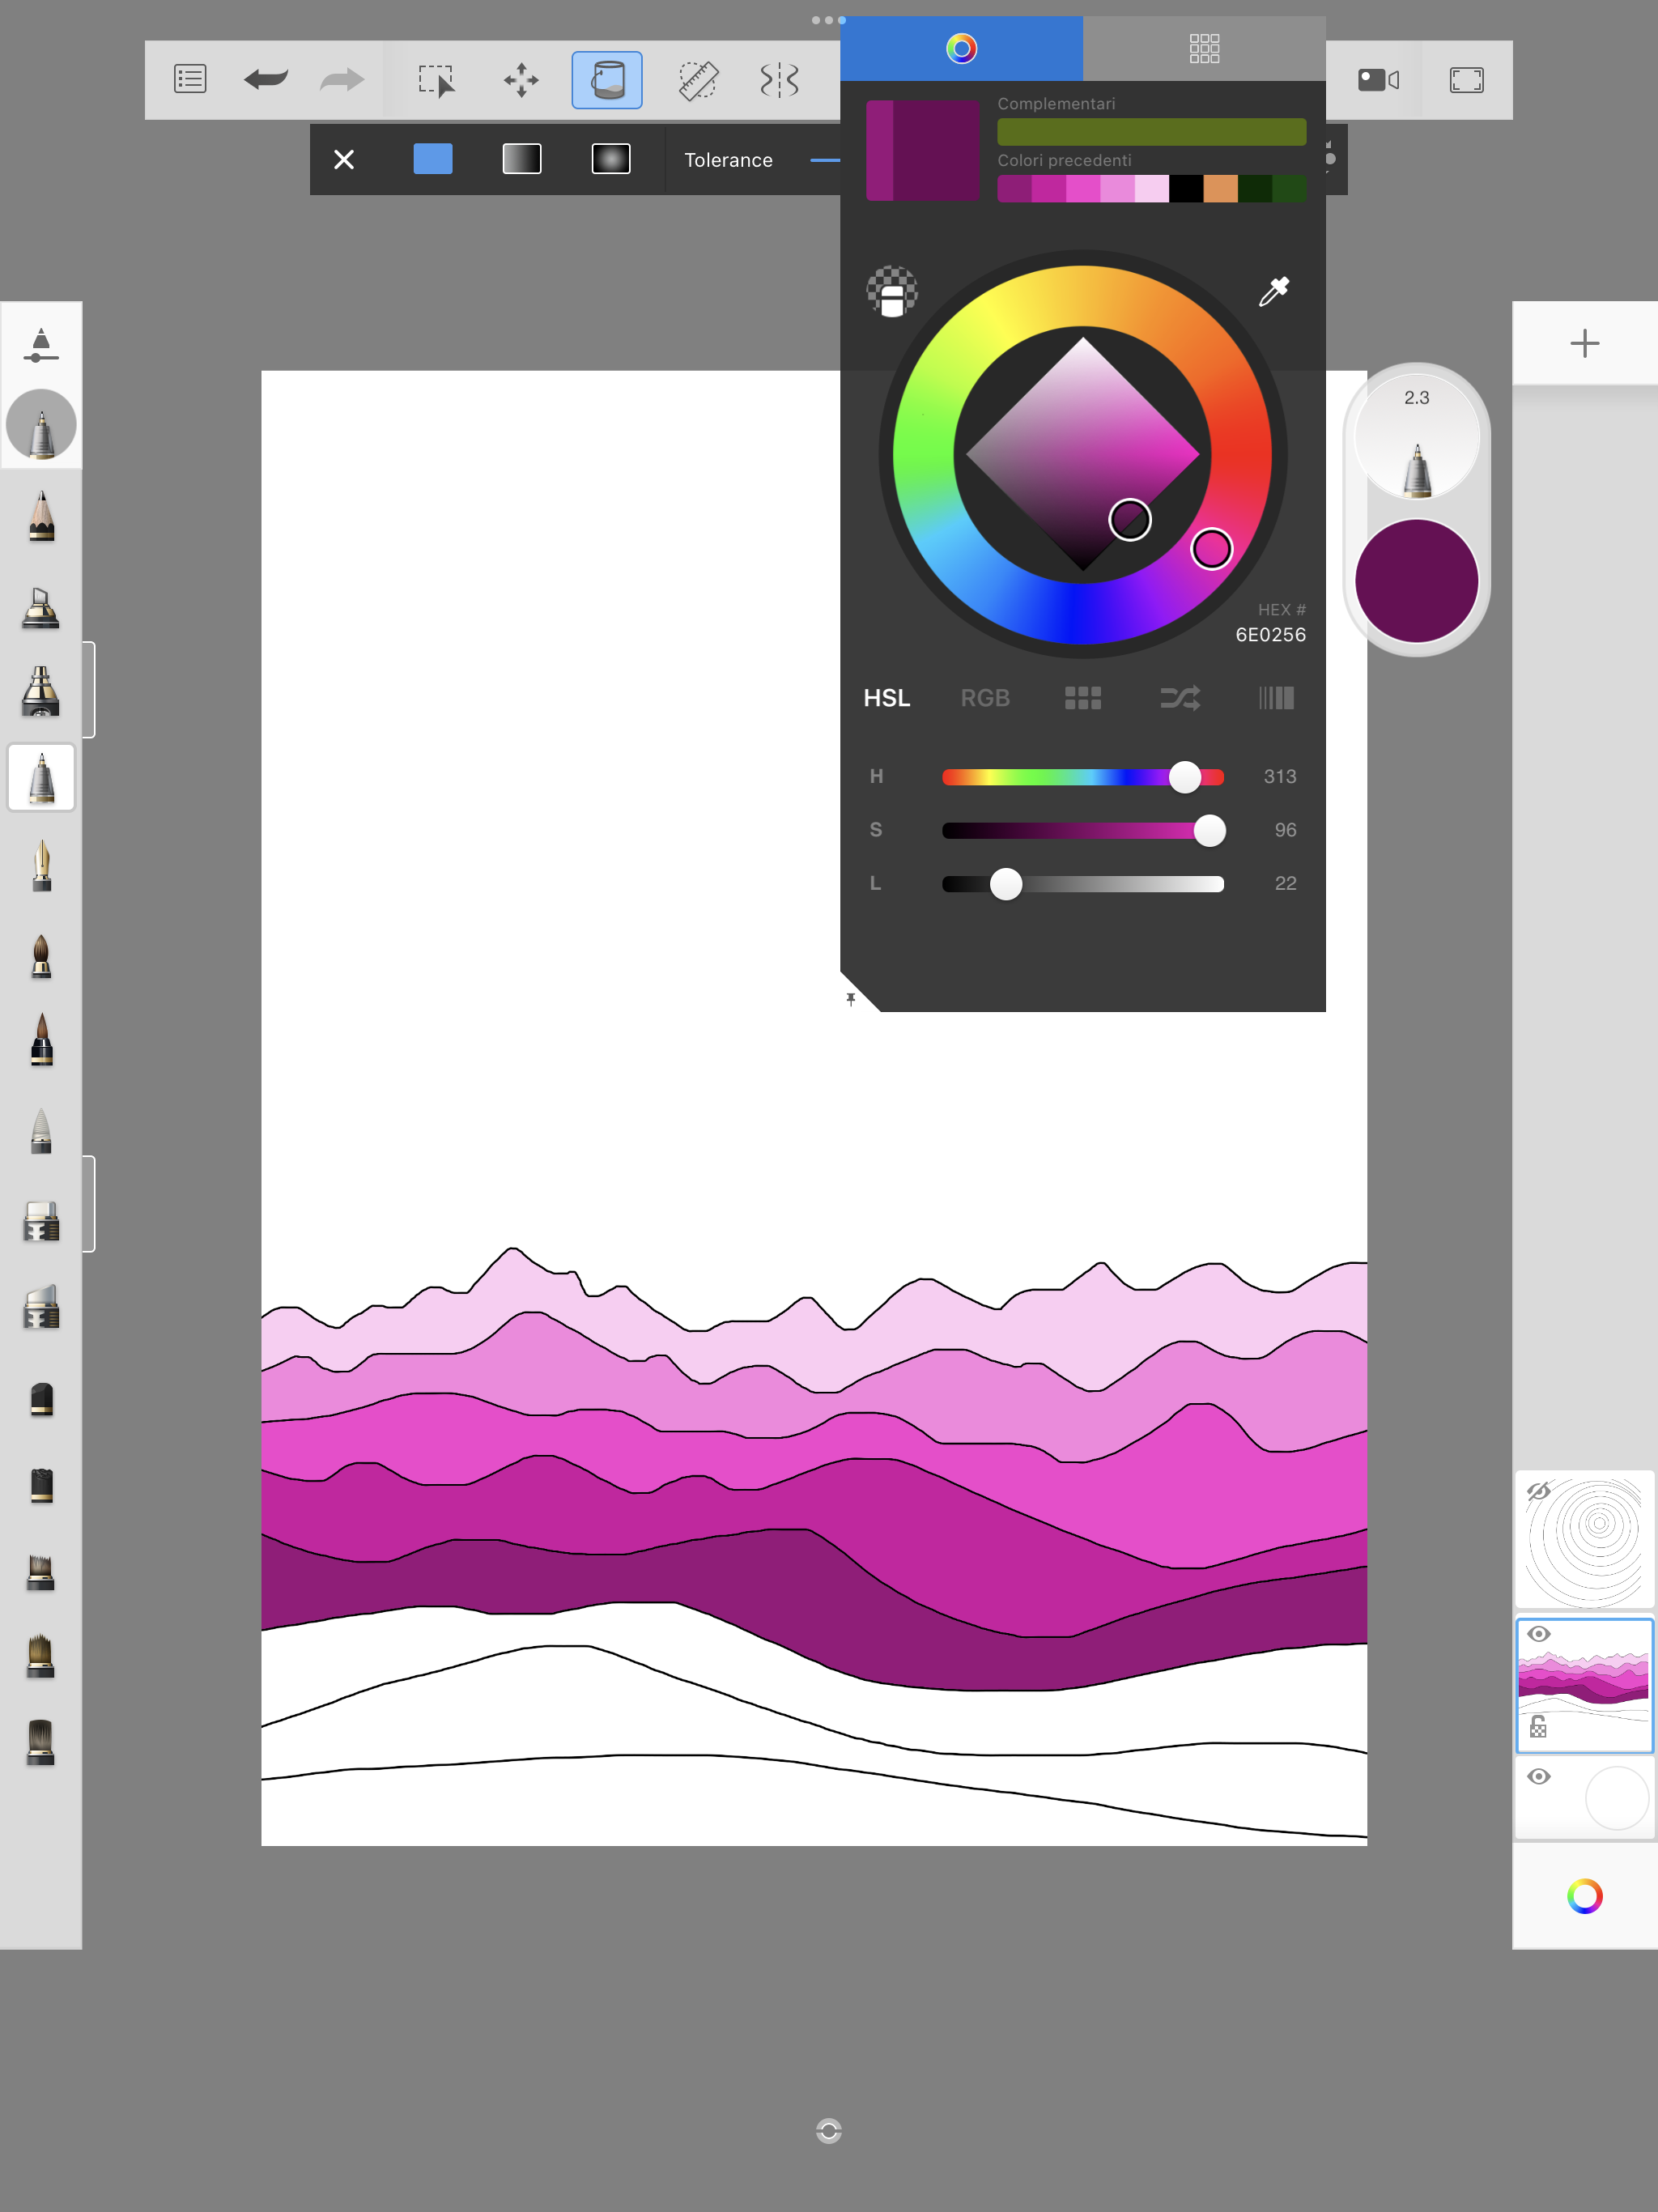
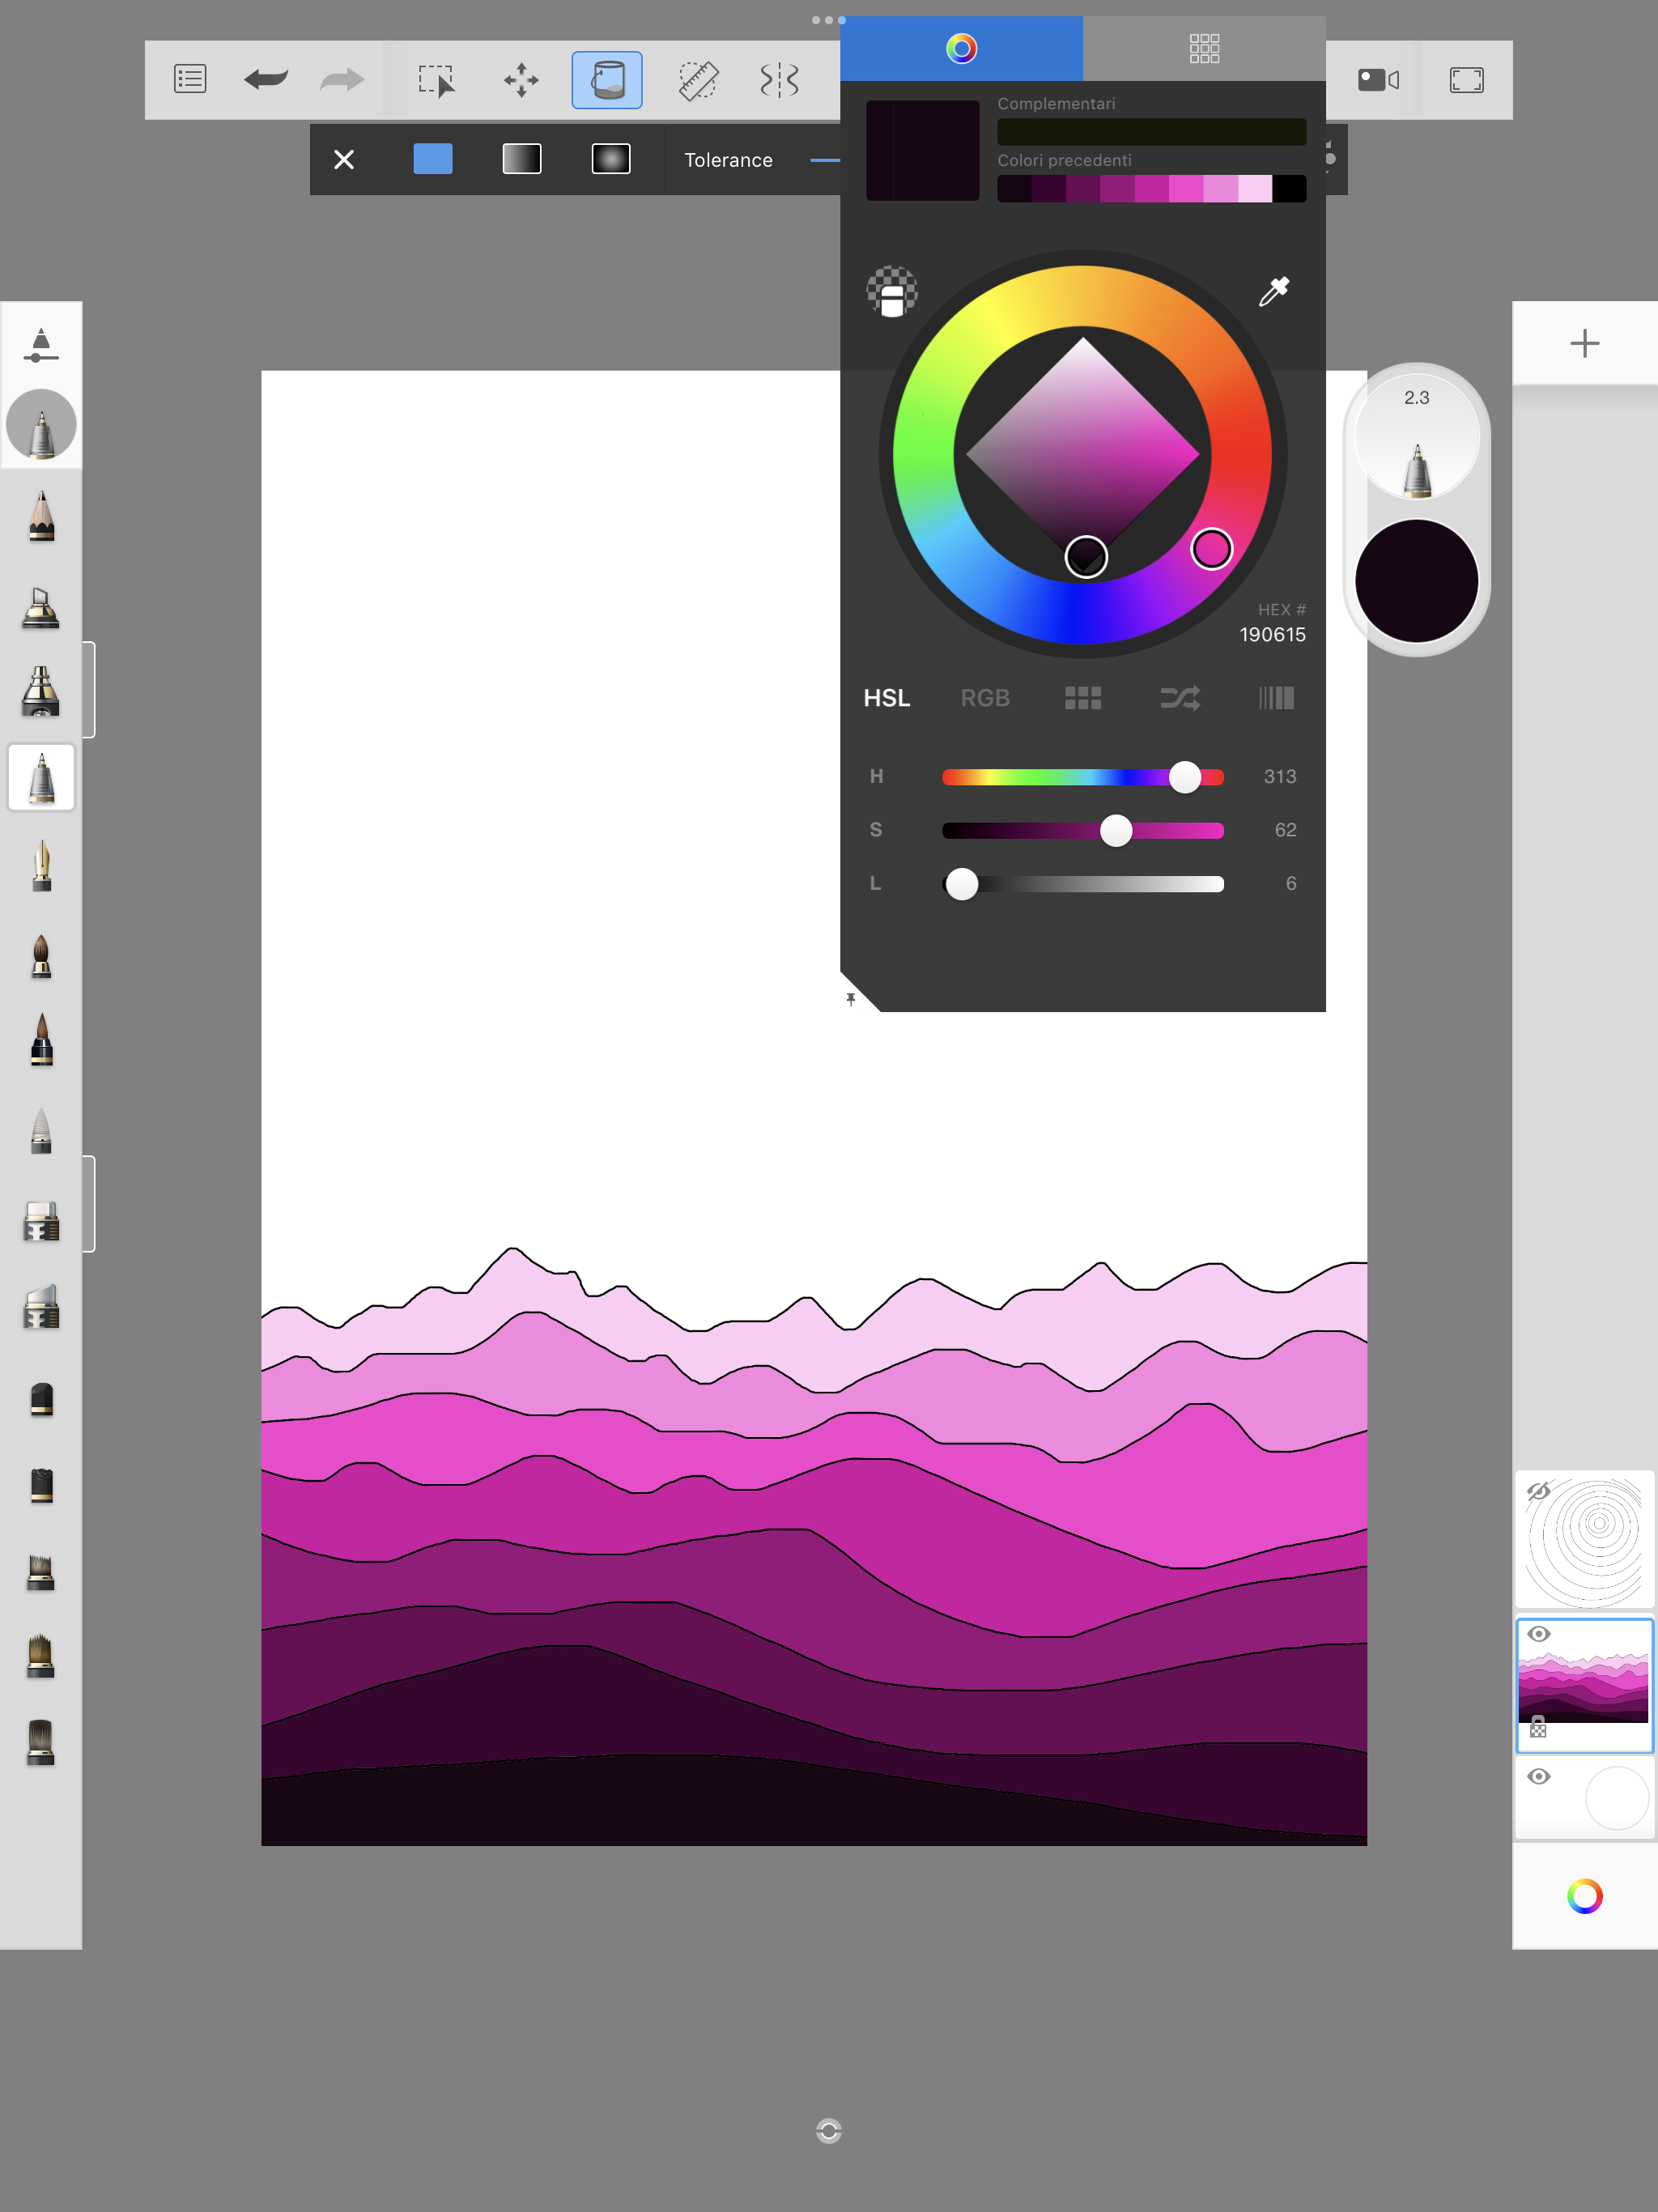
When the landscape on the first level was traced, we chose a color from the palette and colored the mountains starting from the lightest shade on the background and proceeding with increasingly darker shades.
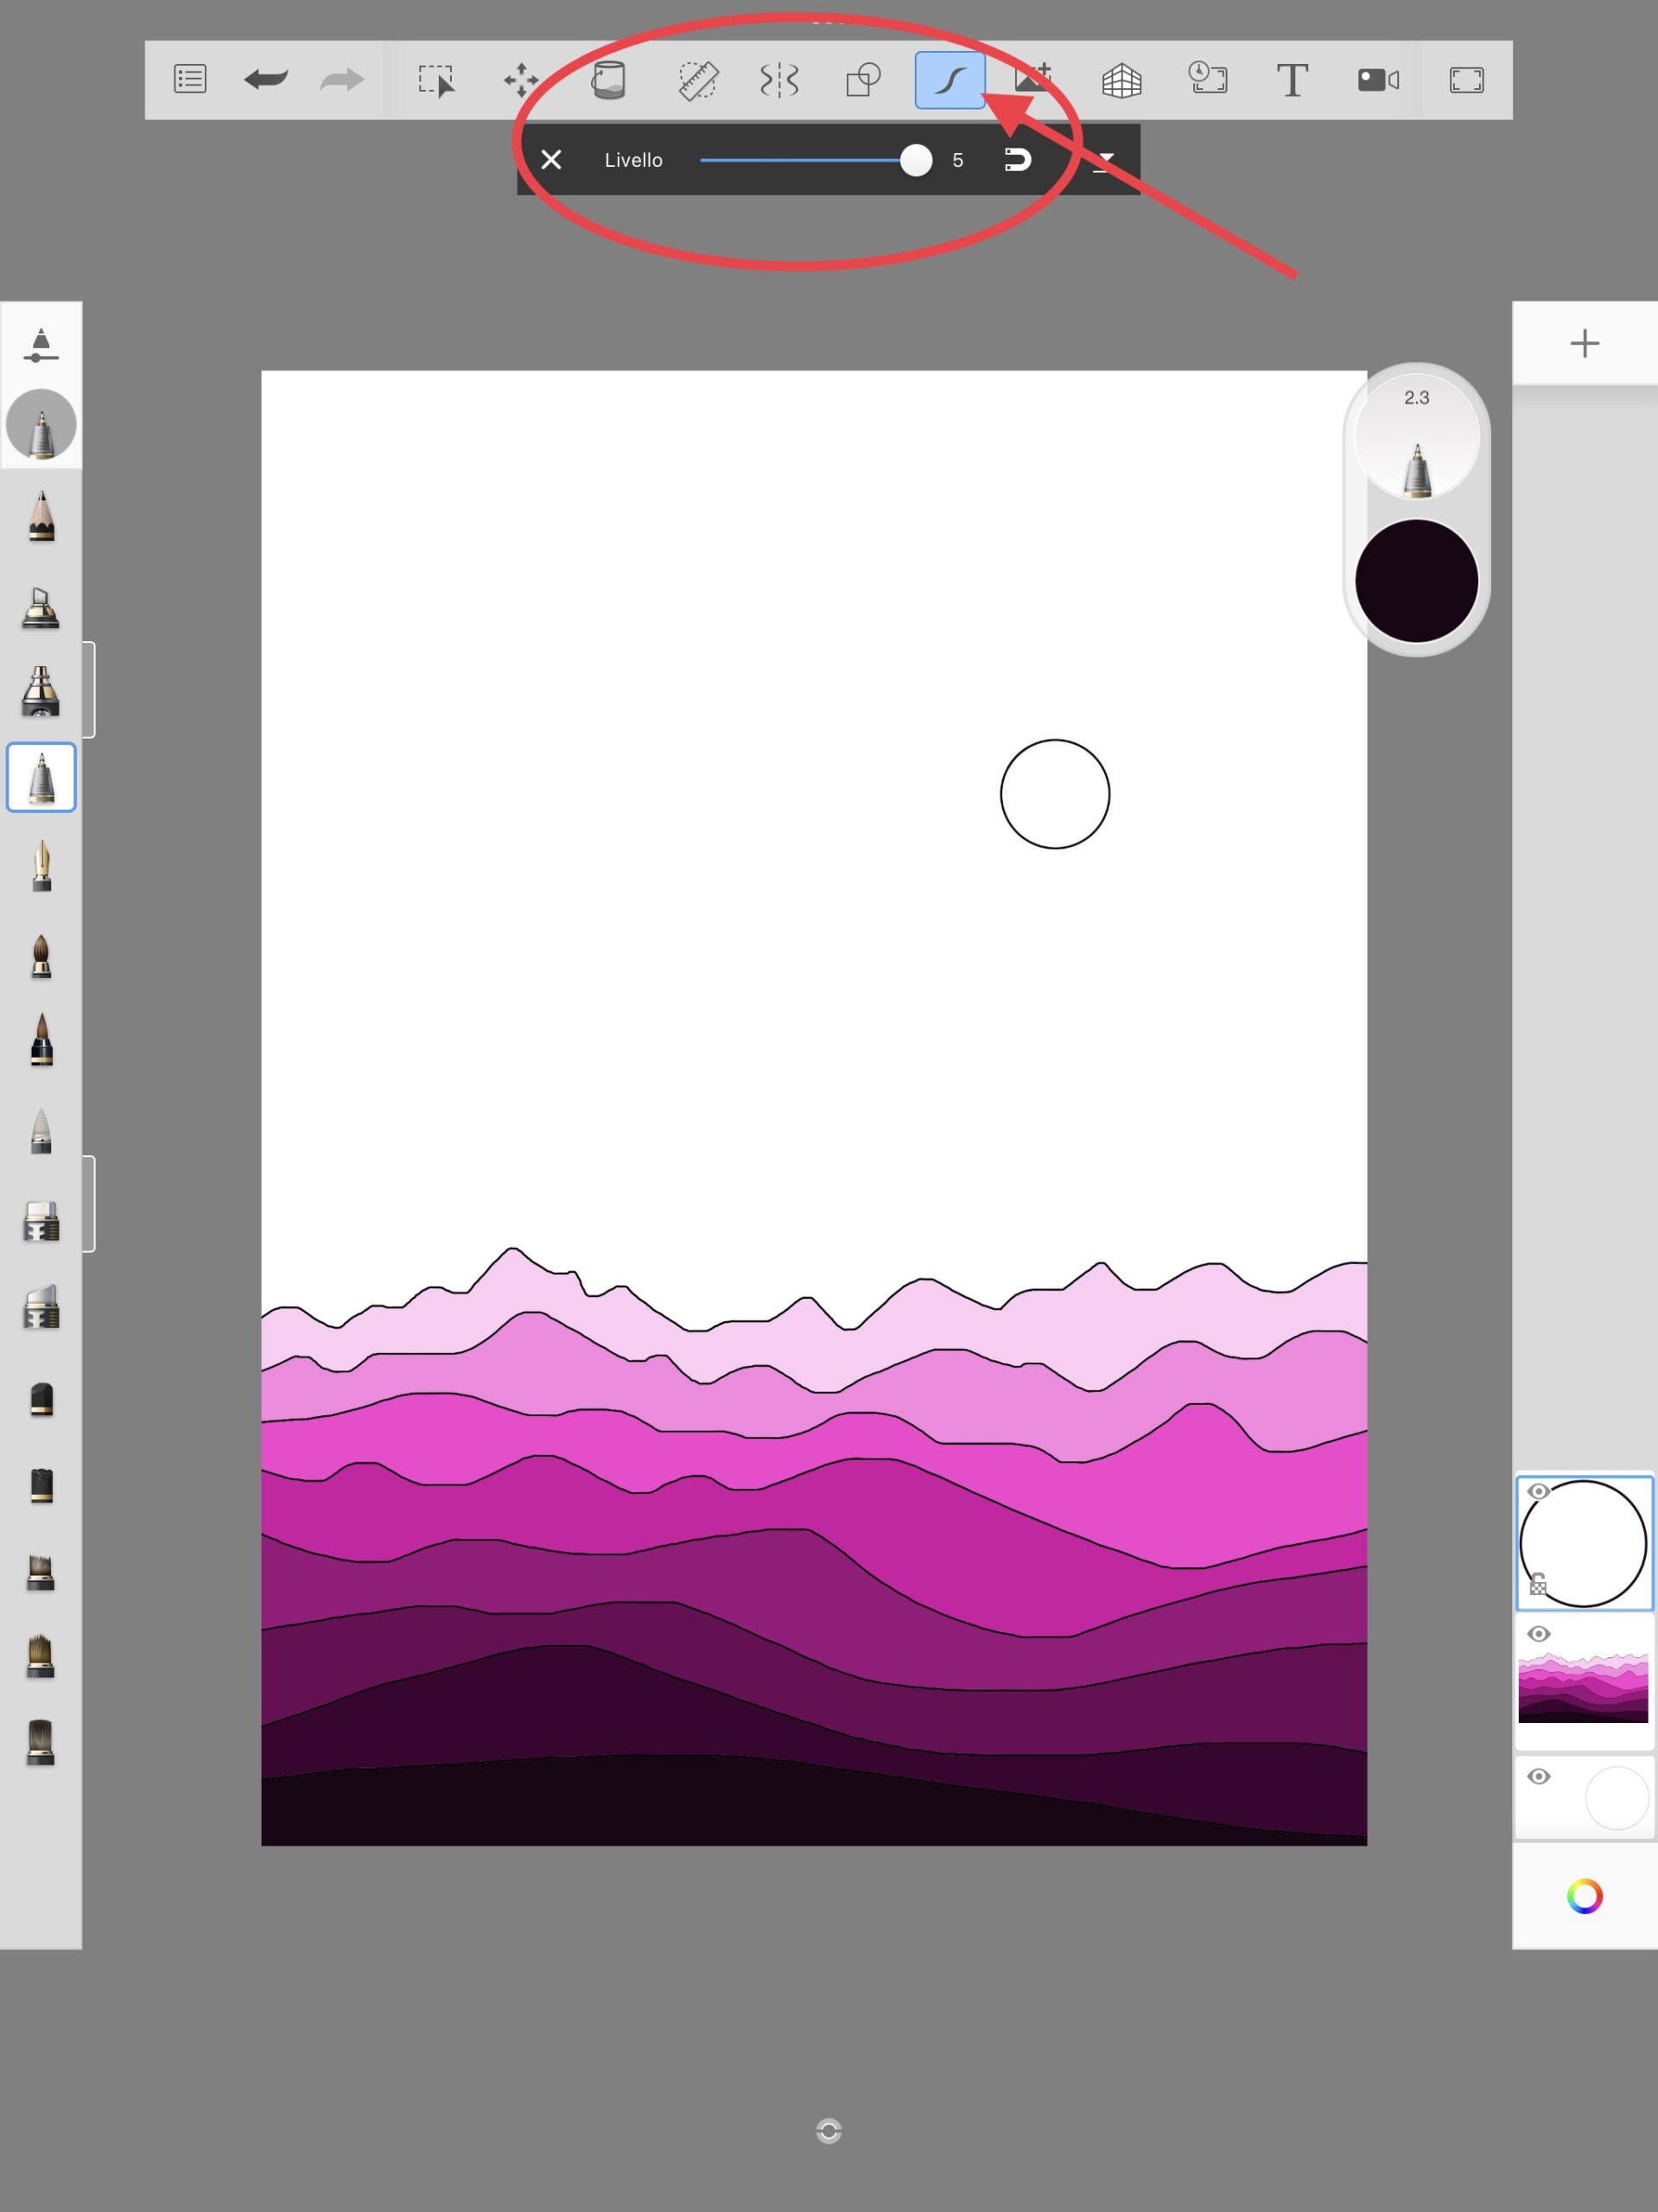
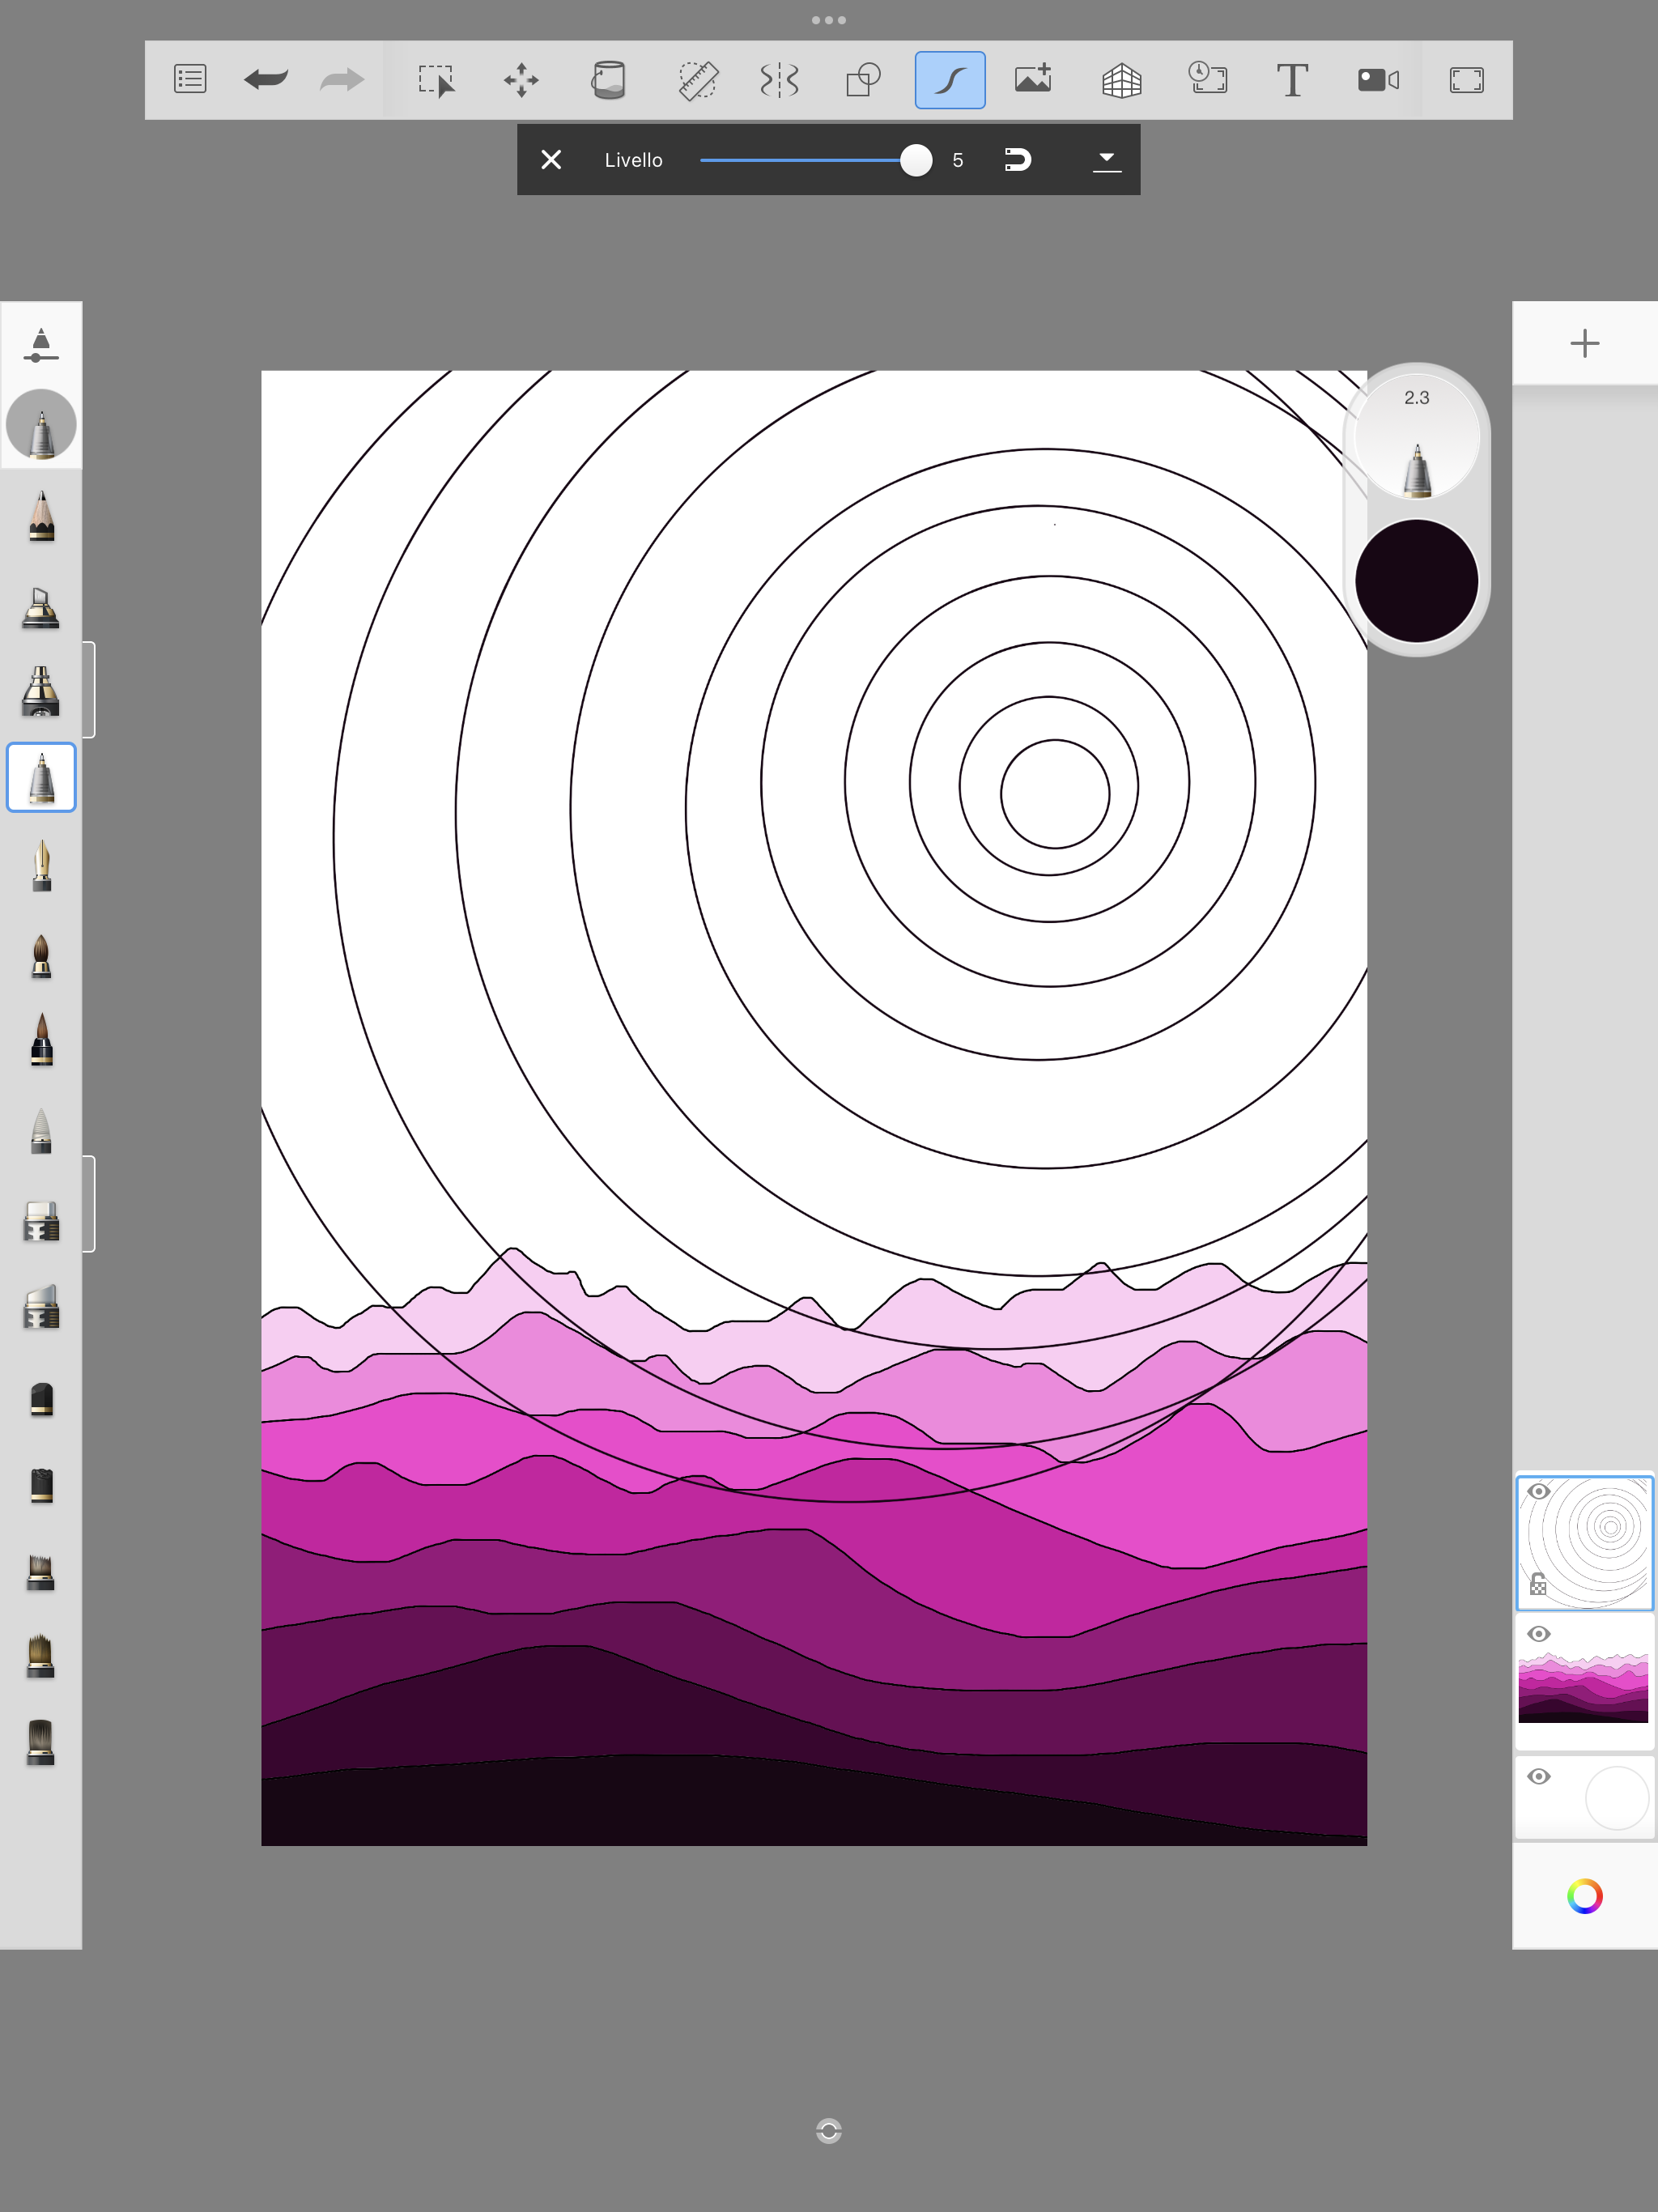
After that we created a second level with the + key and we drew the sun and ever wider concentric circles. To draw the circles we used the “predictive stroke” function at level 5 (top bar, icon with an S curve) which allows us to draw an irregular freehand circle and this automatically transforms into a regular geometric shape. Obviously the circular shapes must be closed shapes.


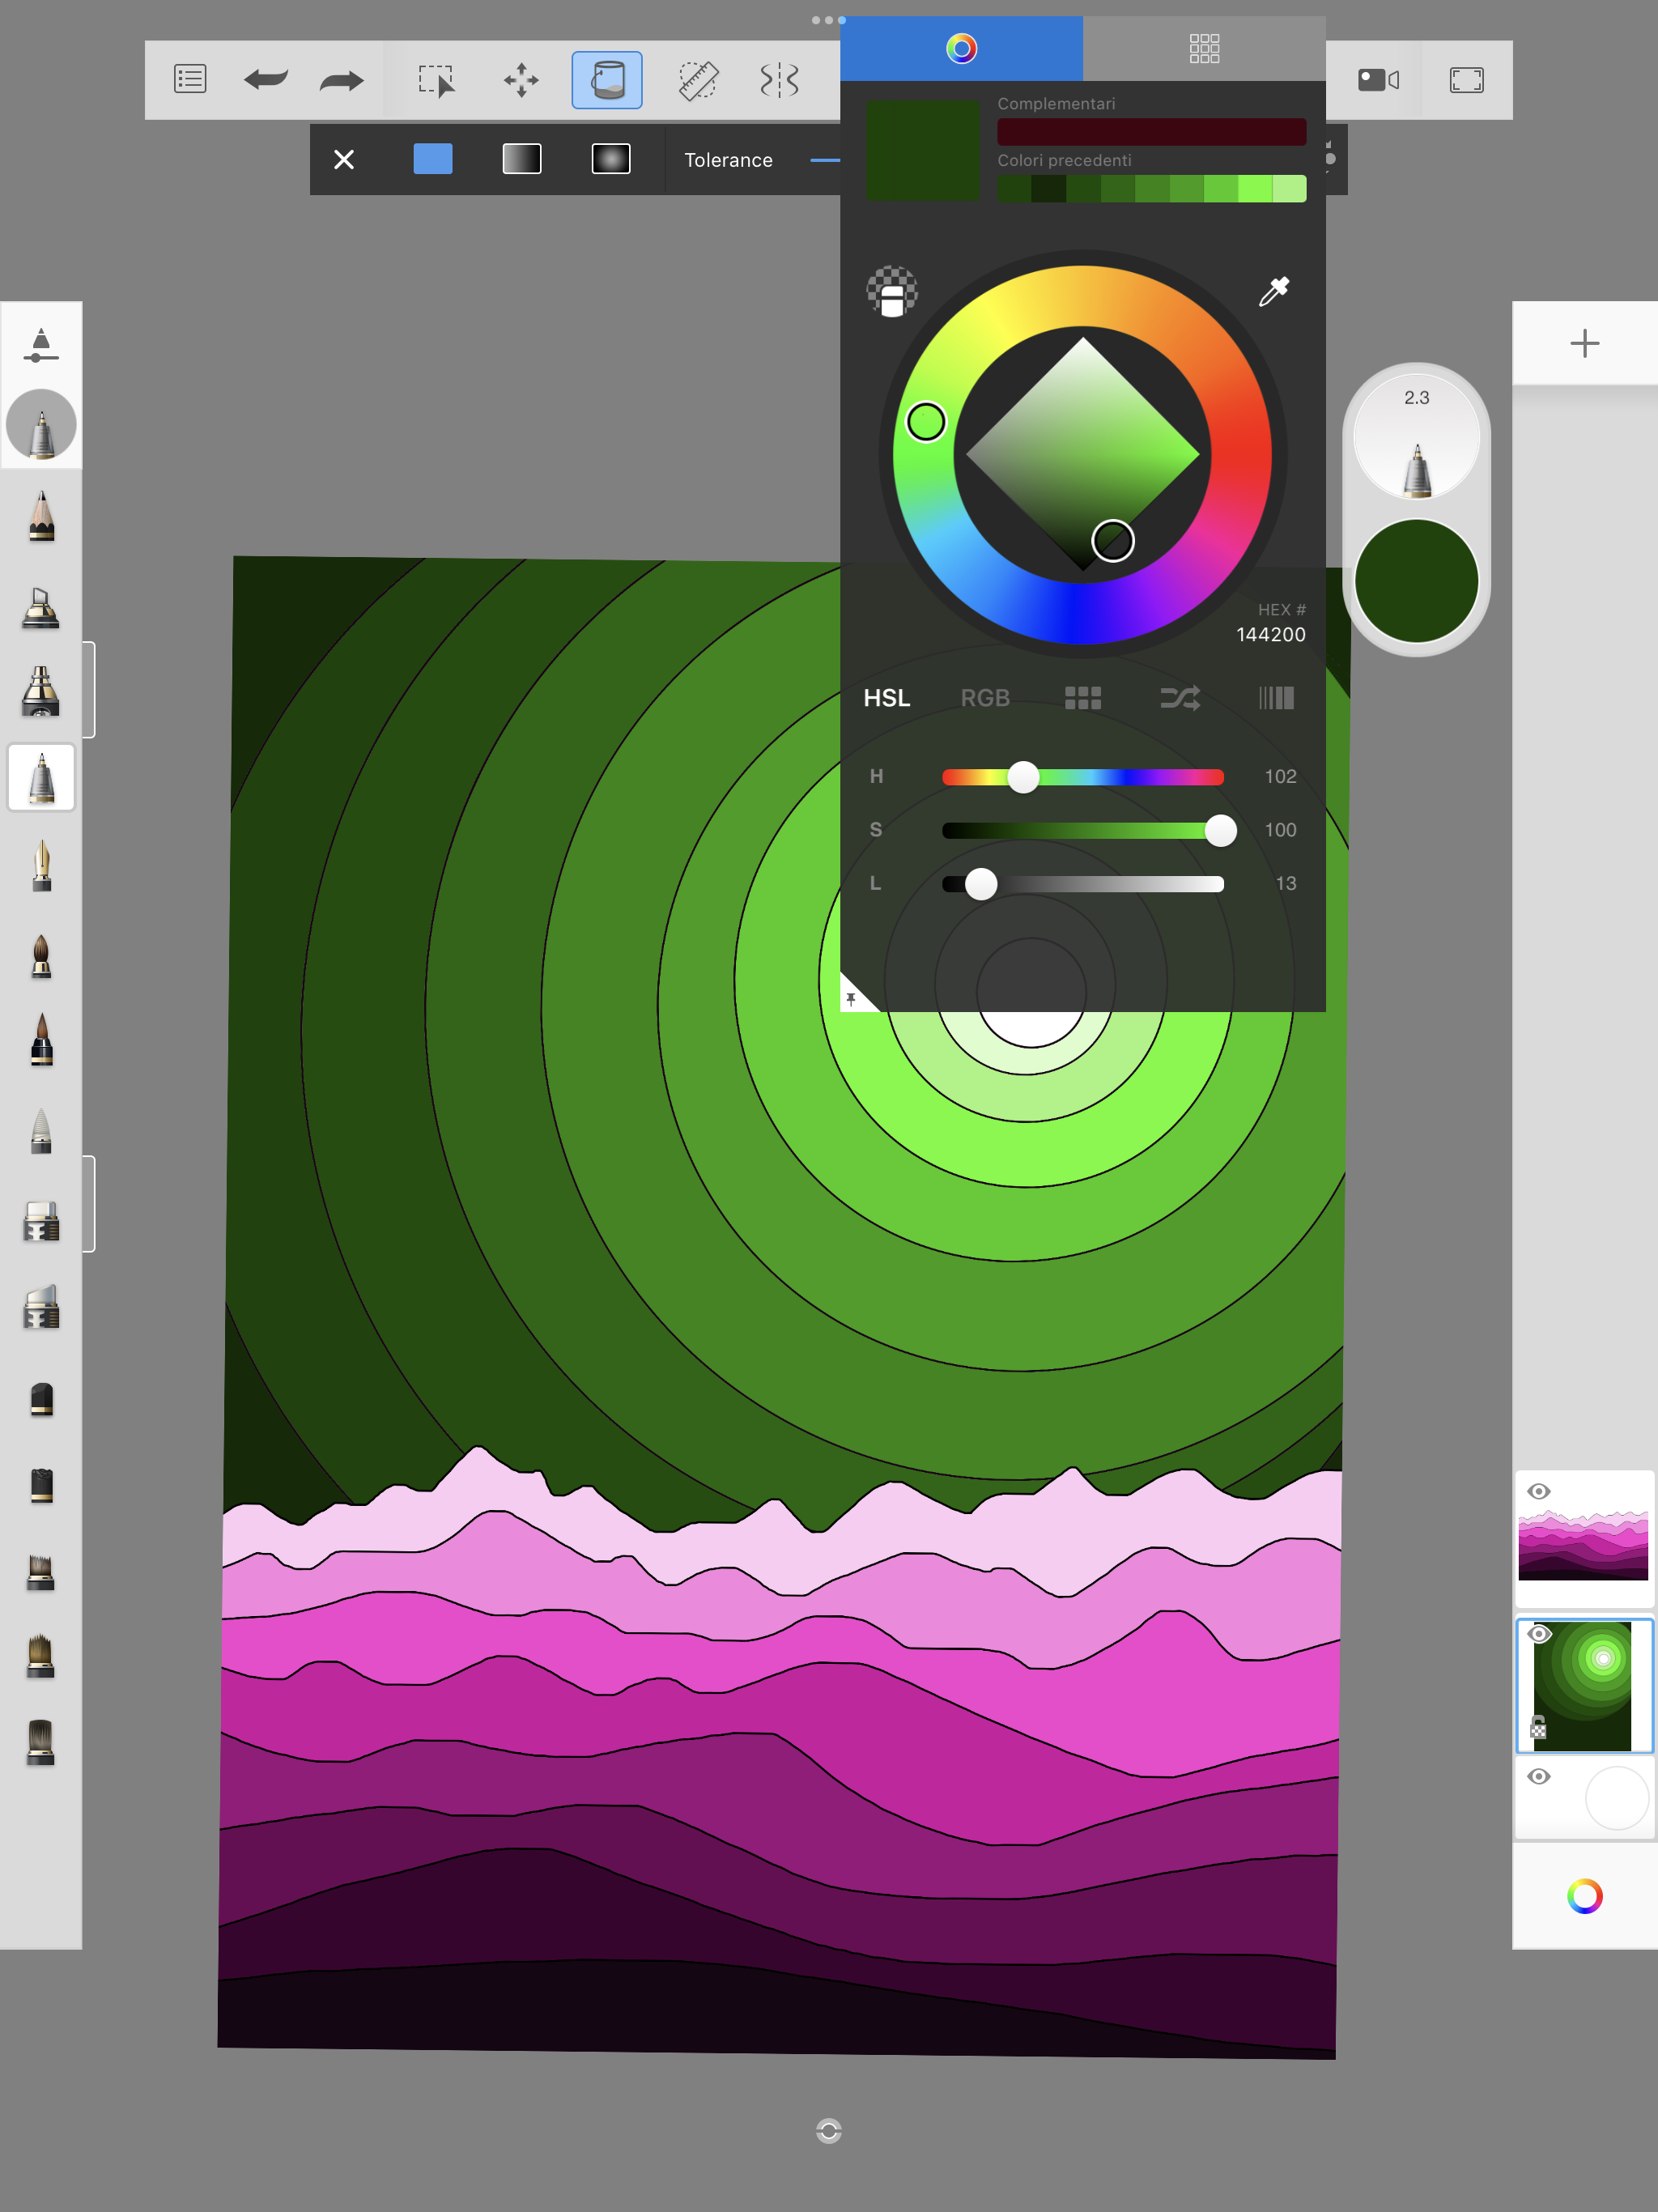
At this point we can move the levels, bringing the mountain level in front of the sky level. To do this, just touch the level for one or two seconds, it will become mobile and it will be possible to move it up or down.

After this step it is possible to color the sky by choosing a color from the palette and proceeding with colors in tonal gradation from the lightest to the darkest.

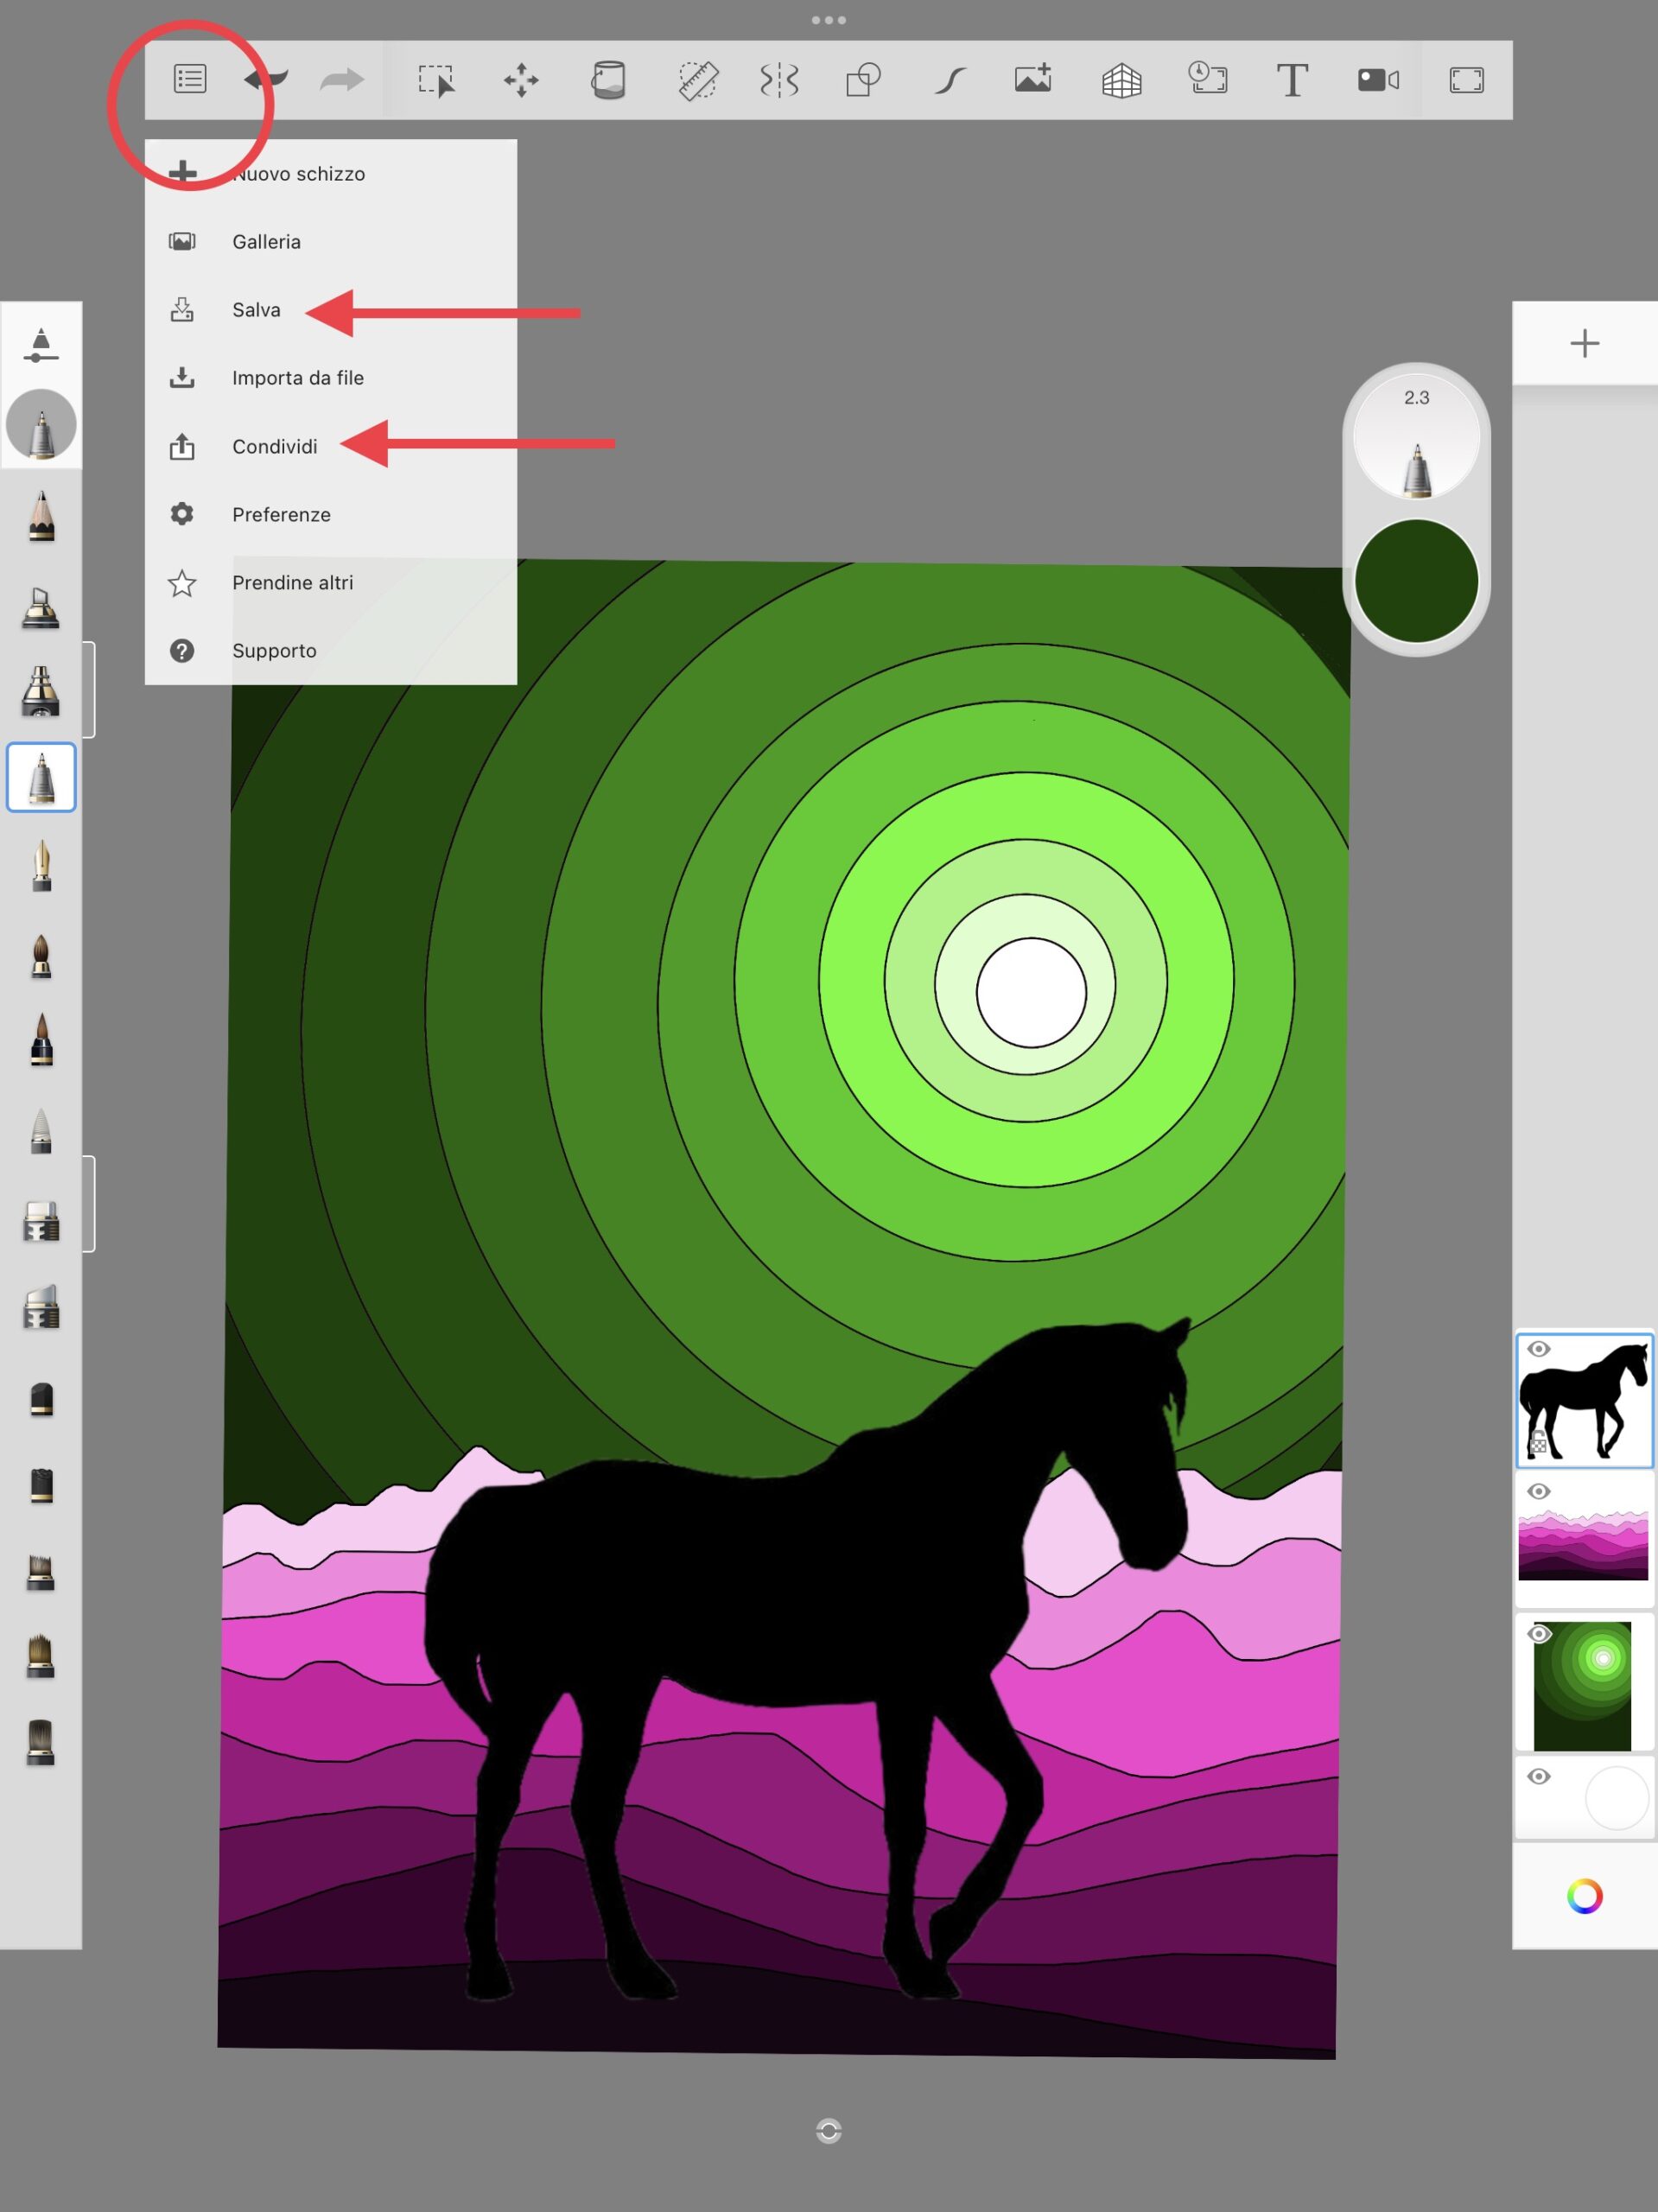
To add the silhouette of the animal, I prepared some png images with a transparent background that students can use via Classroom or Drive. Once the image has been chosen, it is inserted with the image icon with the + and can be moved and enlarged with the tools on the top bar starting from the icon of the four arrows and processing the figure with the menu that offers the various options (move, distort, rotate…). You have to make sure that the LEVEL WITH THE ANIMAL is above the others, to have the silhouette in front of the landscape.


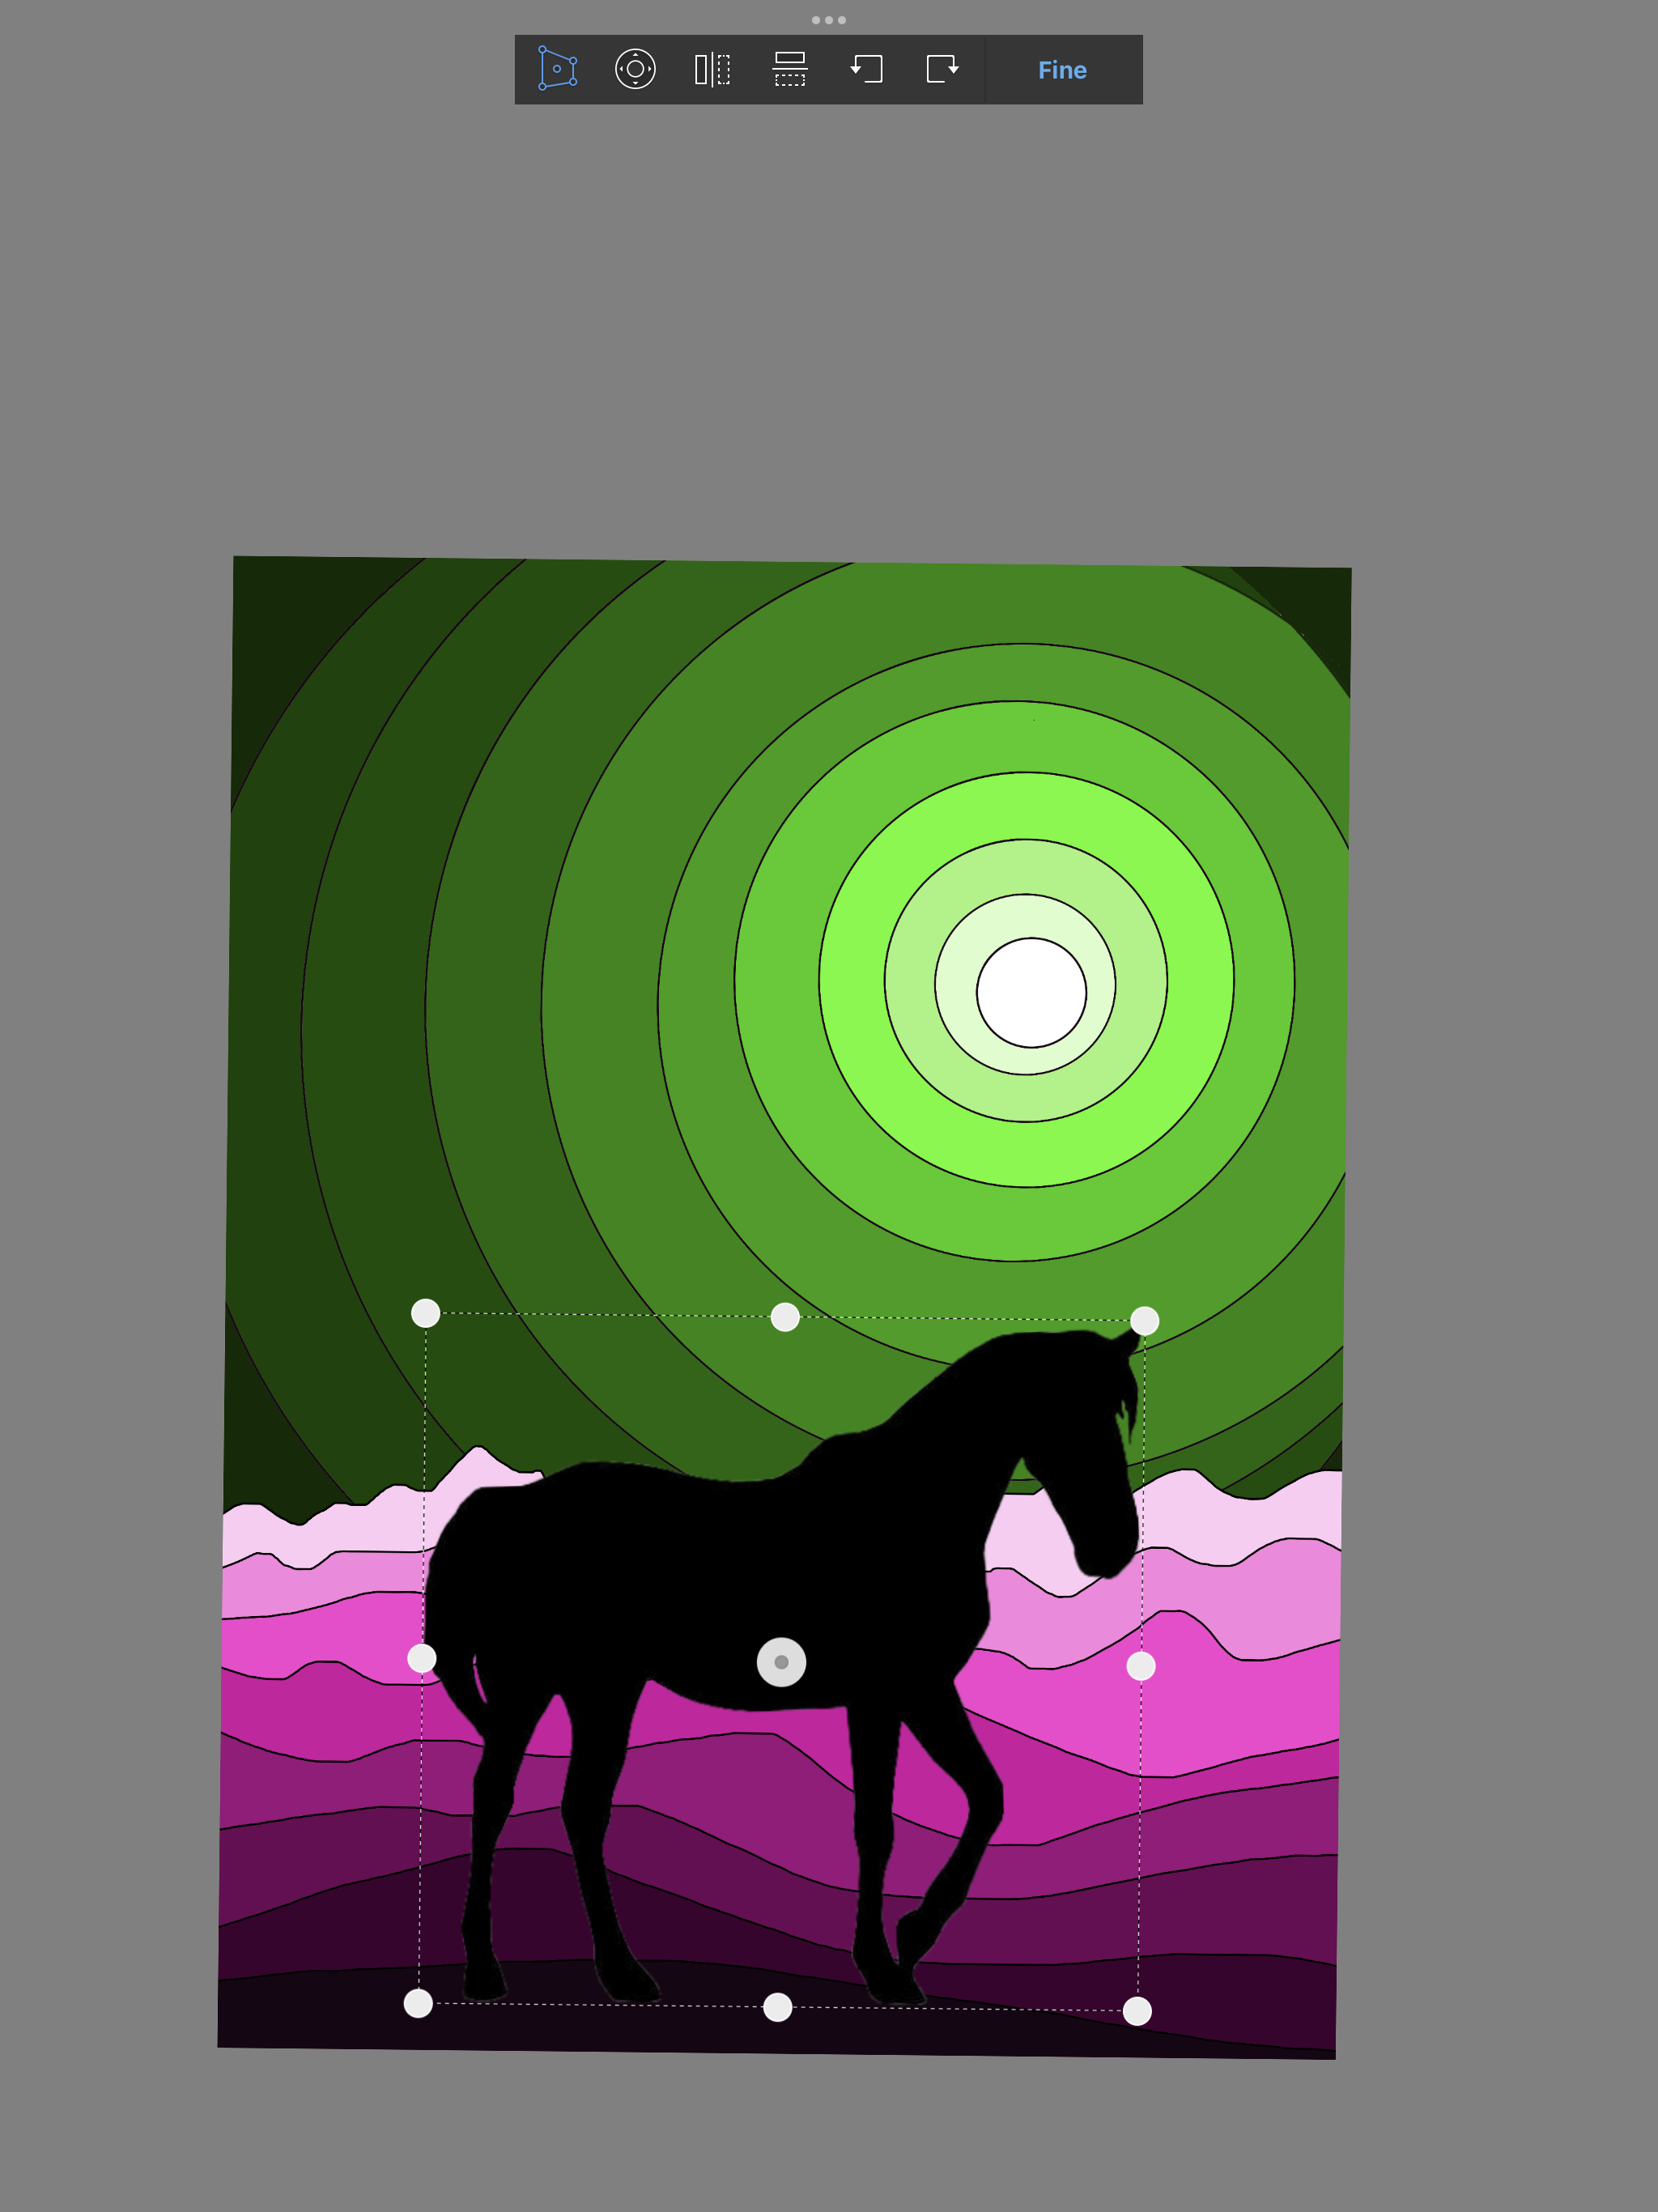
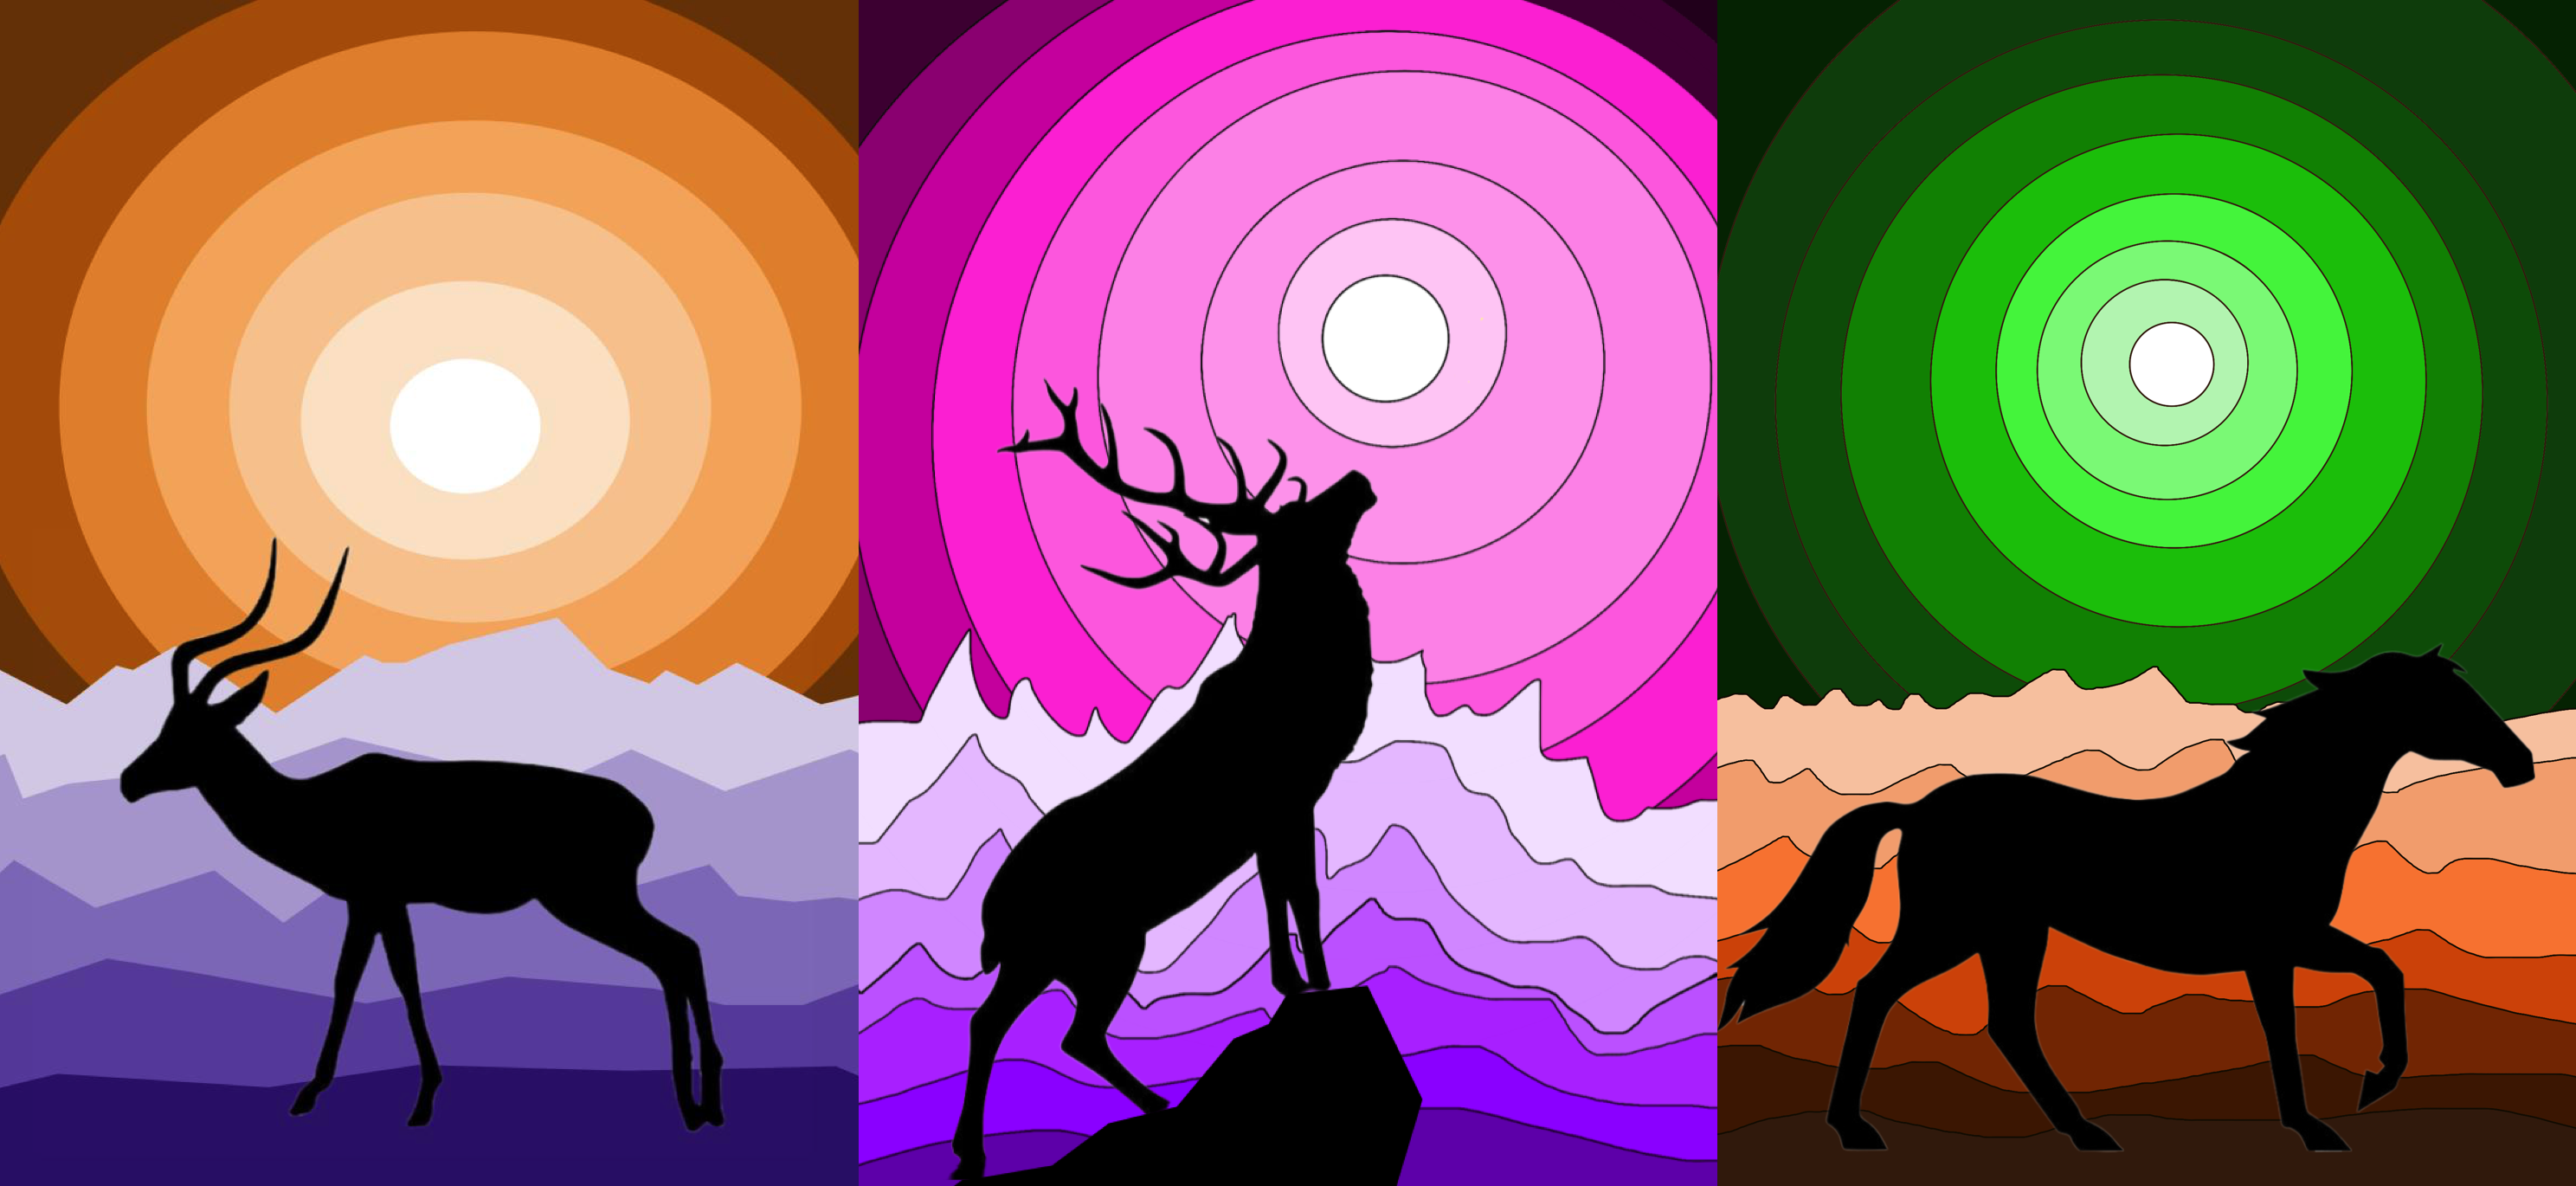
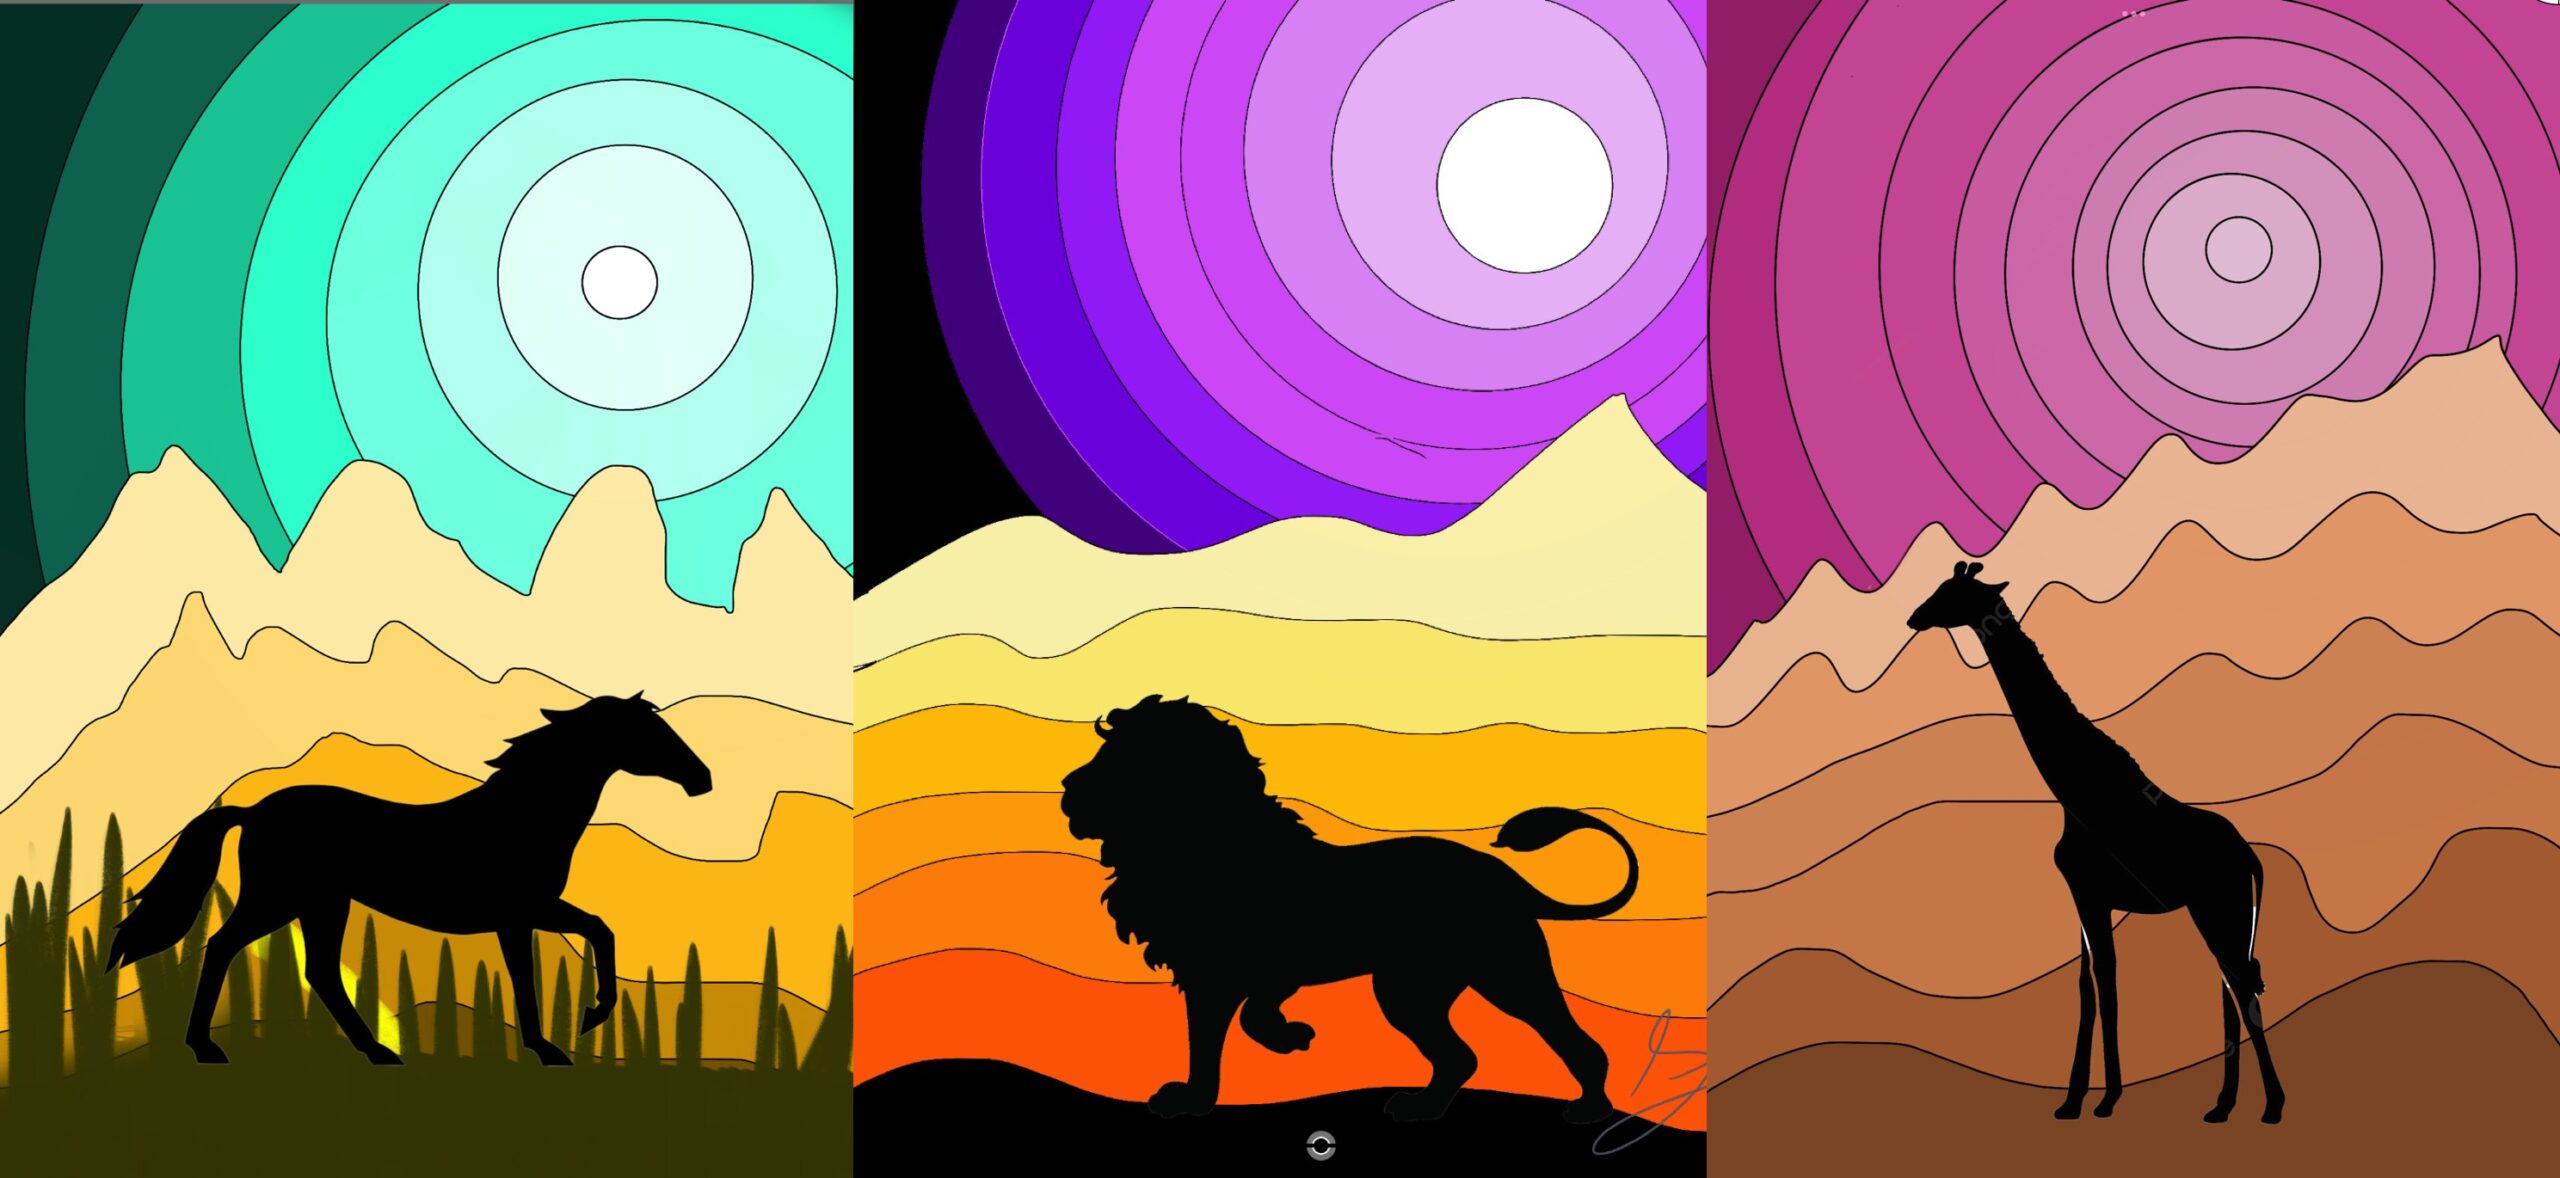
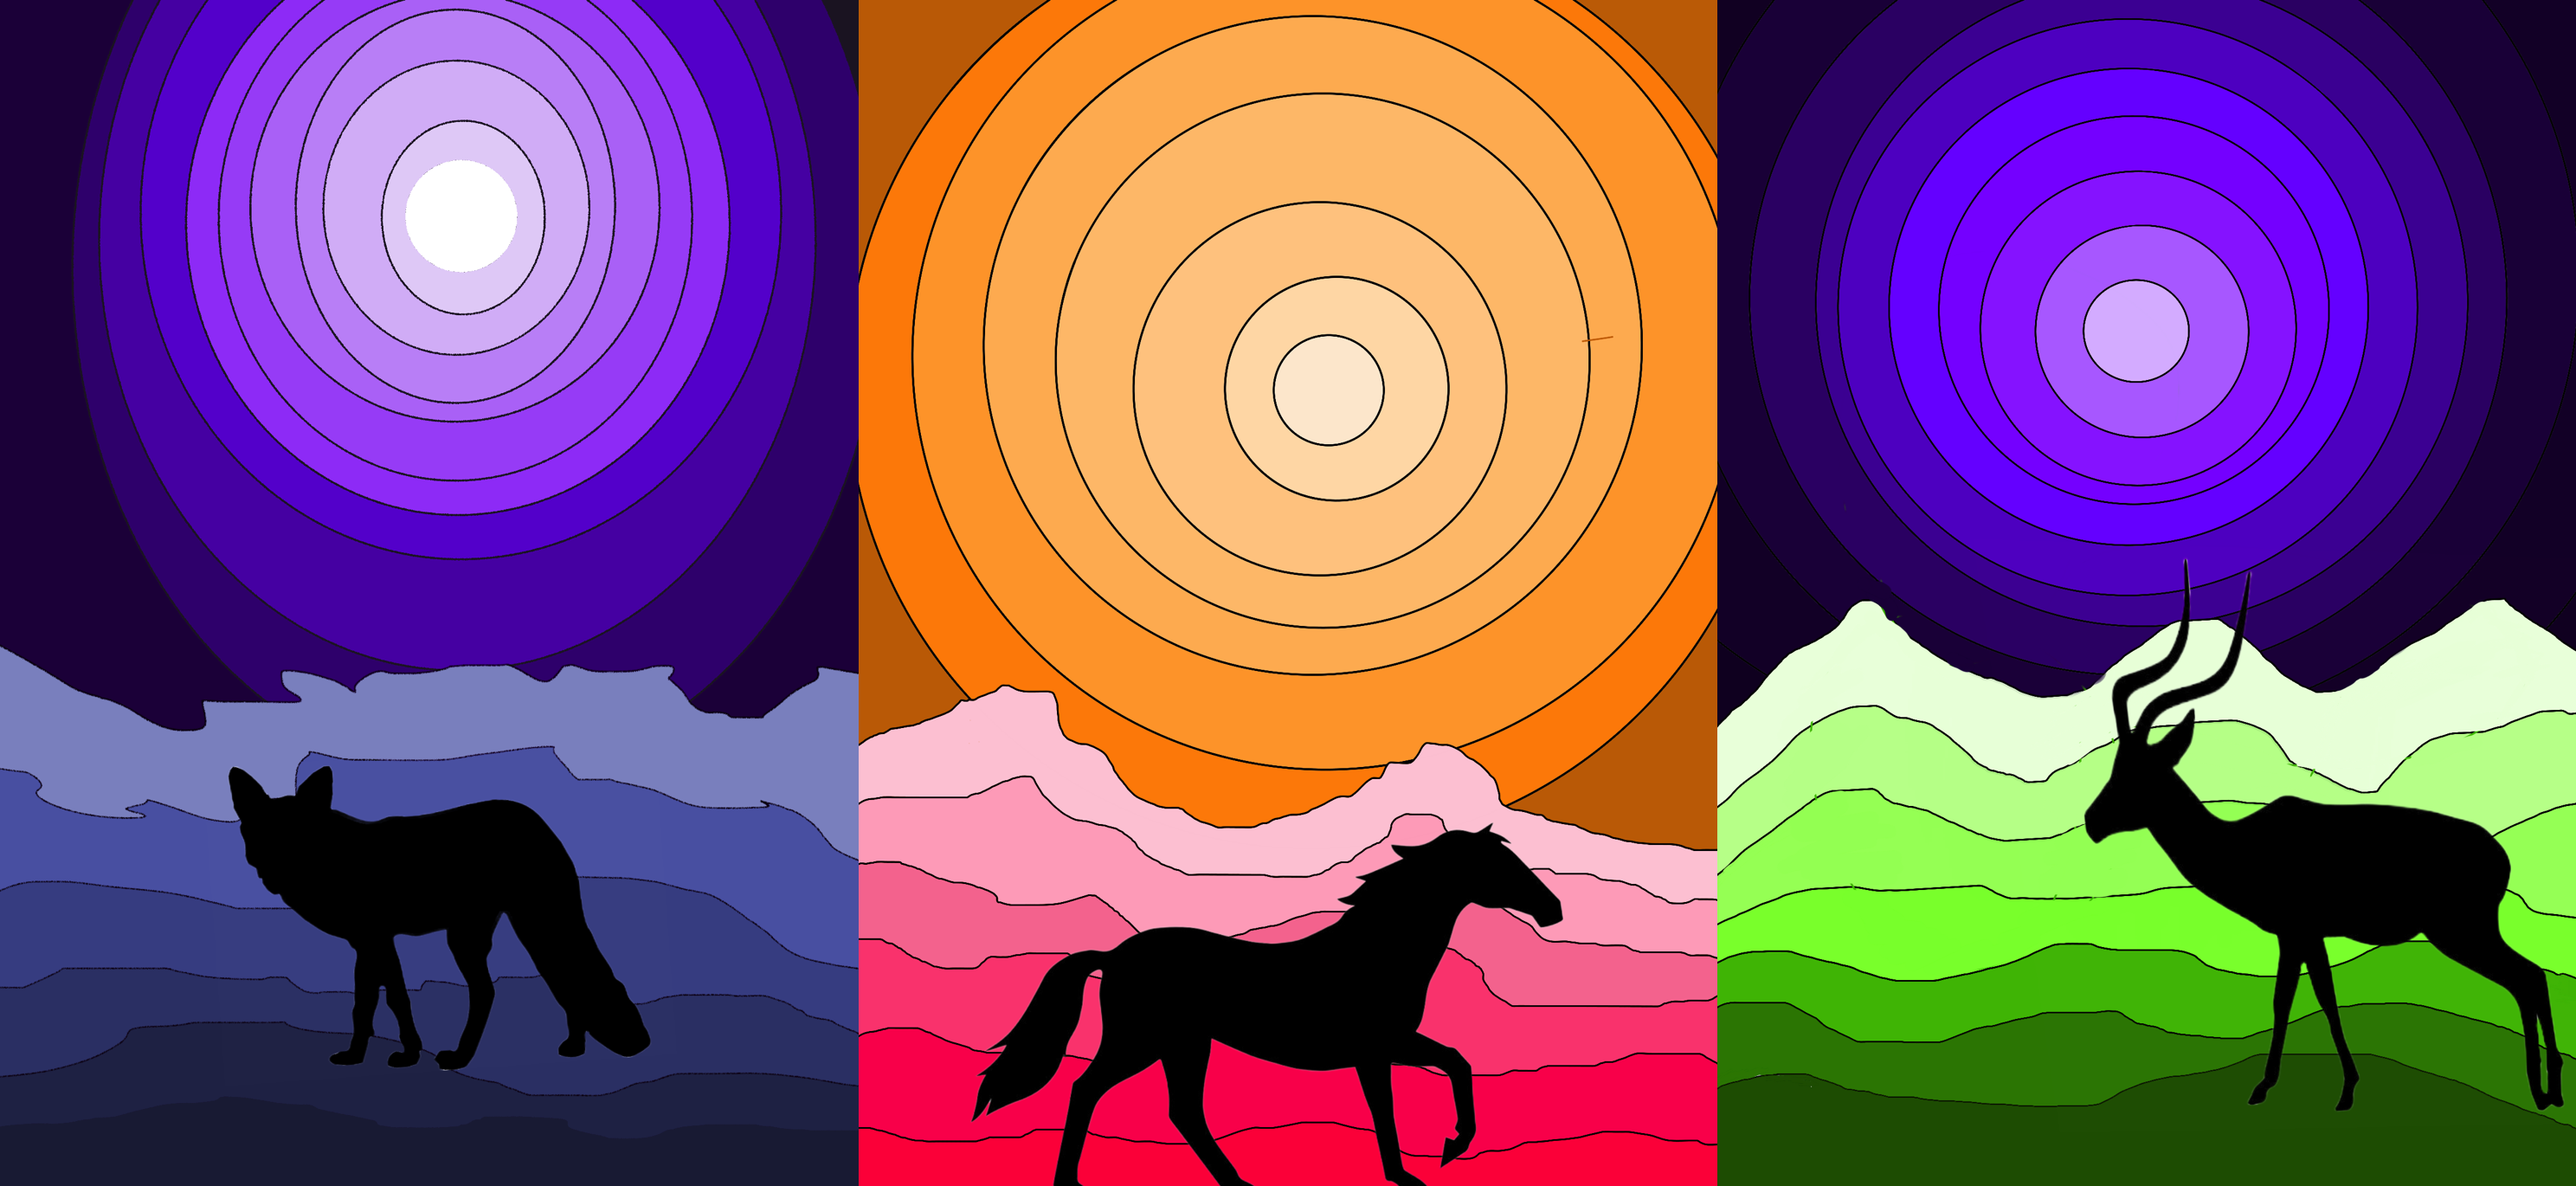
Finally, the file must be saved and shared with the drop-down menu that appears by clicking on the menu icon at the top left. Below we see our digital landscapes in value scale of colors: