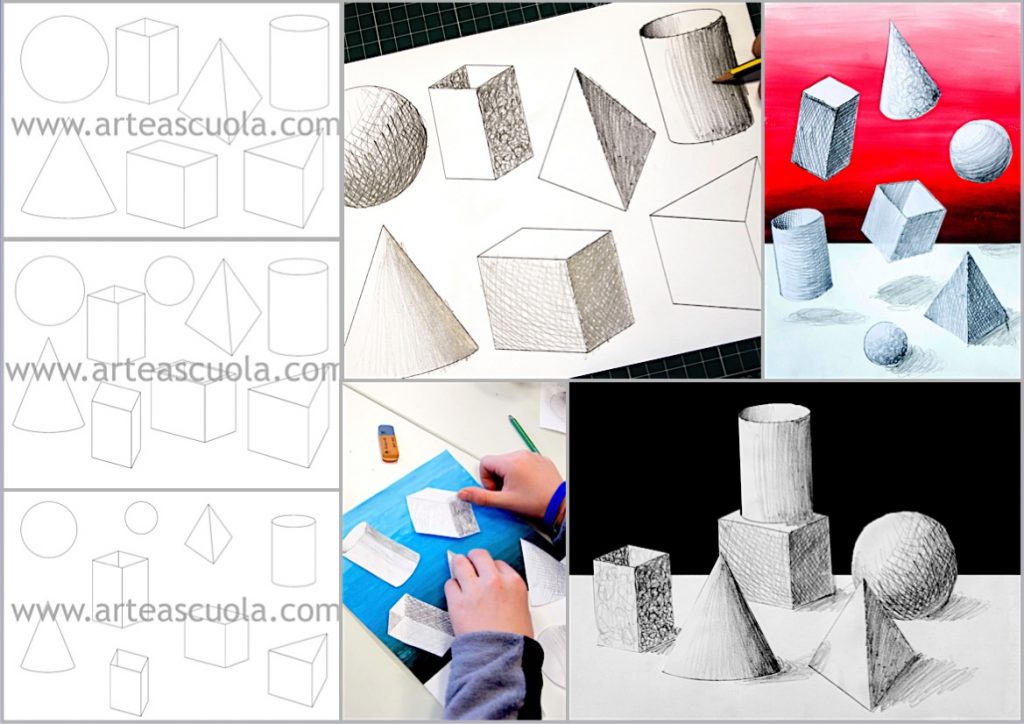
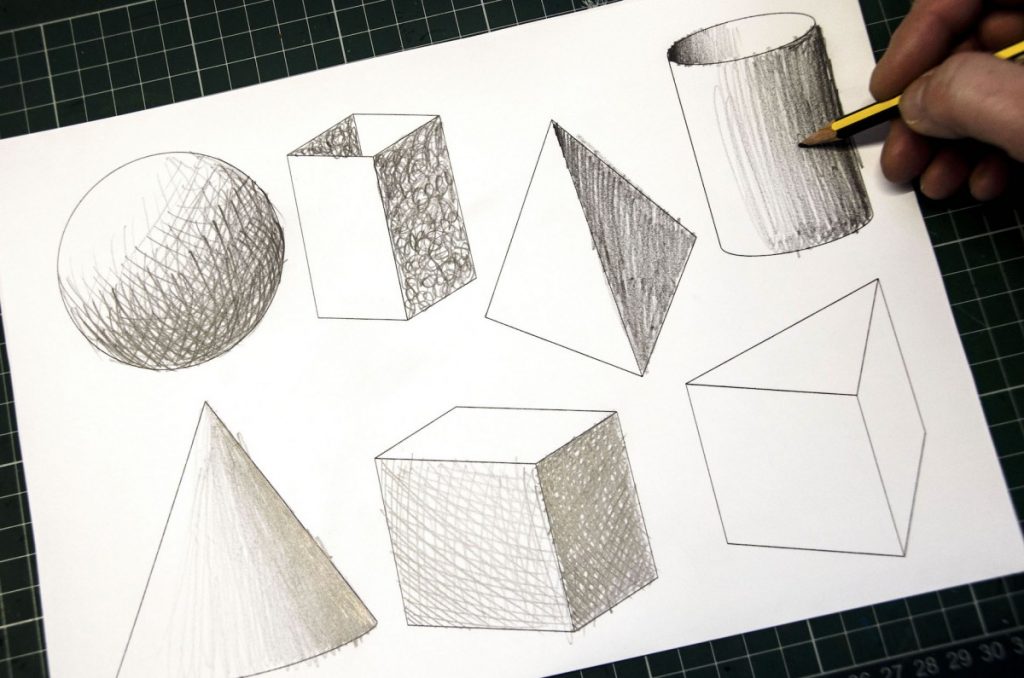
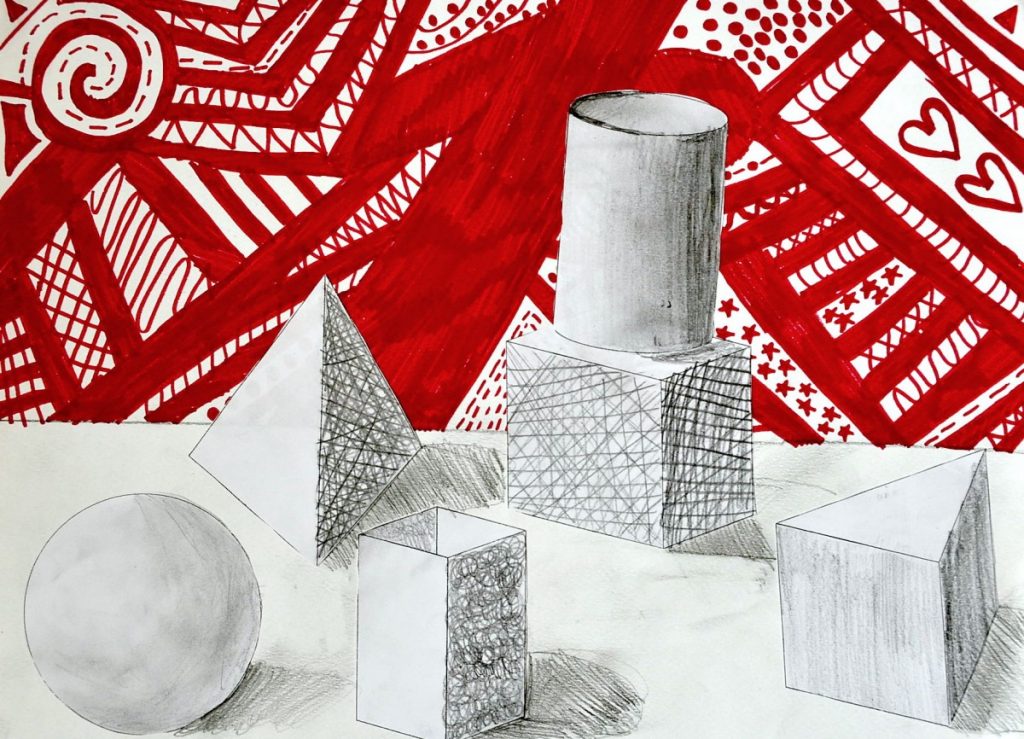
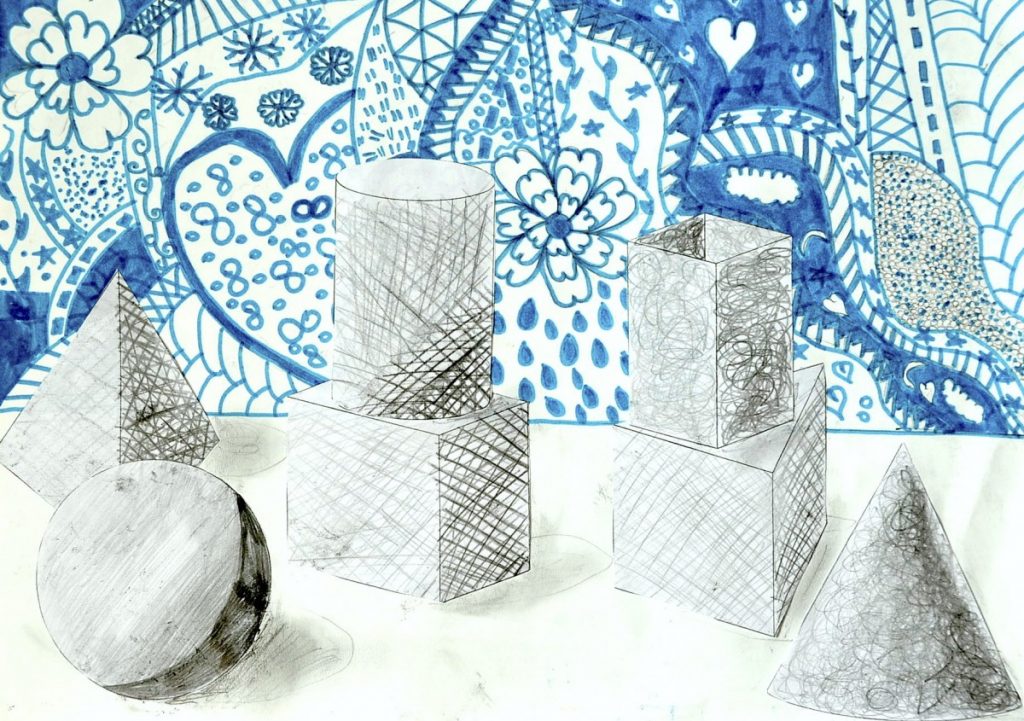
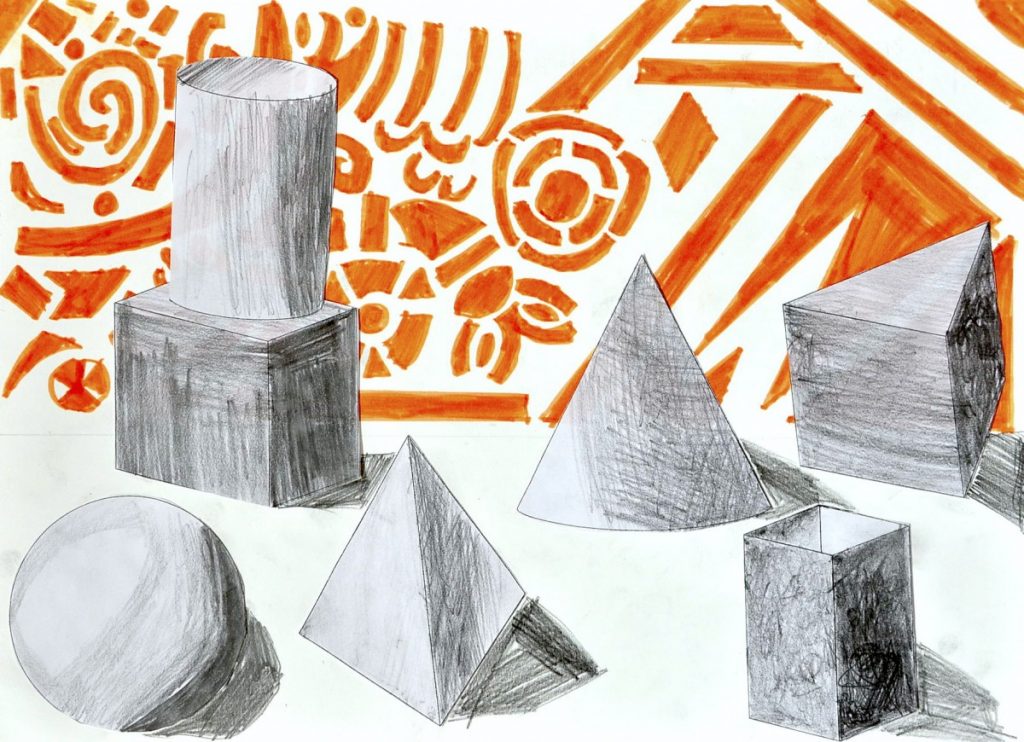
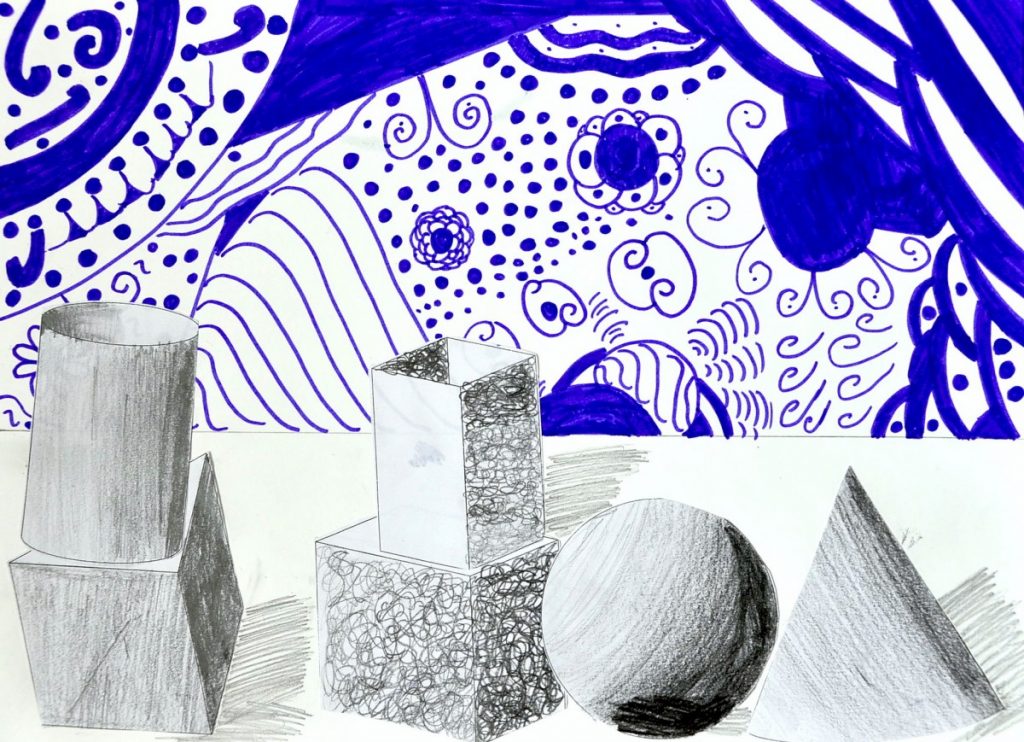
How can you shade different forms and solids with different kinds of surfaces? We observed that the strength of the shadow’s edges are determined by the object you are drawing. Something with sharp edges and flat surfaces, like a cube, will have dark, or hard, shadows at the edges. The darkness of the shadow on the faces will not change much. Something with a curved surface, like a ball, will have a softer, more gradual shadow.
To practice shading on different forms we used the worksheets you can find here below. We drew the form shadows on the worksheet, according to a unique light source using three different kinds of chiaroscuro (have a look at this previous lesson about chiaroscuro).
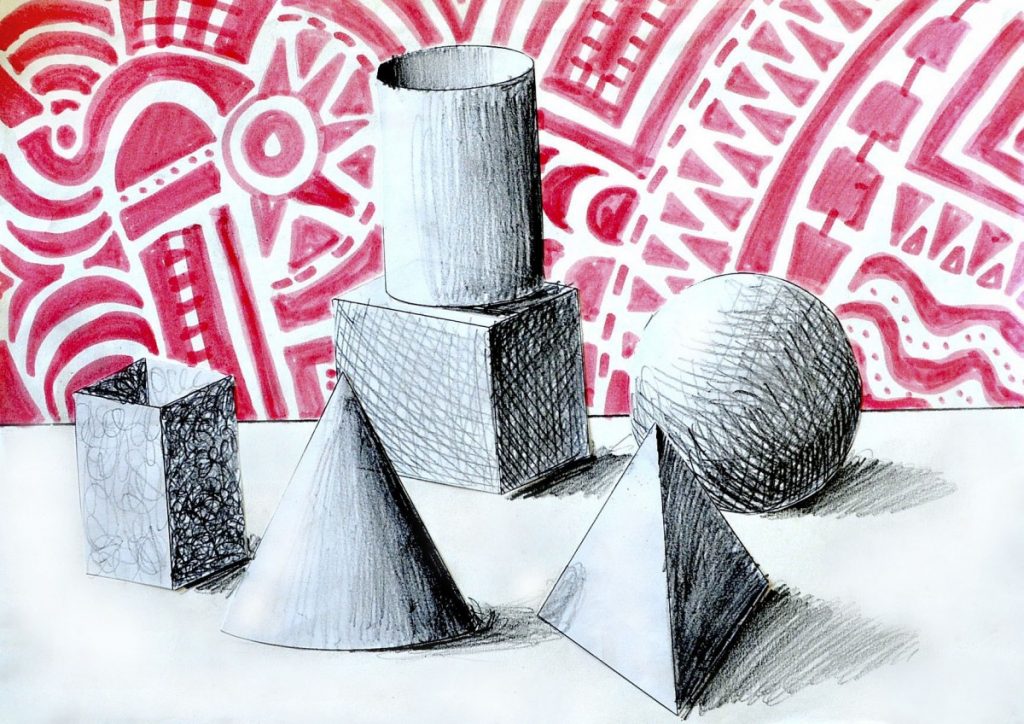
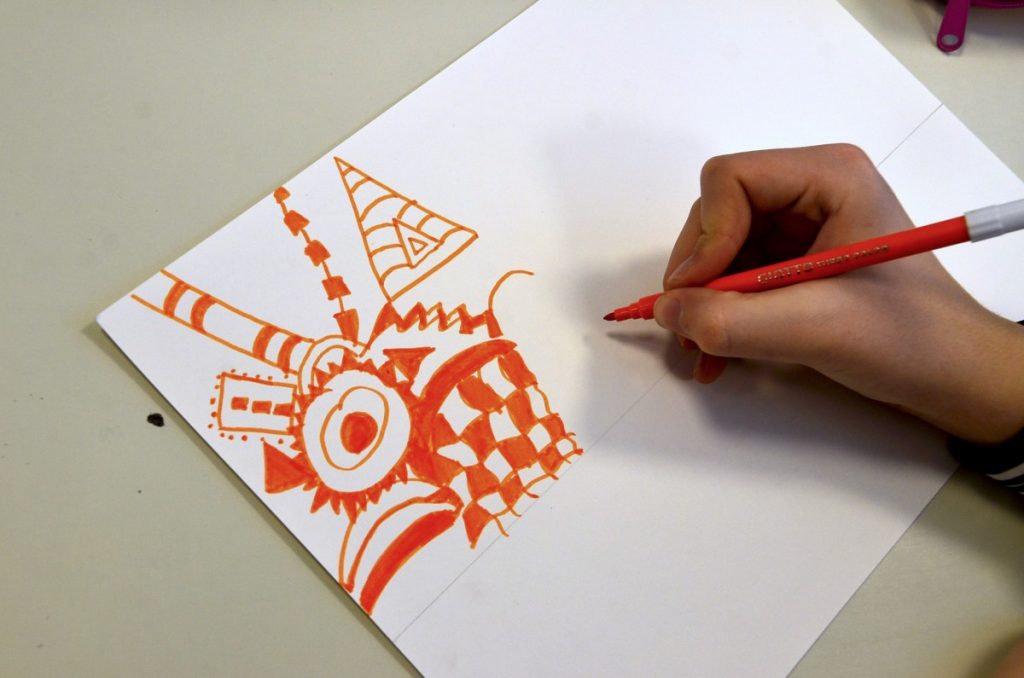
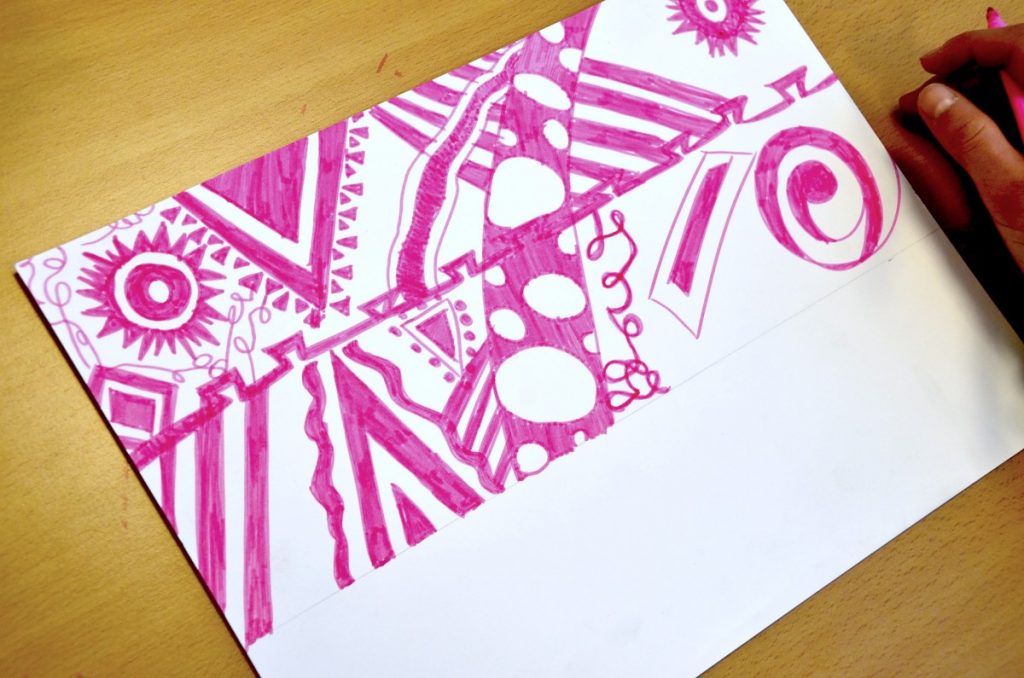
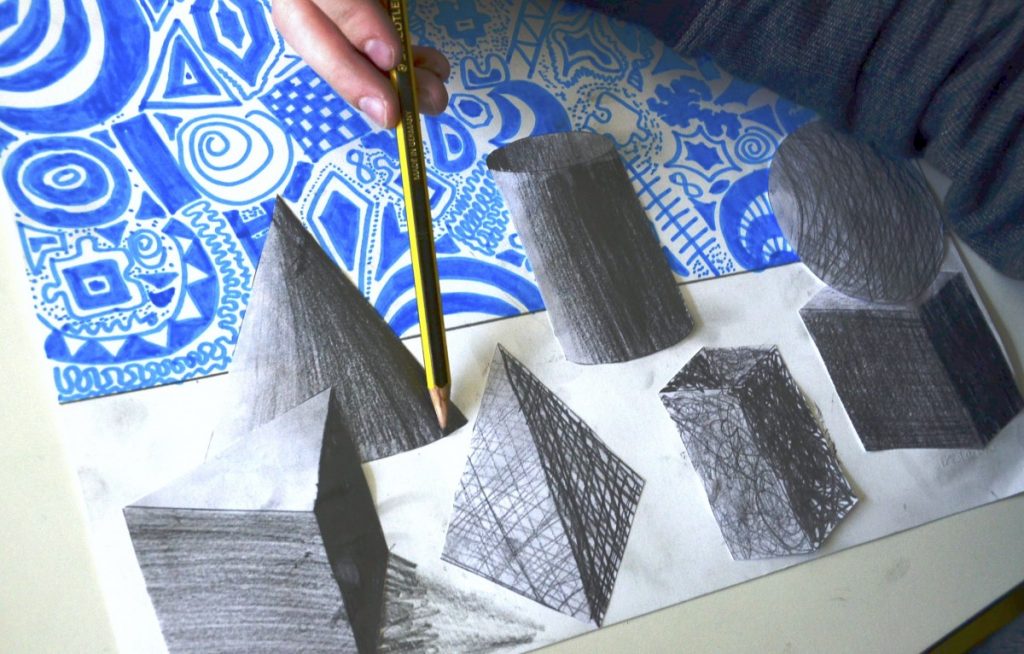
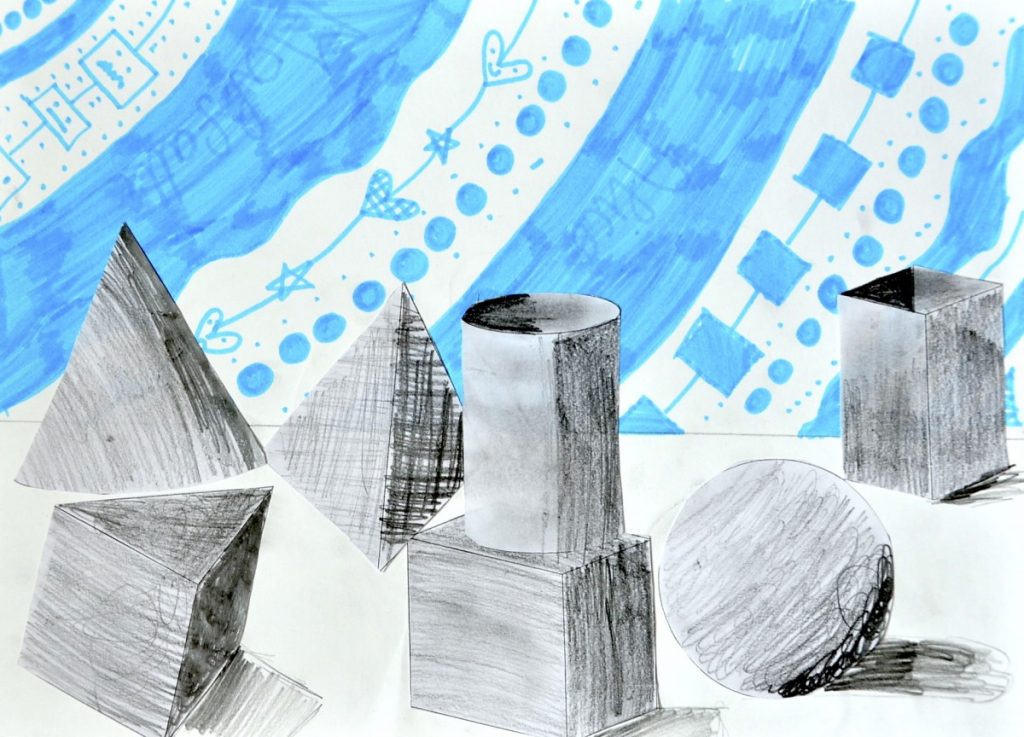
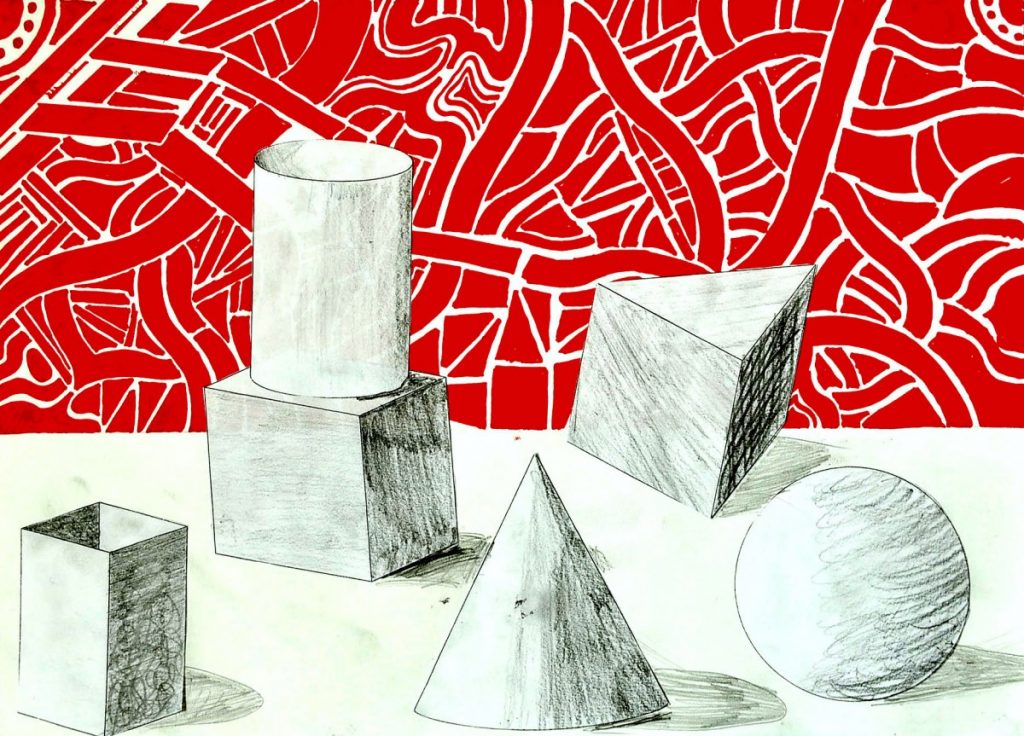
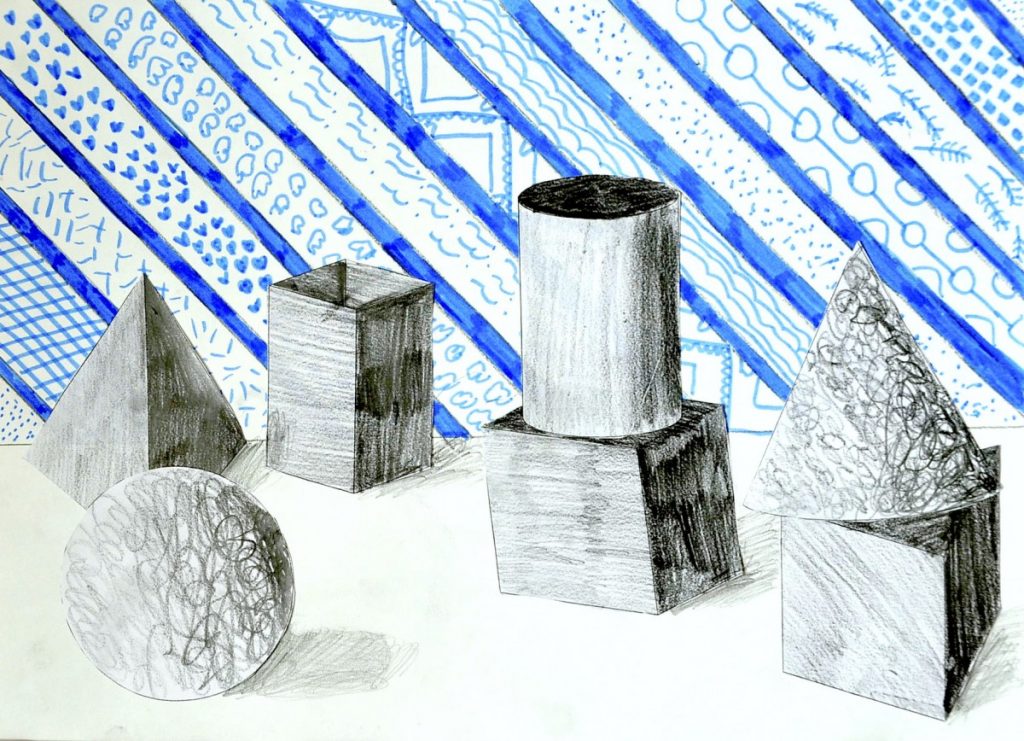
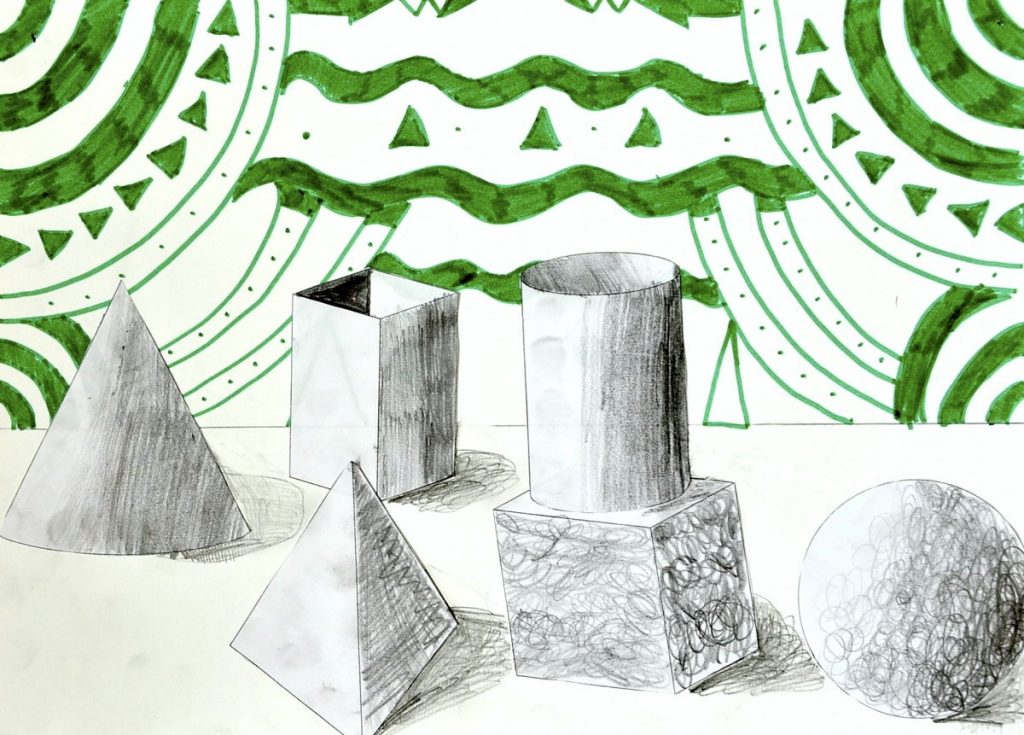
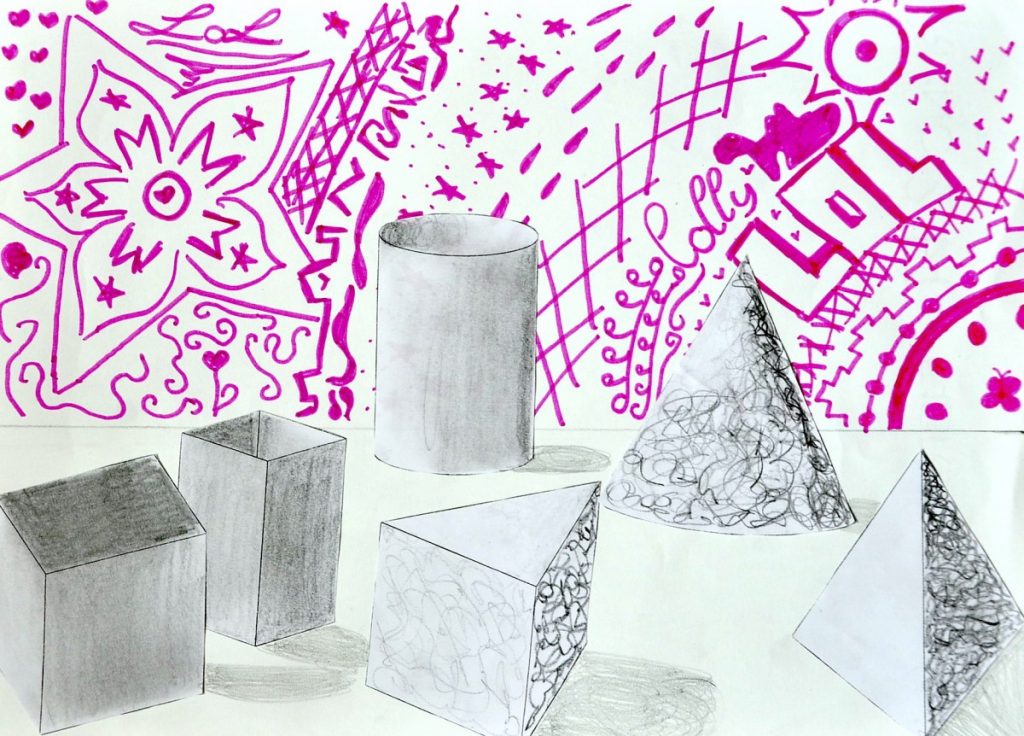
On a drawing paper (24x33cm) we draw a line at 10 cm in height that separates the foreground from the background and we color the background with free forms using a felt-tip pen.
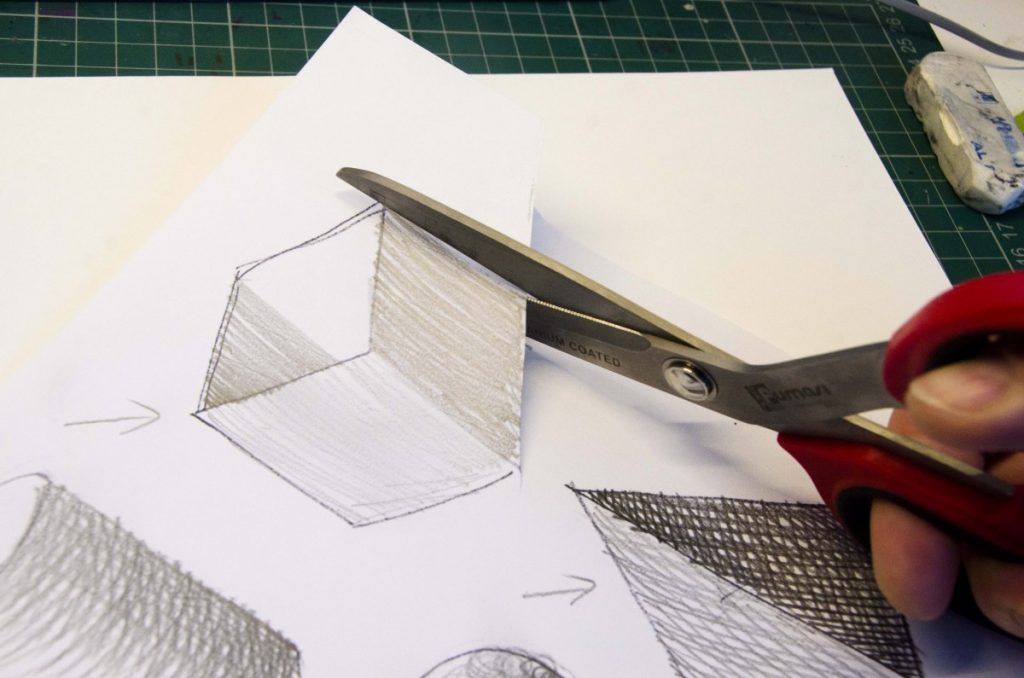
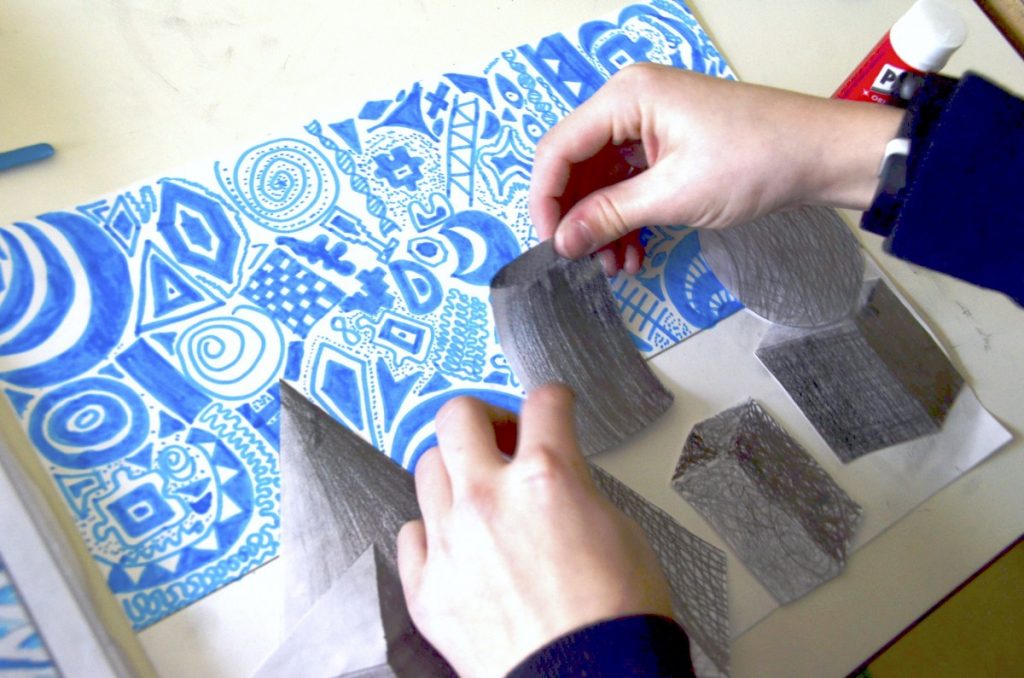
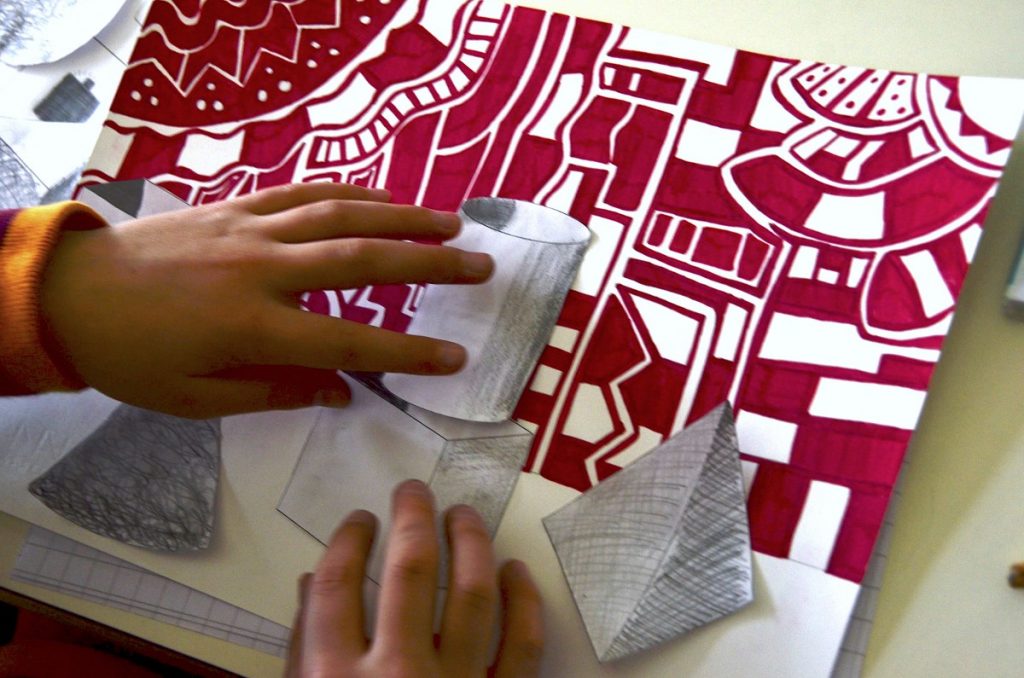
When we finished decorating the background, we glue the previously cut solids by arranging them in a manner consistent with the light source and taking care of the positions of the forms on the foreground surface (front/back – top/bottom).
To make our design more realistic, we added the cast shadow on the support surface in the foreground, drawing it with a pencil on the same side of the form shadow.
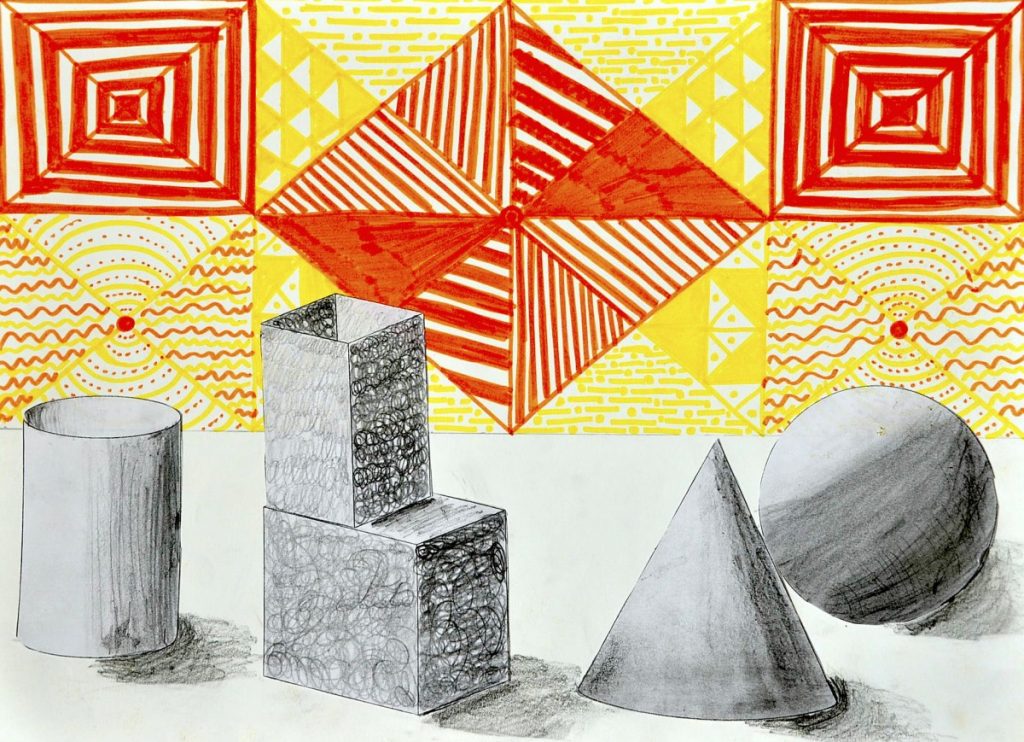
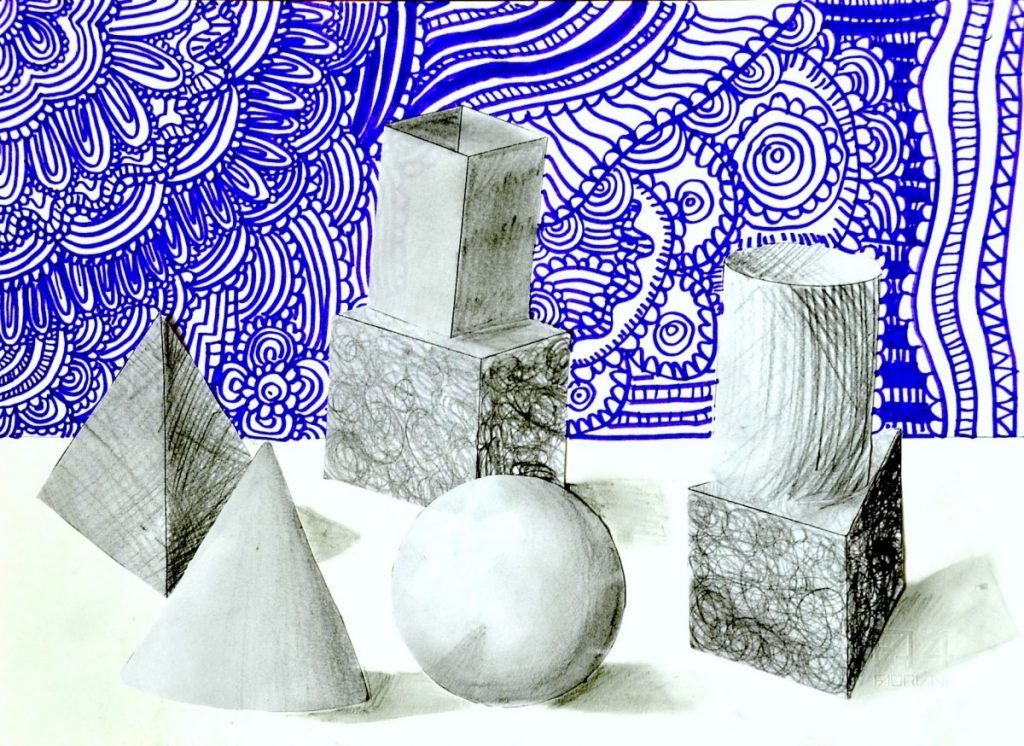
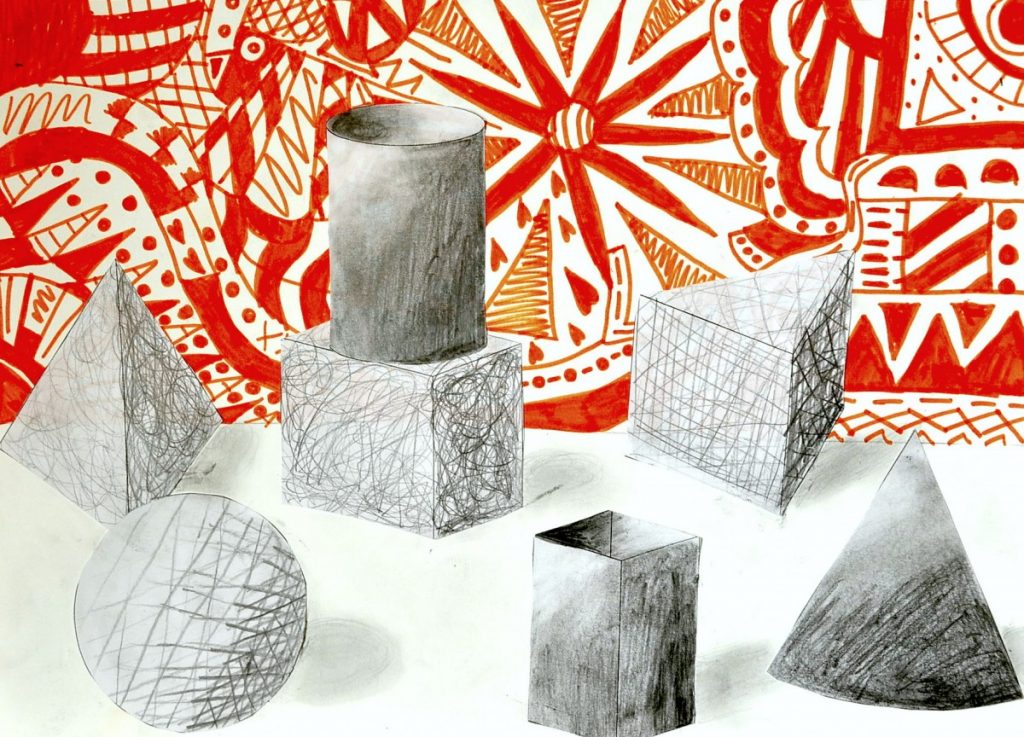
Each drawing will have a different composition of solids, depending on the assembly we have chosen. The lively background enhances the chiaroscuro of the black and white shapes.


THIS IS BEYOND DELIGHTFUL! How do you teach the students how to draw the background free forms? I am having trouble trying to figure out how to break that part of the assignment down.
Hi Rachel, I just show them some examples and gave them some suggestions: draw different shapes, fill the whole background, be careful to alternate empty space with full space (draw shapes, not just lines)