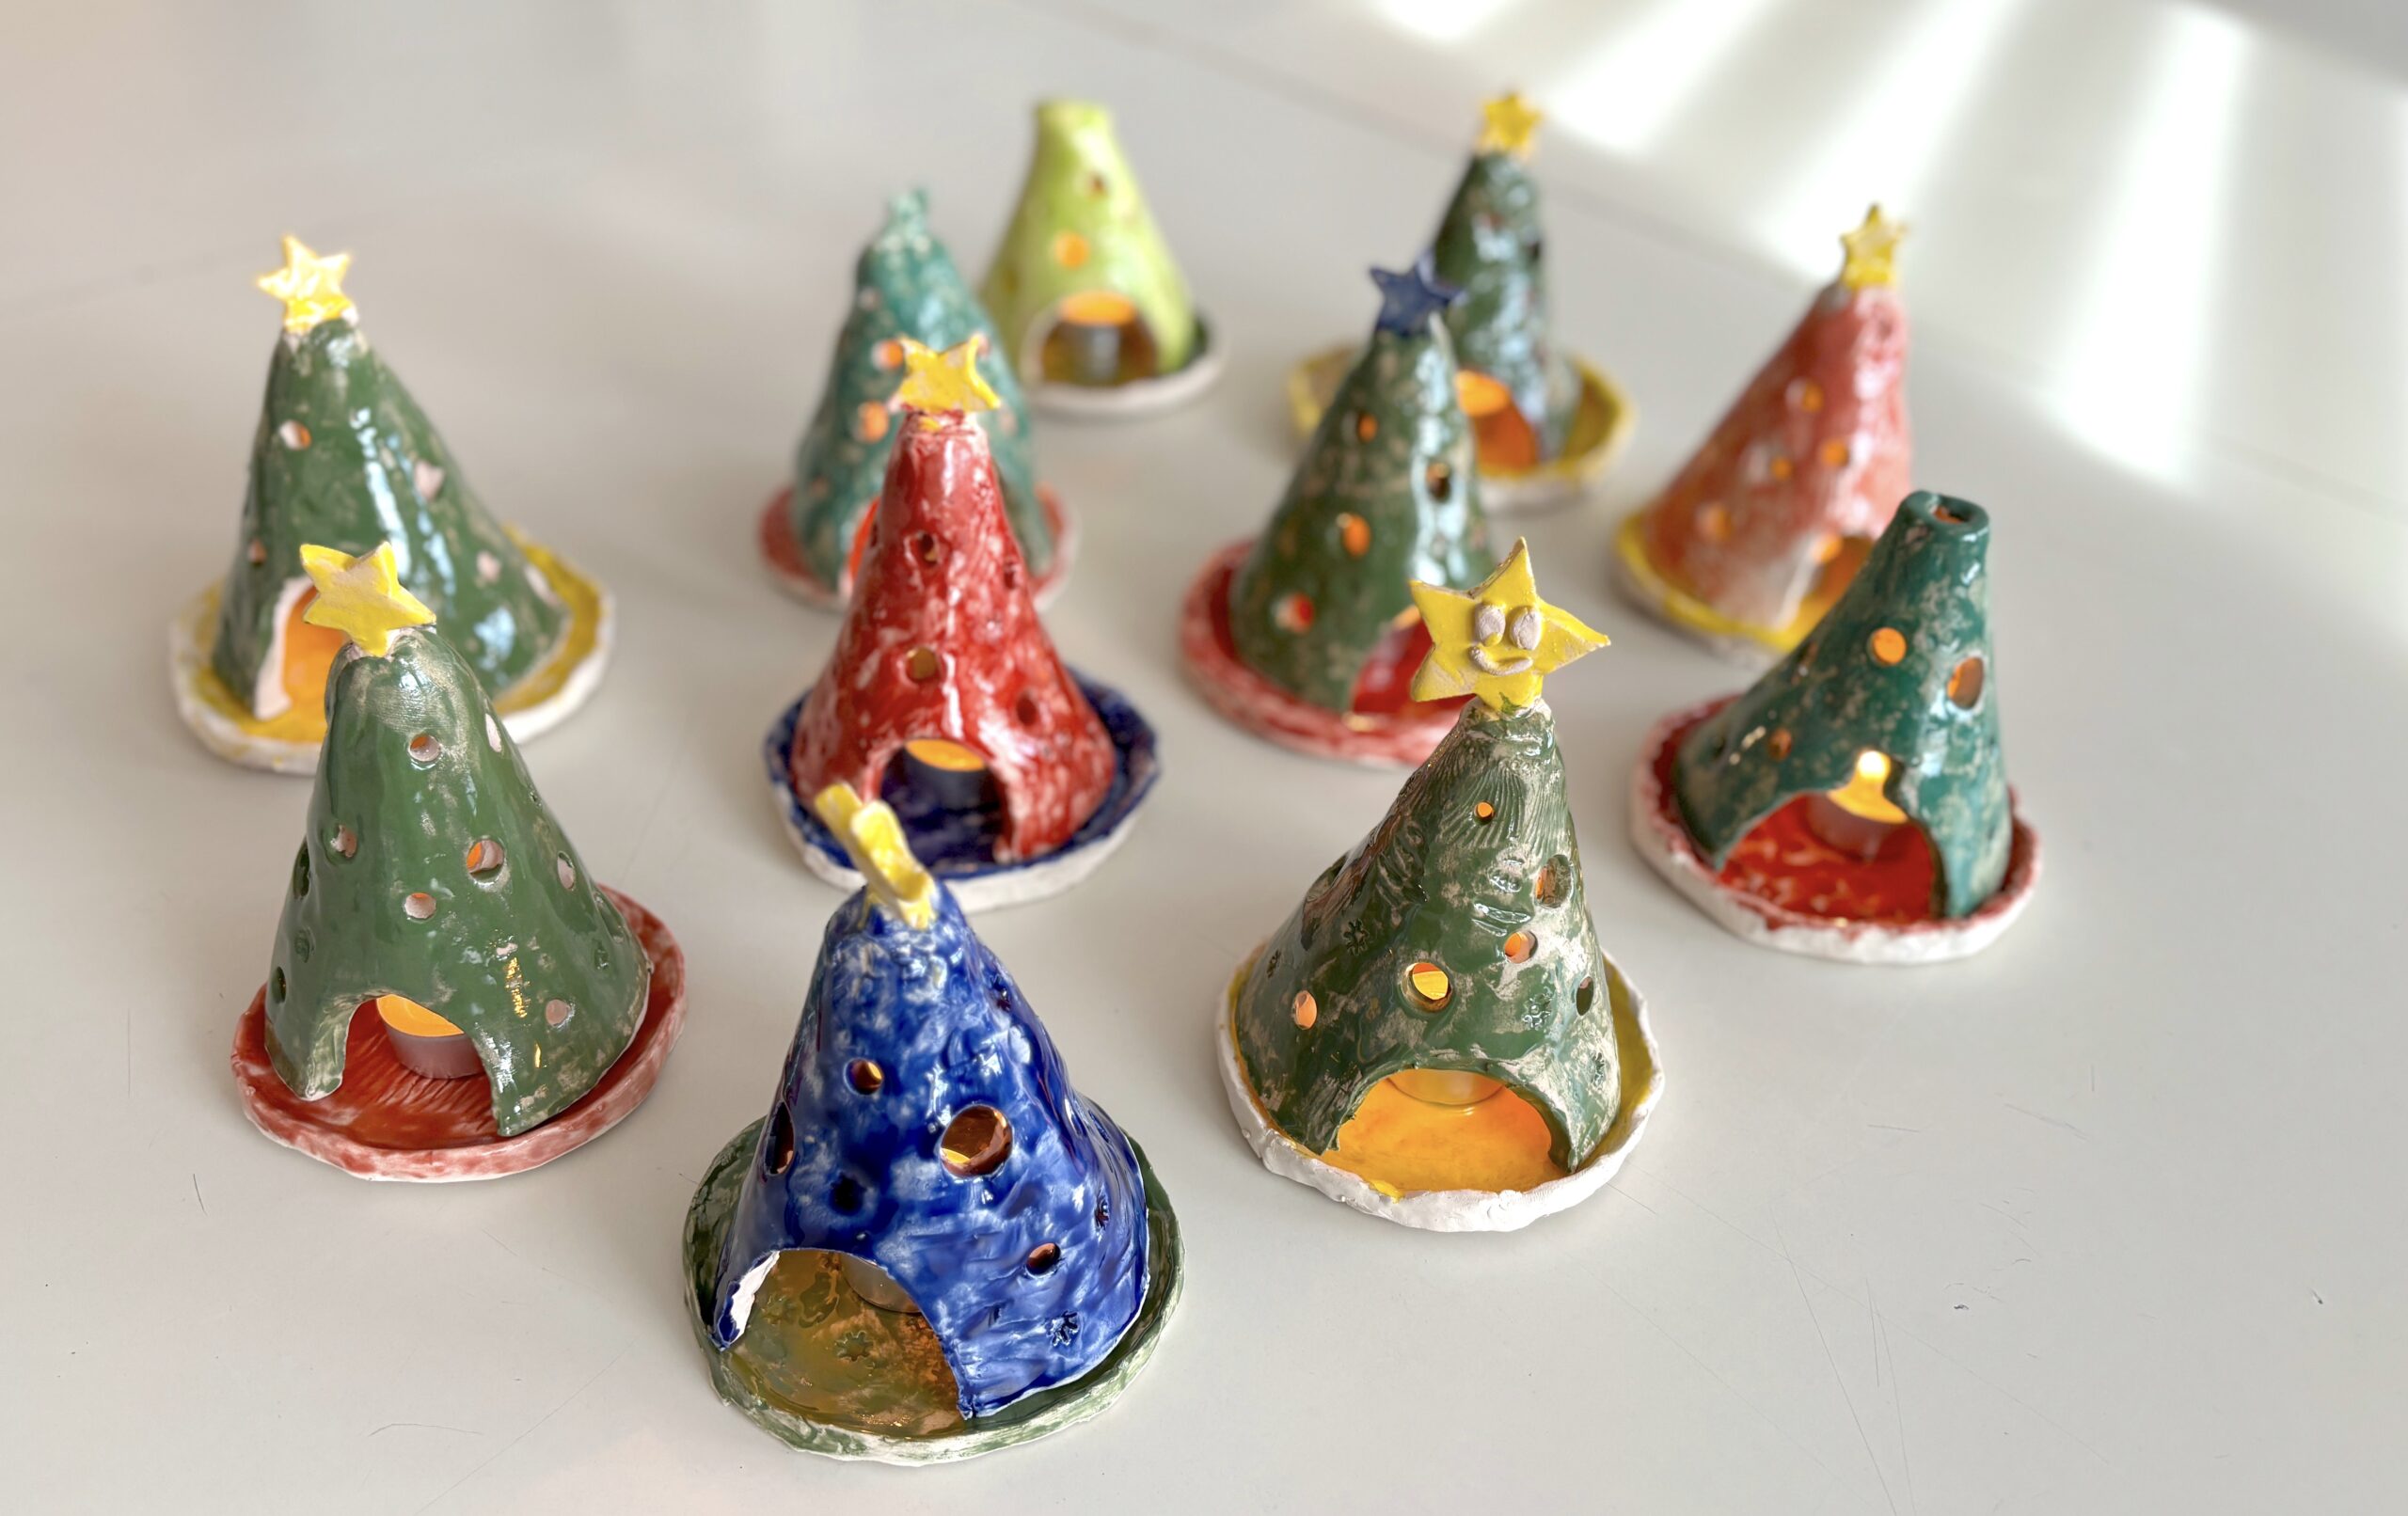
For the sixth grade students ceramics workshop we created Christmas candle-holder trees, using the slab technique and colored with enamel.
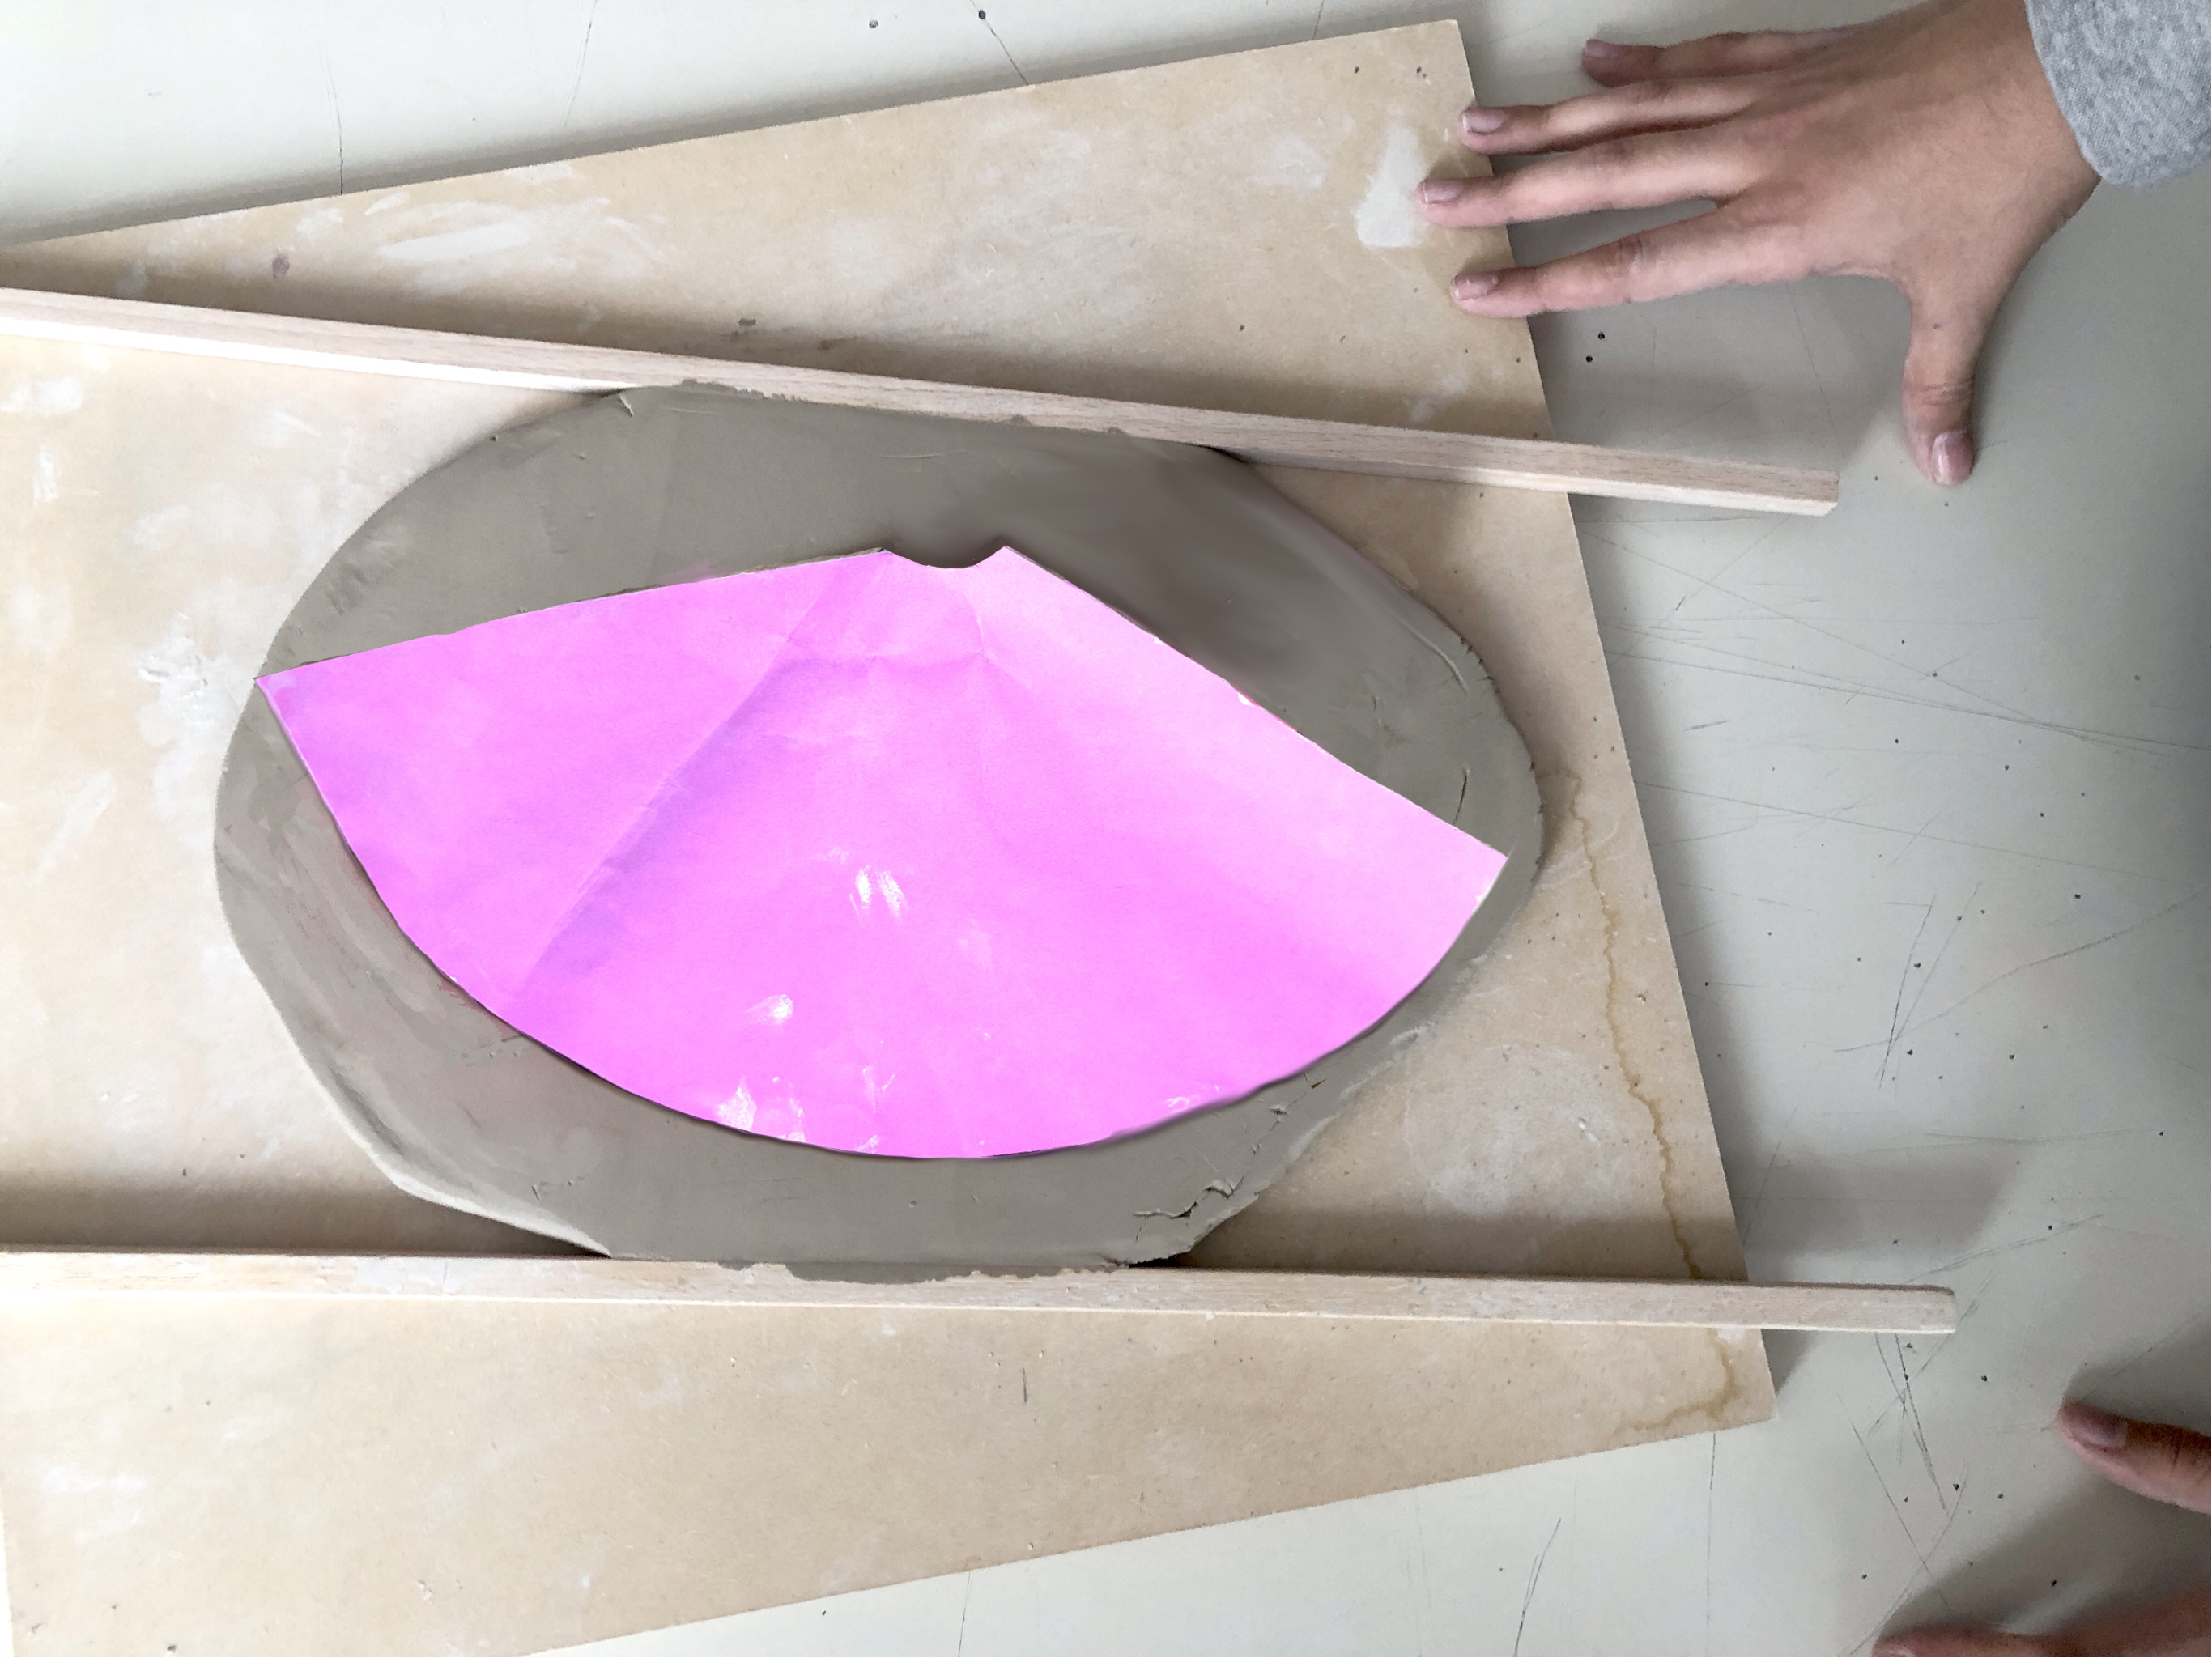
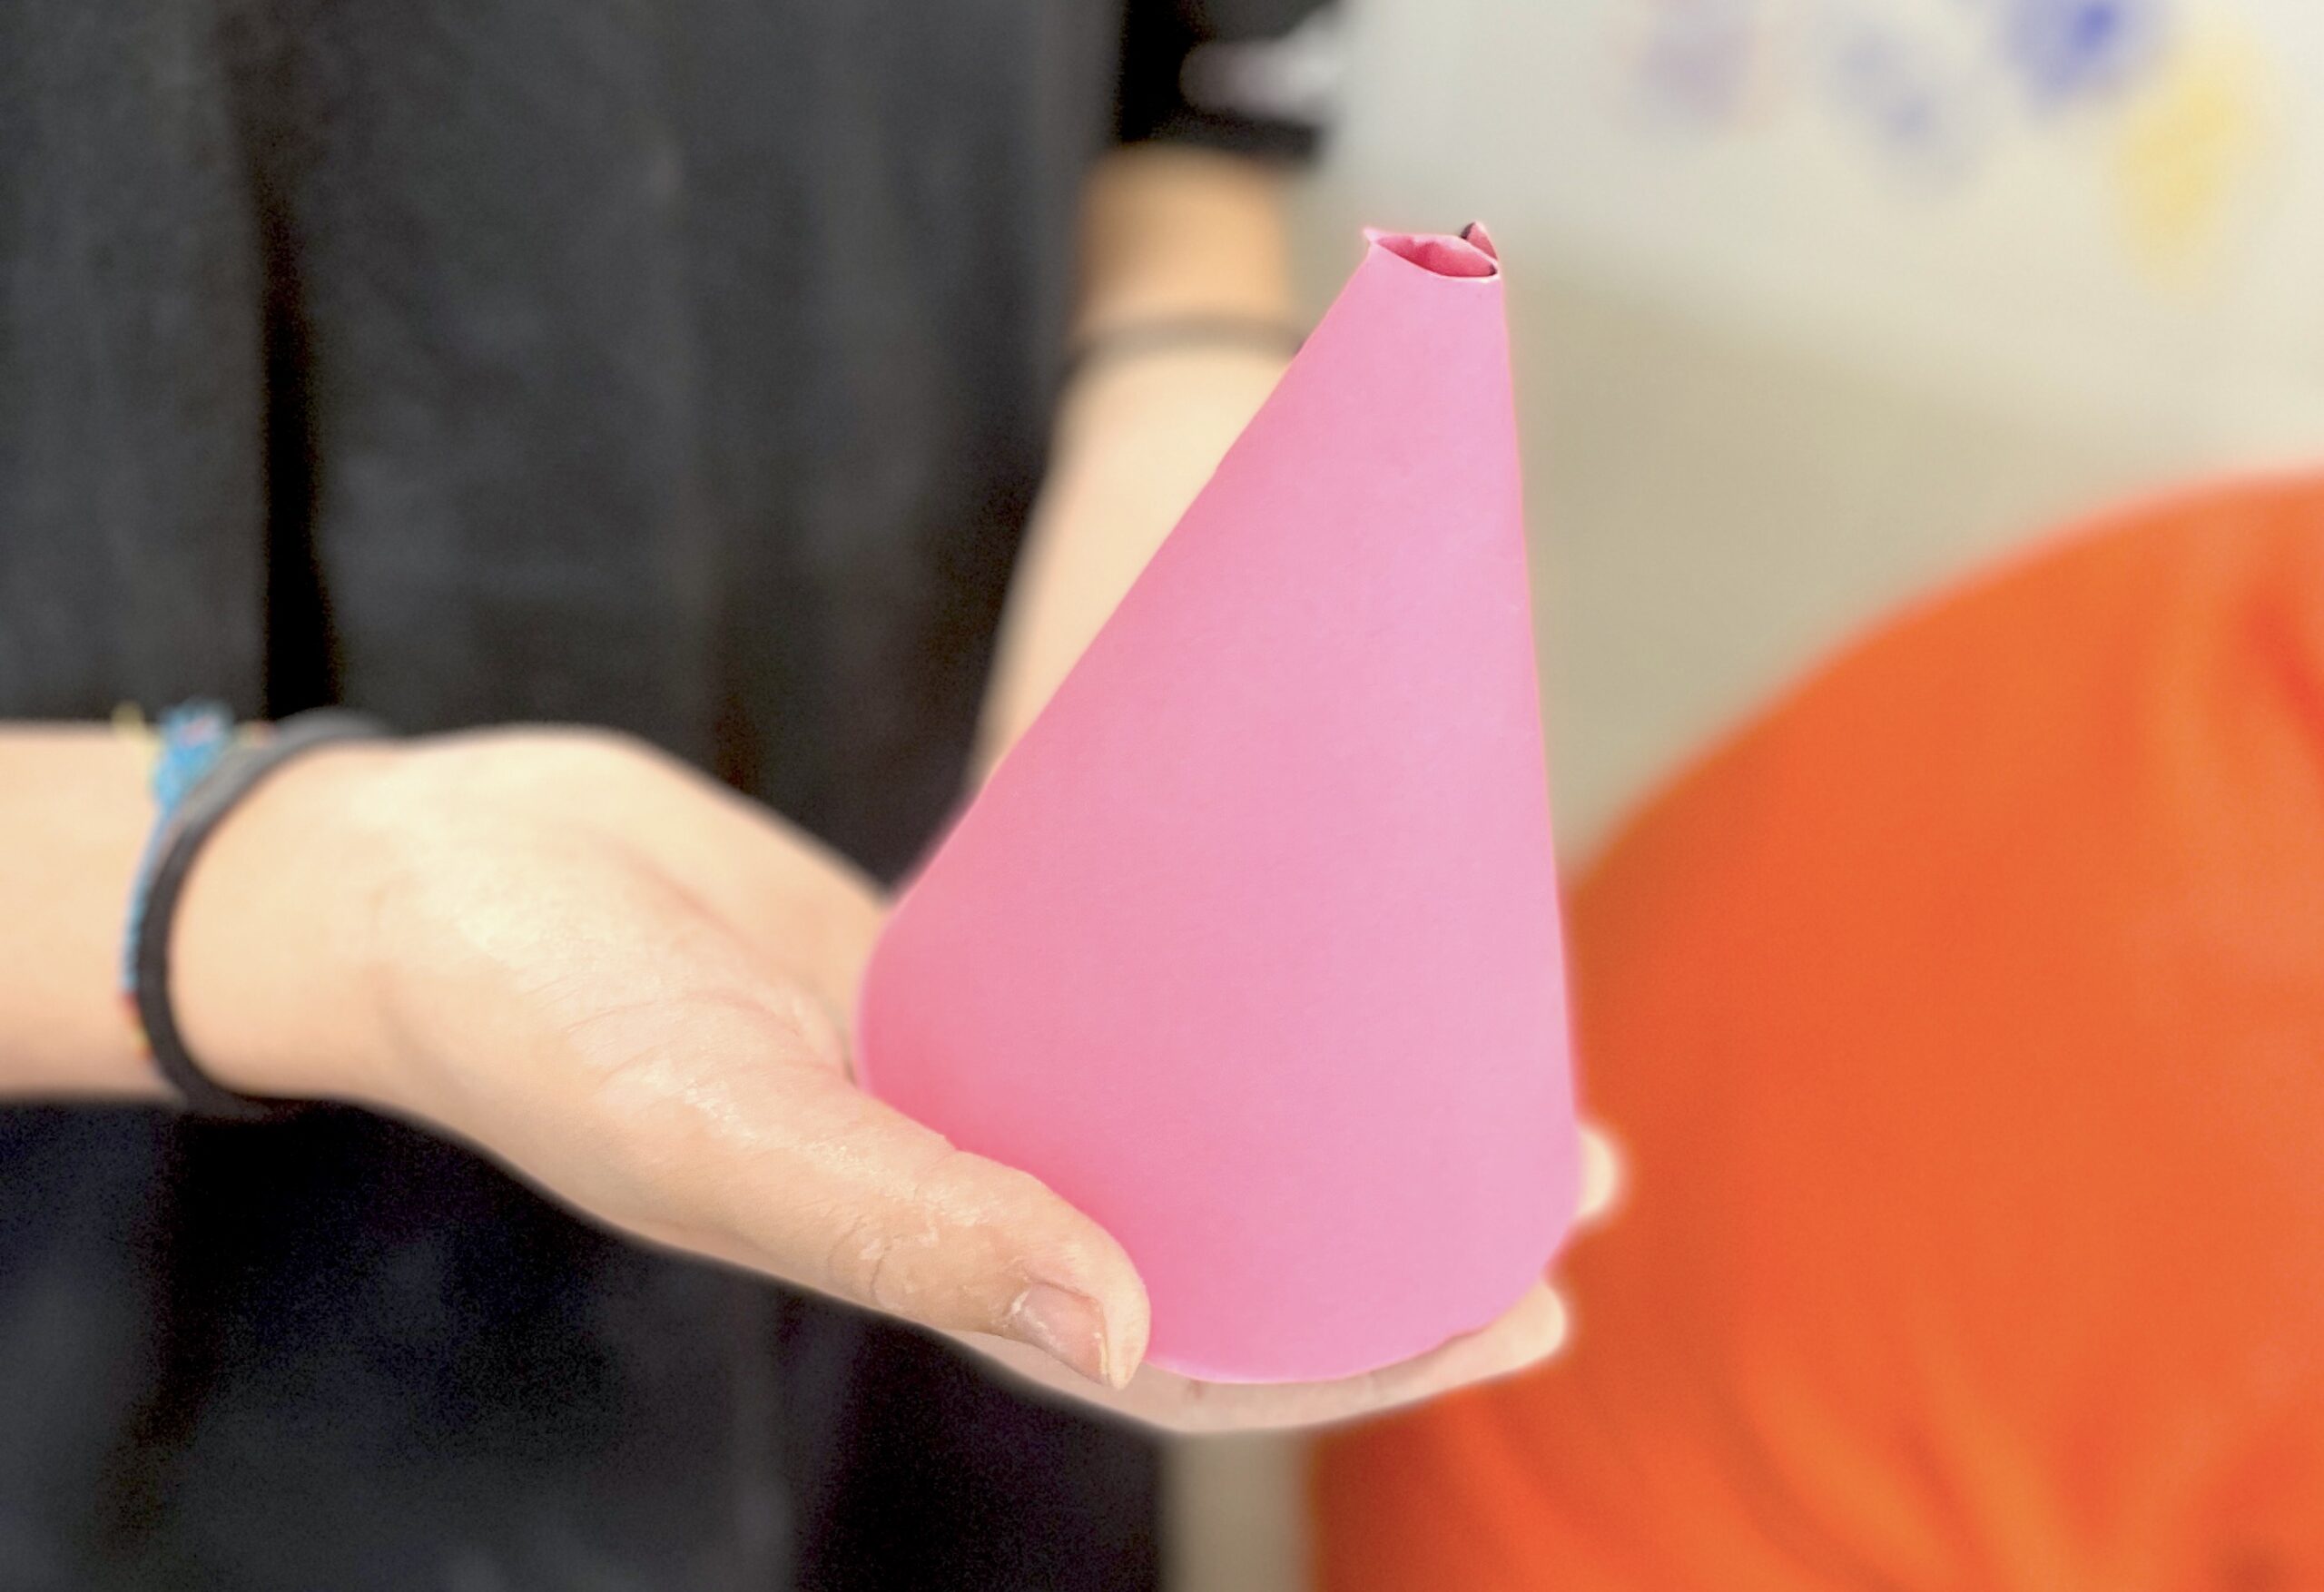
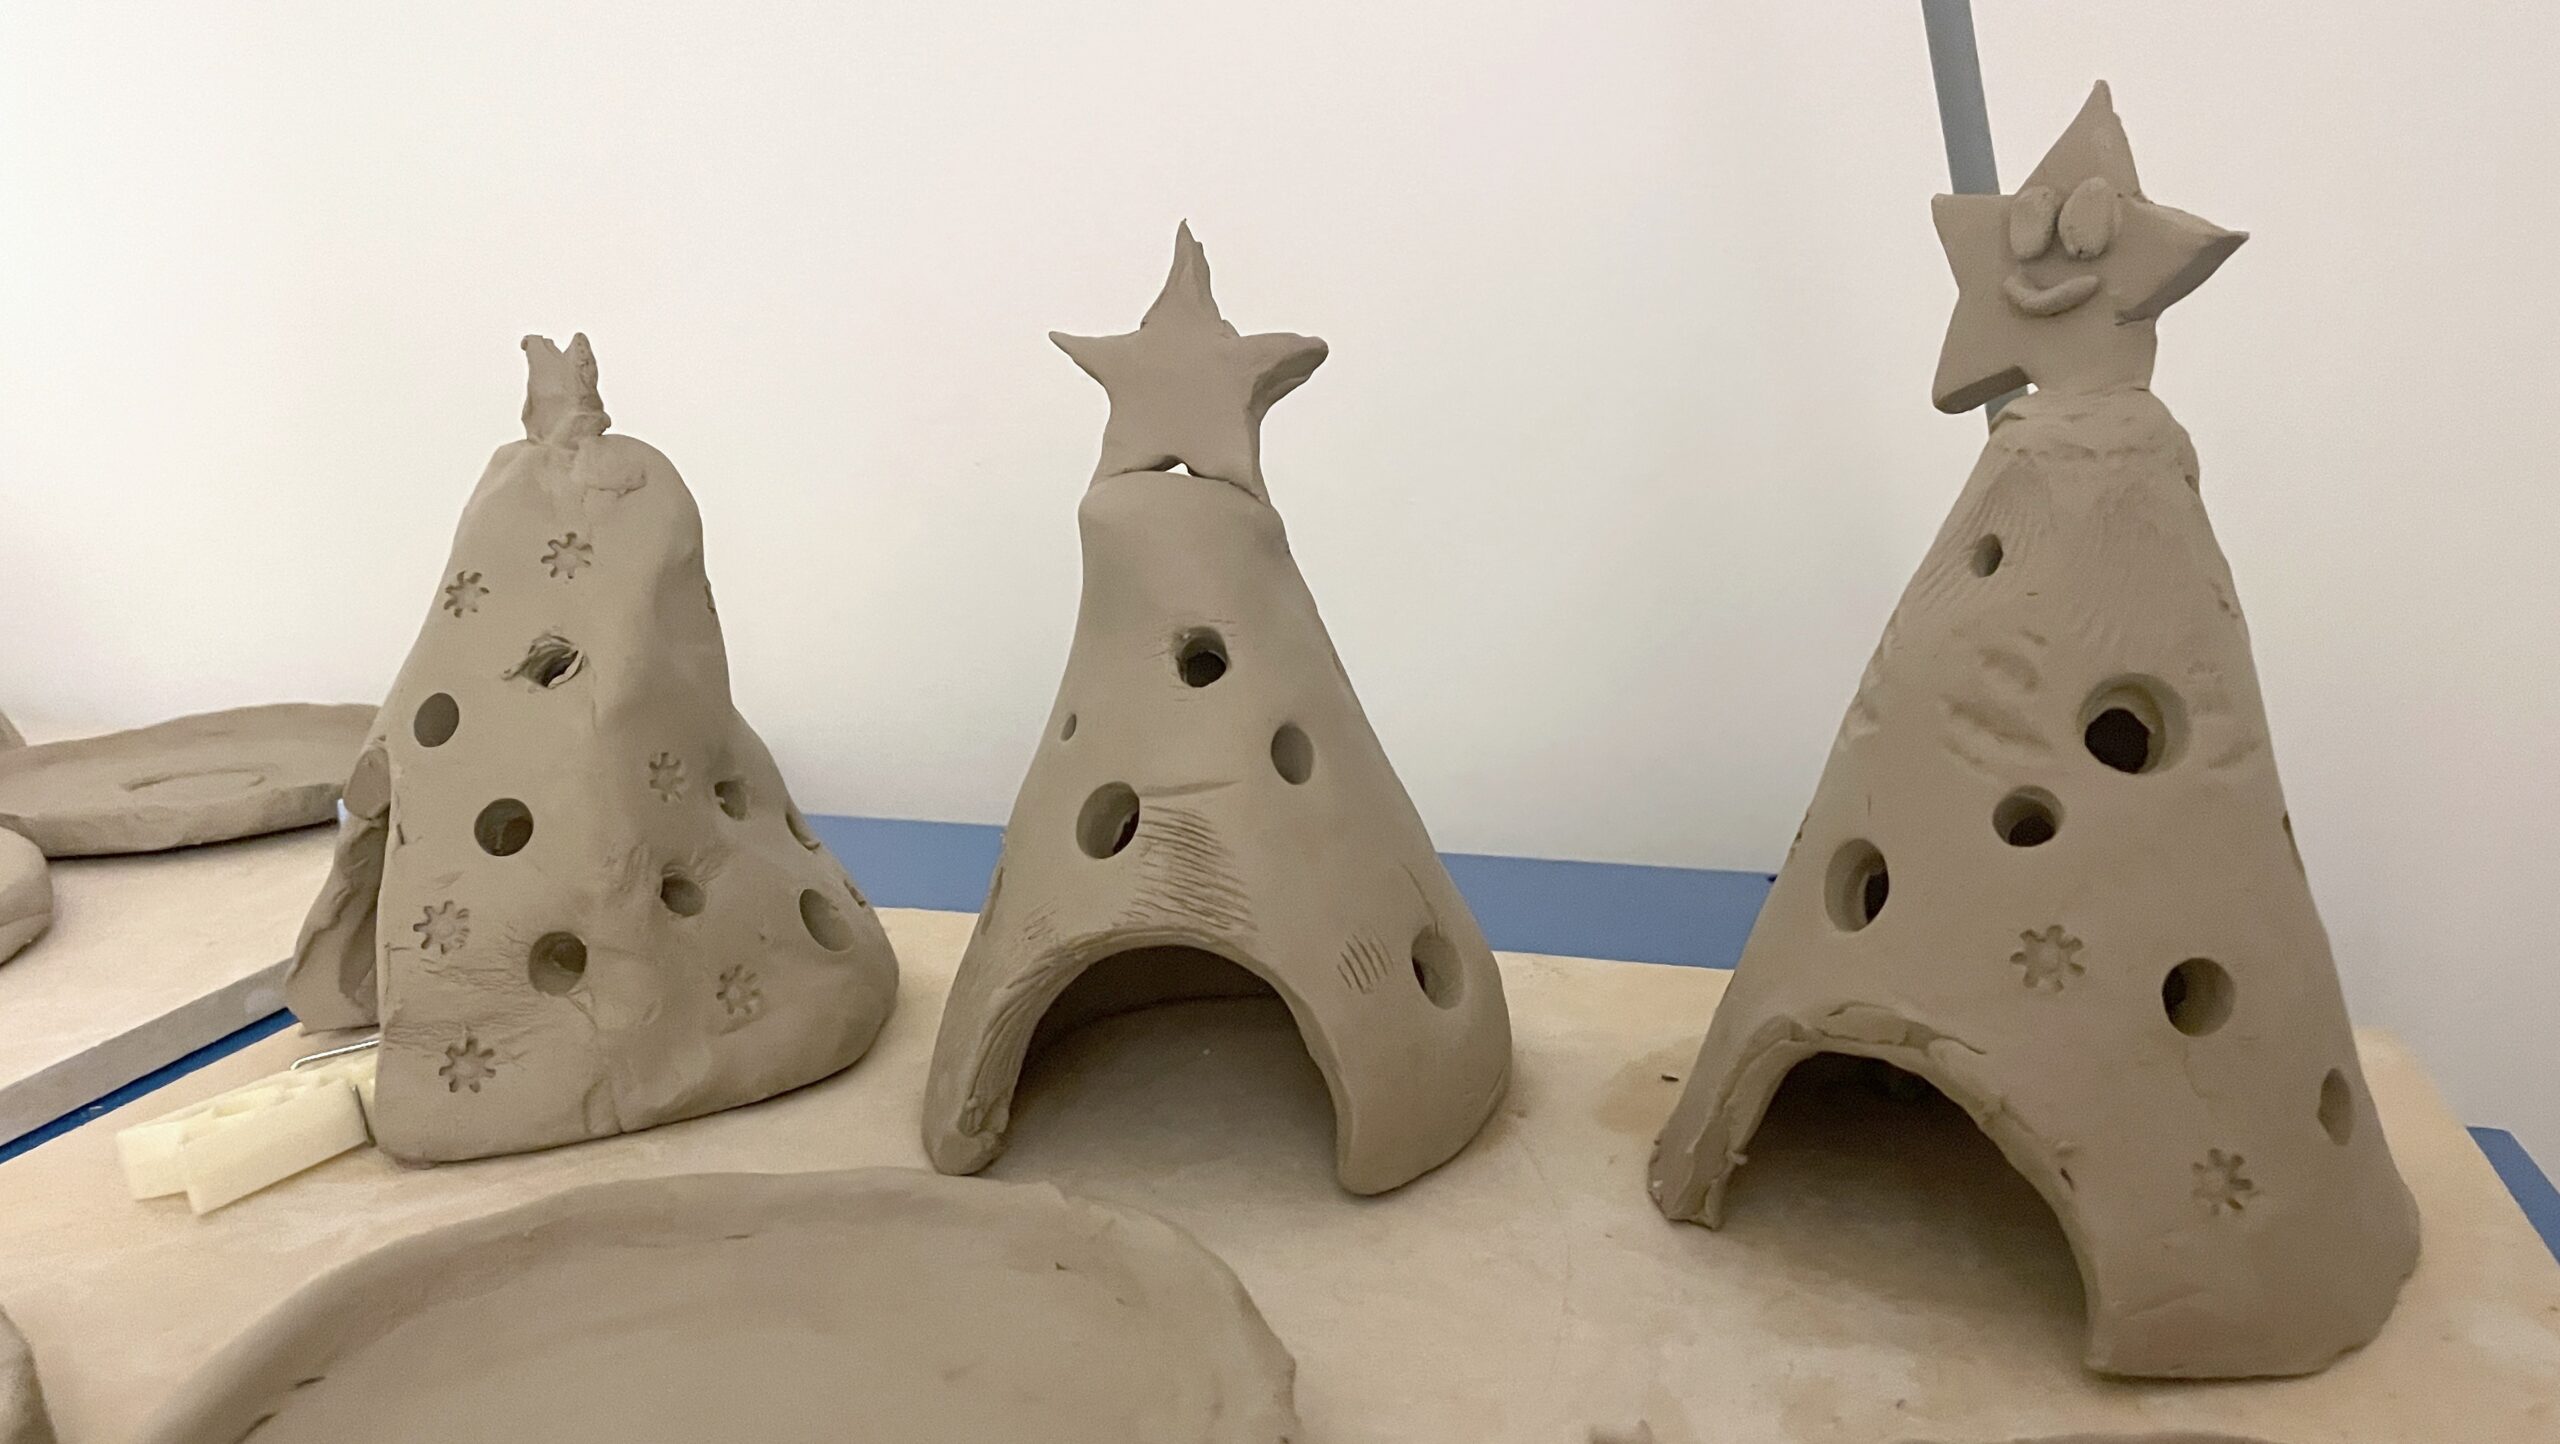
To create the main elements (cone and saucer) we used templates that you can purchase below. The tree is made of a perforated cone decorated with a star at the top, and a saucer underneath, on which to place the candle.
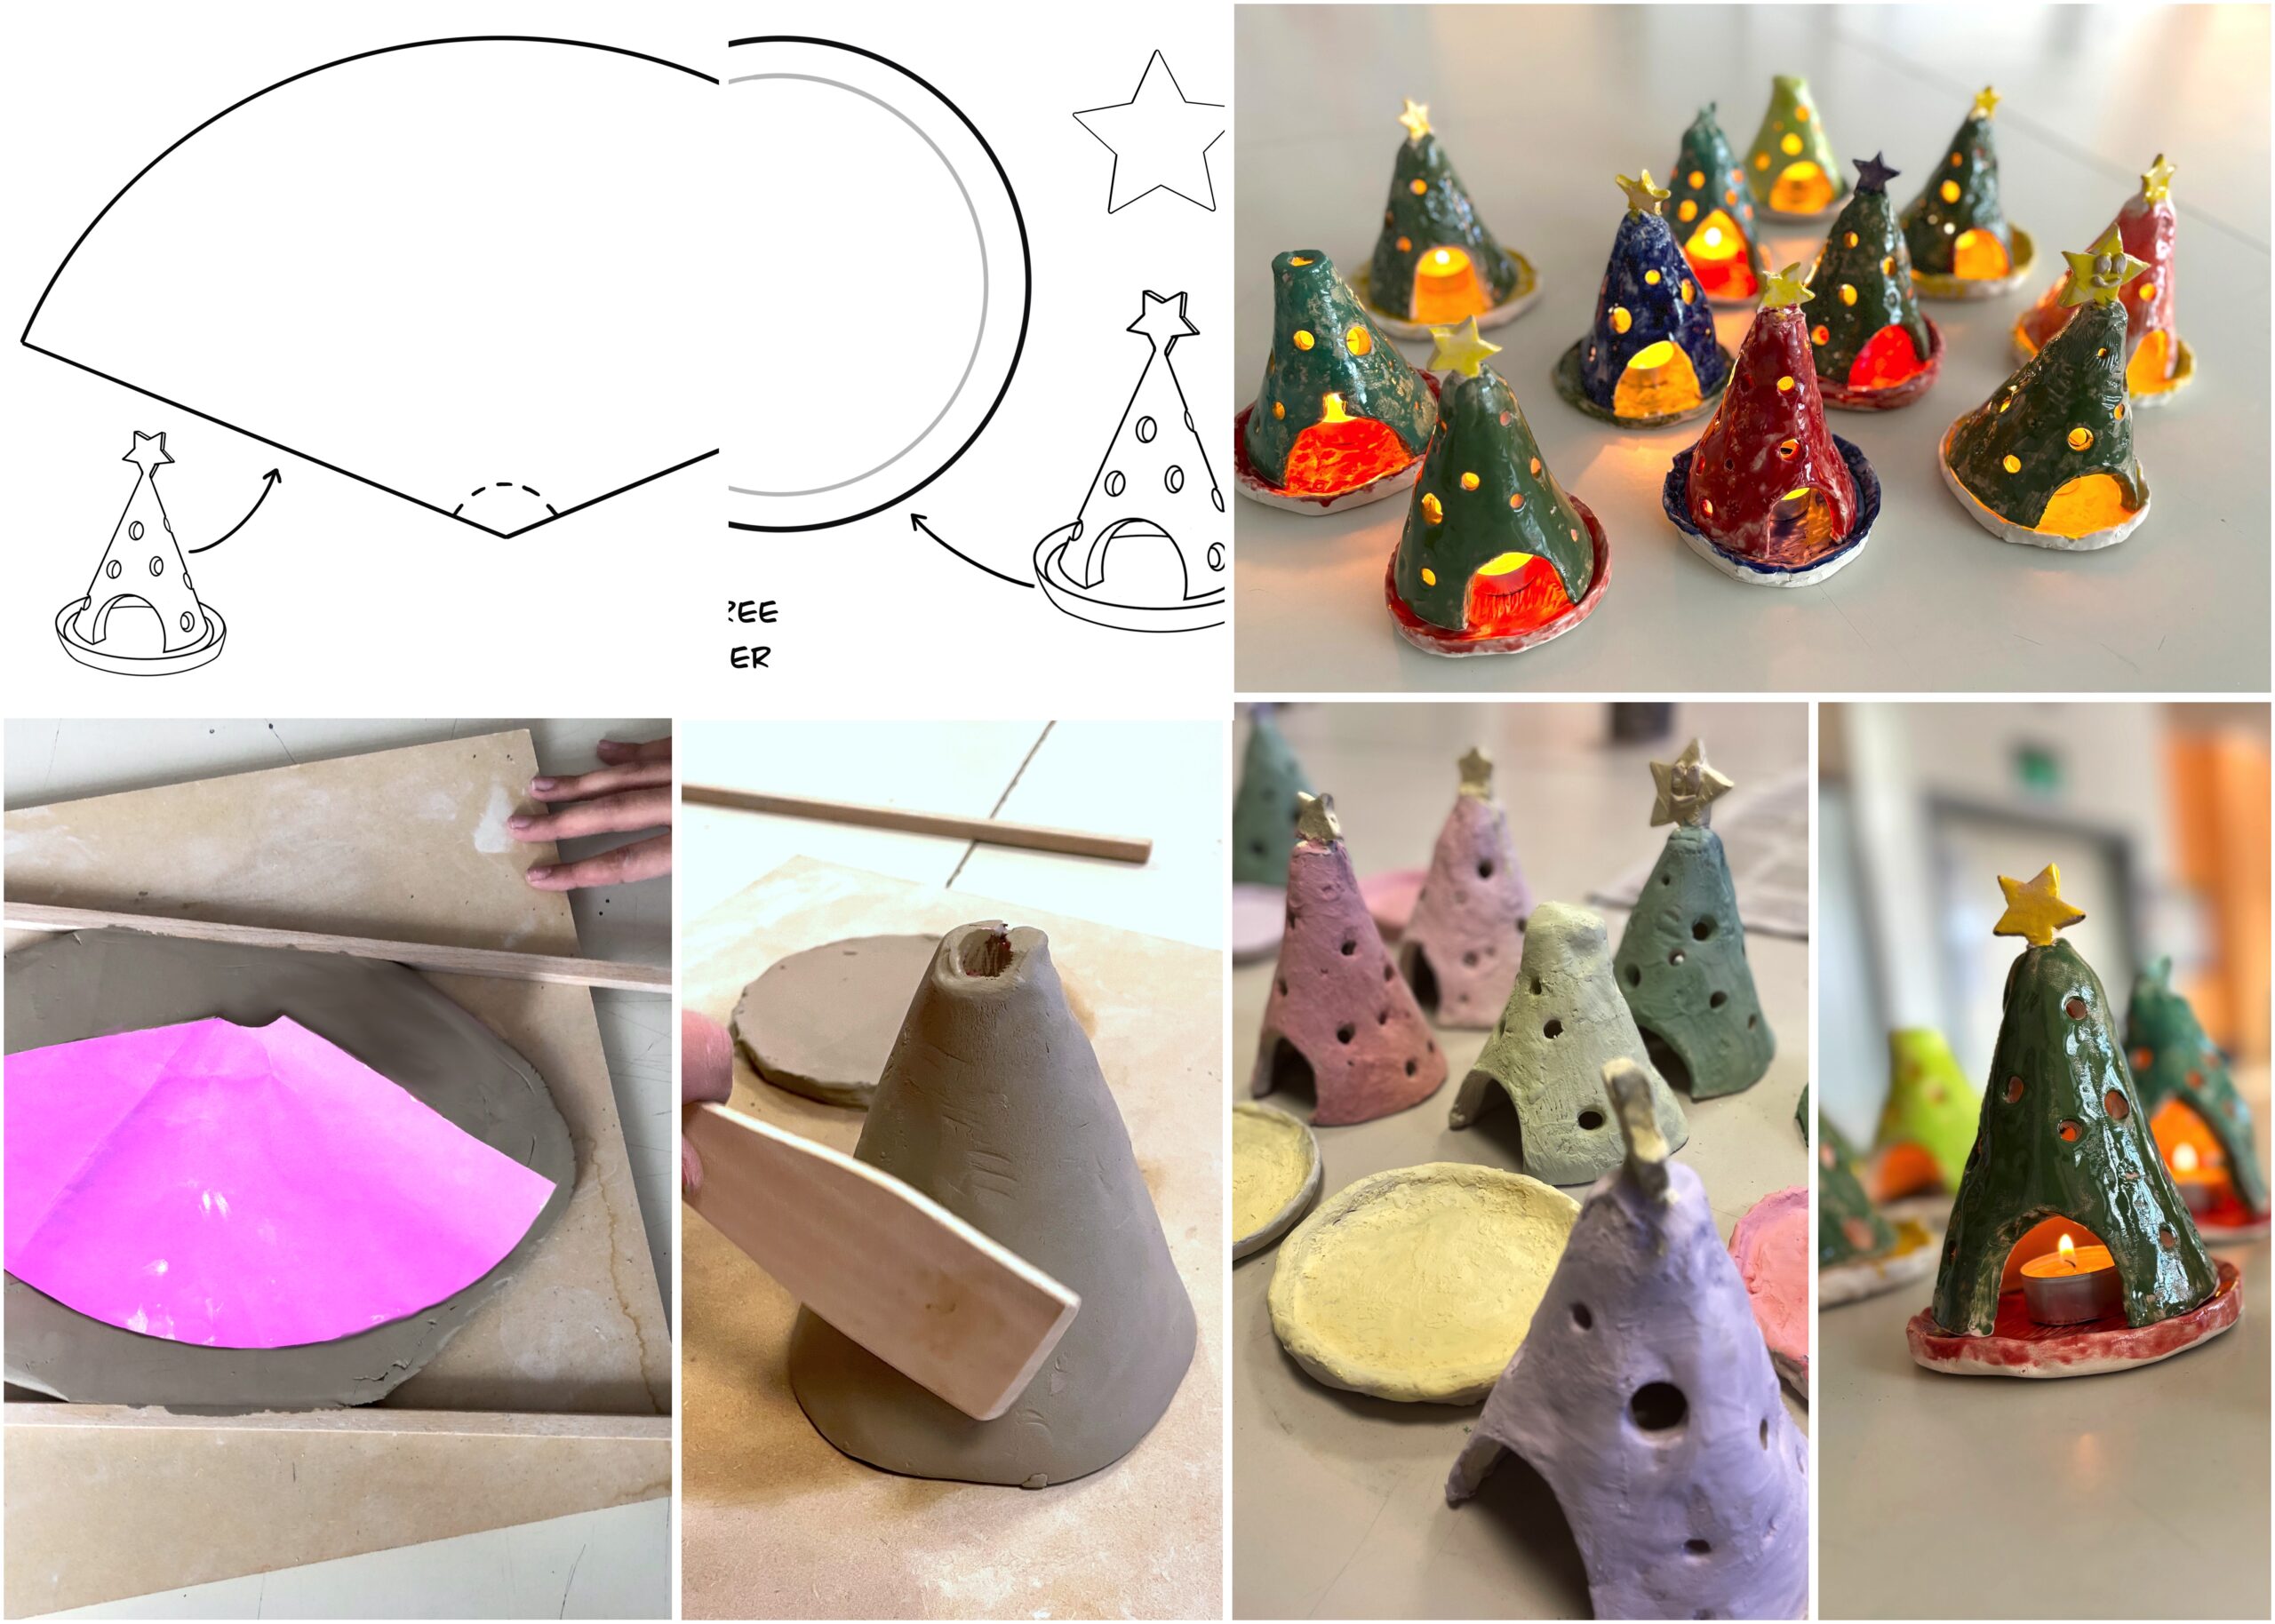
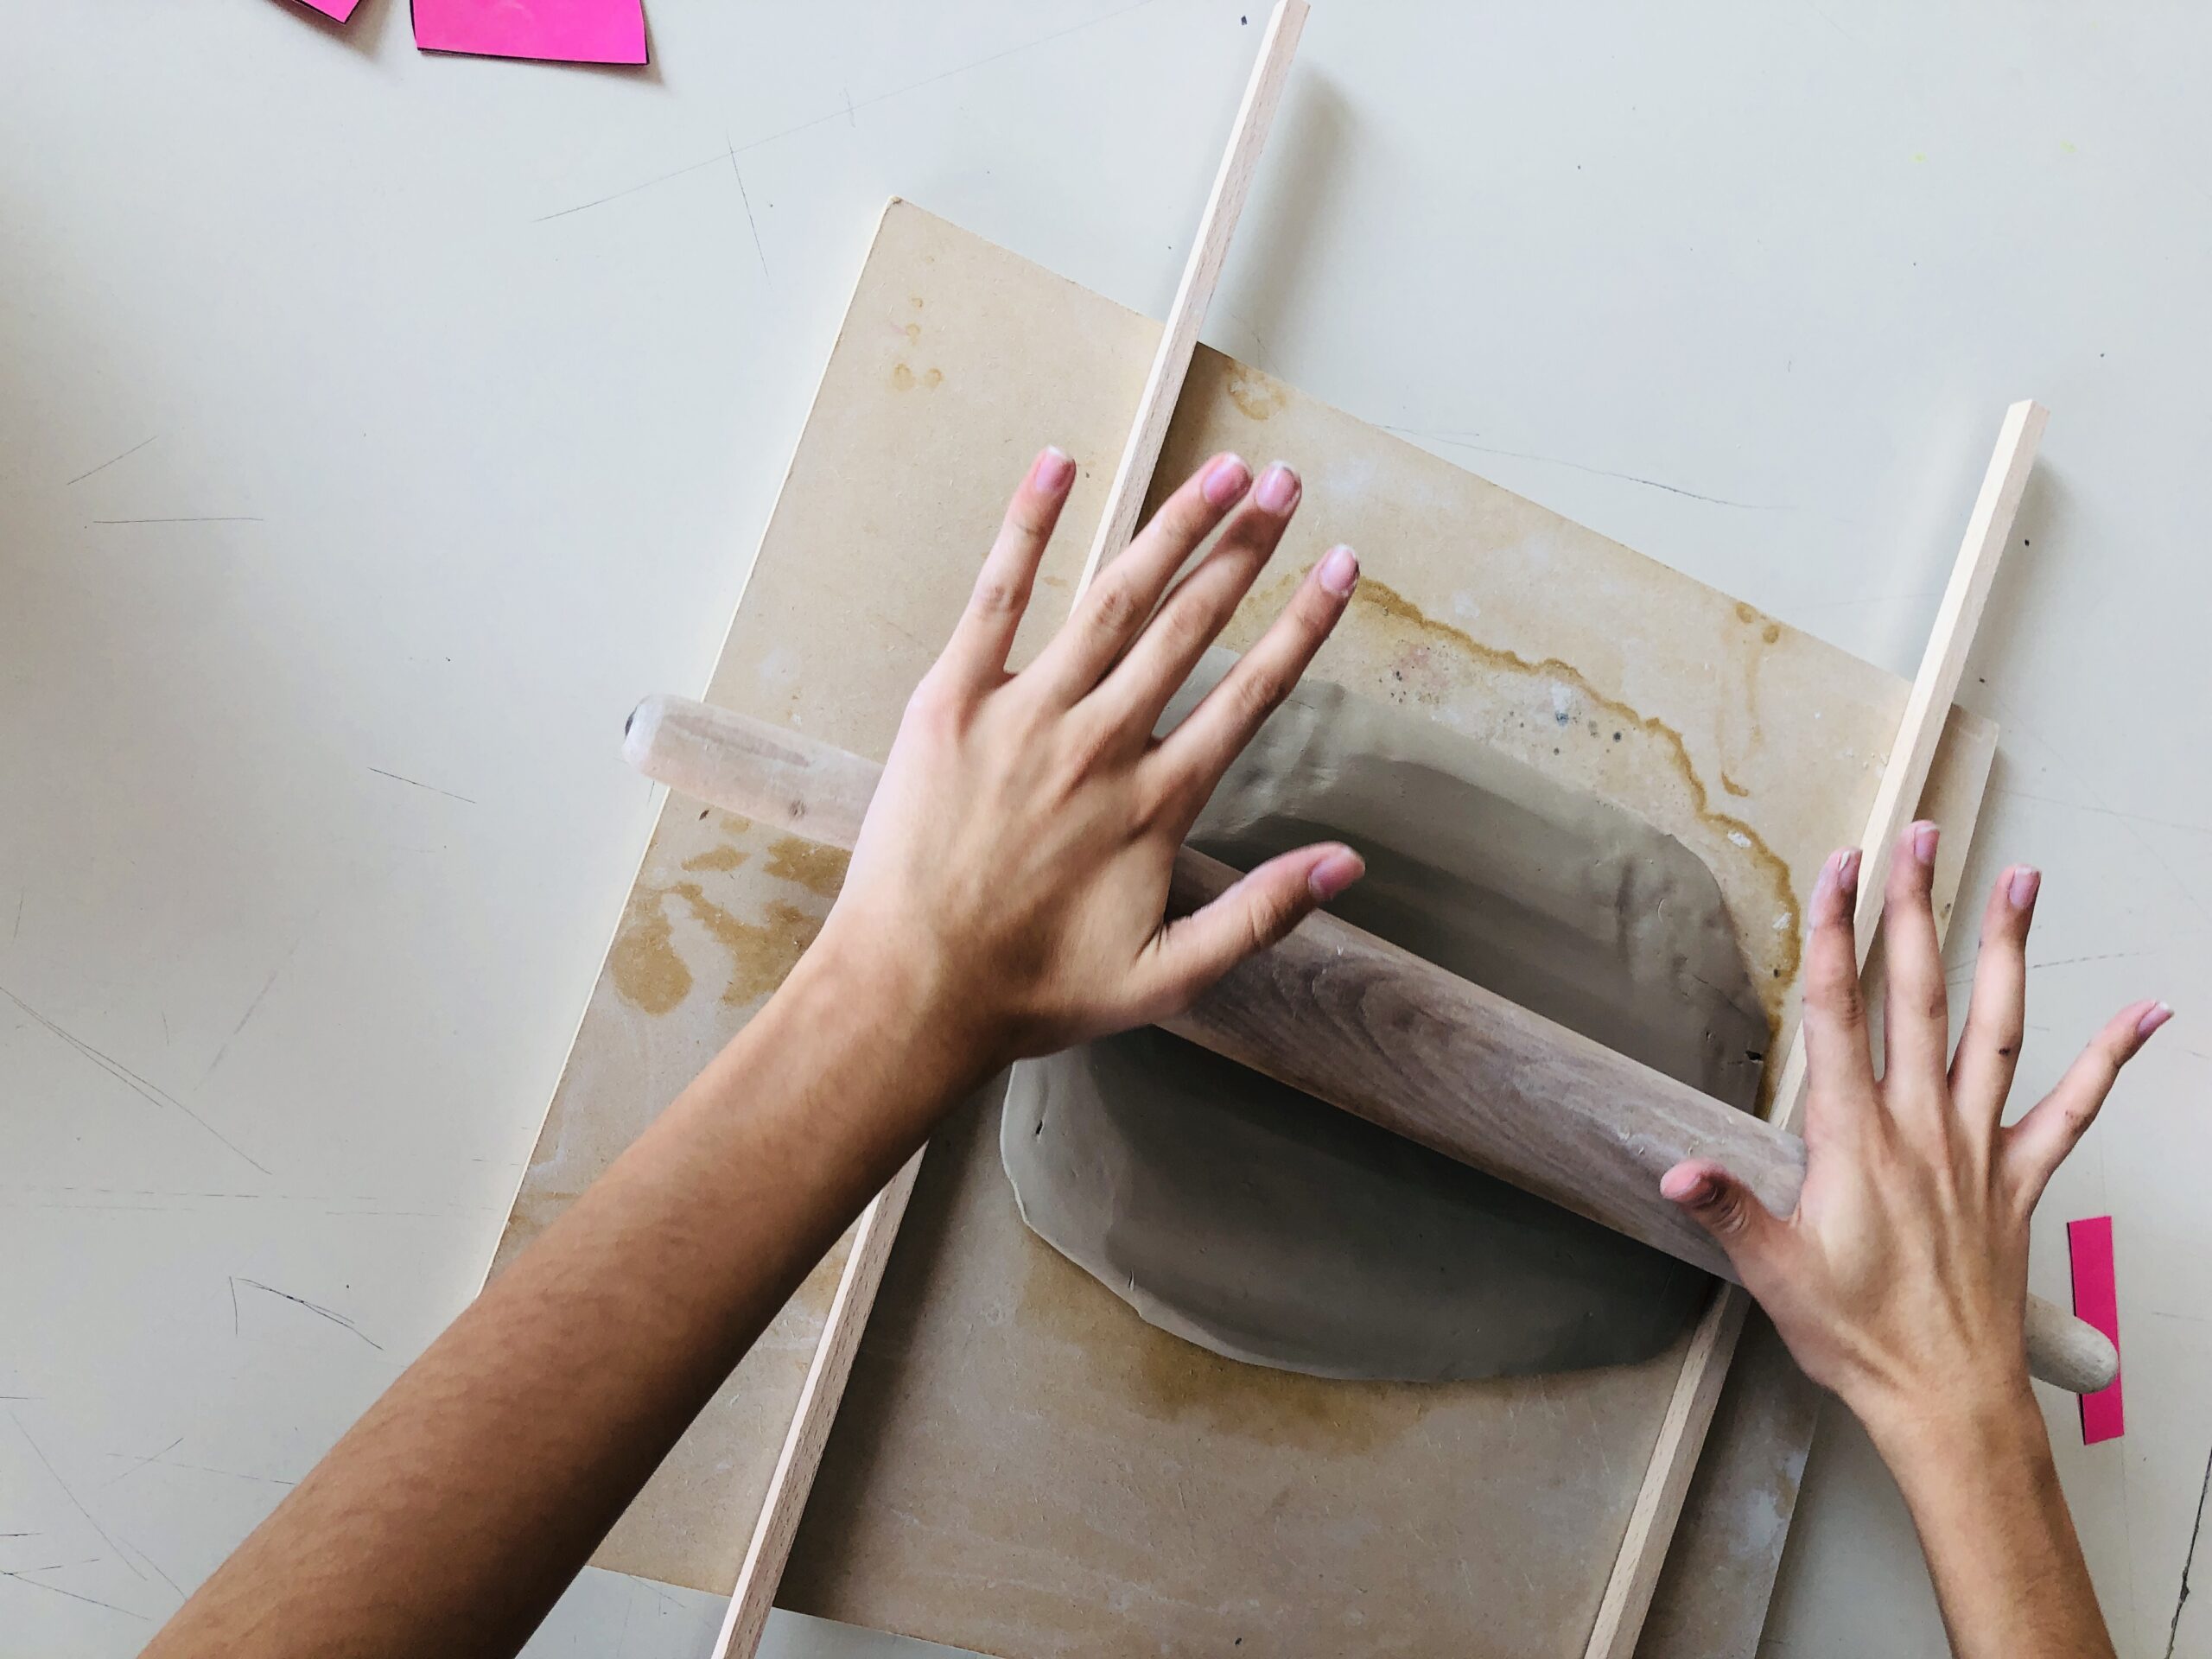
When the clay slabs were prepared we used the templates printed on cardboard and cut out to create the clay elements. To create the saucer we cut out the circle from the clay slab, and to create the cone we cut out the second shape, to be assembled with the star at the top.
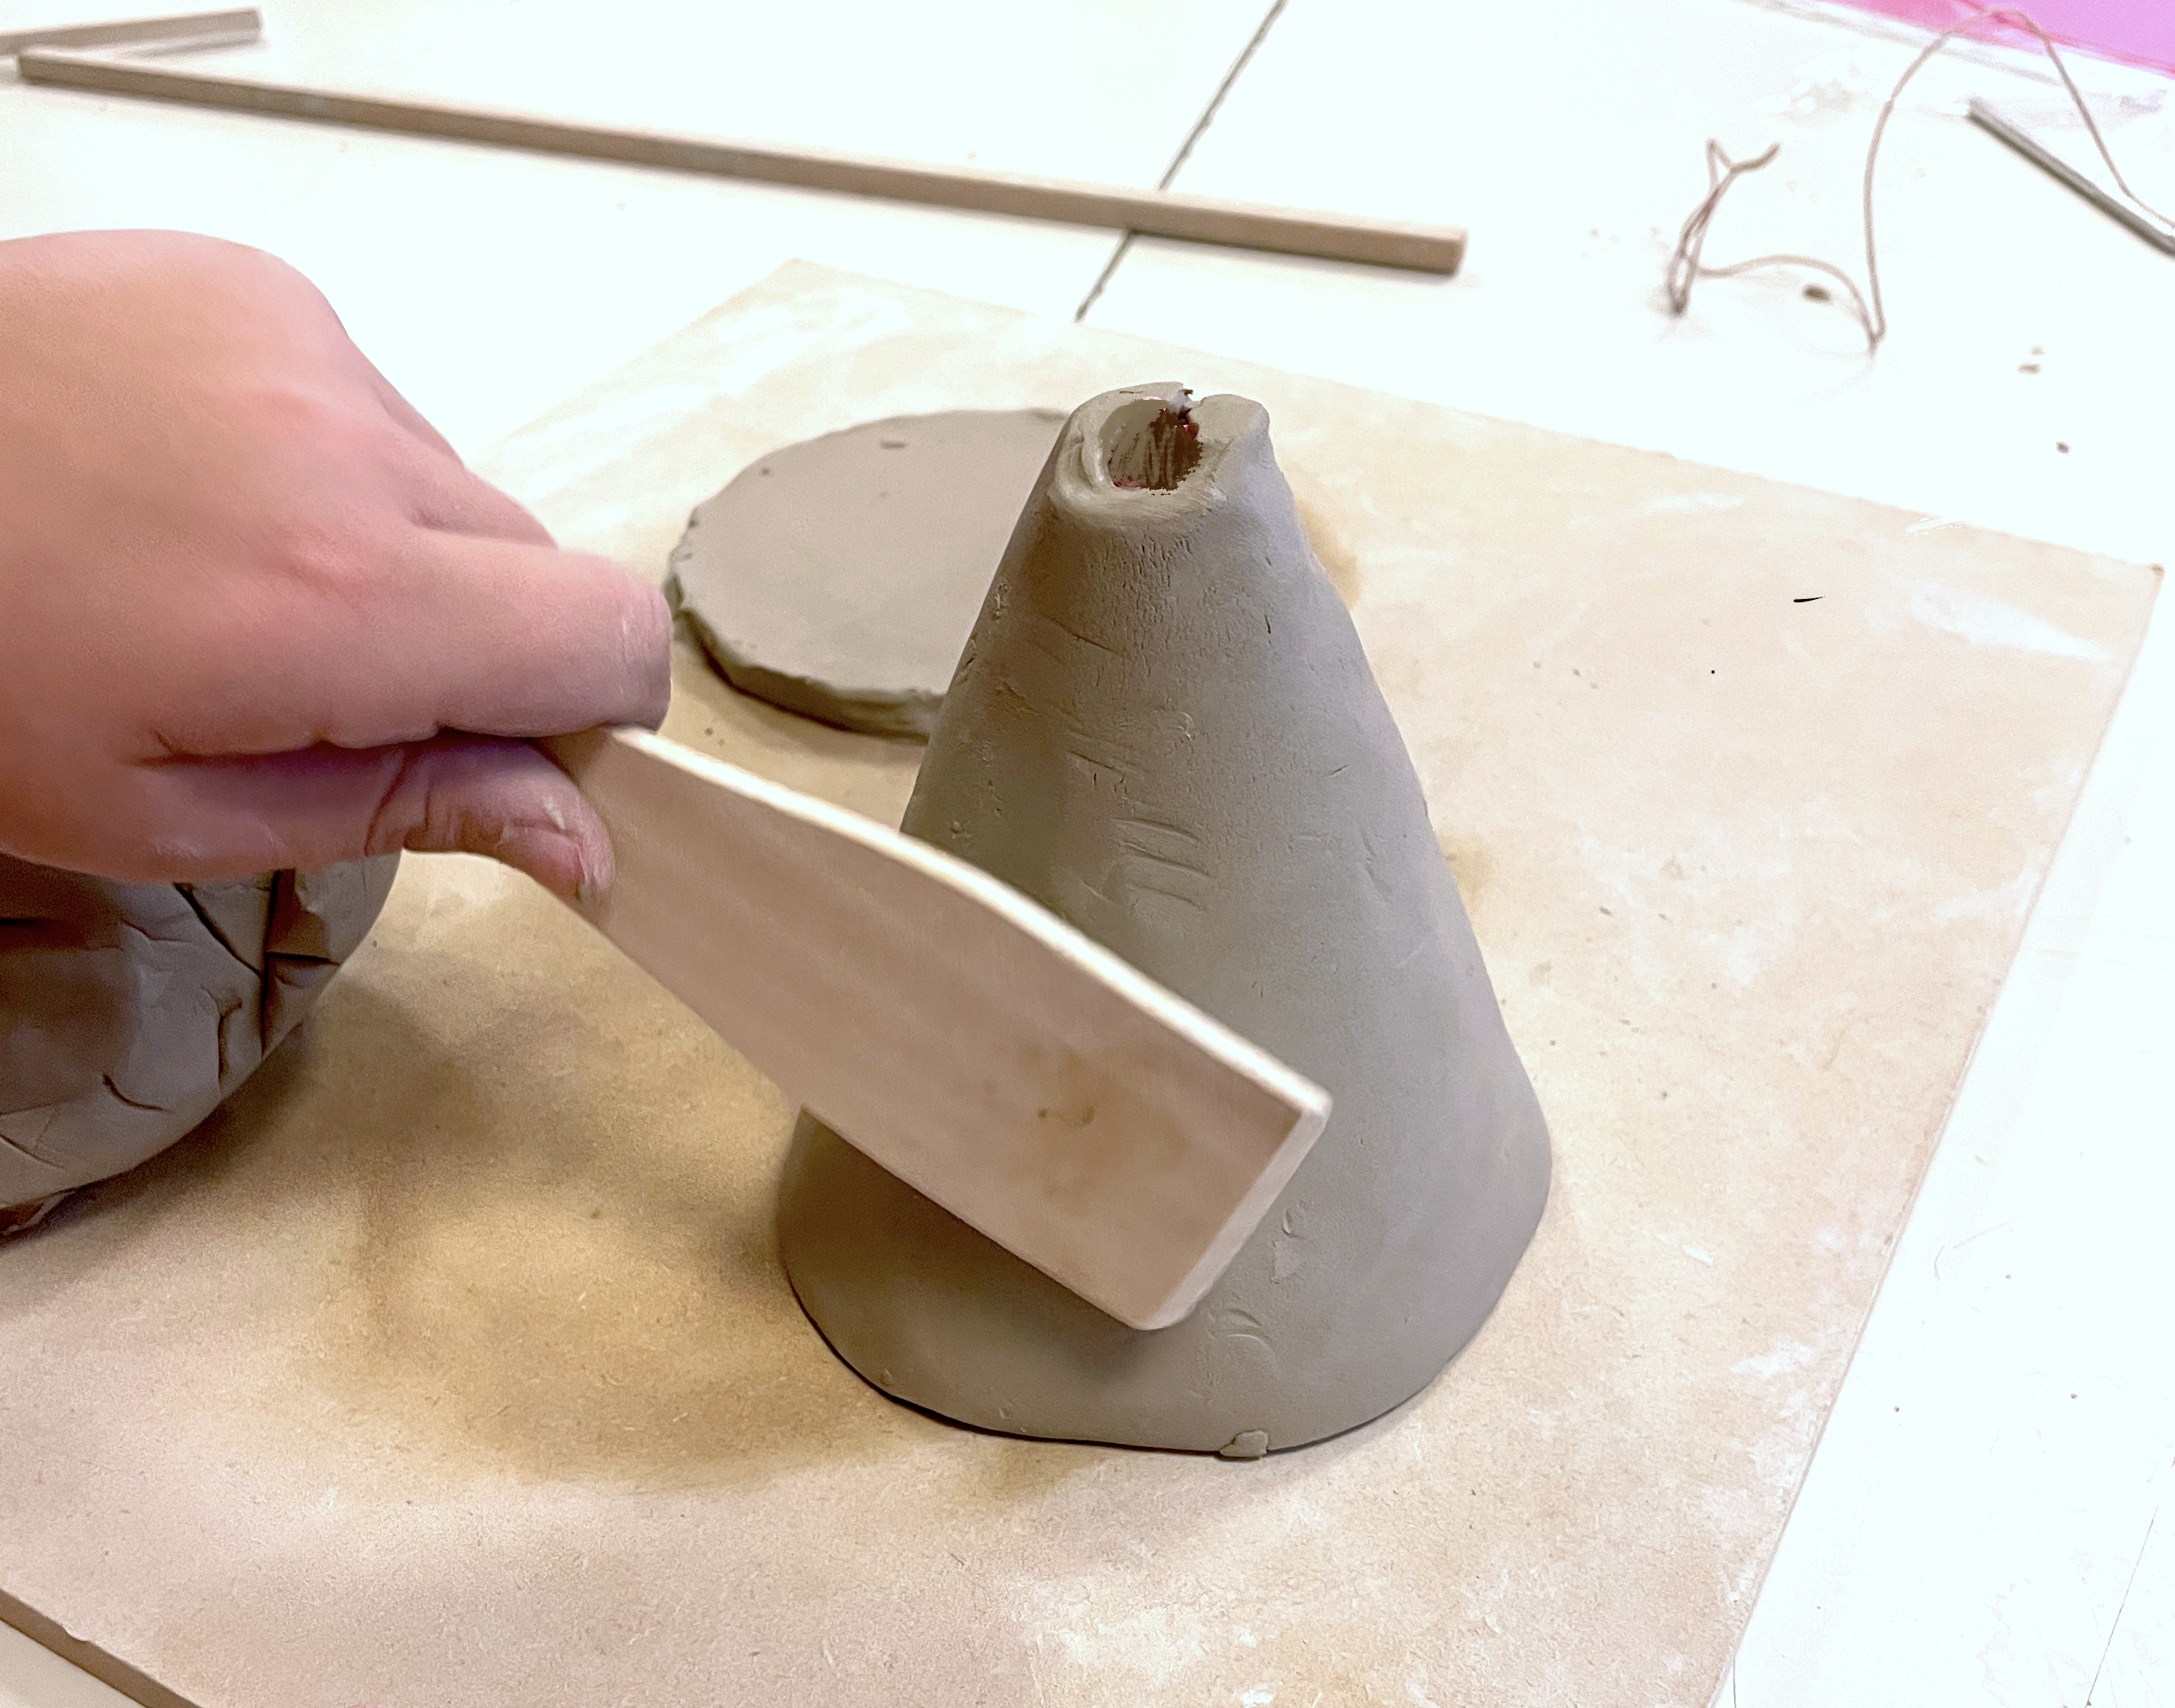
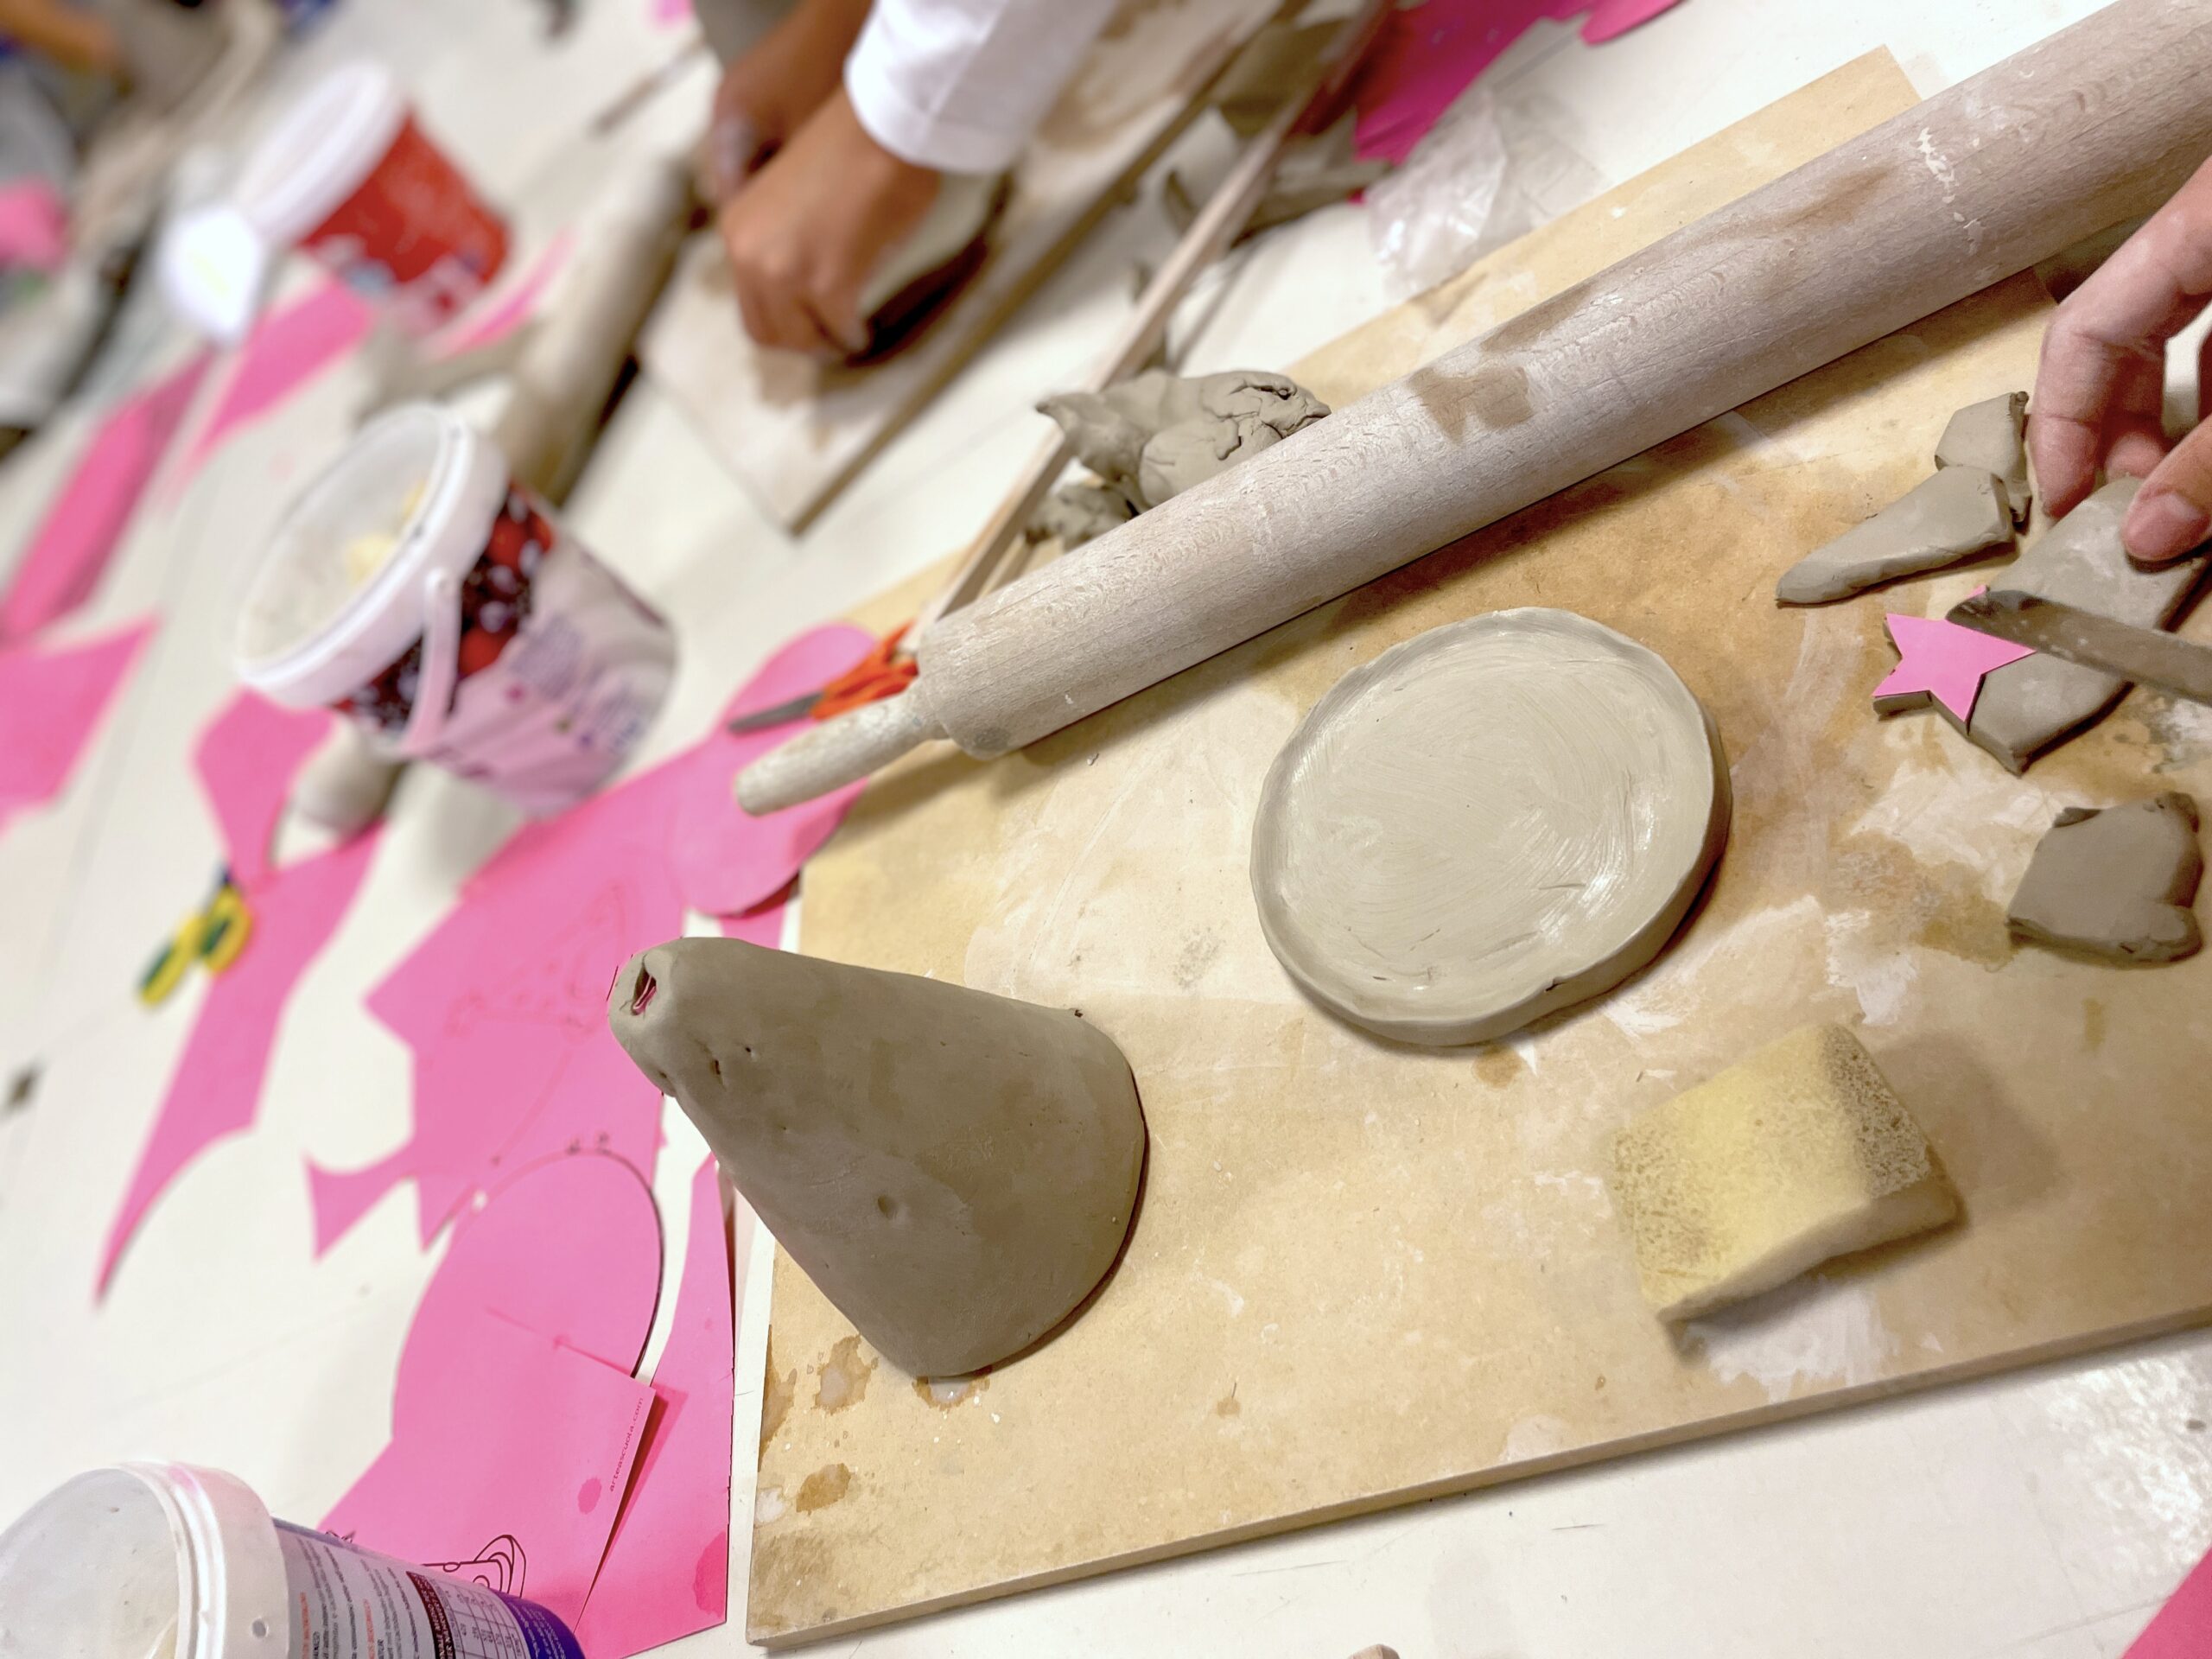
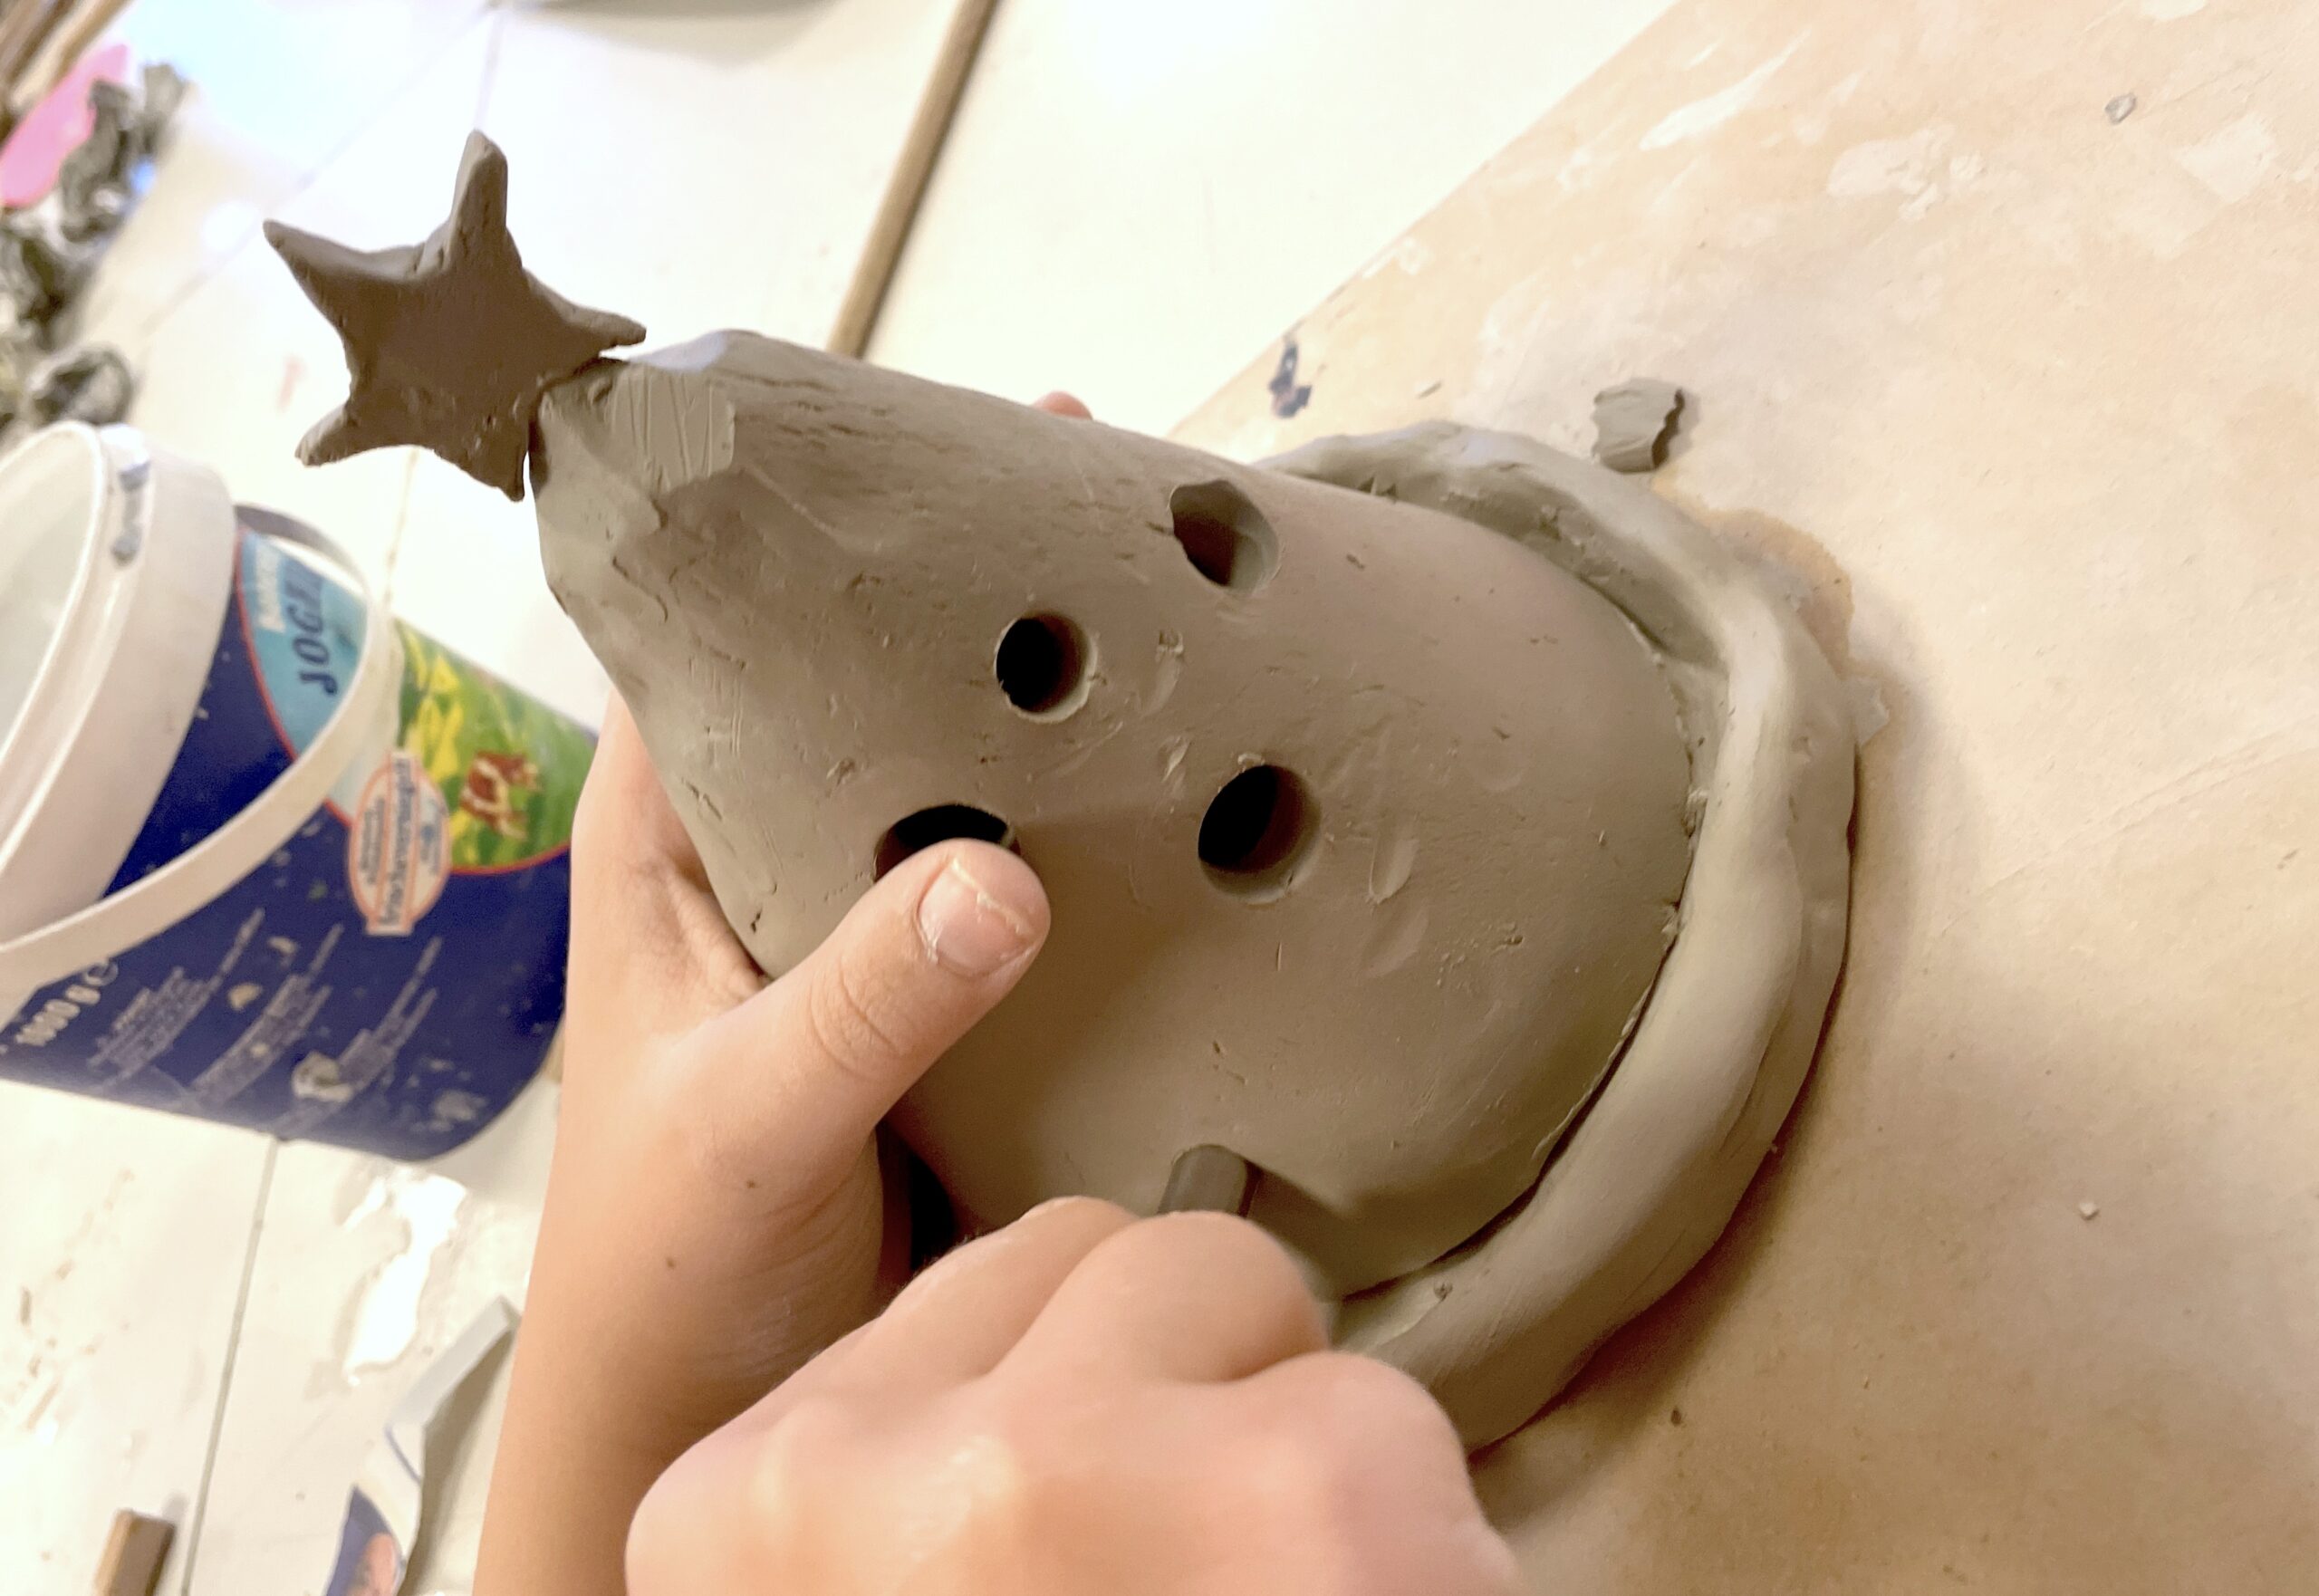
The cone is assembled by welding the edges of the slab with the slip, after having knurled the surfaces to be “glued”: the shape can be smoothed on the outside by lightly tapping the surfaces with a wooden paddle. The saucer is created by cutting out the circle and raising the edge with your fingers. Finally, cut out a small star from the sheet (you can also use the shapes on the sheet) to apply to the top of the tree, always knurling the surfaces and applying the slip.
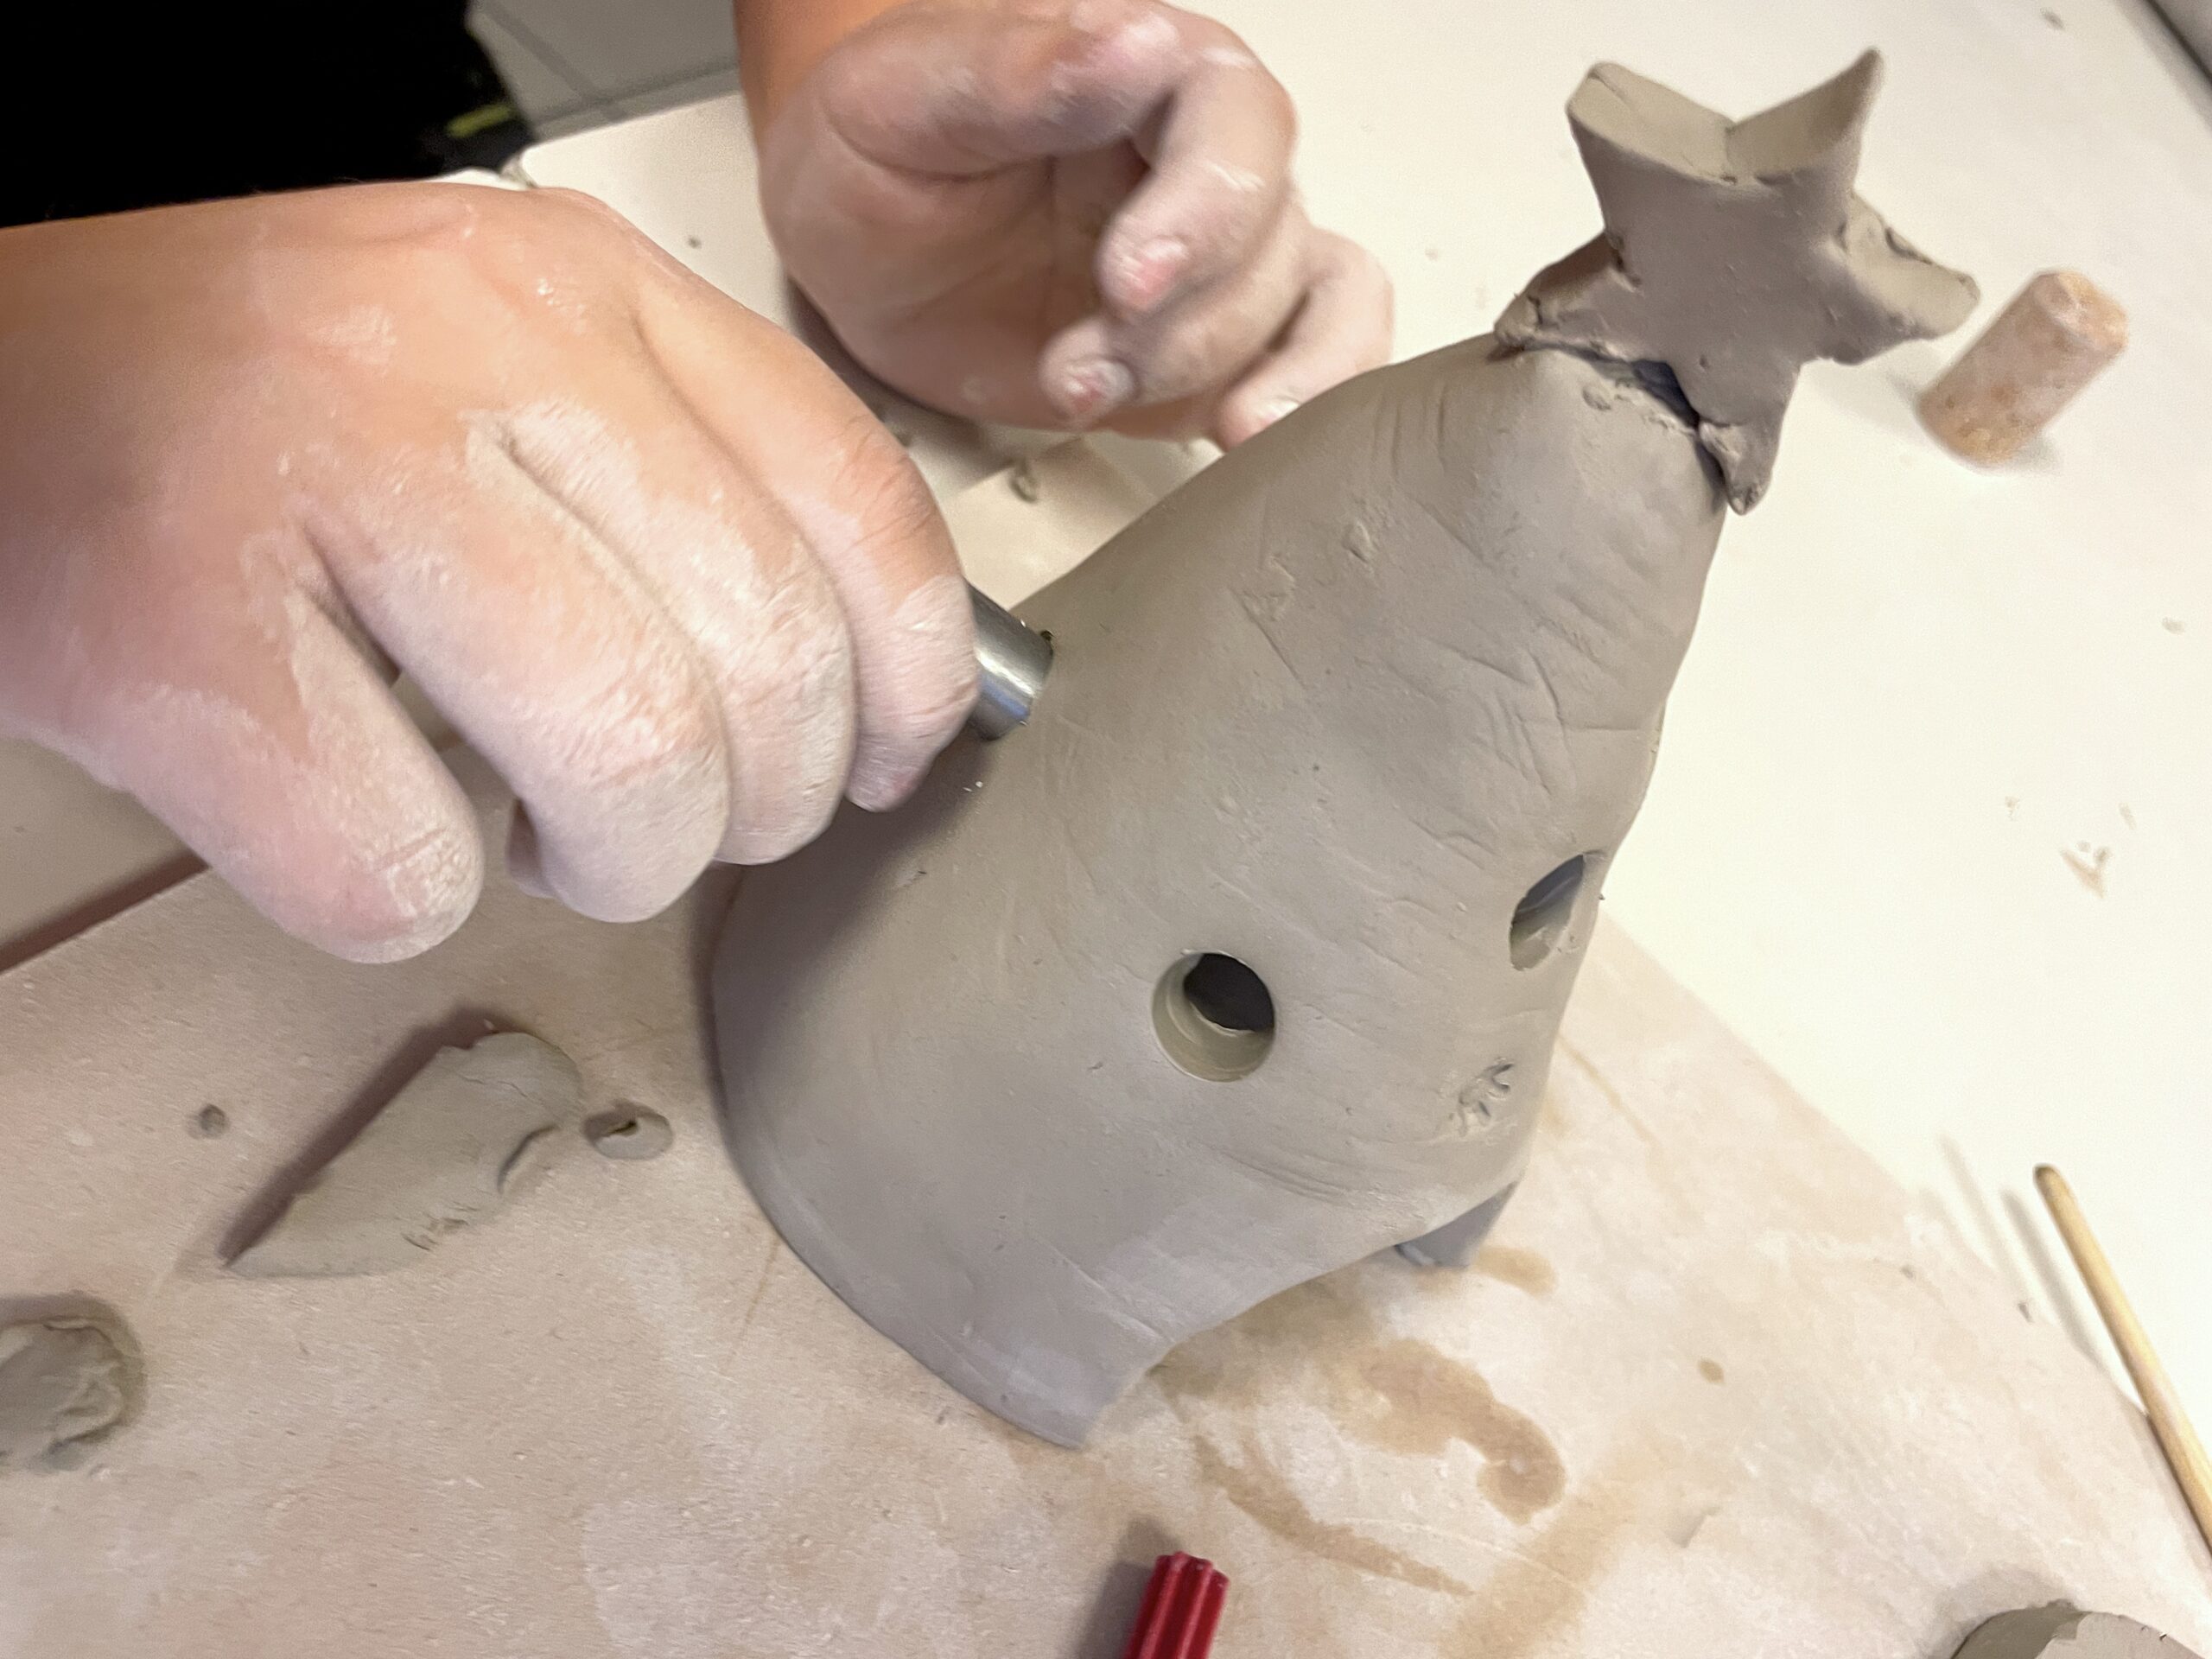
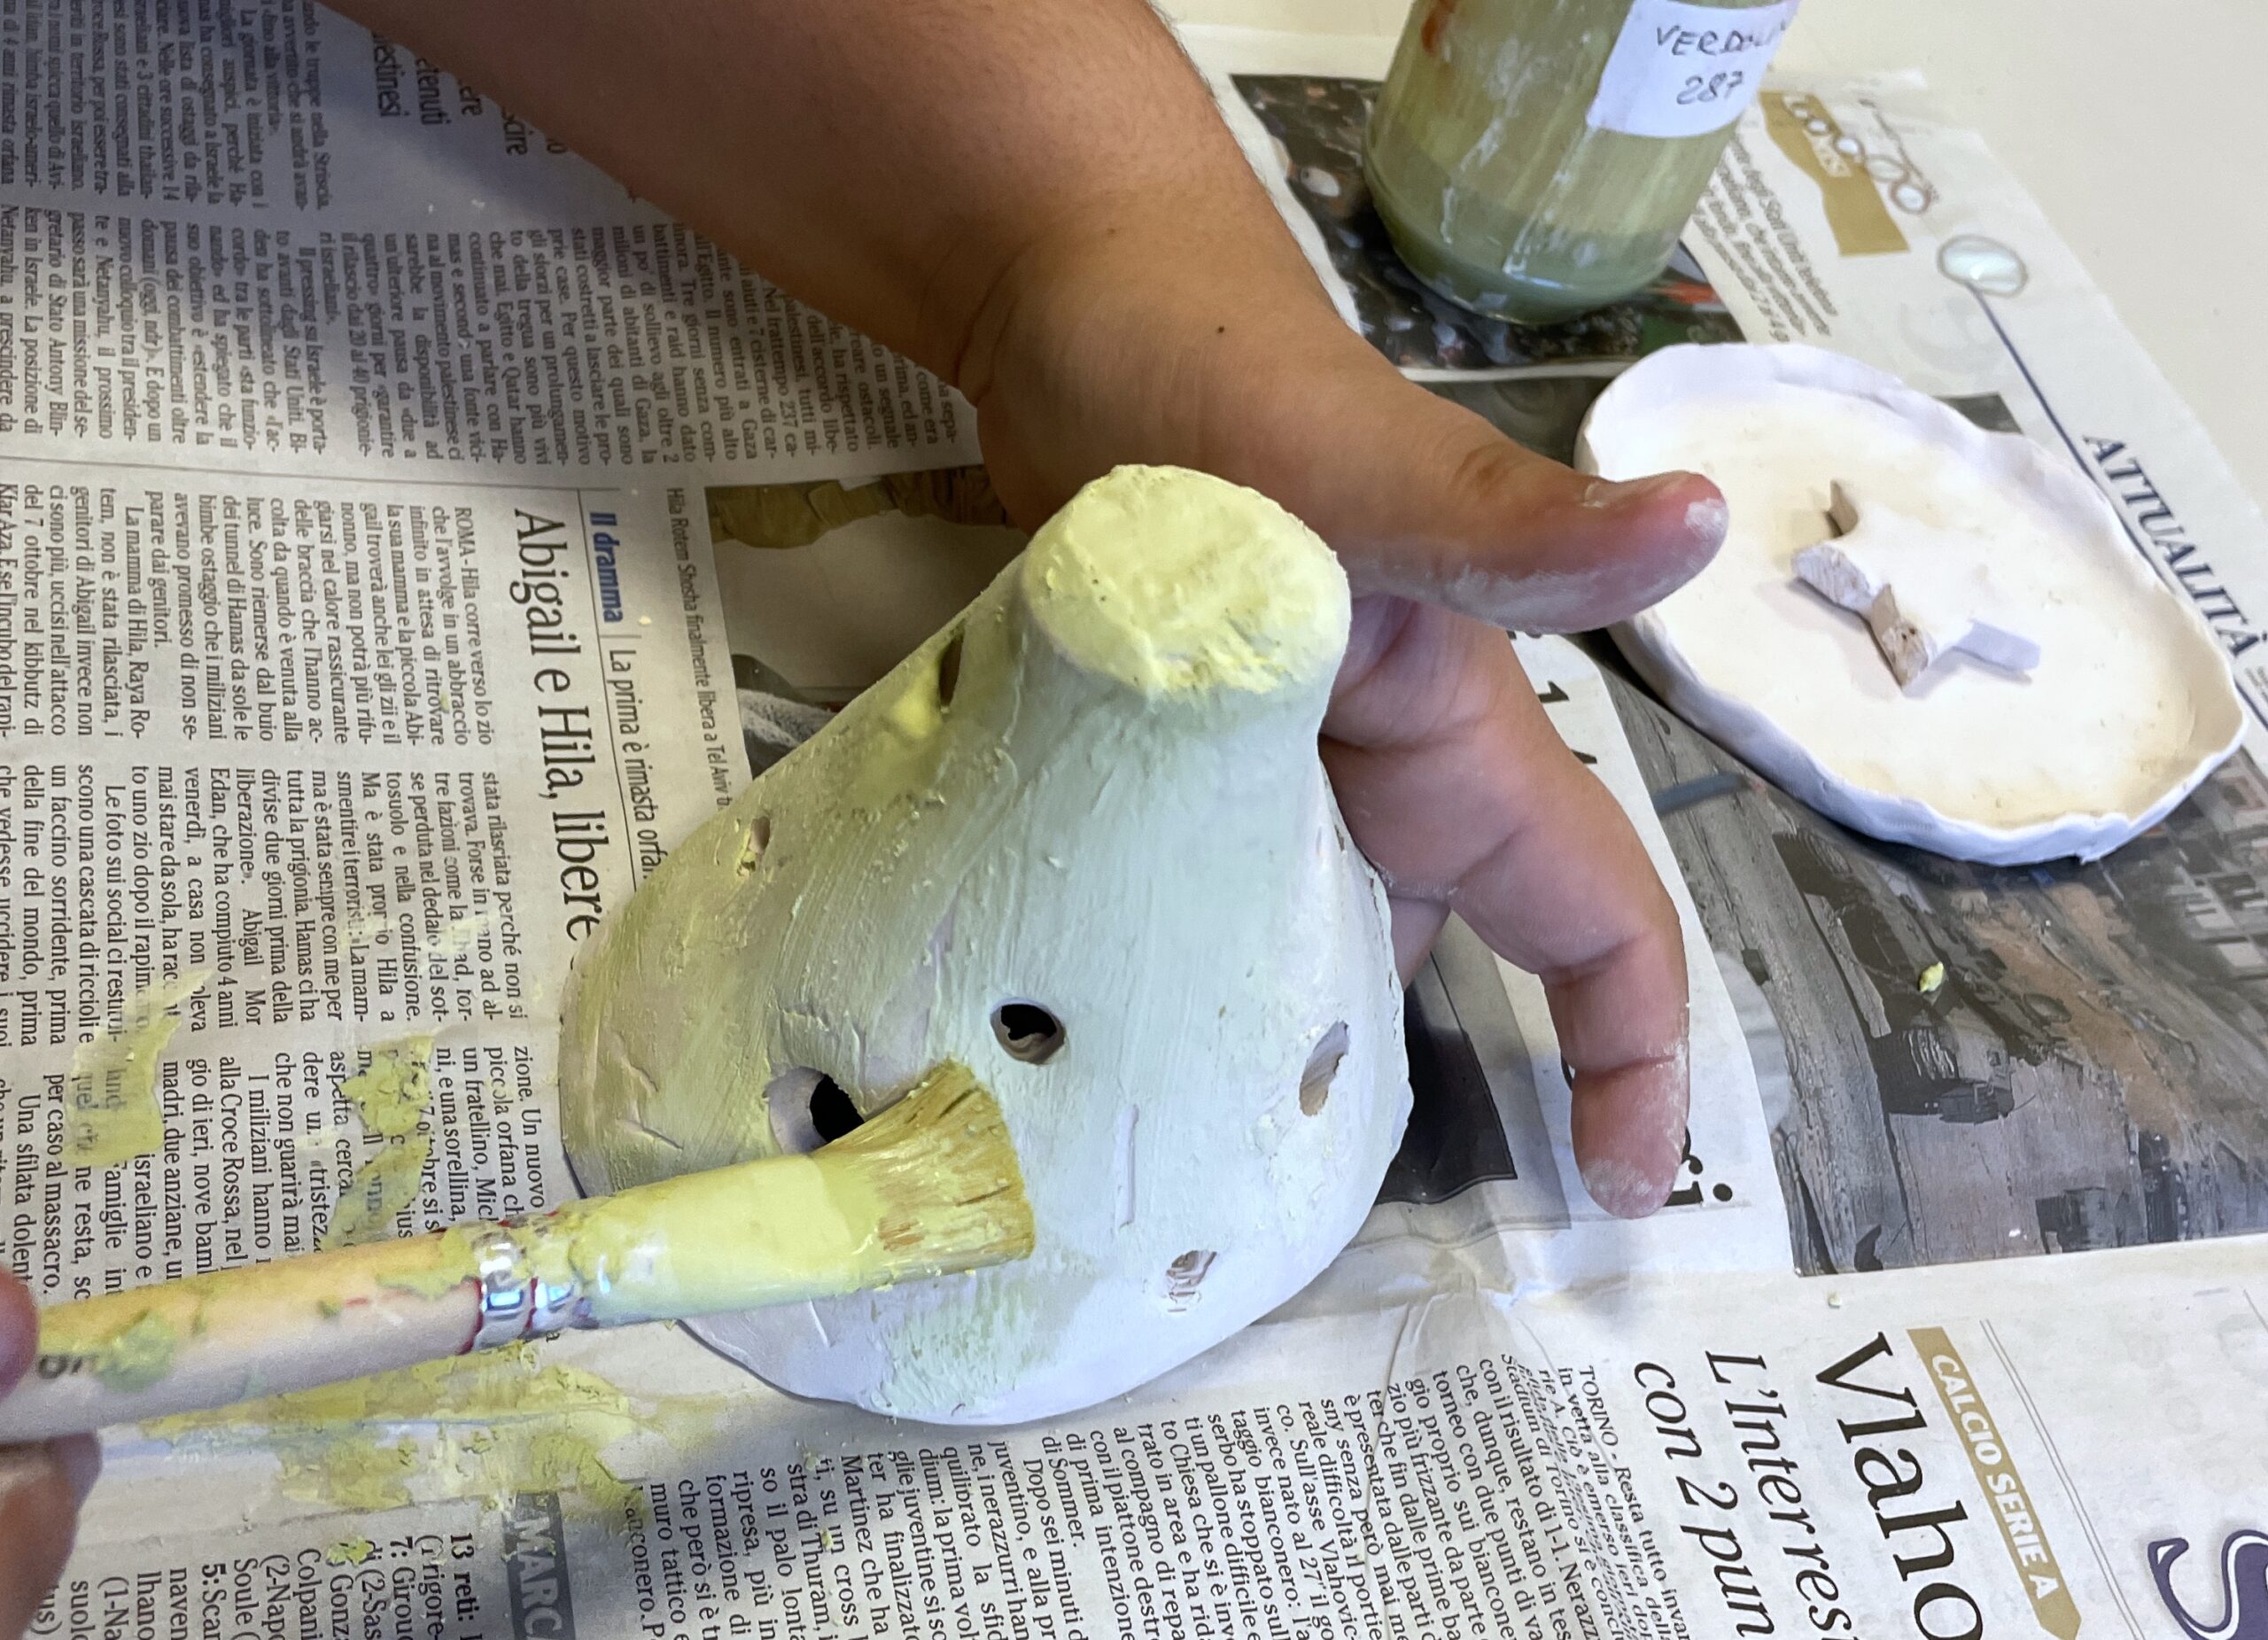
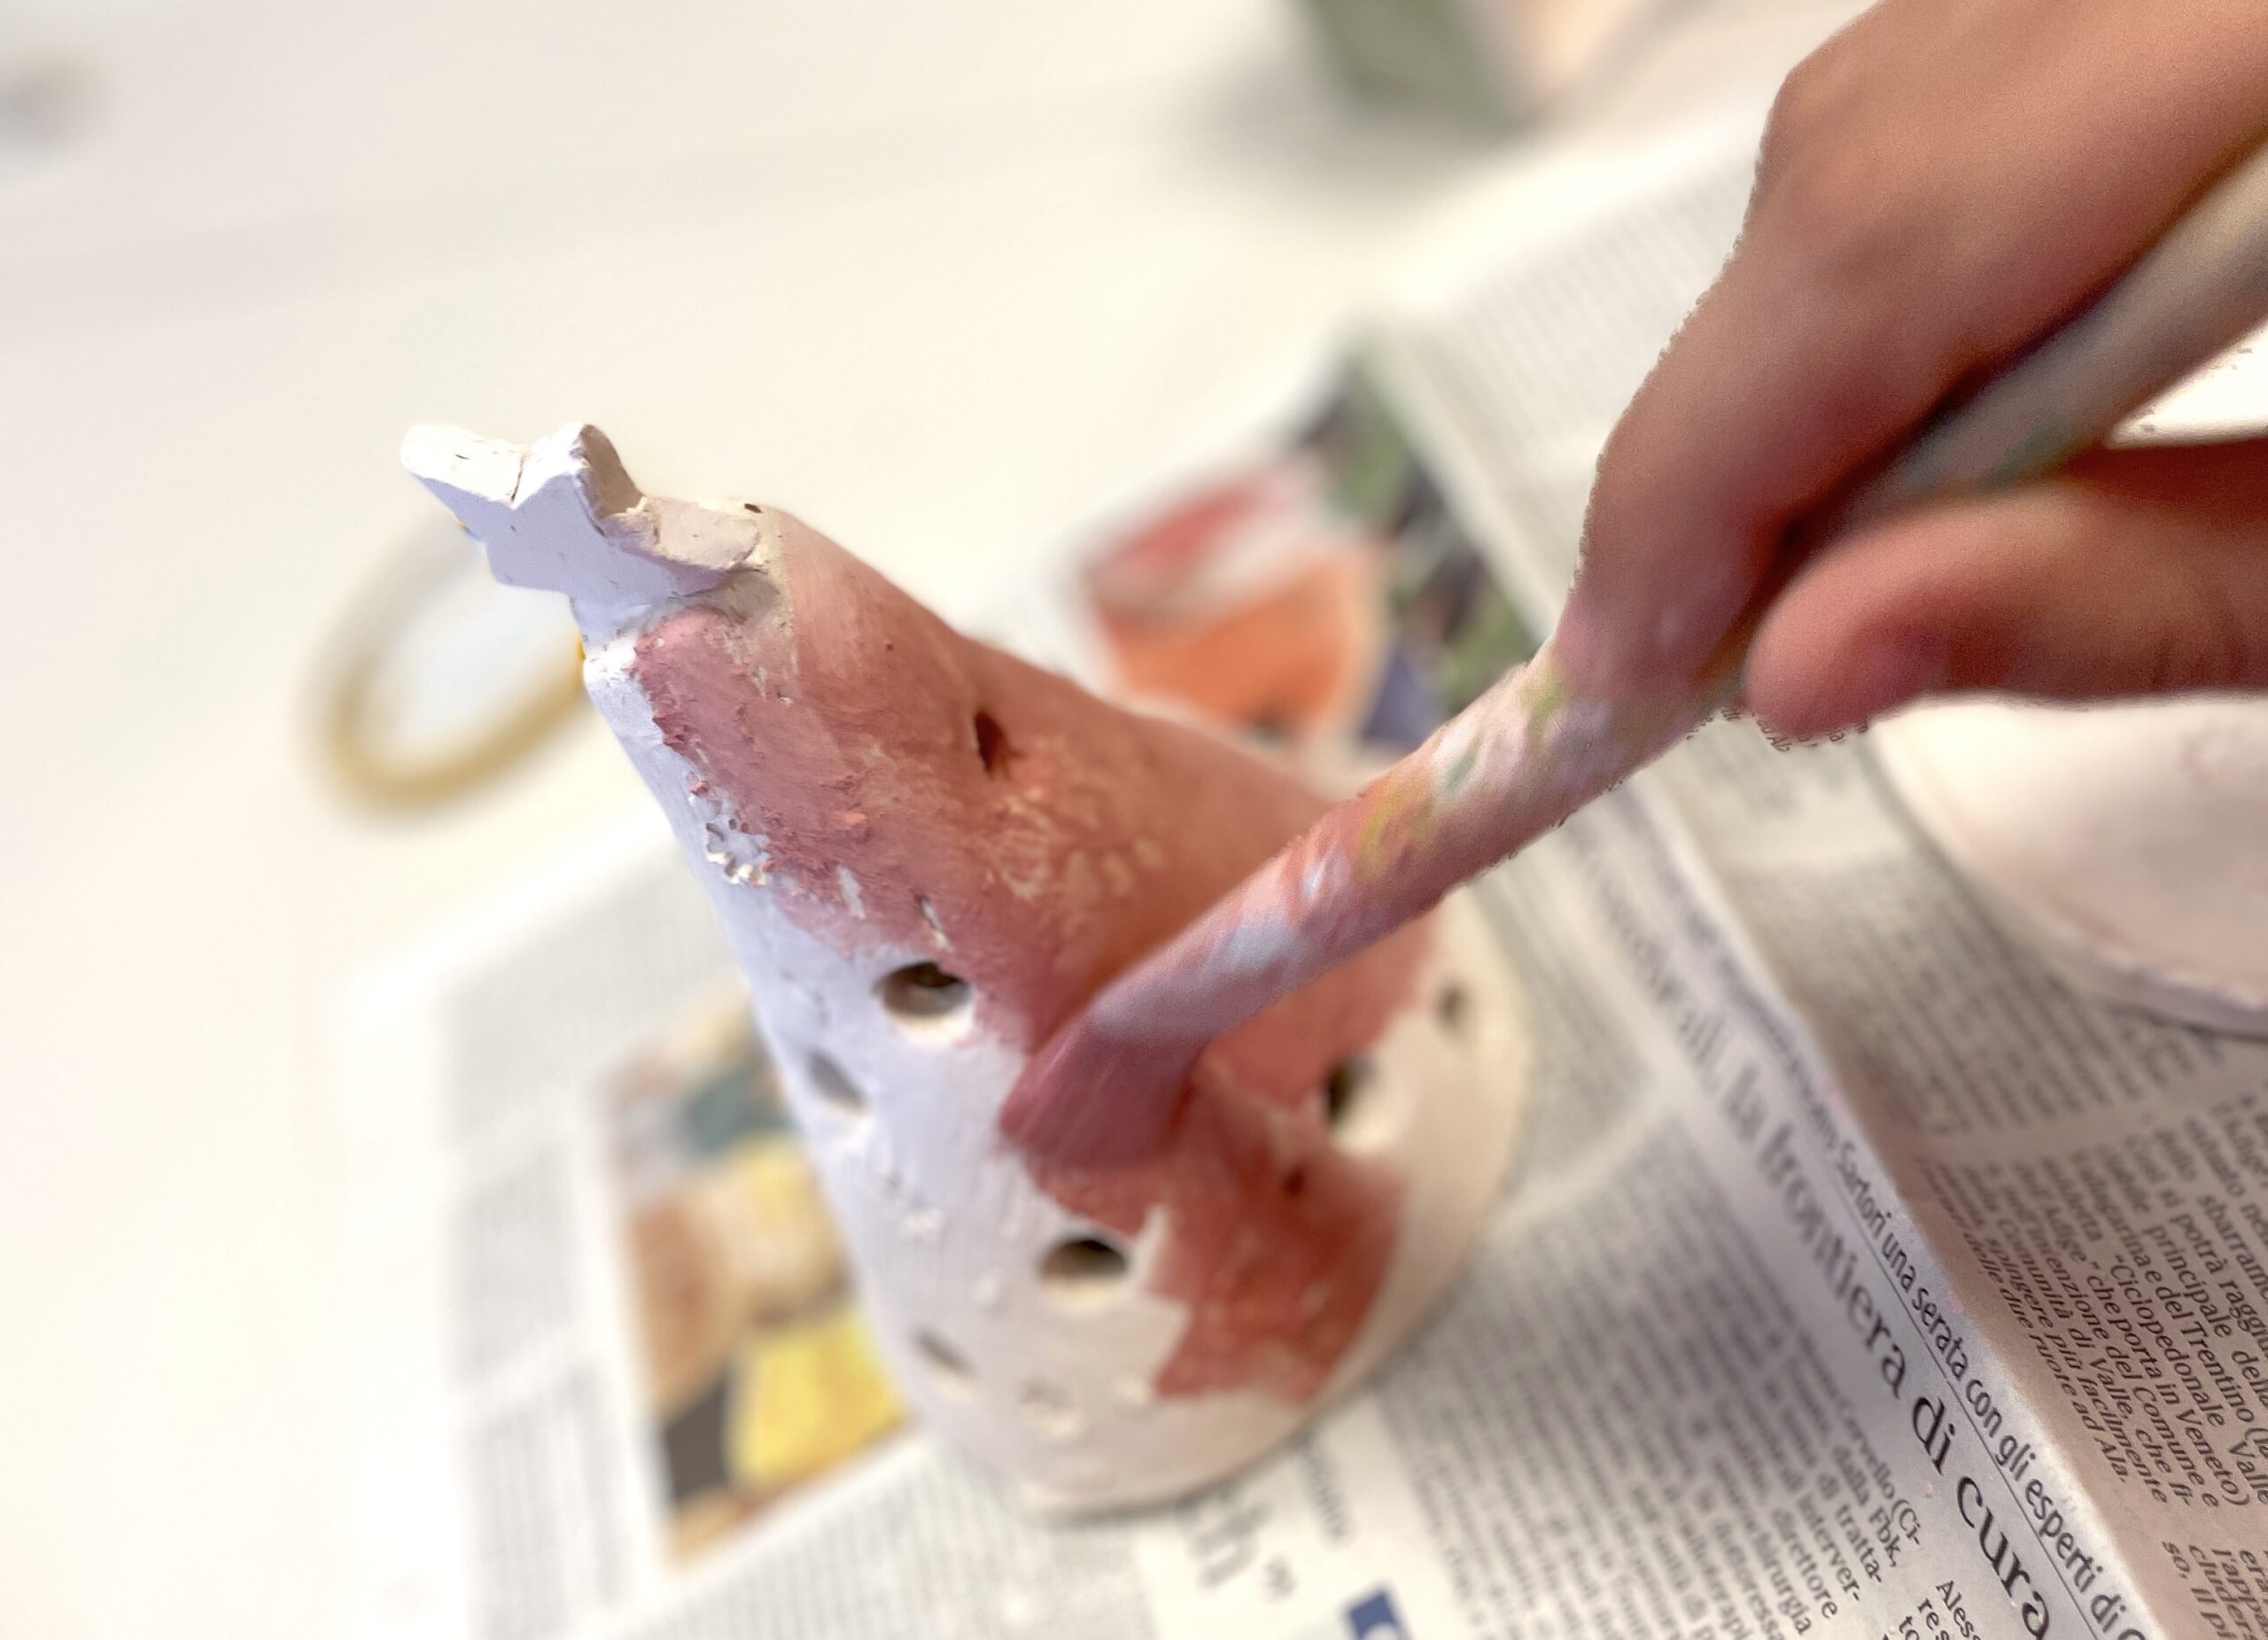
When the clay reaches leather hardness, you can open the arch for the candle and the holes. To make the opening for the candle we used a small knife, while for the holes we used small metal tubes of various sizes.

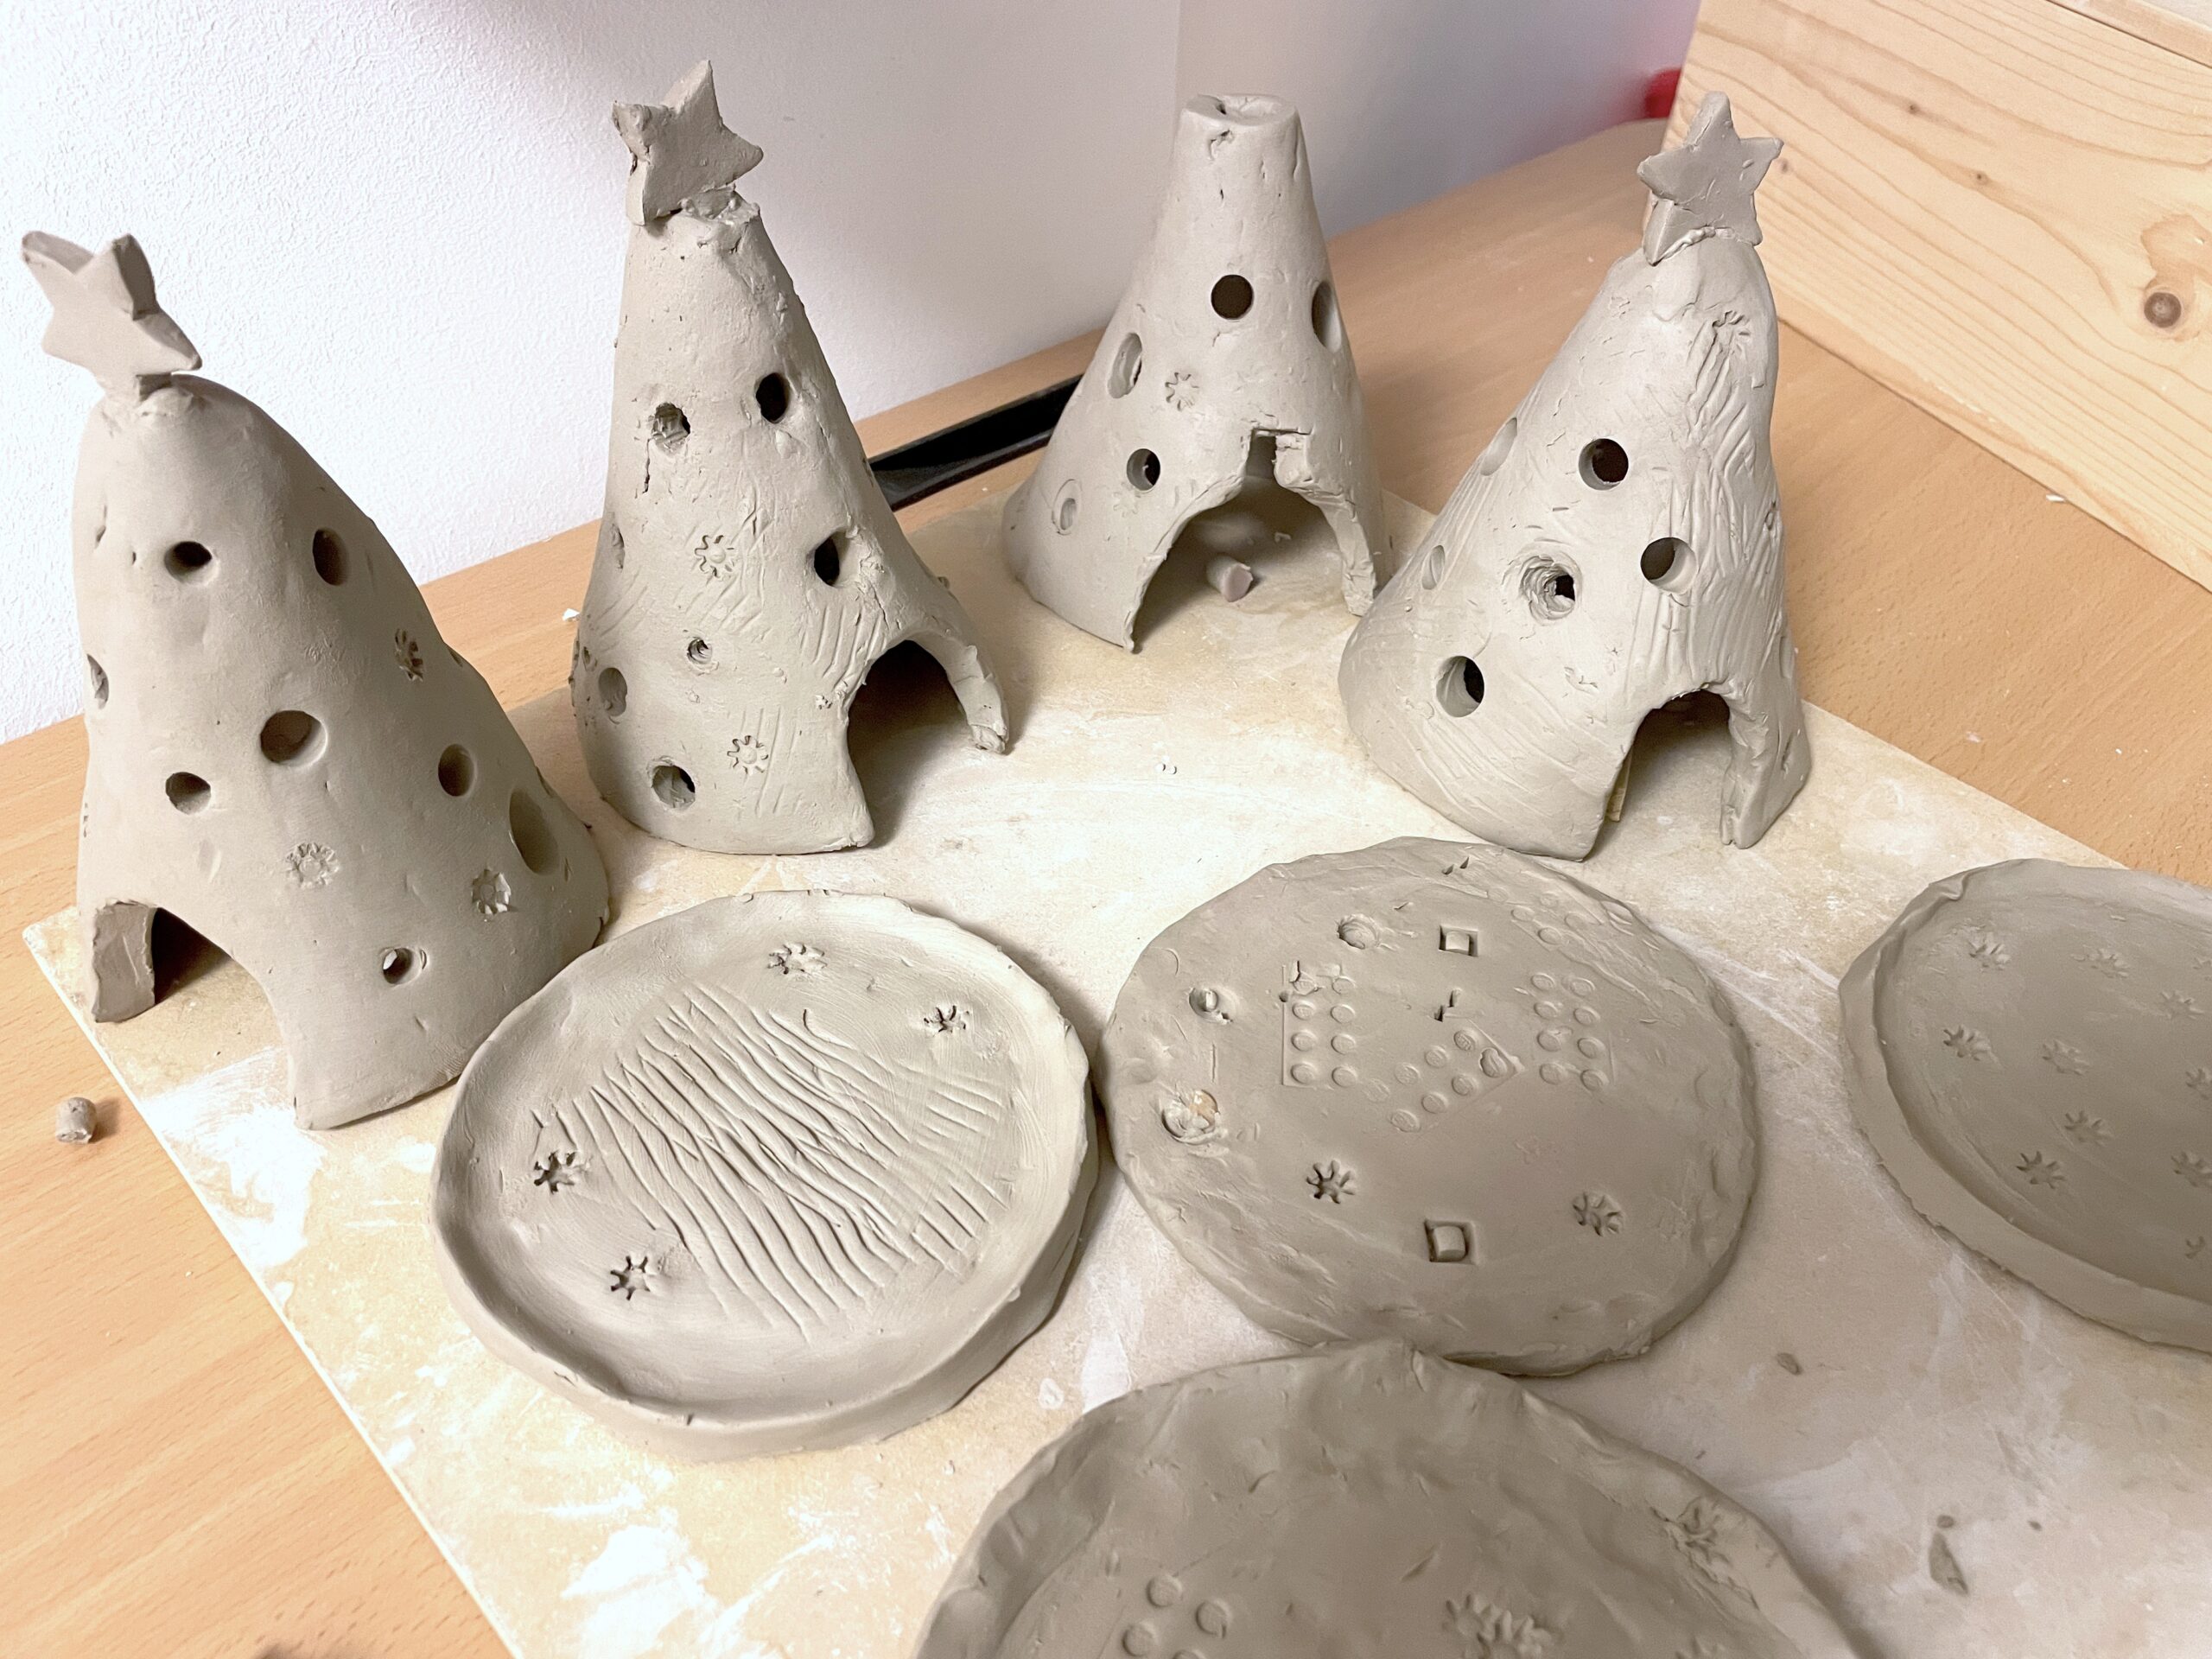
The surface of the saucers and trees was subsequently decorated with textures and imprints of various objects, to make the surface more ornate.

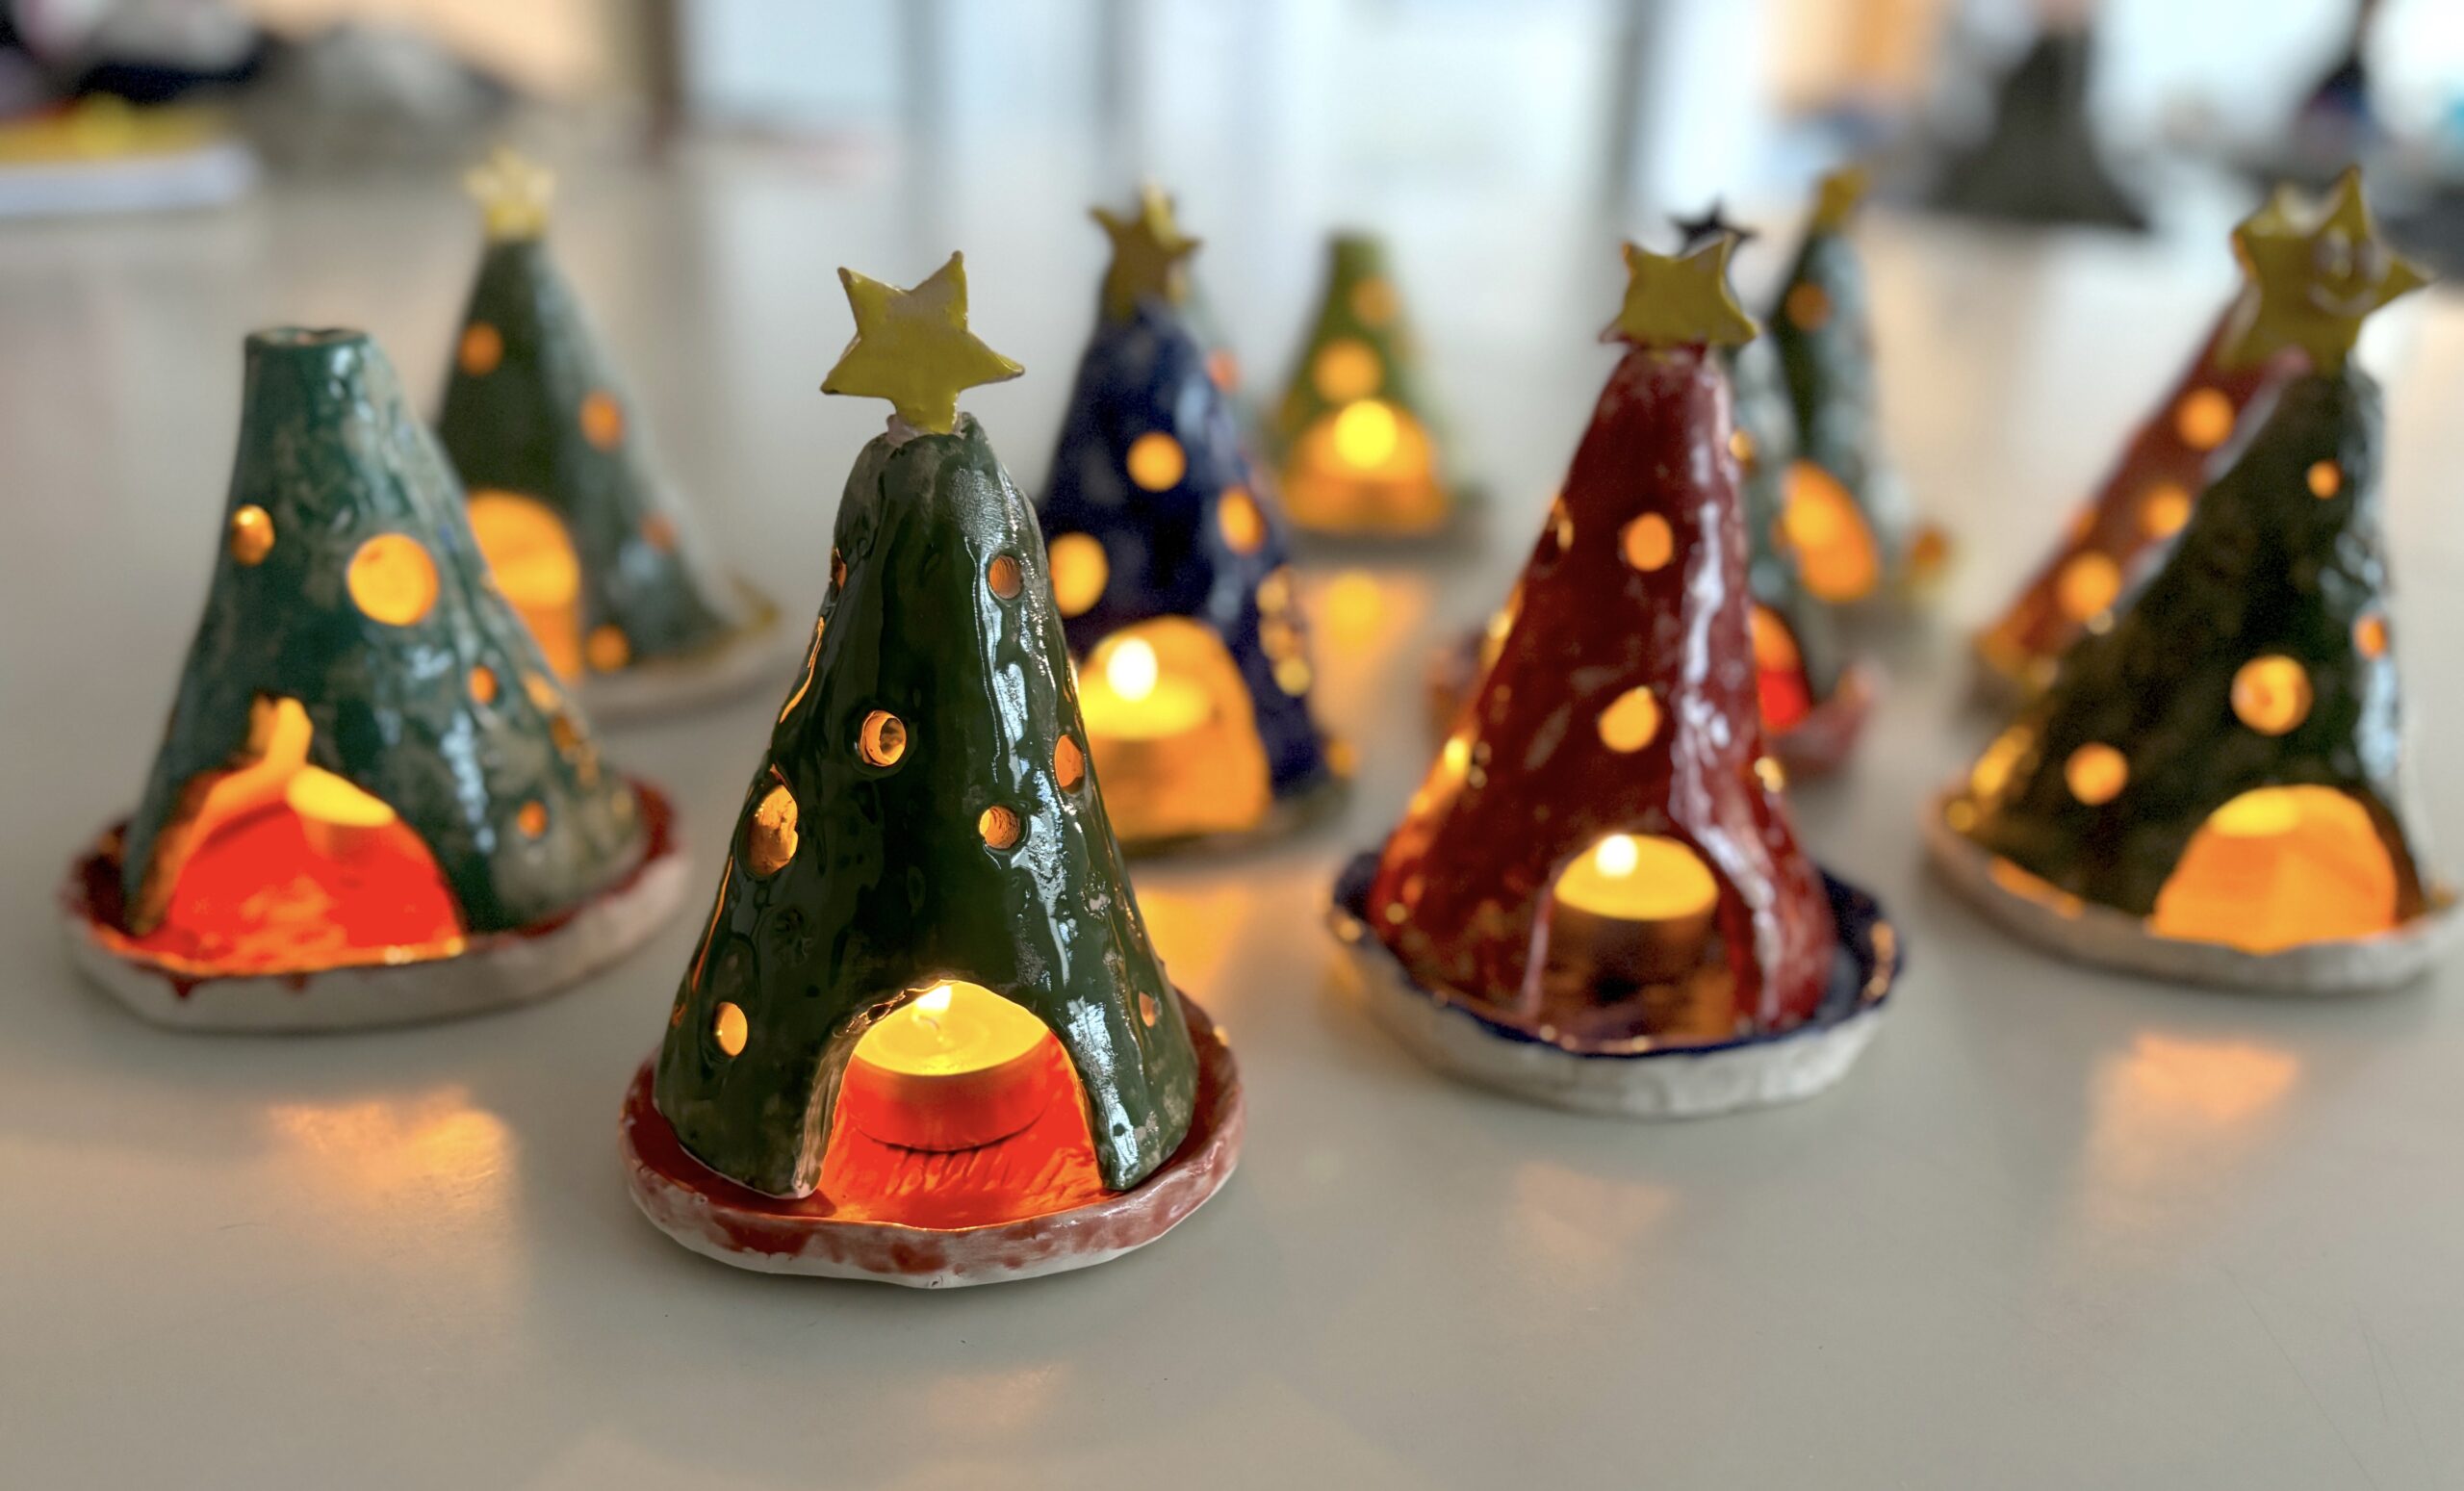
After the first firing, the pieces were decorated with colored glazes and the second firing was carried out:

Here are the pieces after the second firing, ready to create a perfect Christmas atmosphere!