This year, in the basic ceramics course organized for 6th-grade classes, we explored the slab technique, focusing on creating three-dimensional textures on clay. We decided to make large, personalized capital letters, perfect for hanging in a bedroom or on a front door. Through this workshop, we developed manual skills, tactile perception, and competence in two-dimensional and three-dimensional design, while learning how to manage drying times and the transformations of ceramic materials.
Materials Needed:
- Clay
- Rolling pin and 8 mm wooden slats (roller guides)
- Sheets of paper, pencils, and scissors for the template, or ready-made photocopies with letters
- Tools for engraving and impressing textures (stamps, loop tools, awls, small objects made of wood, plastic, or metal)
- Straw or hole punch tool for the holes
- Colored engobes (underglazes), sponge, and glossy transparent glaze
- Ceramic kiln
Step-by-Step Process
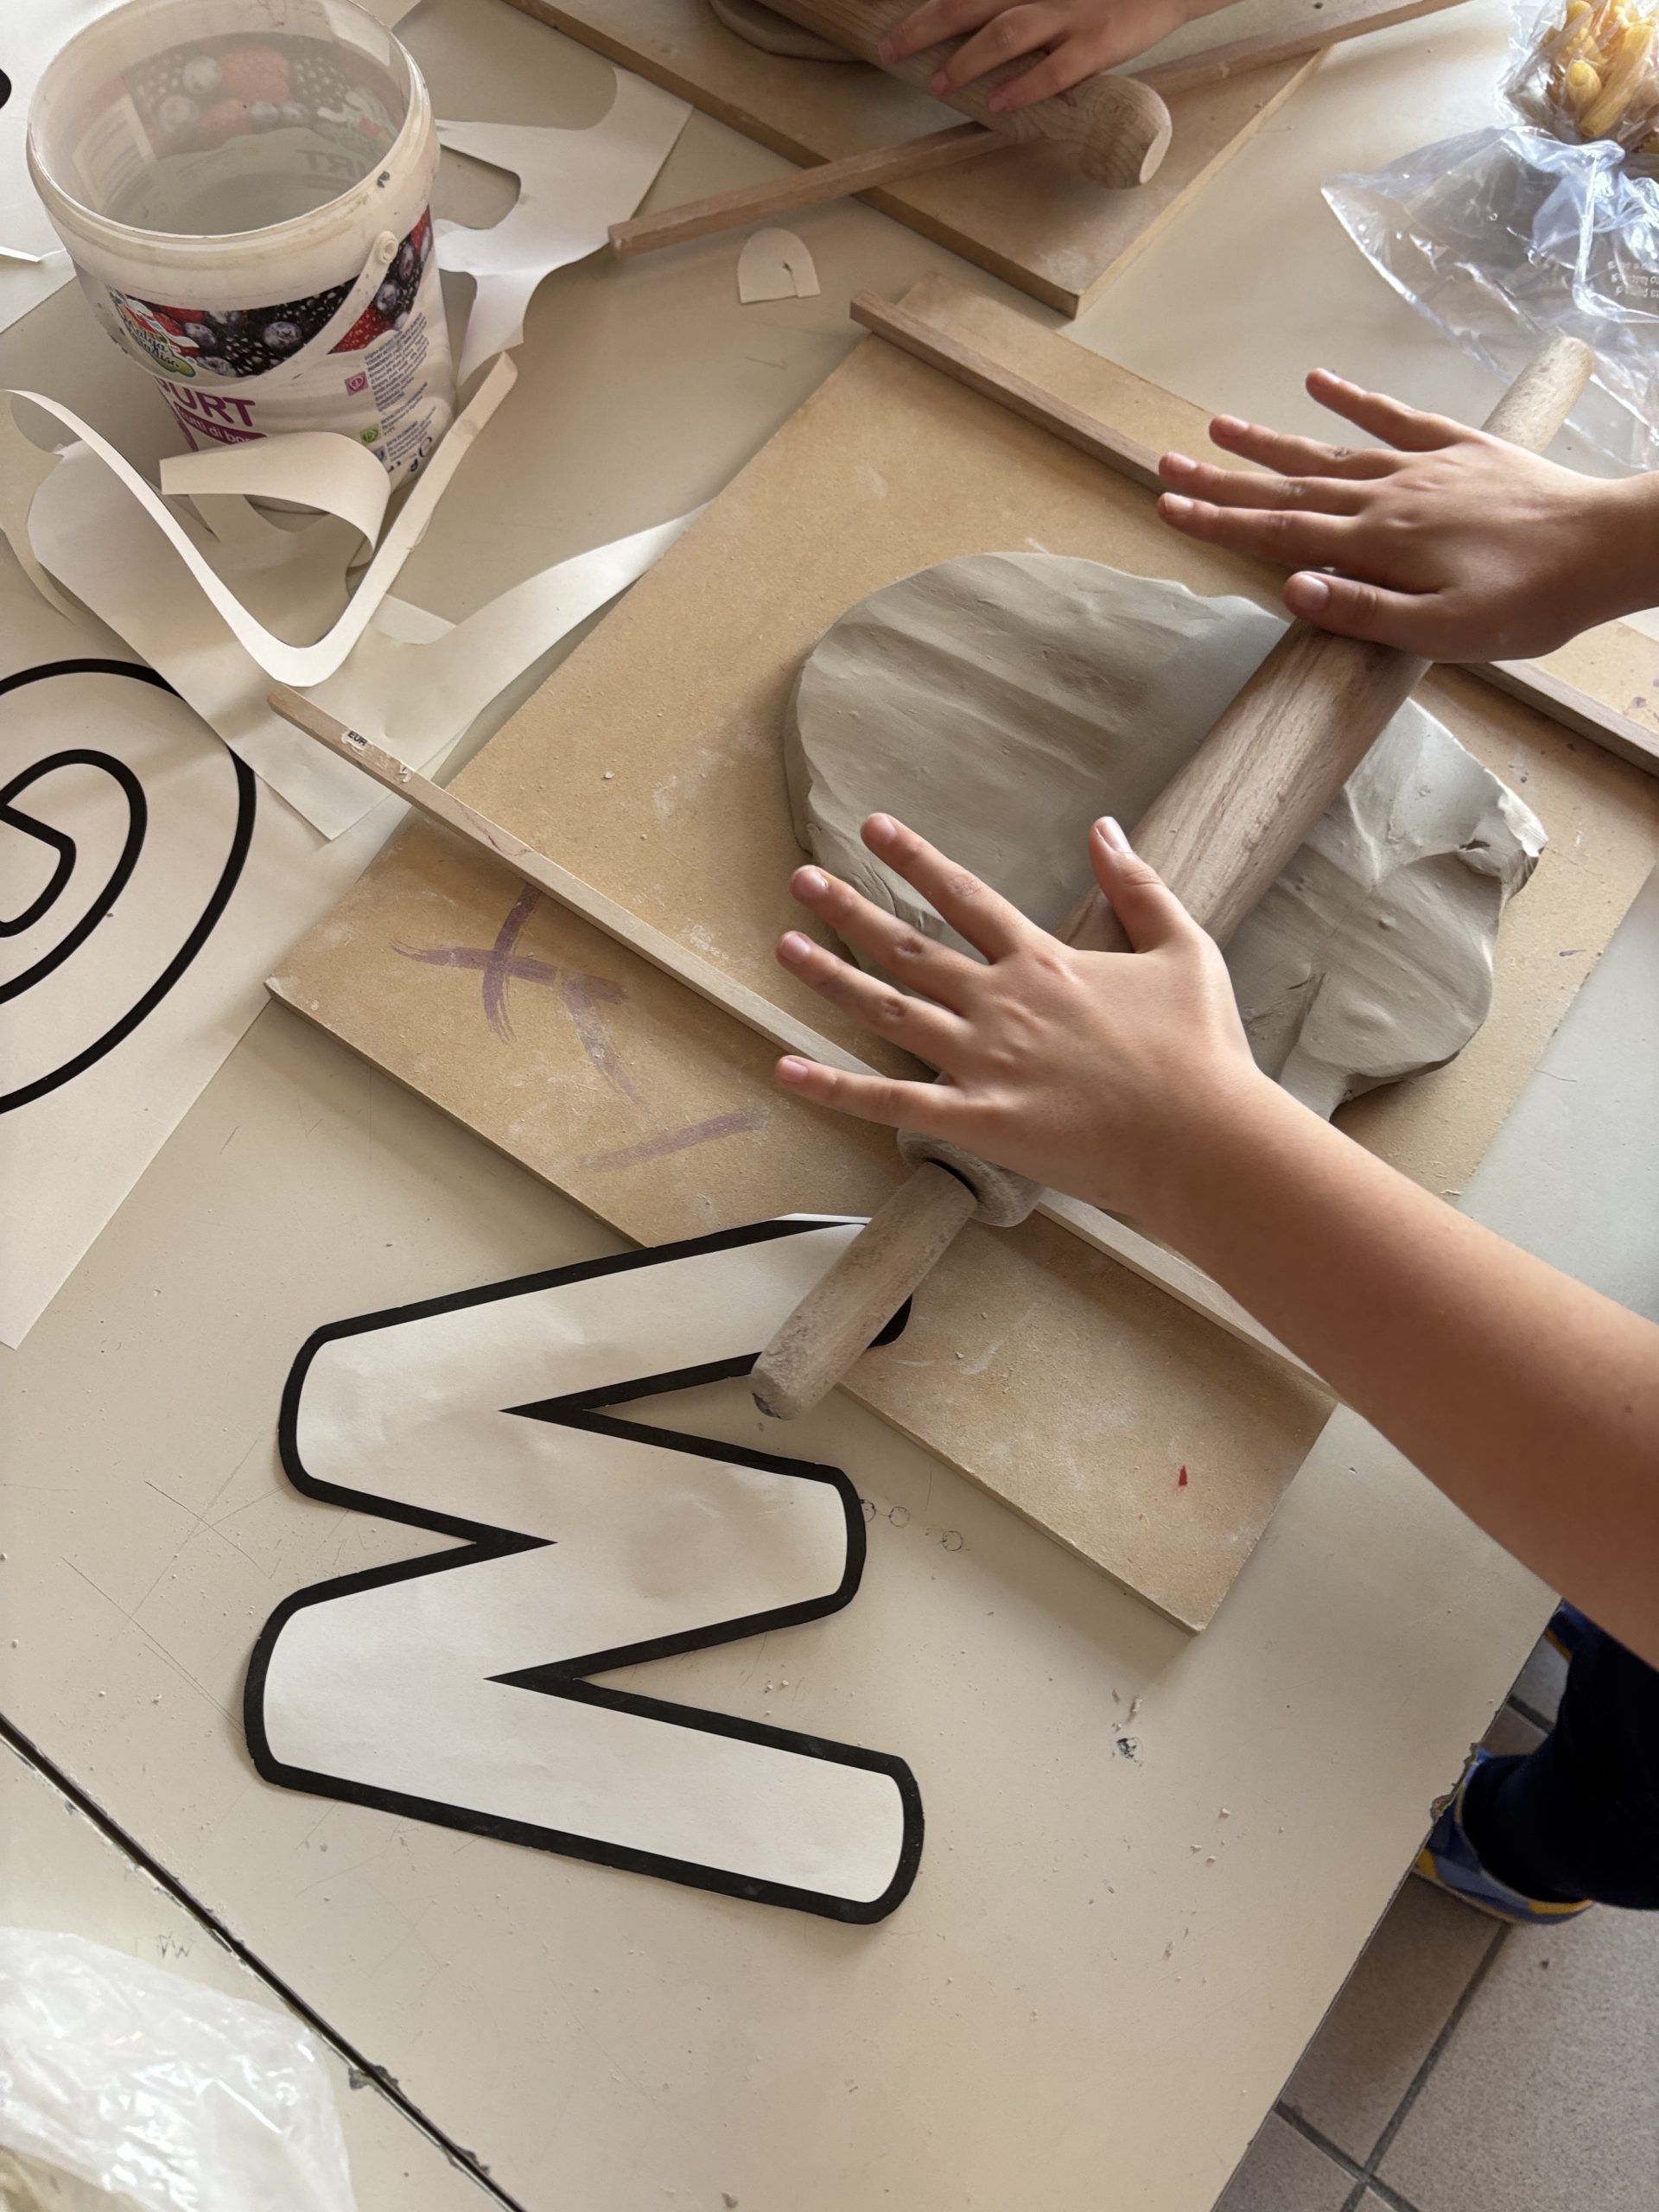
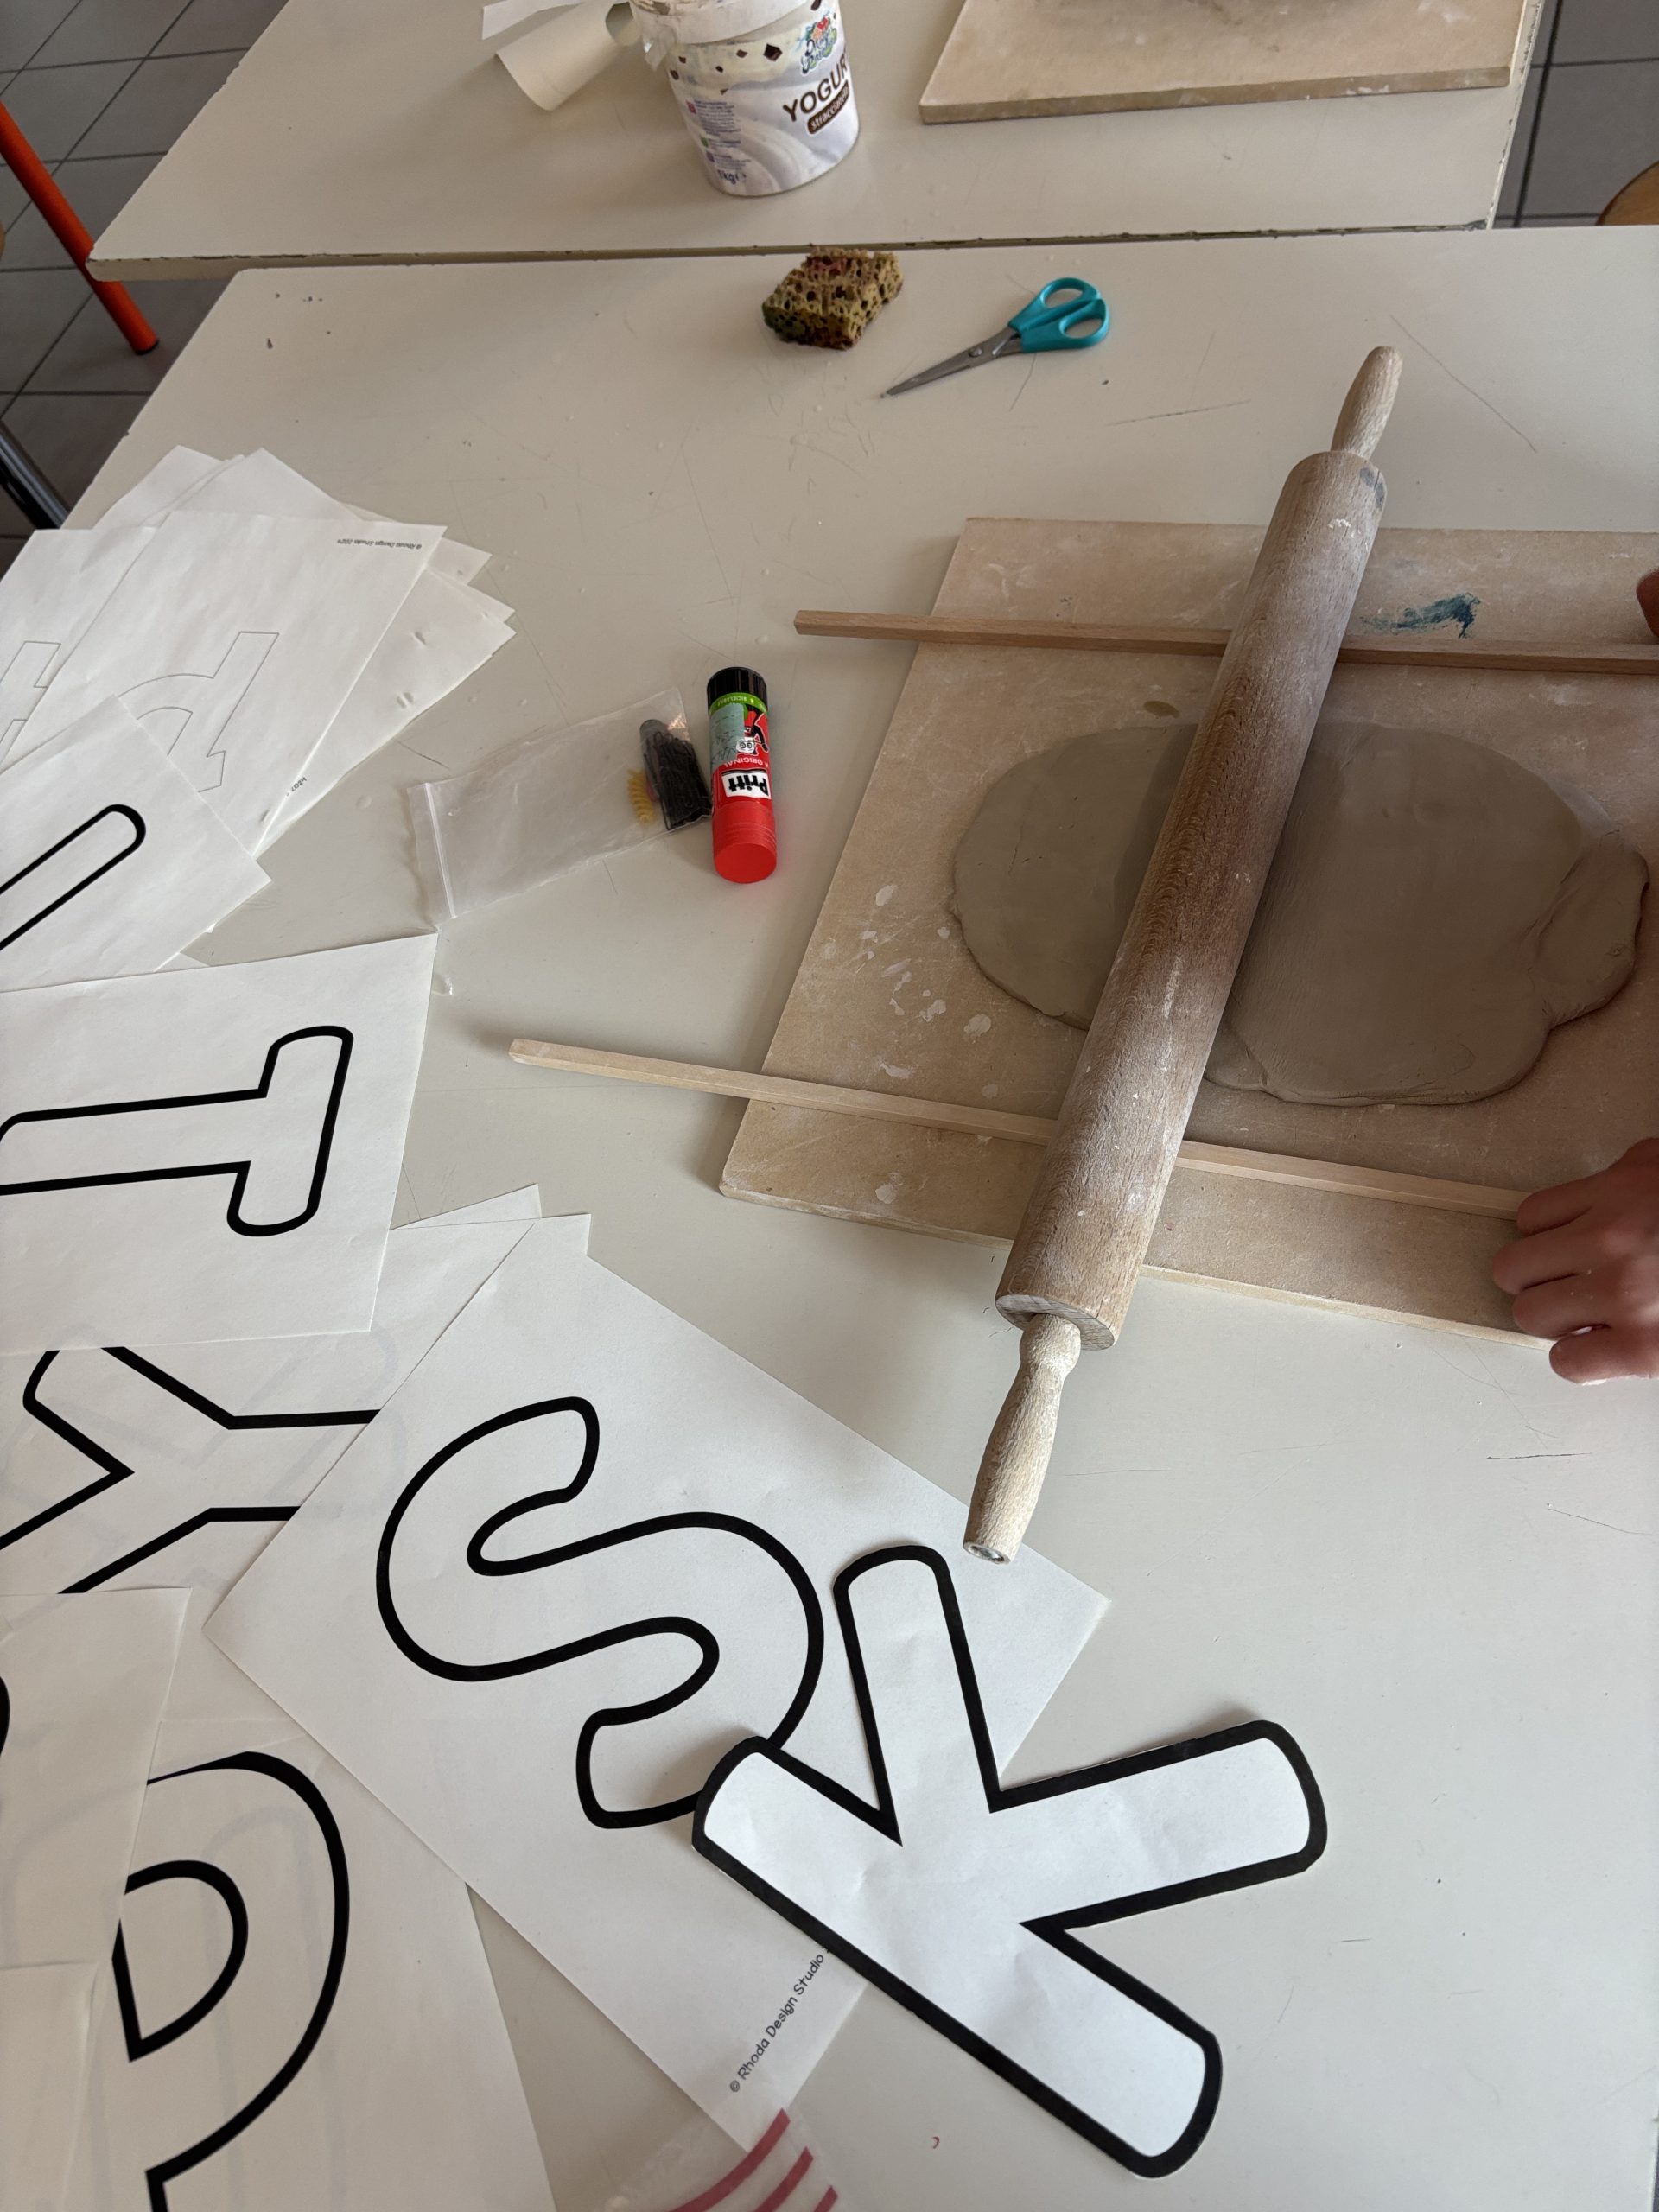
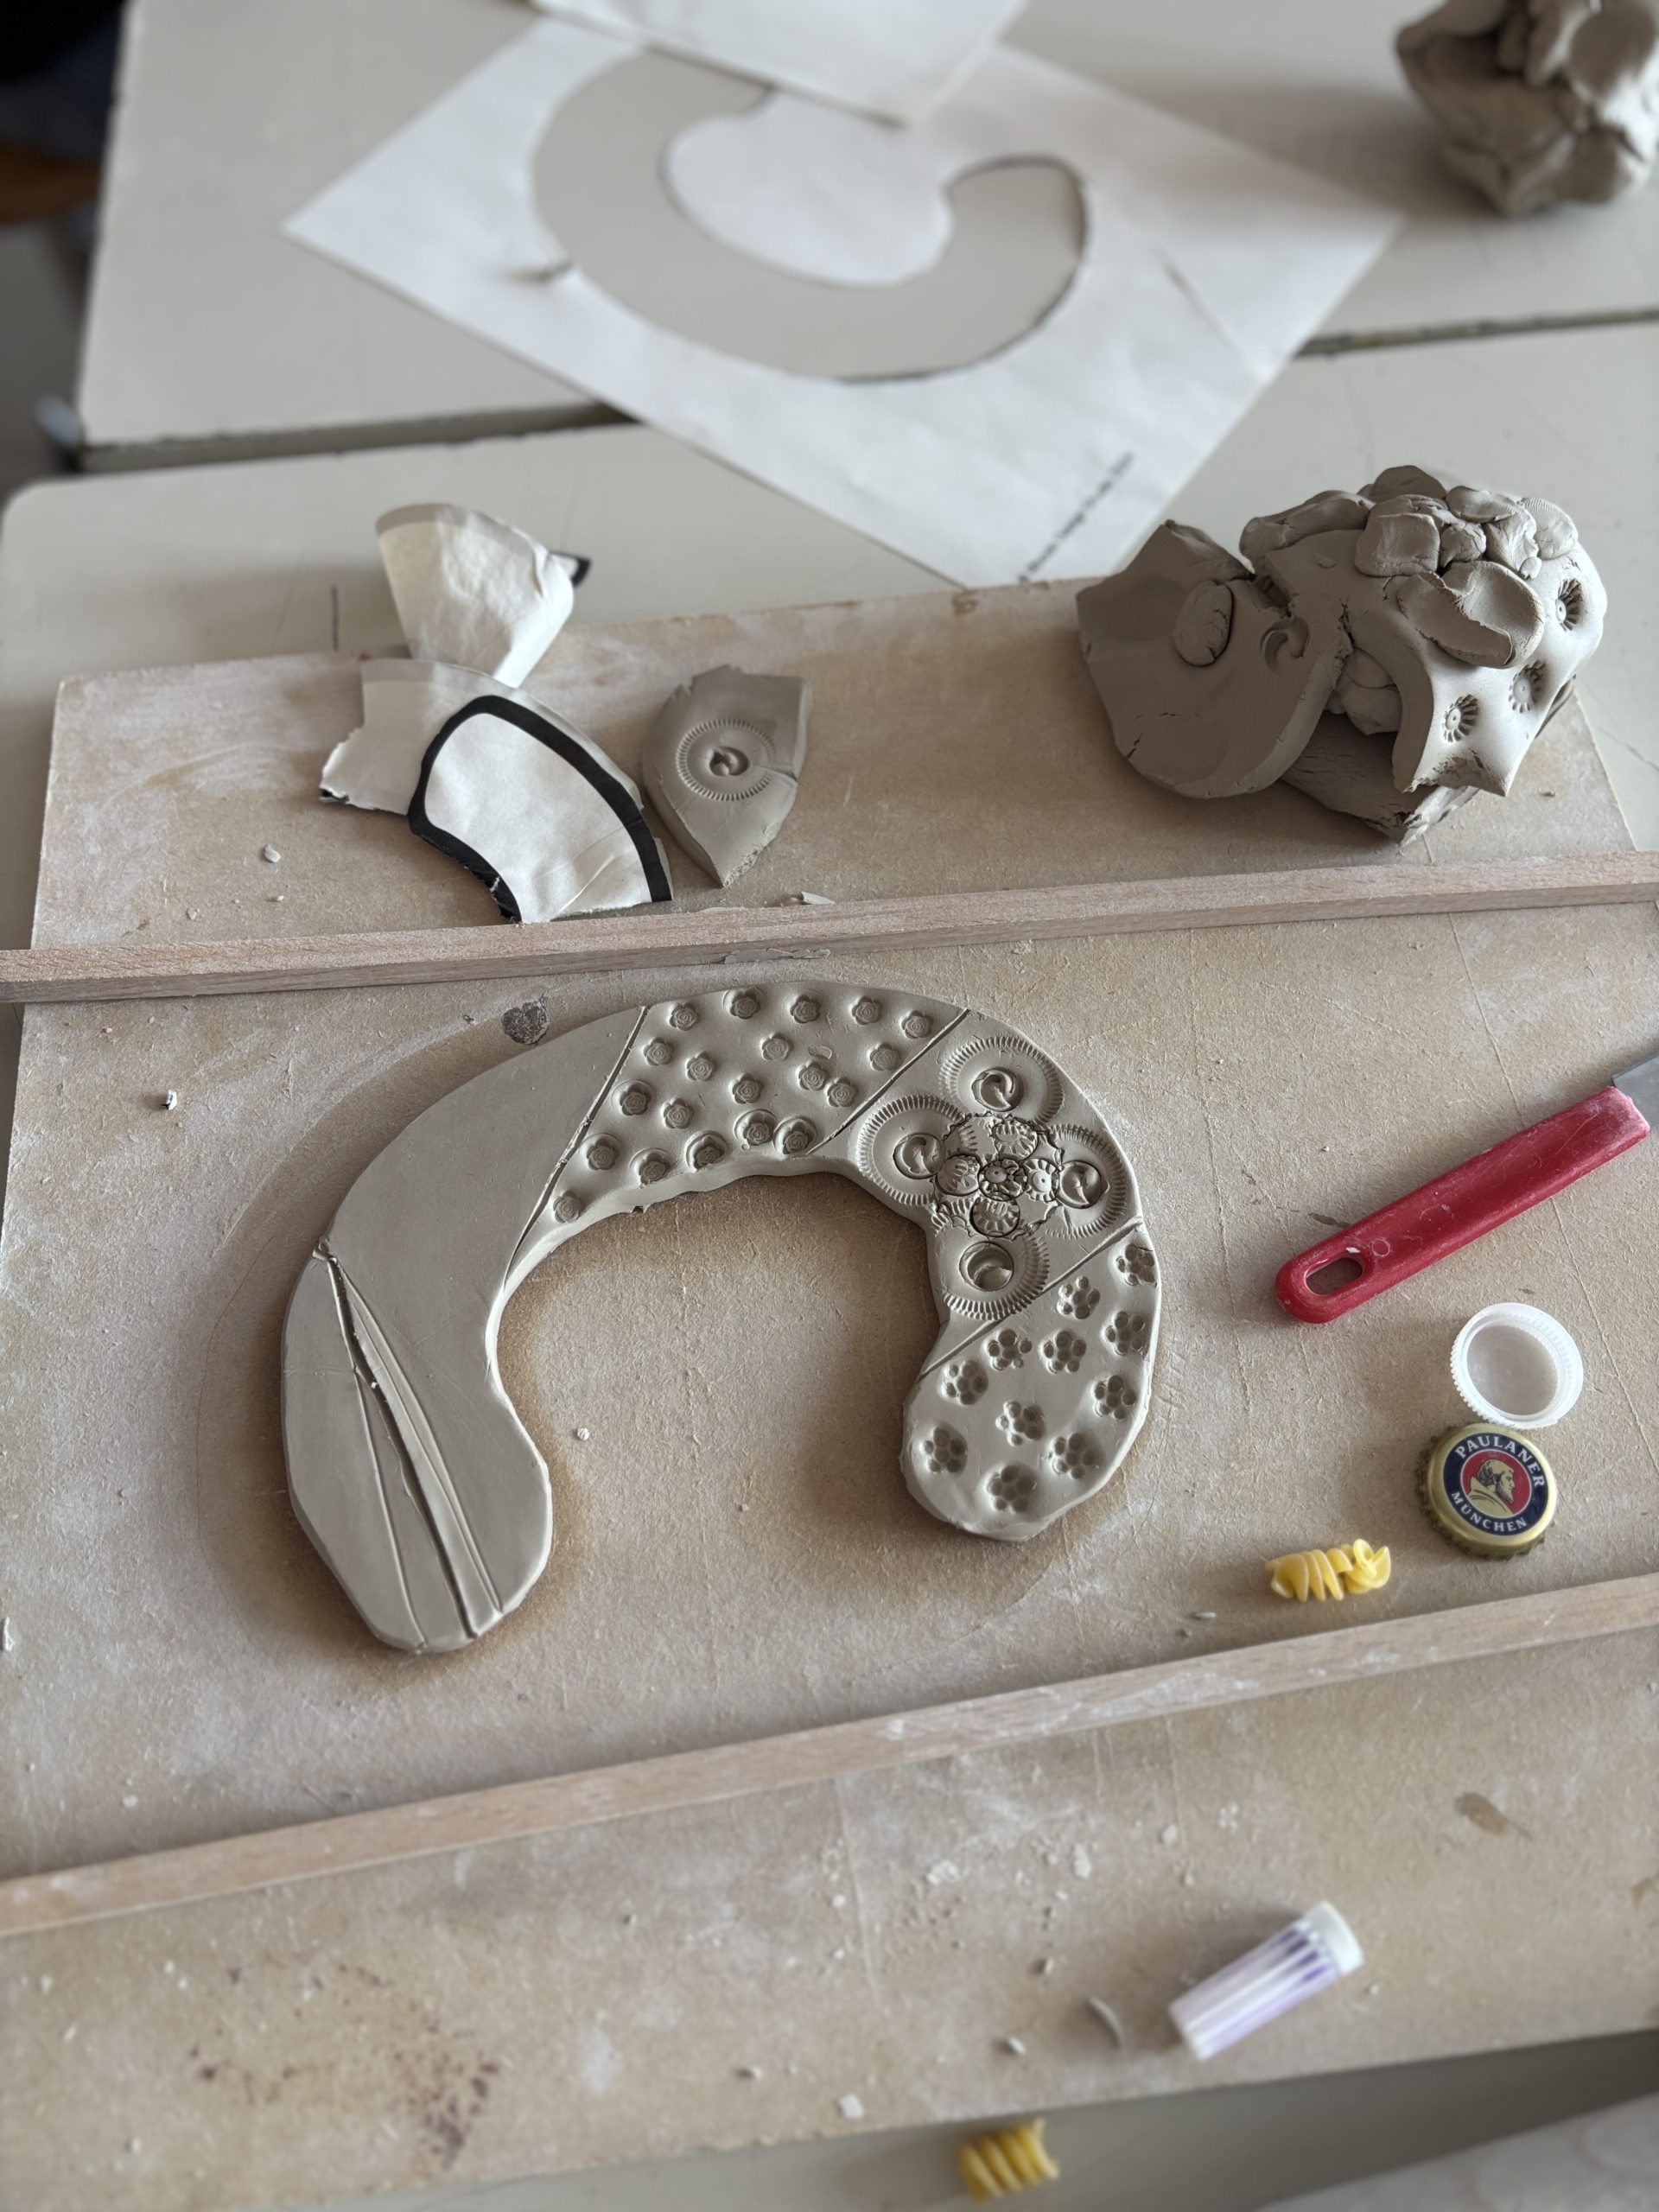
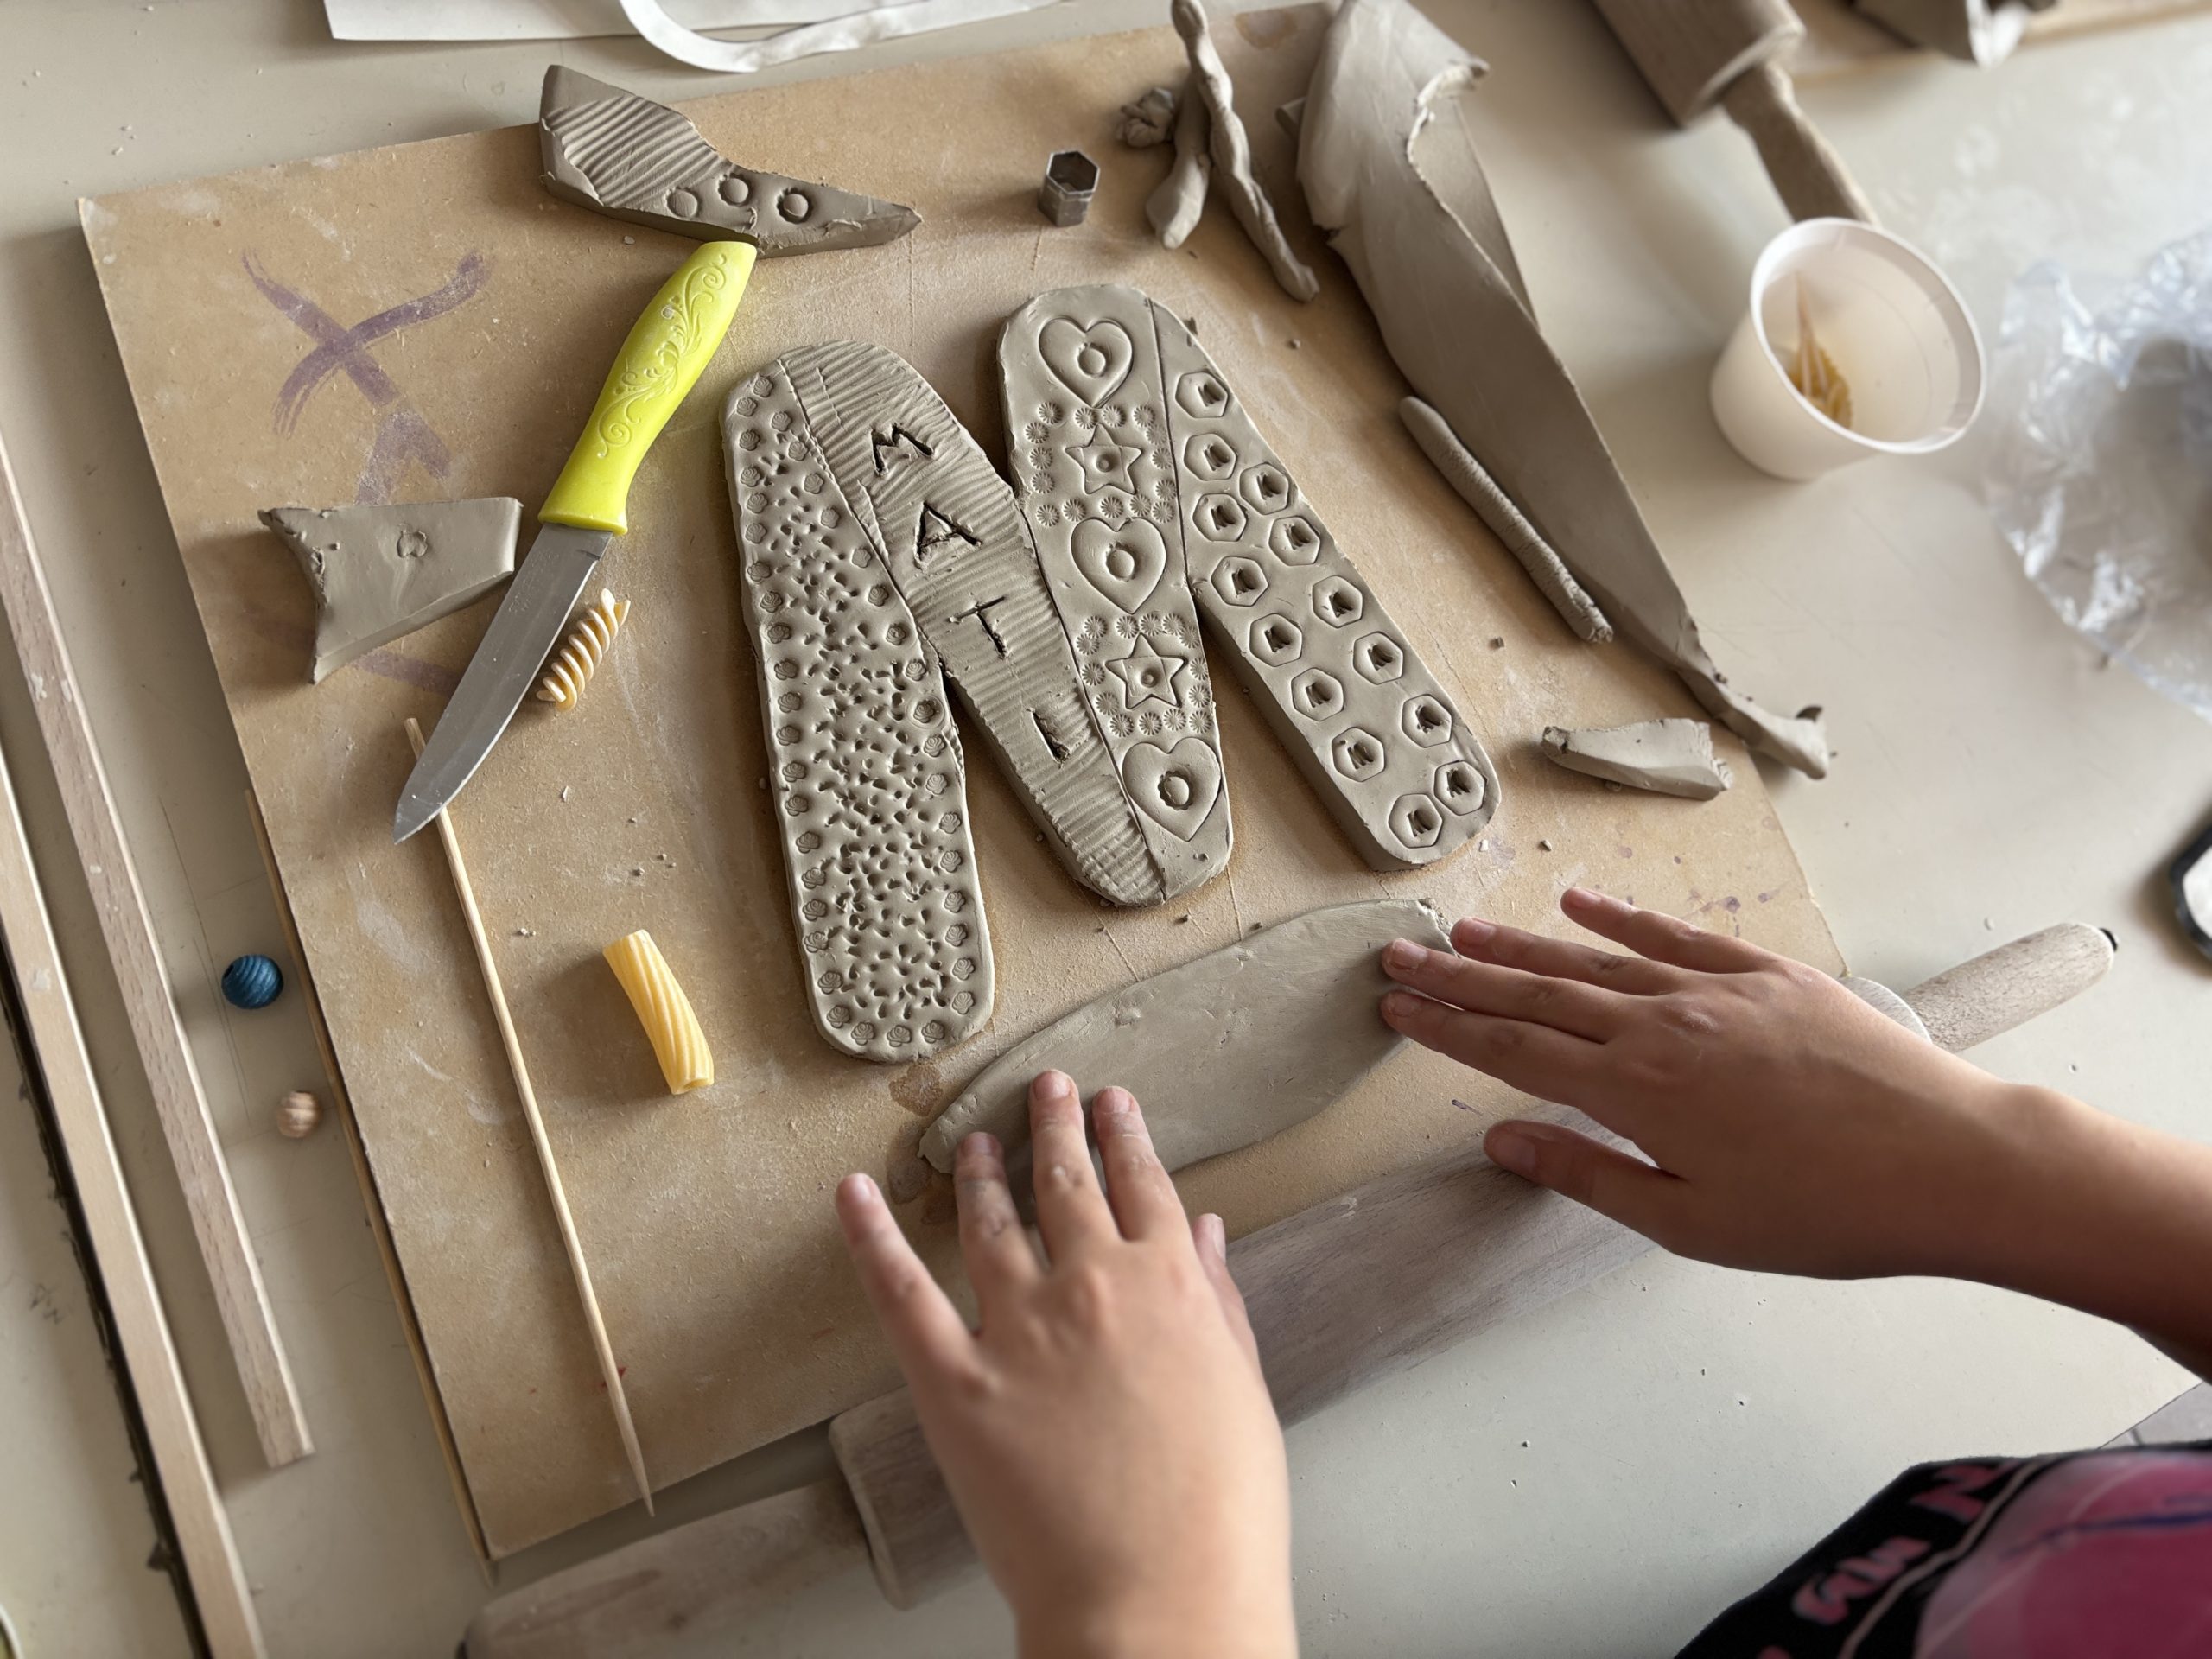
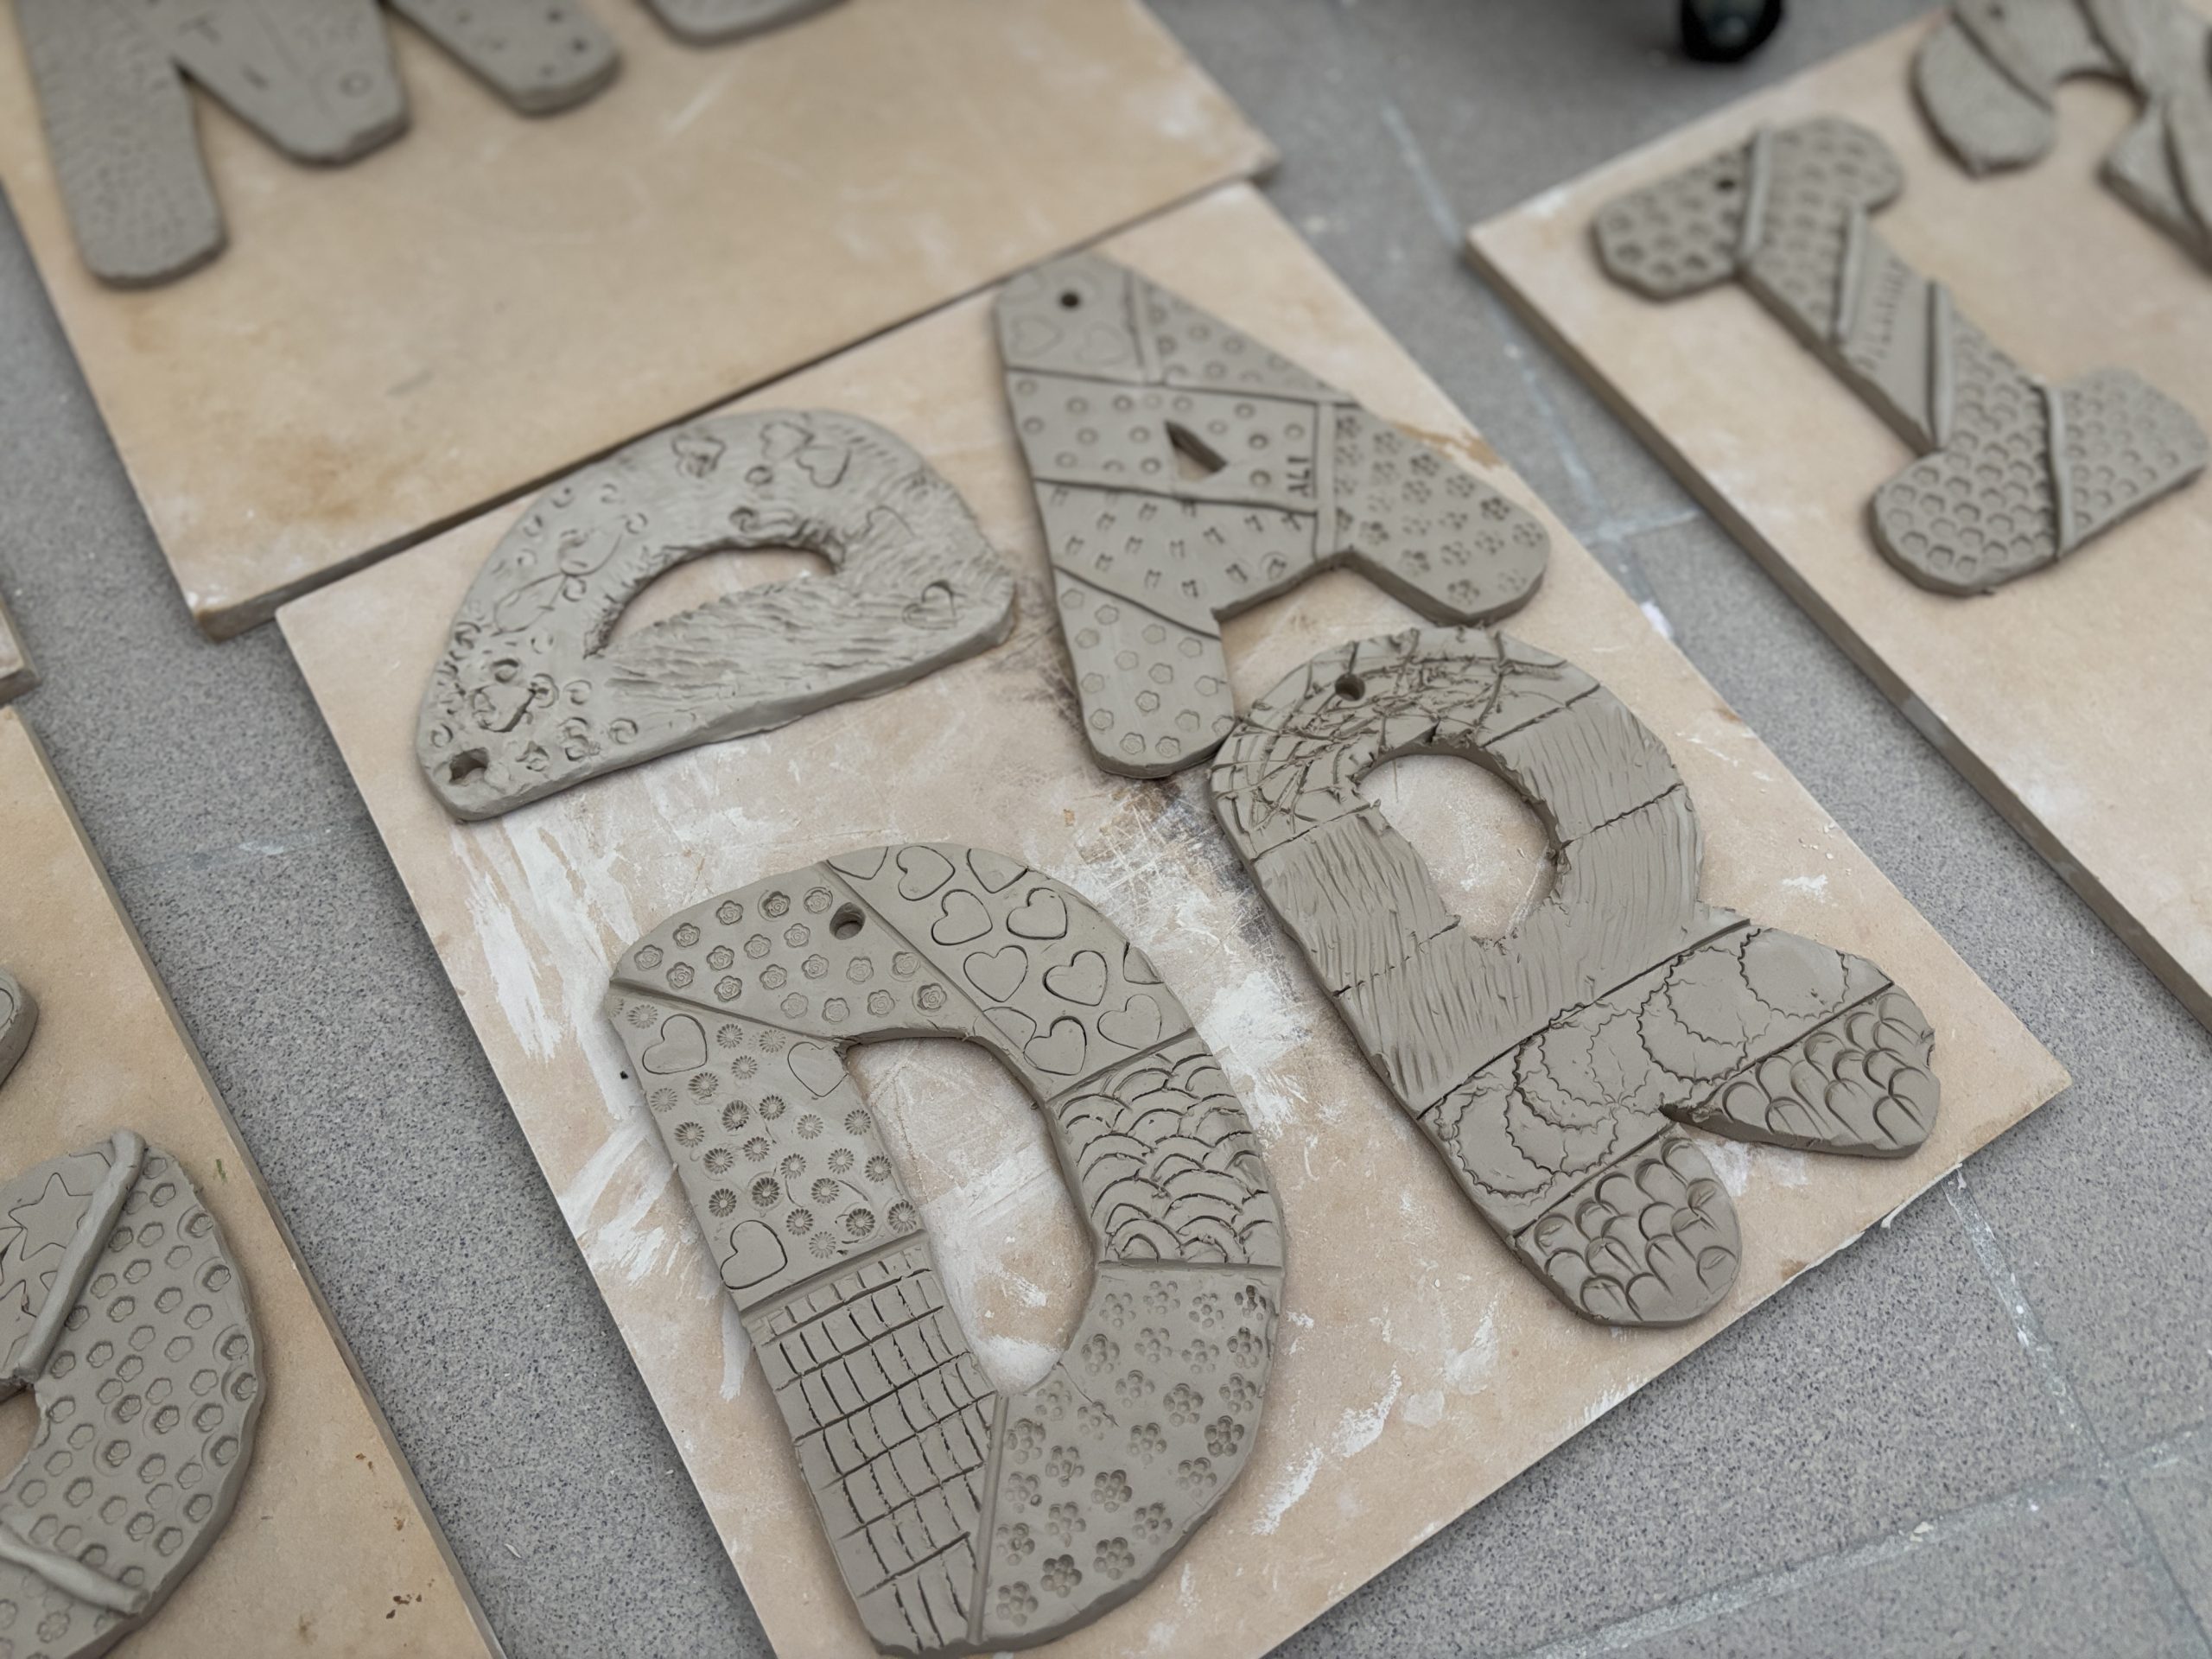
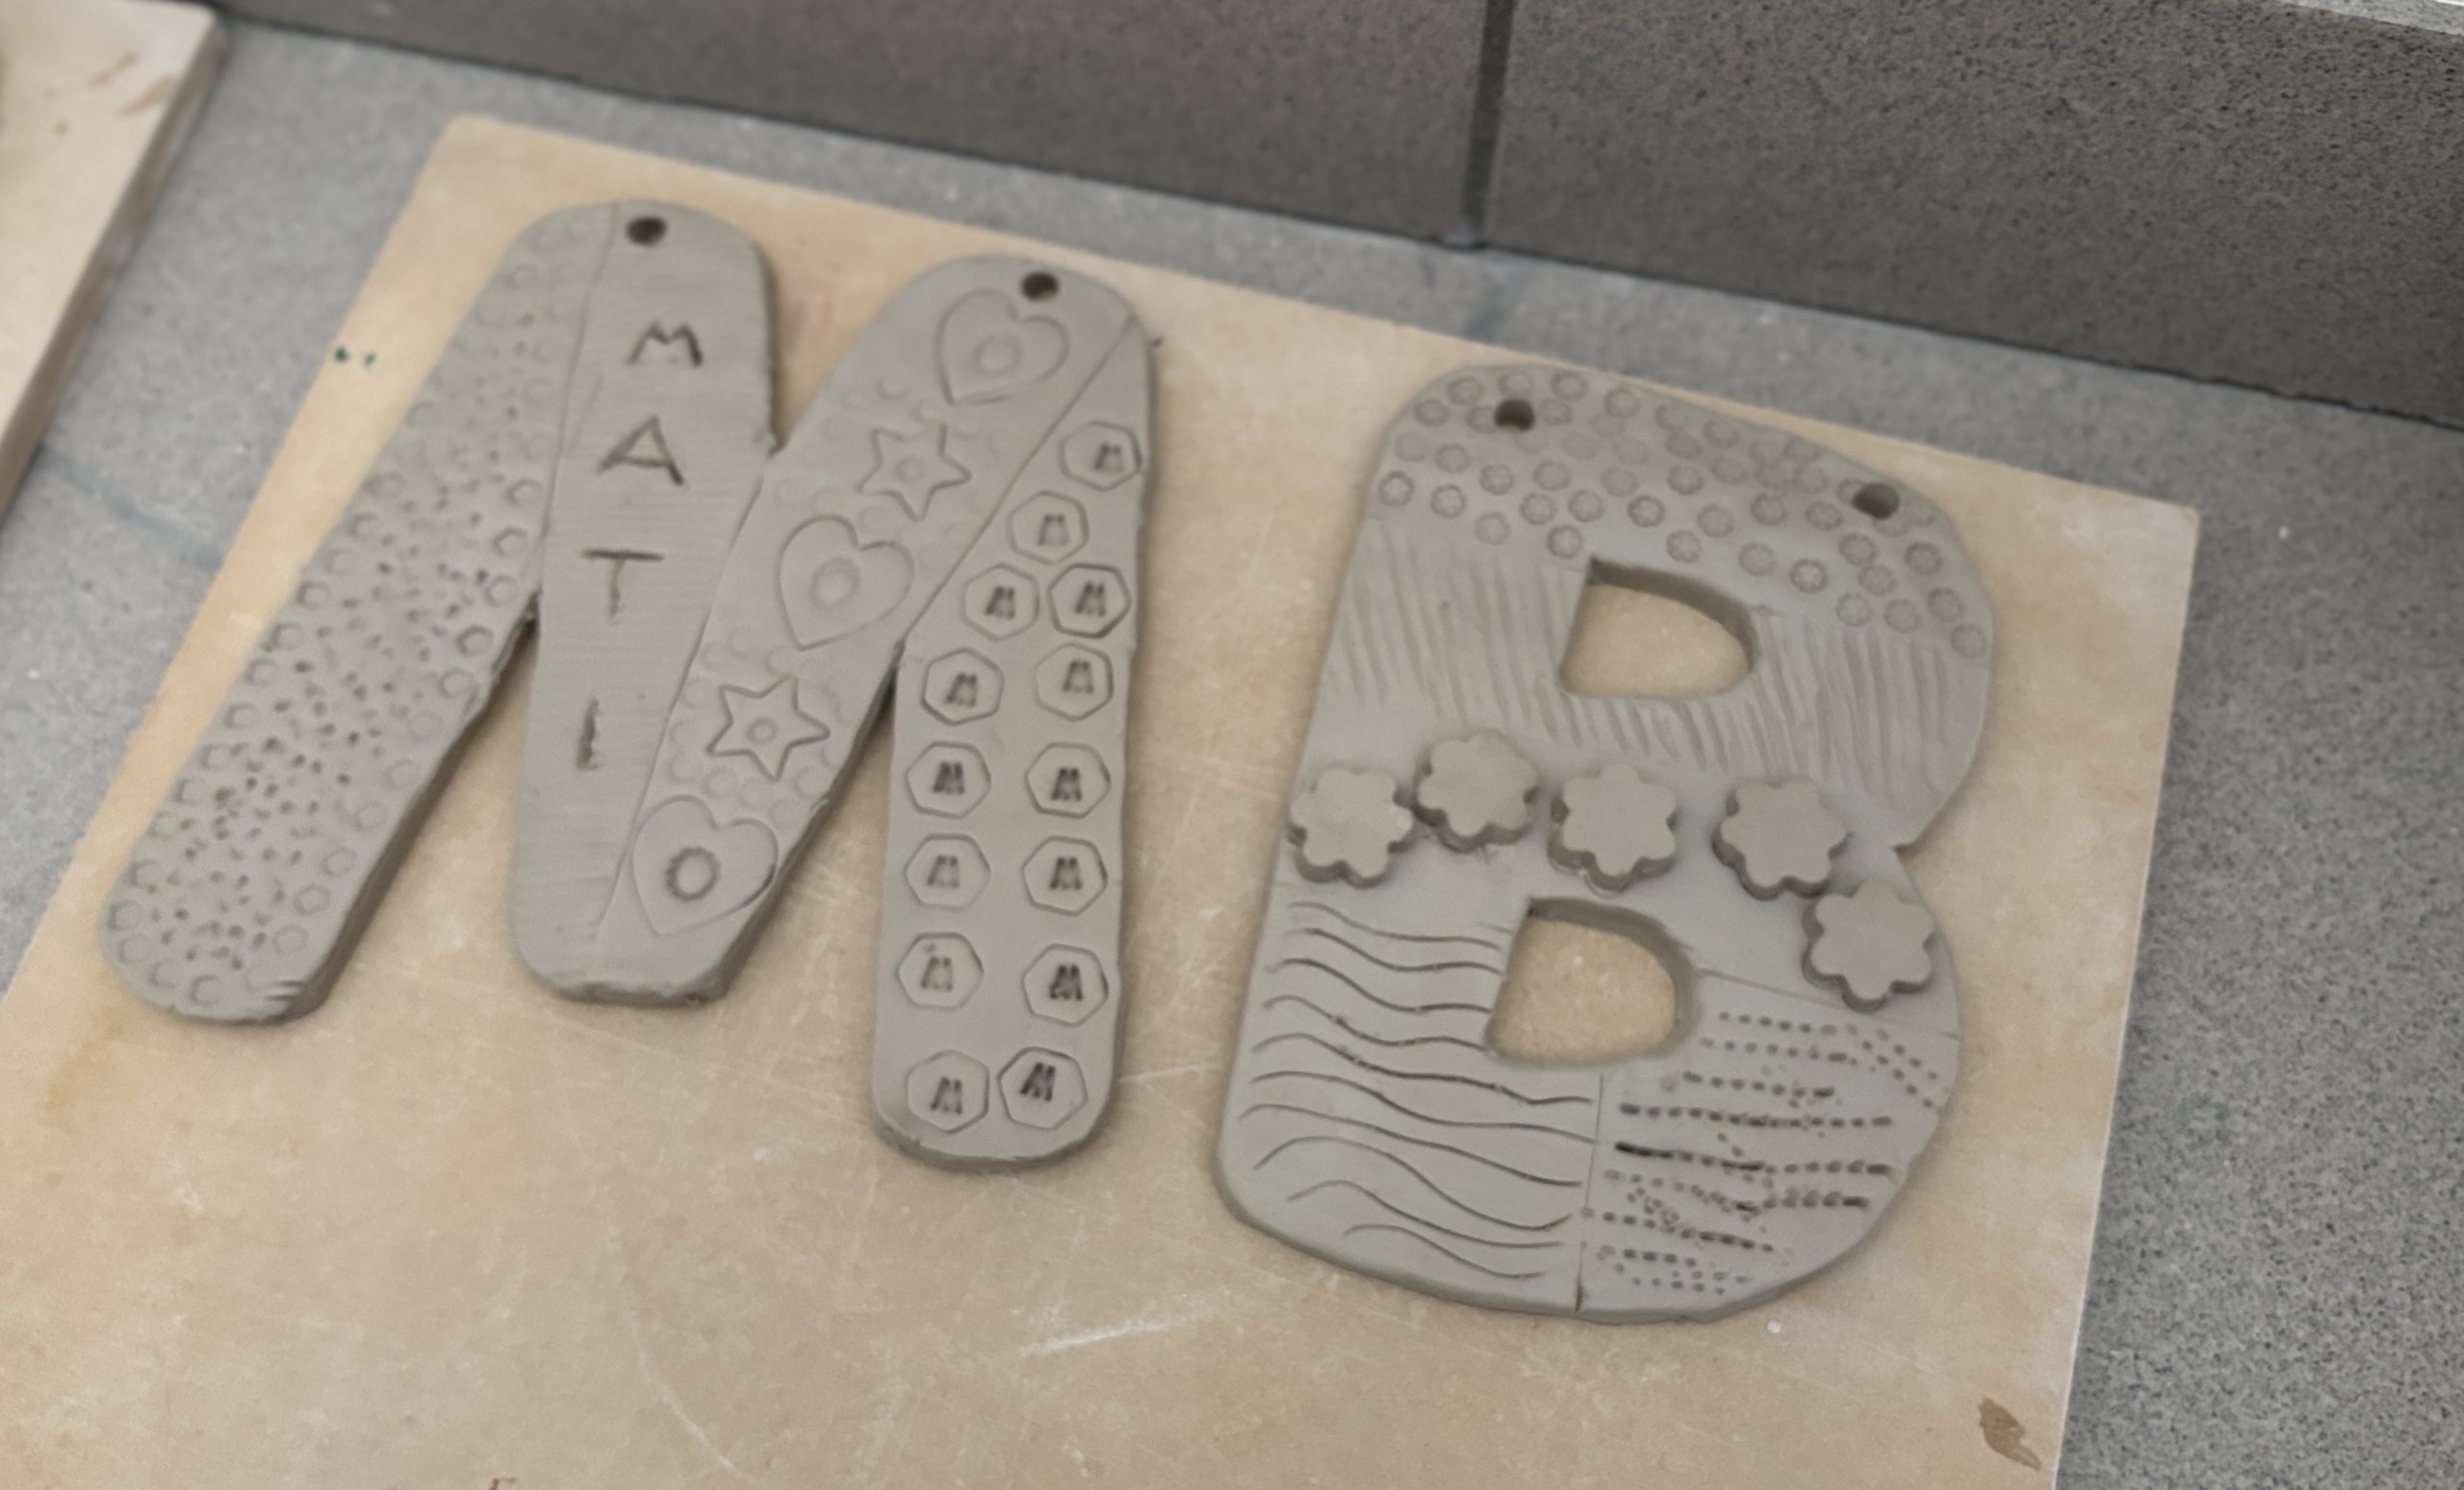
To begin our project, each student created the template for the initial letter of their name, either drawing it freehand on a sheet of paper or cutting it out from a photocopy to have a precise guide.
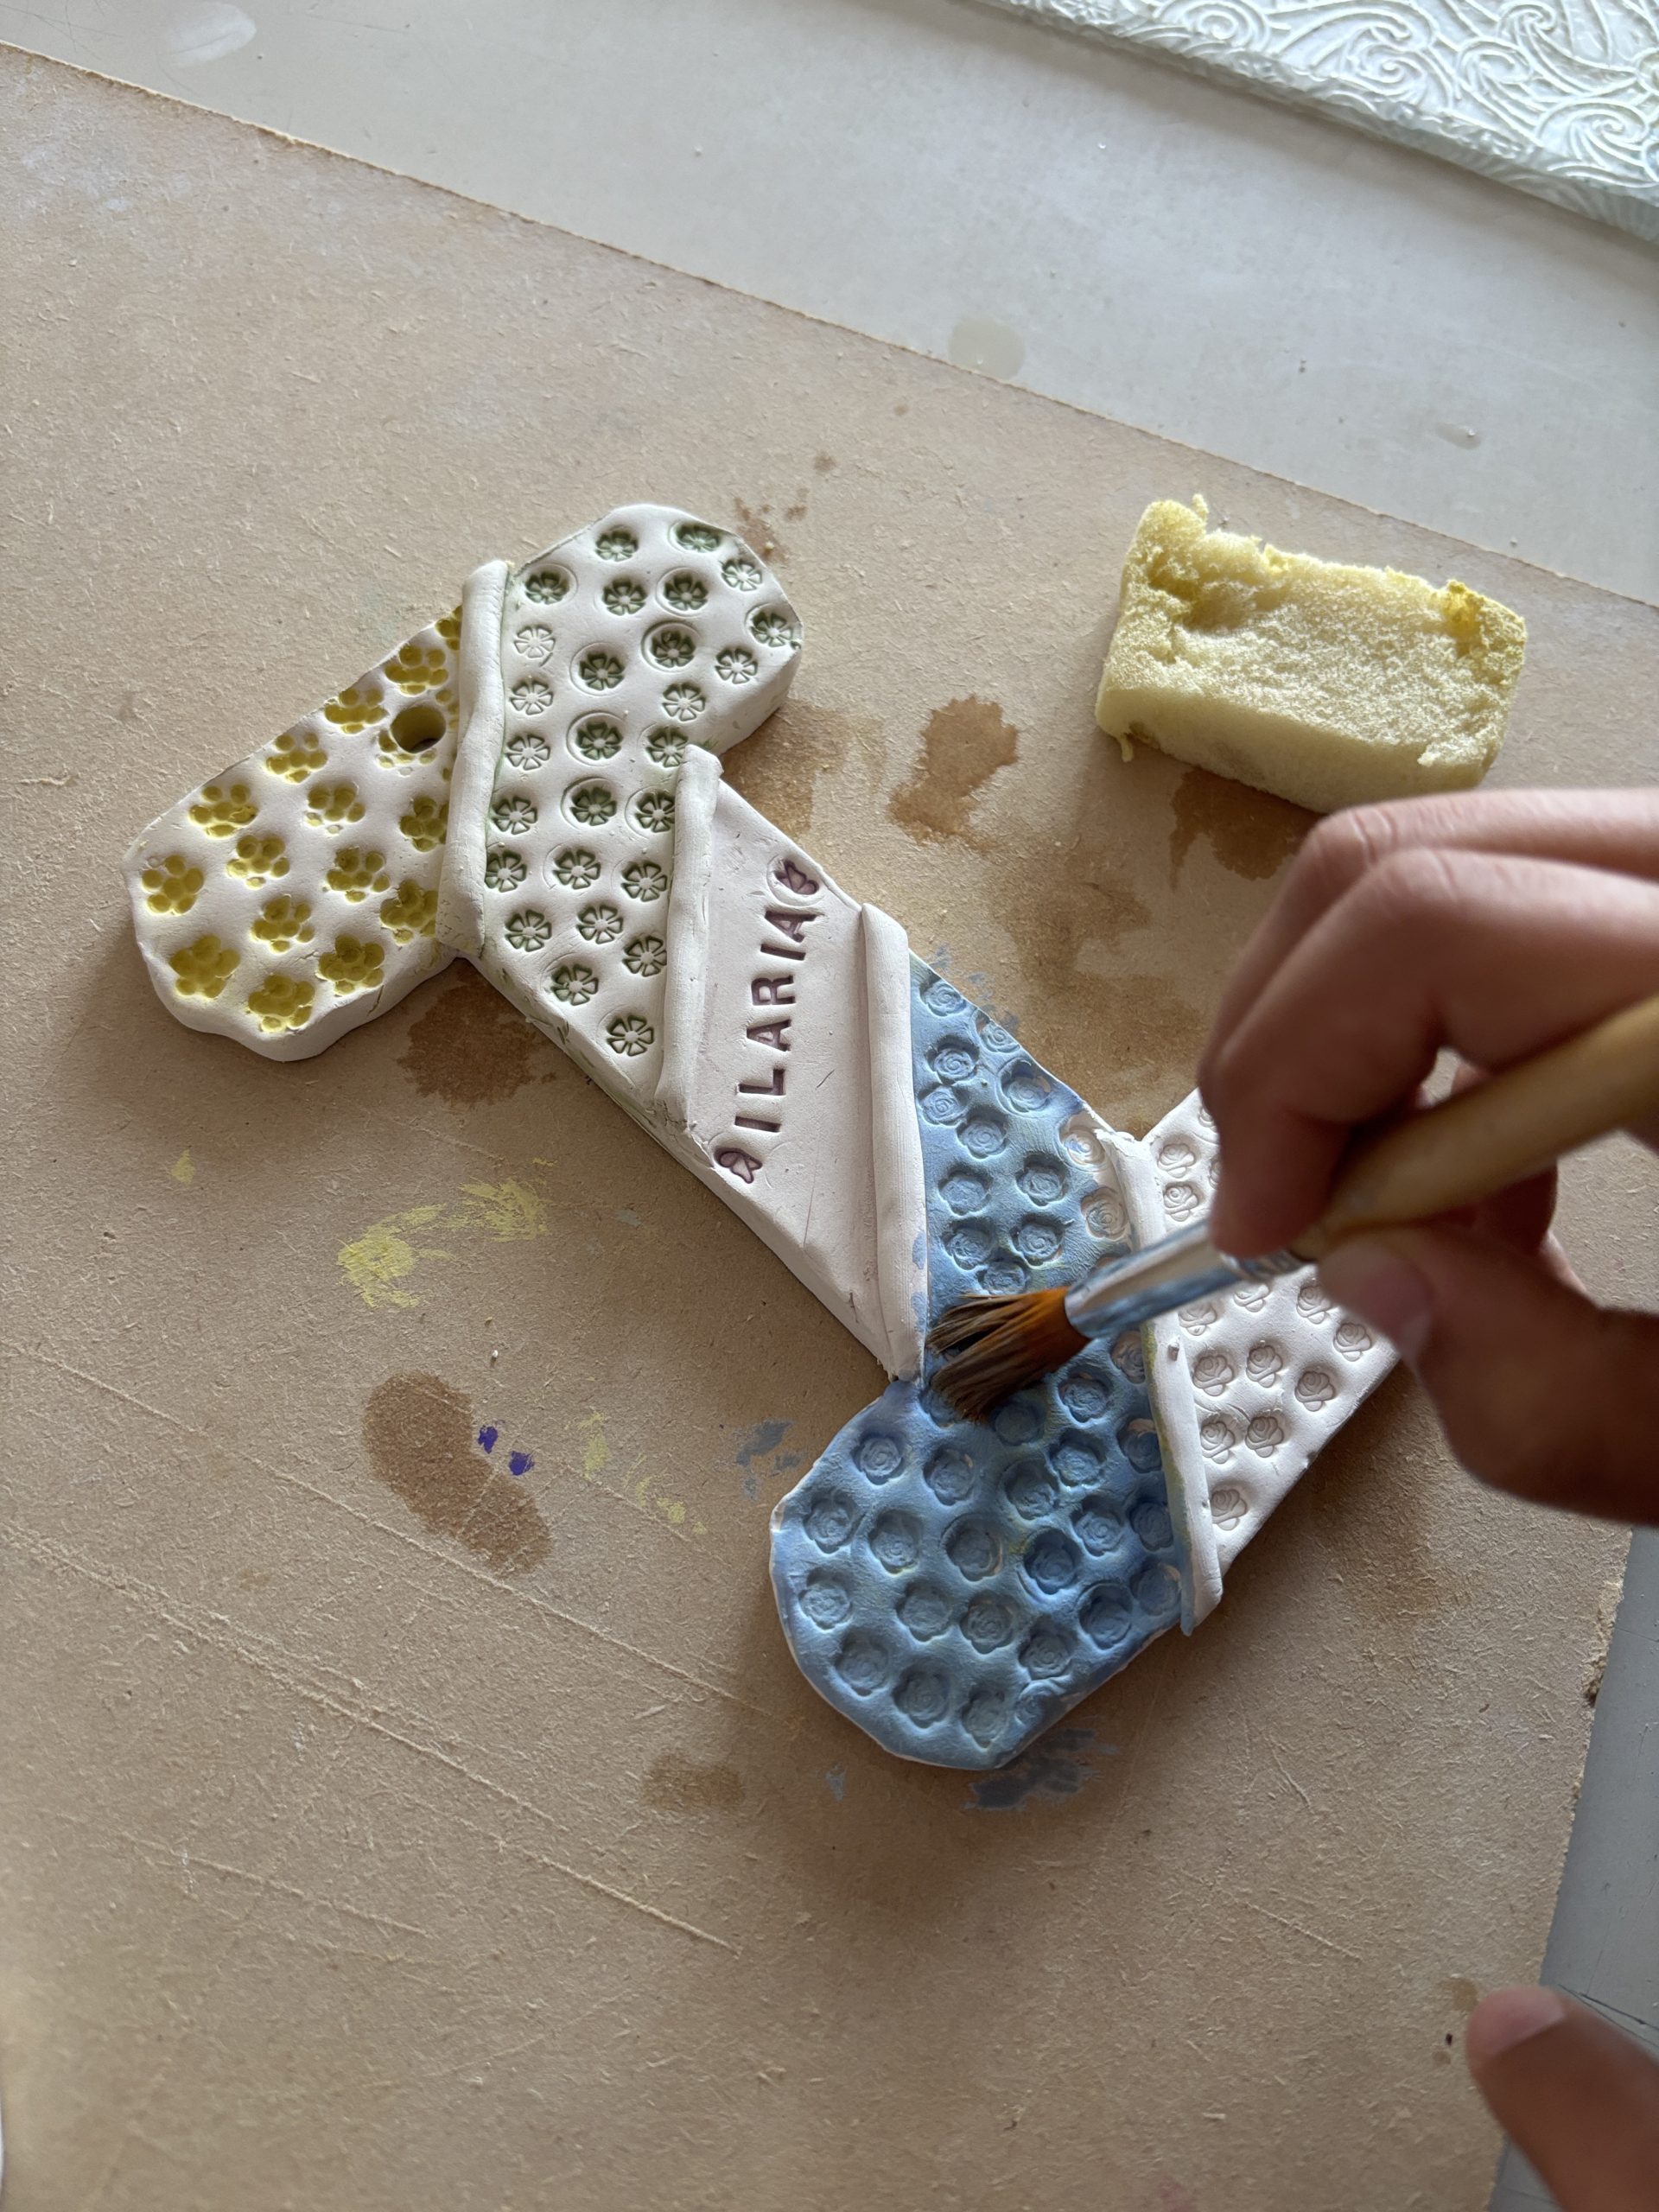
Next, we moved on to manipulating the clay. To obtain an even thickness, we rolled out the clay with a rolling pin using two 8 mm-high wooden guides on the sides. Once we obtained a smooth and regular slab, we placed our paper template on top and cut out the letter following the outlines.
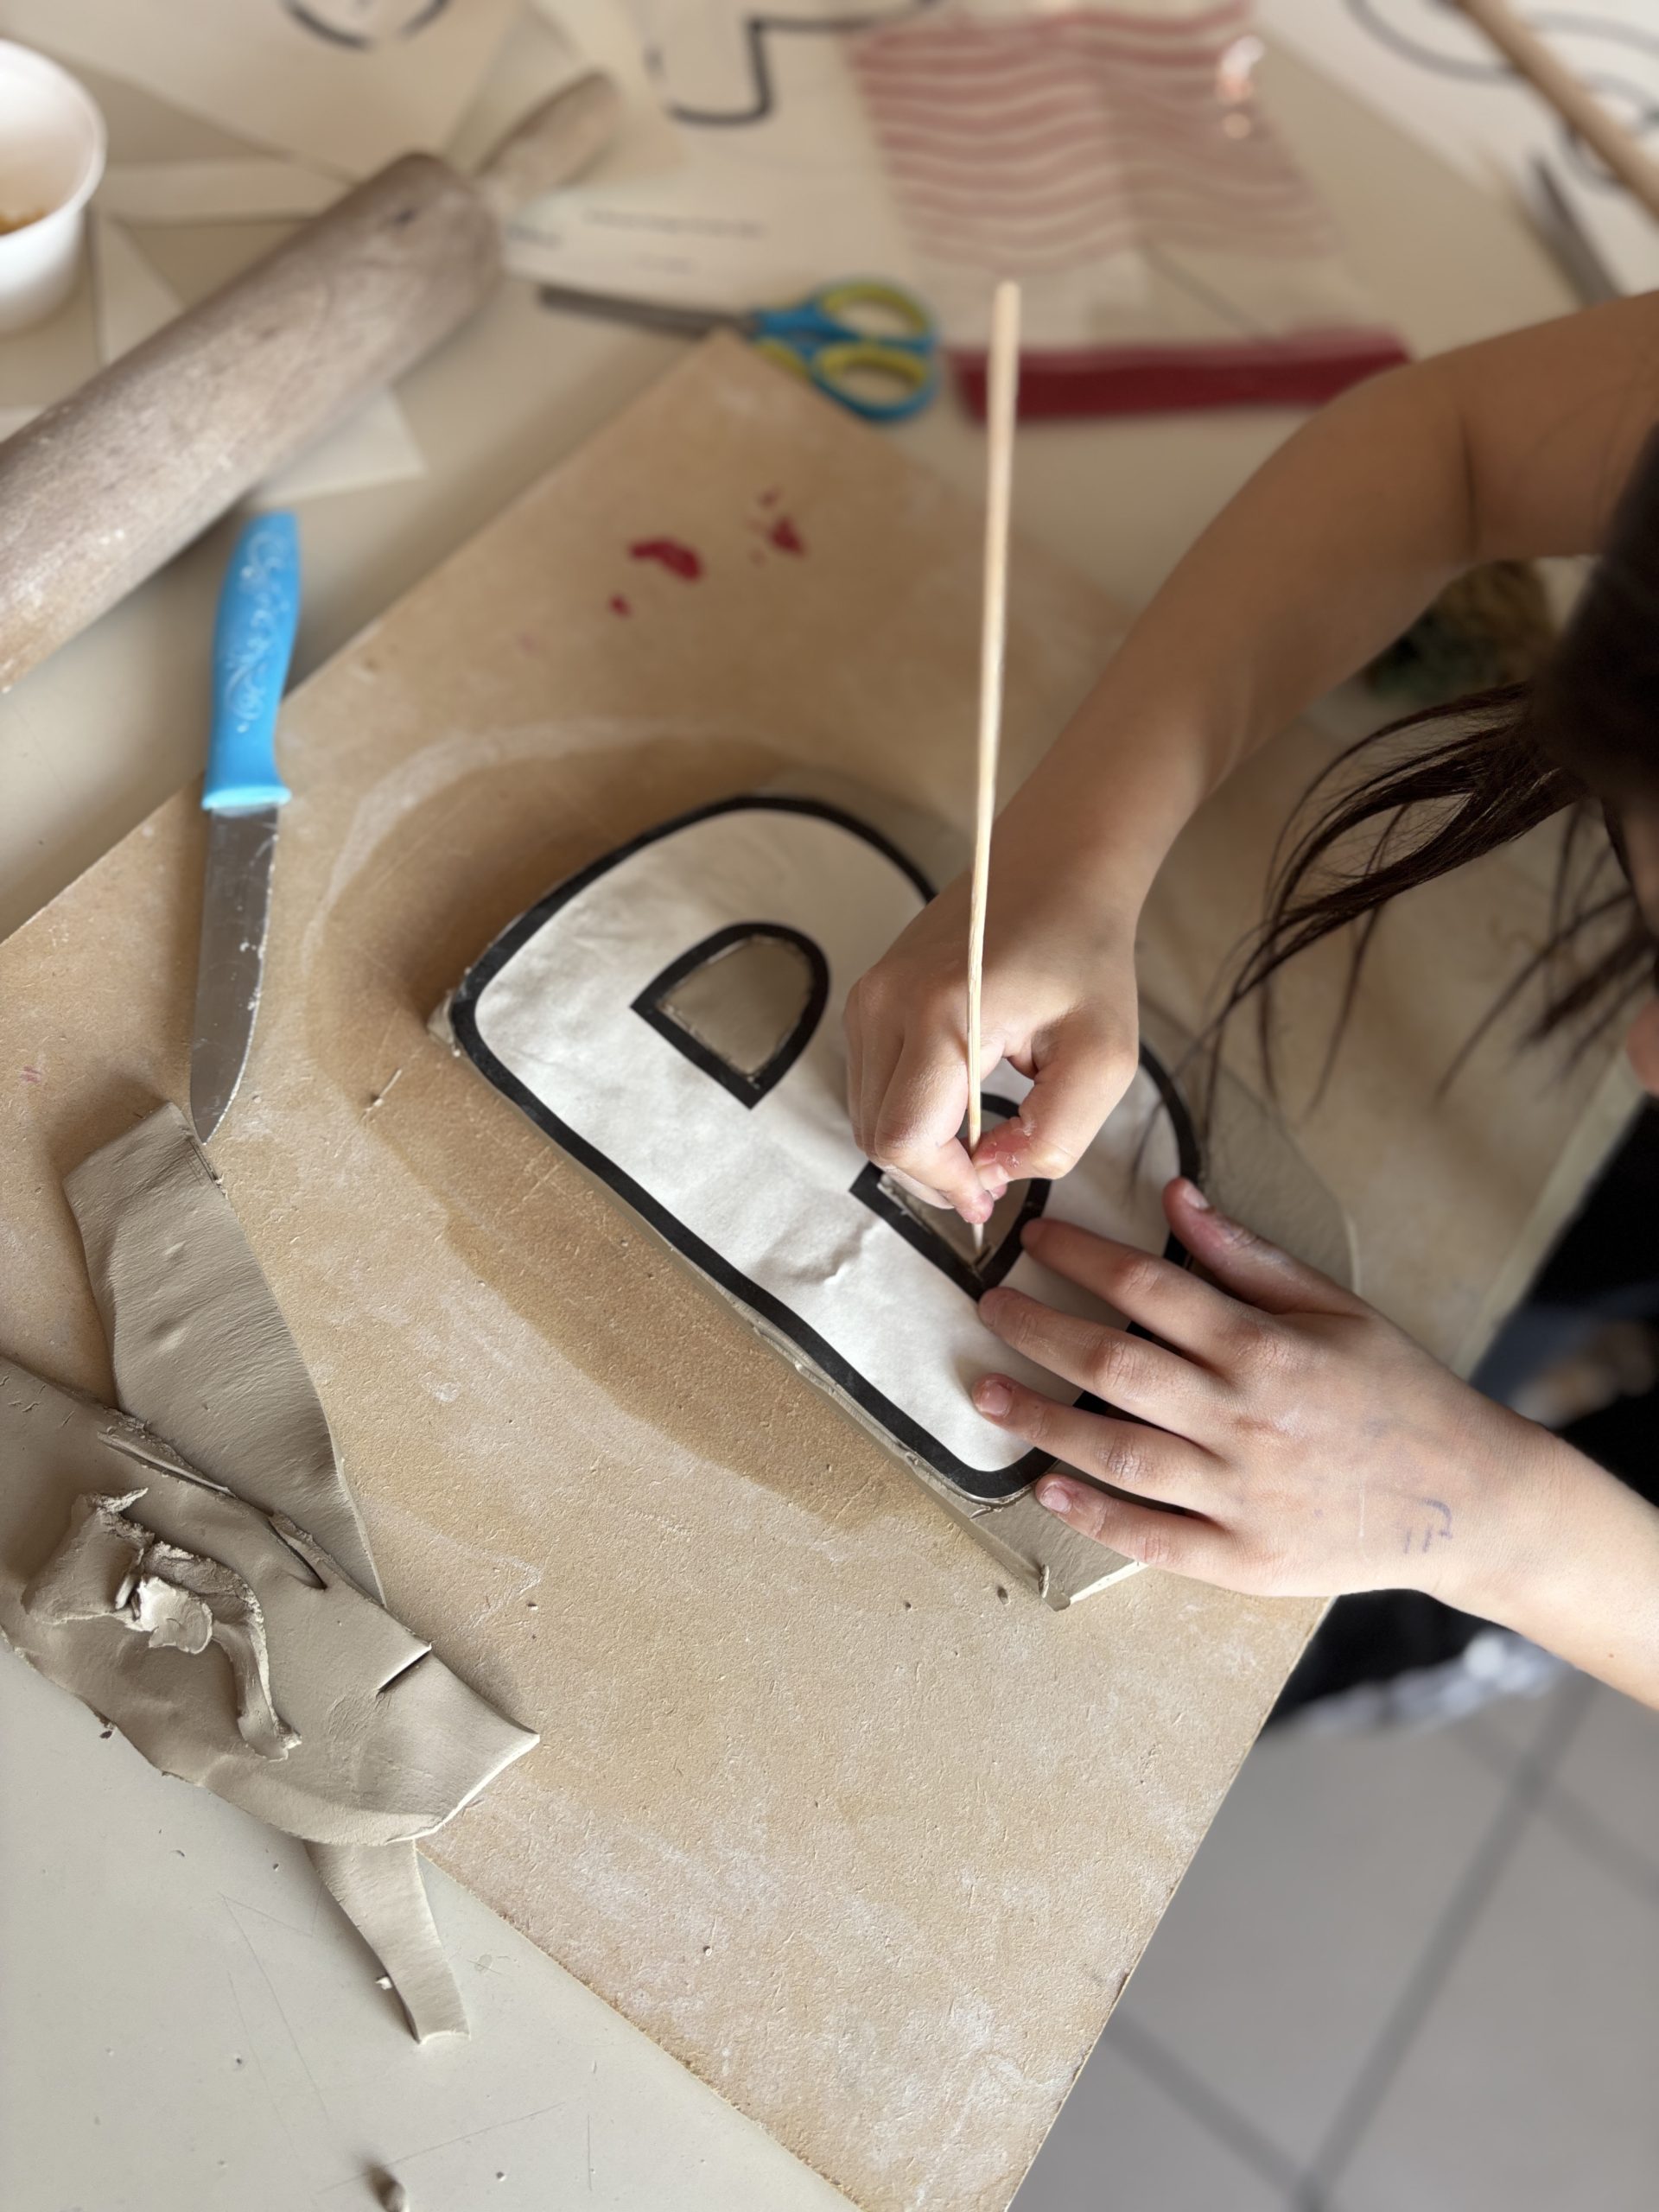
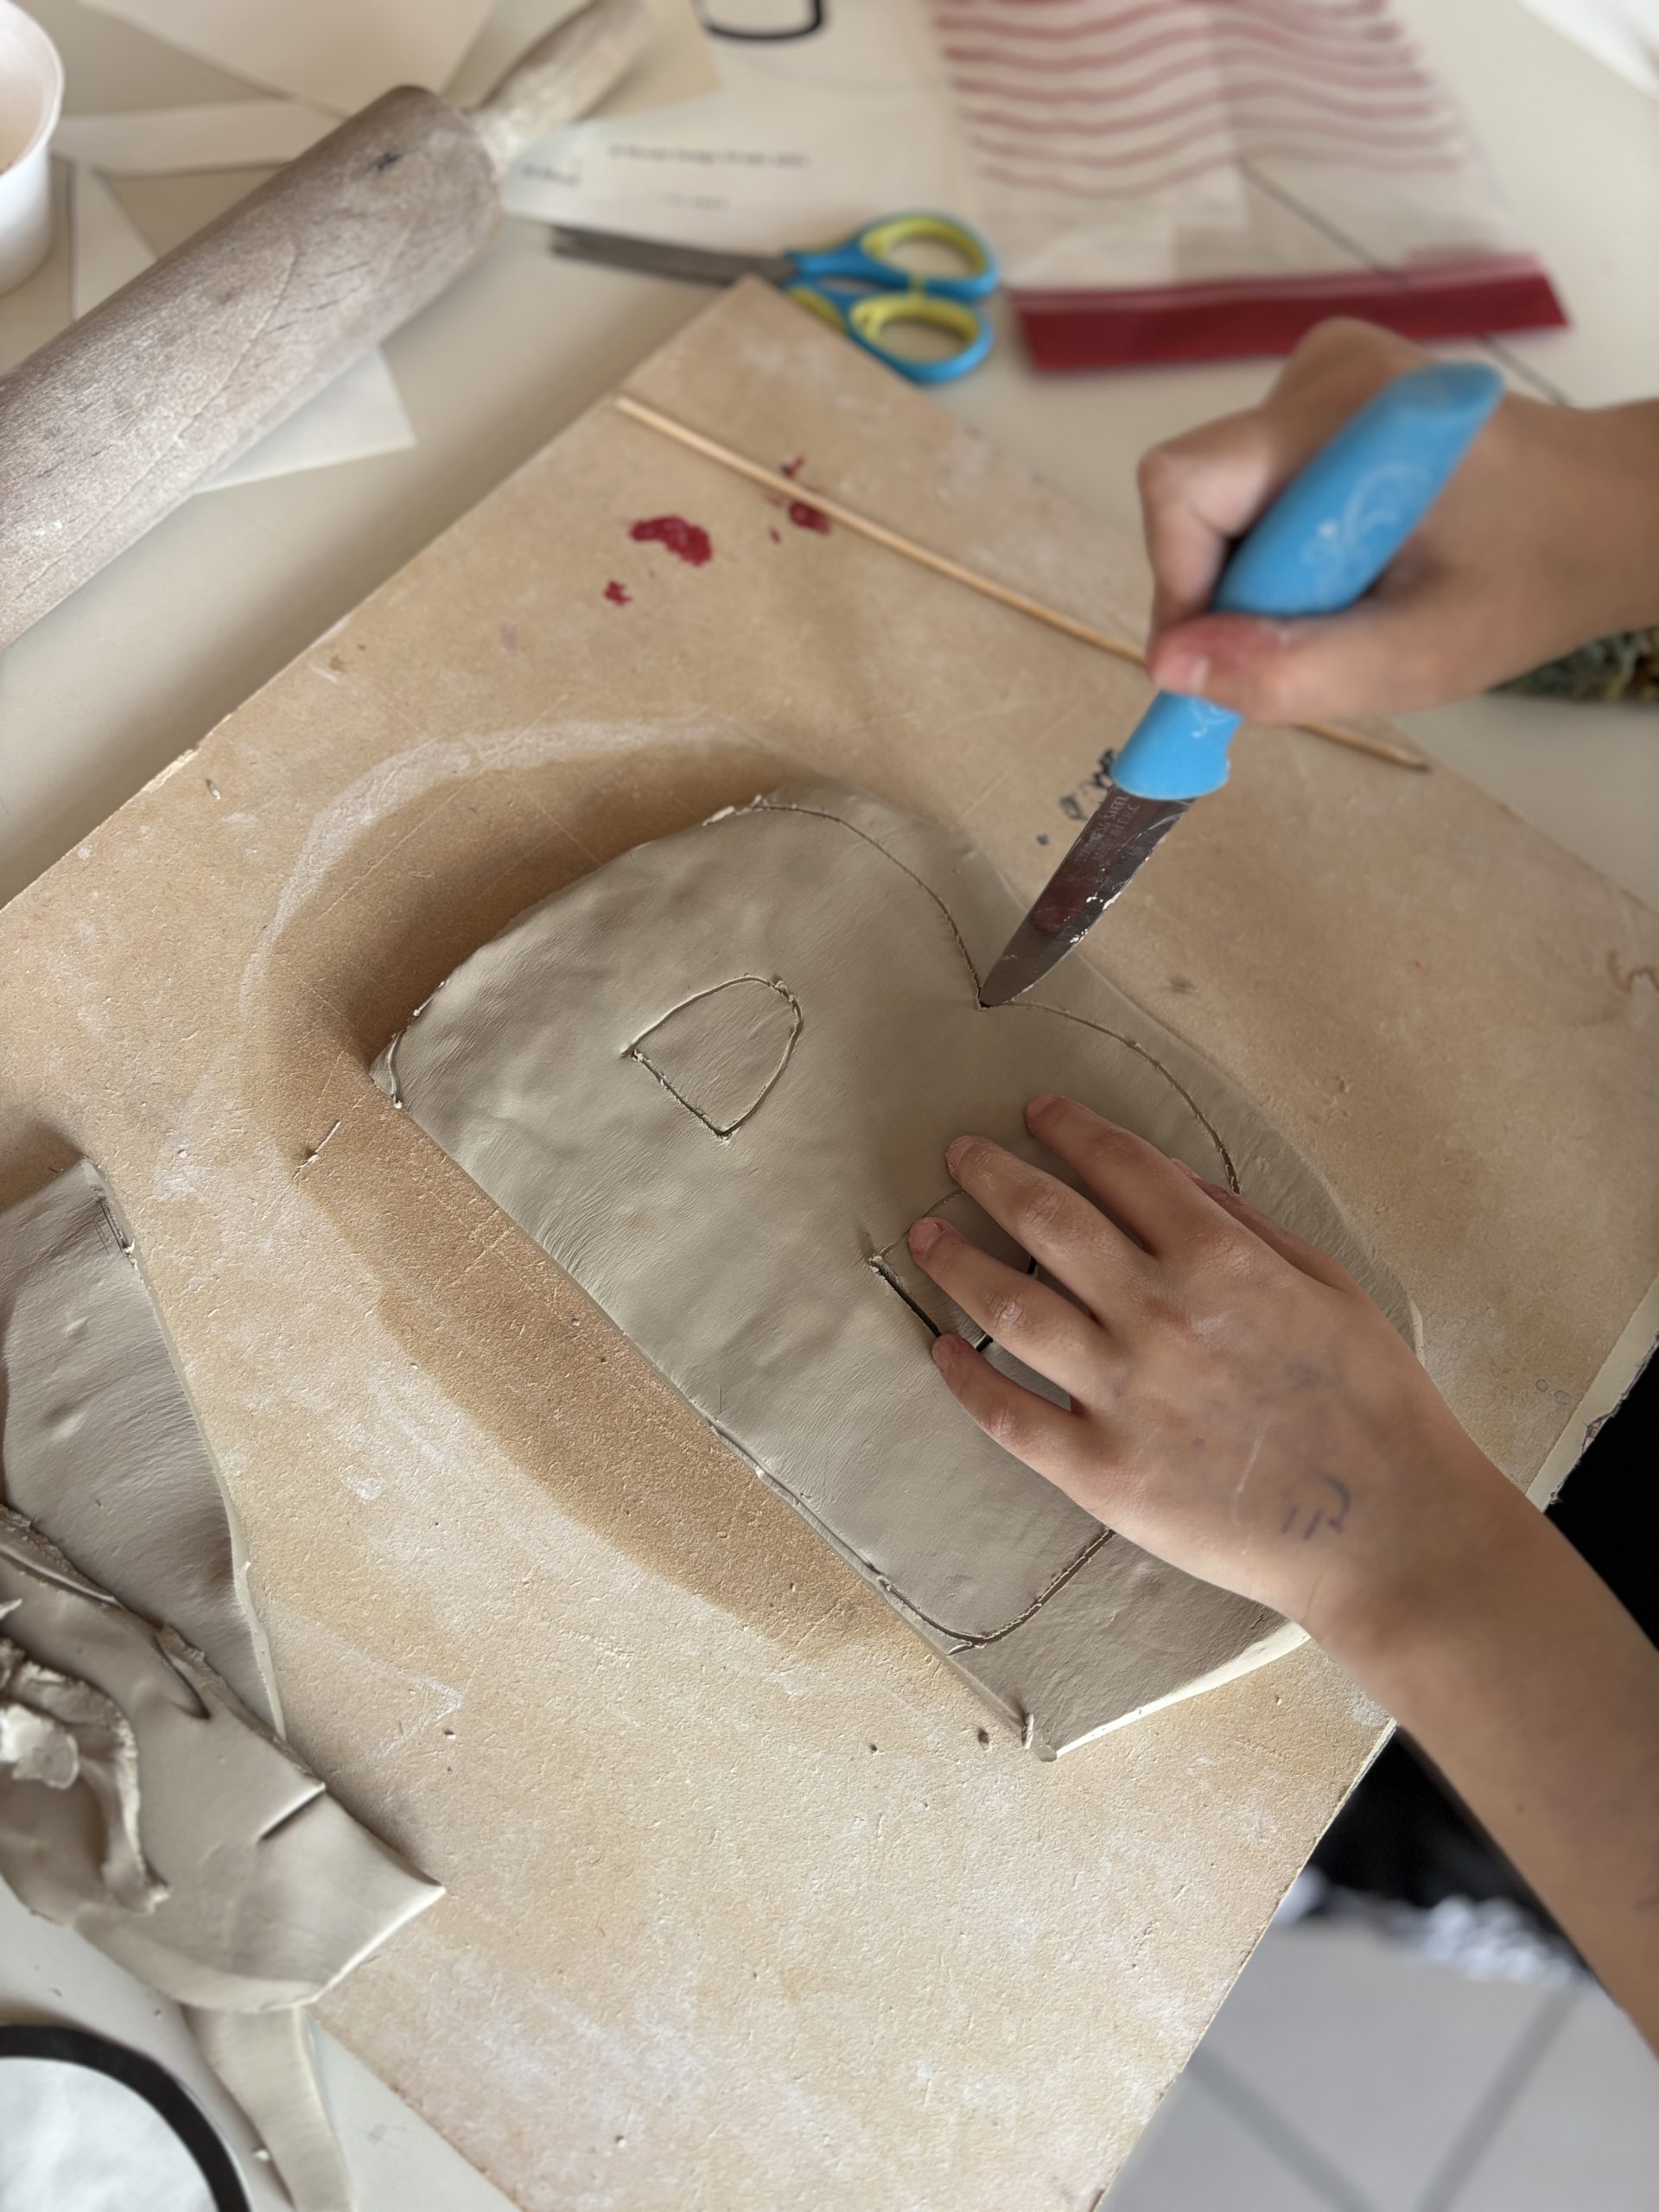
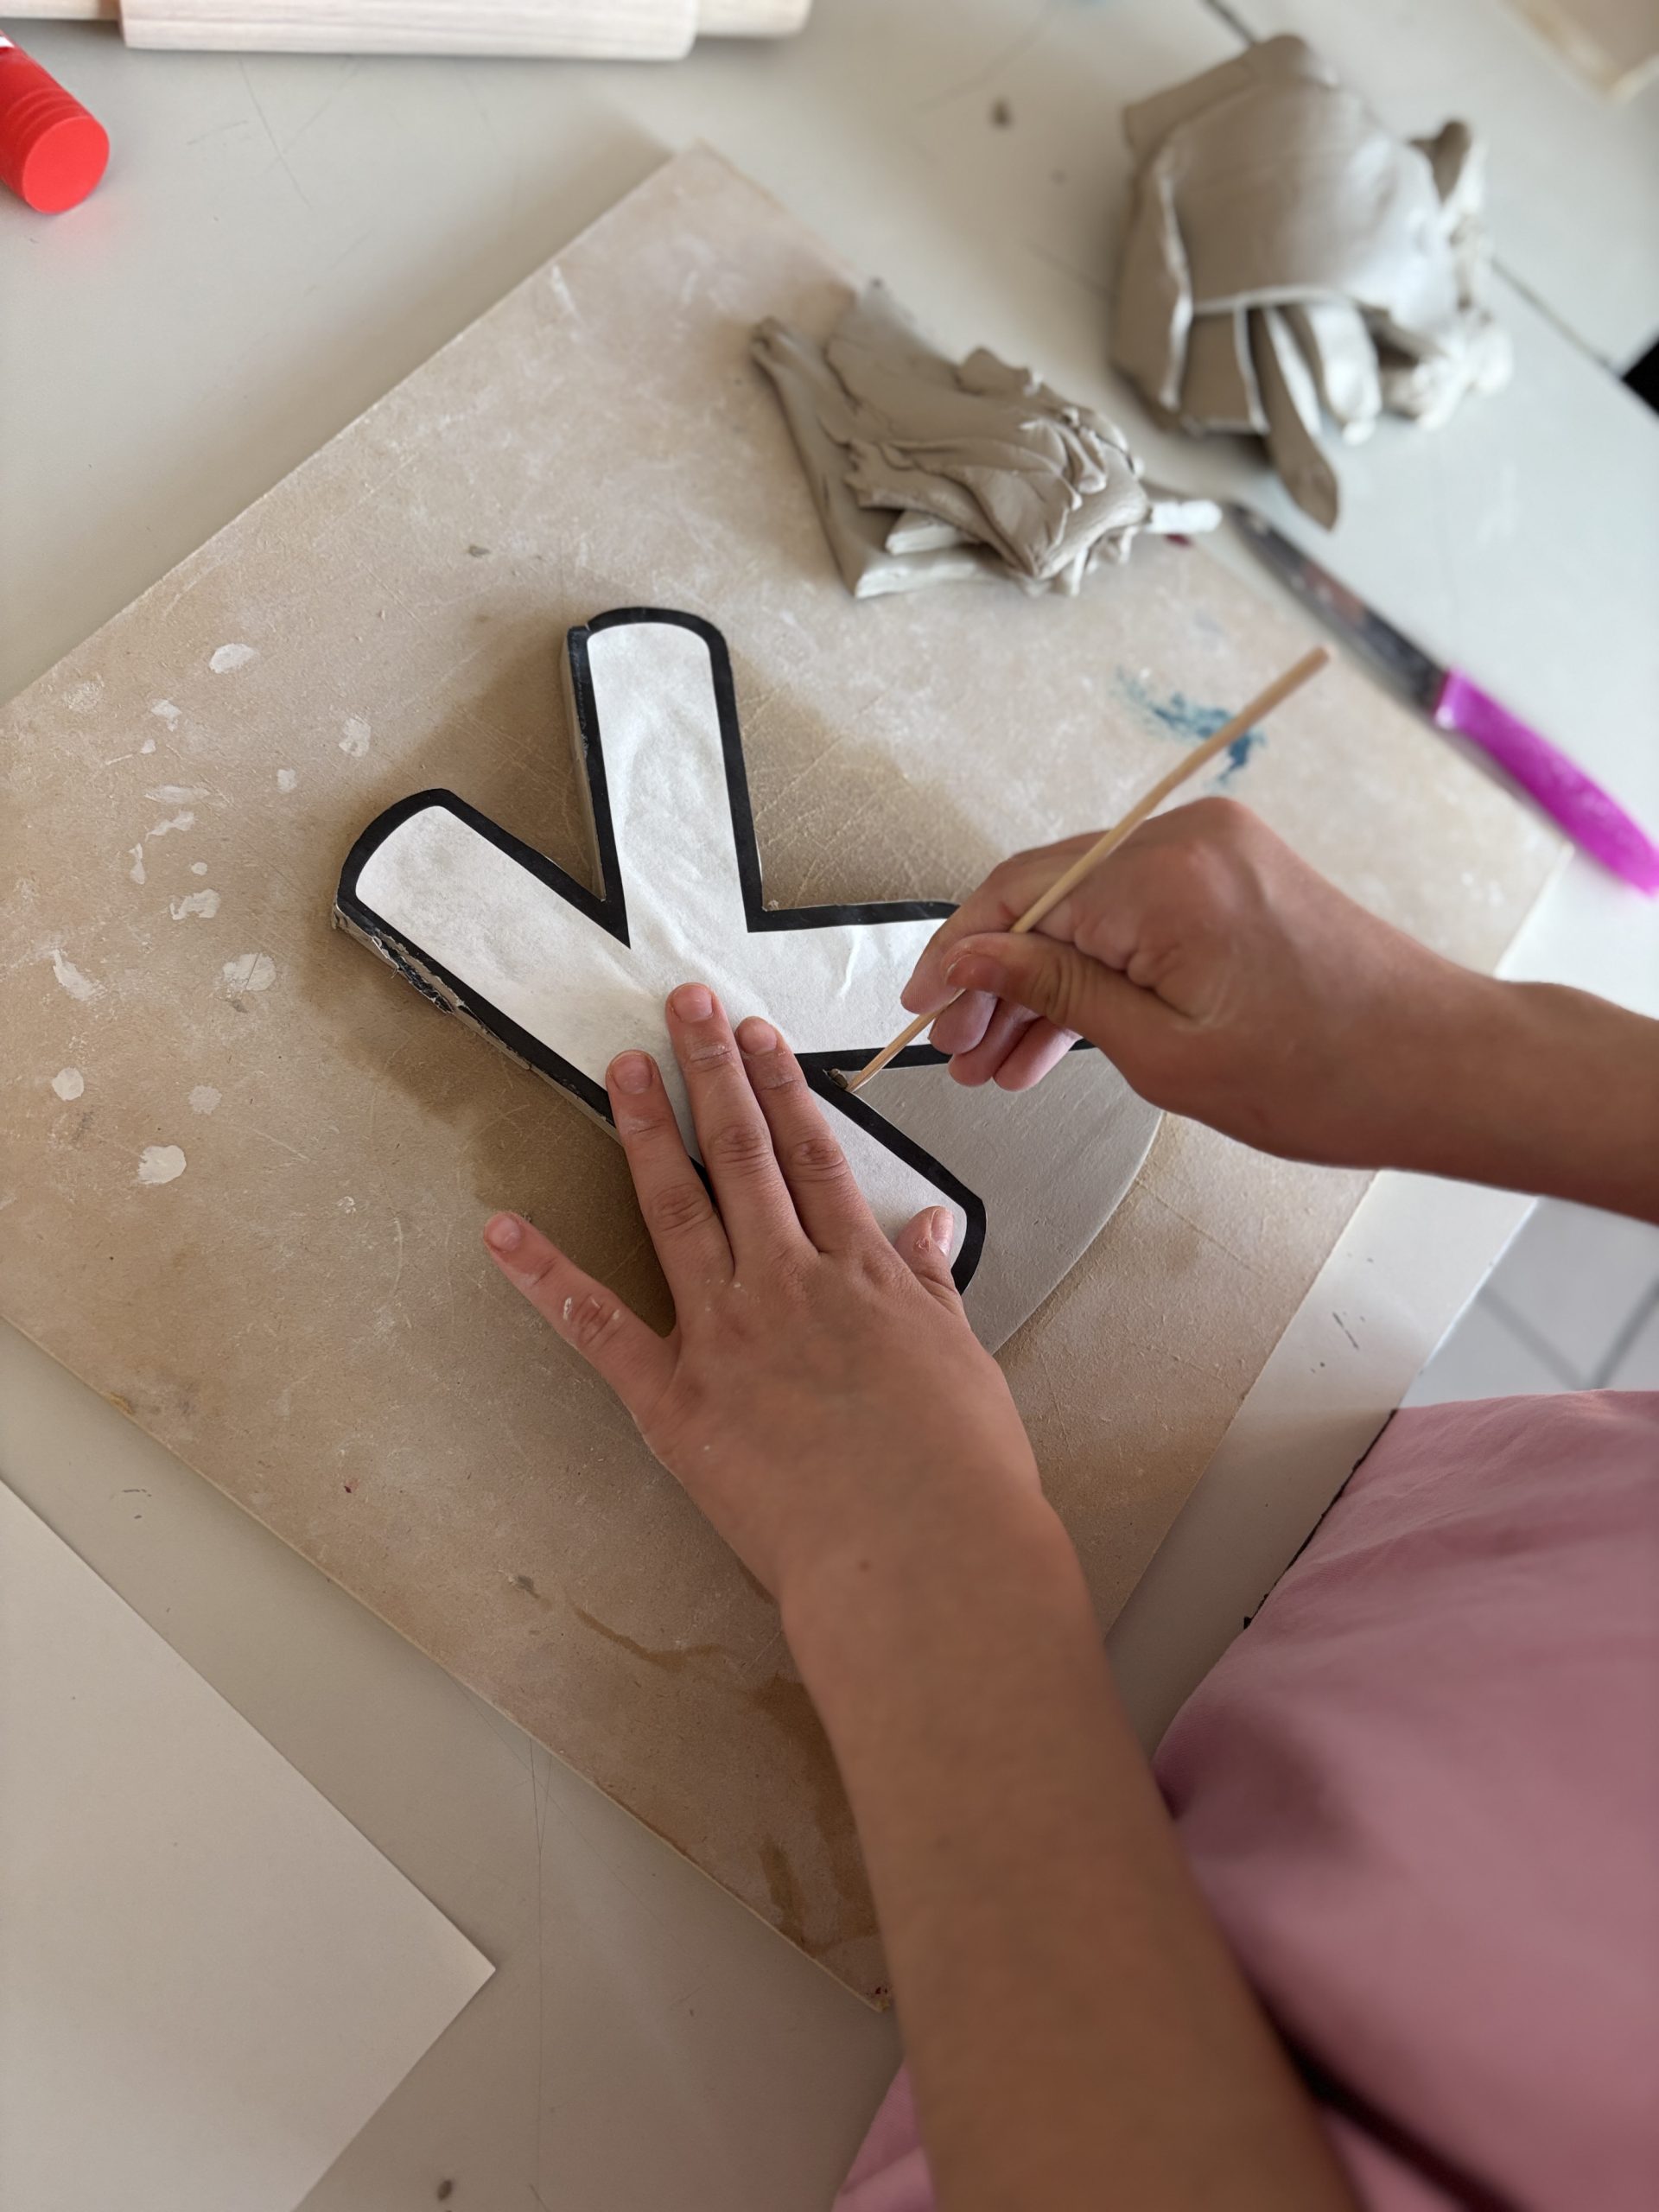
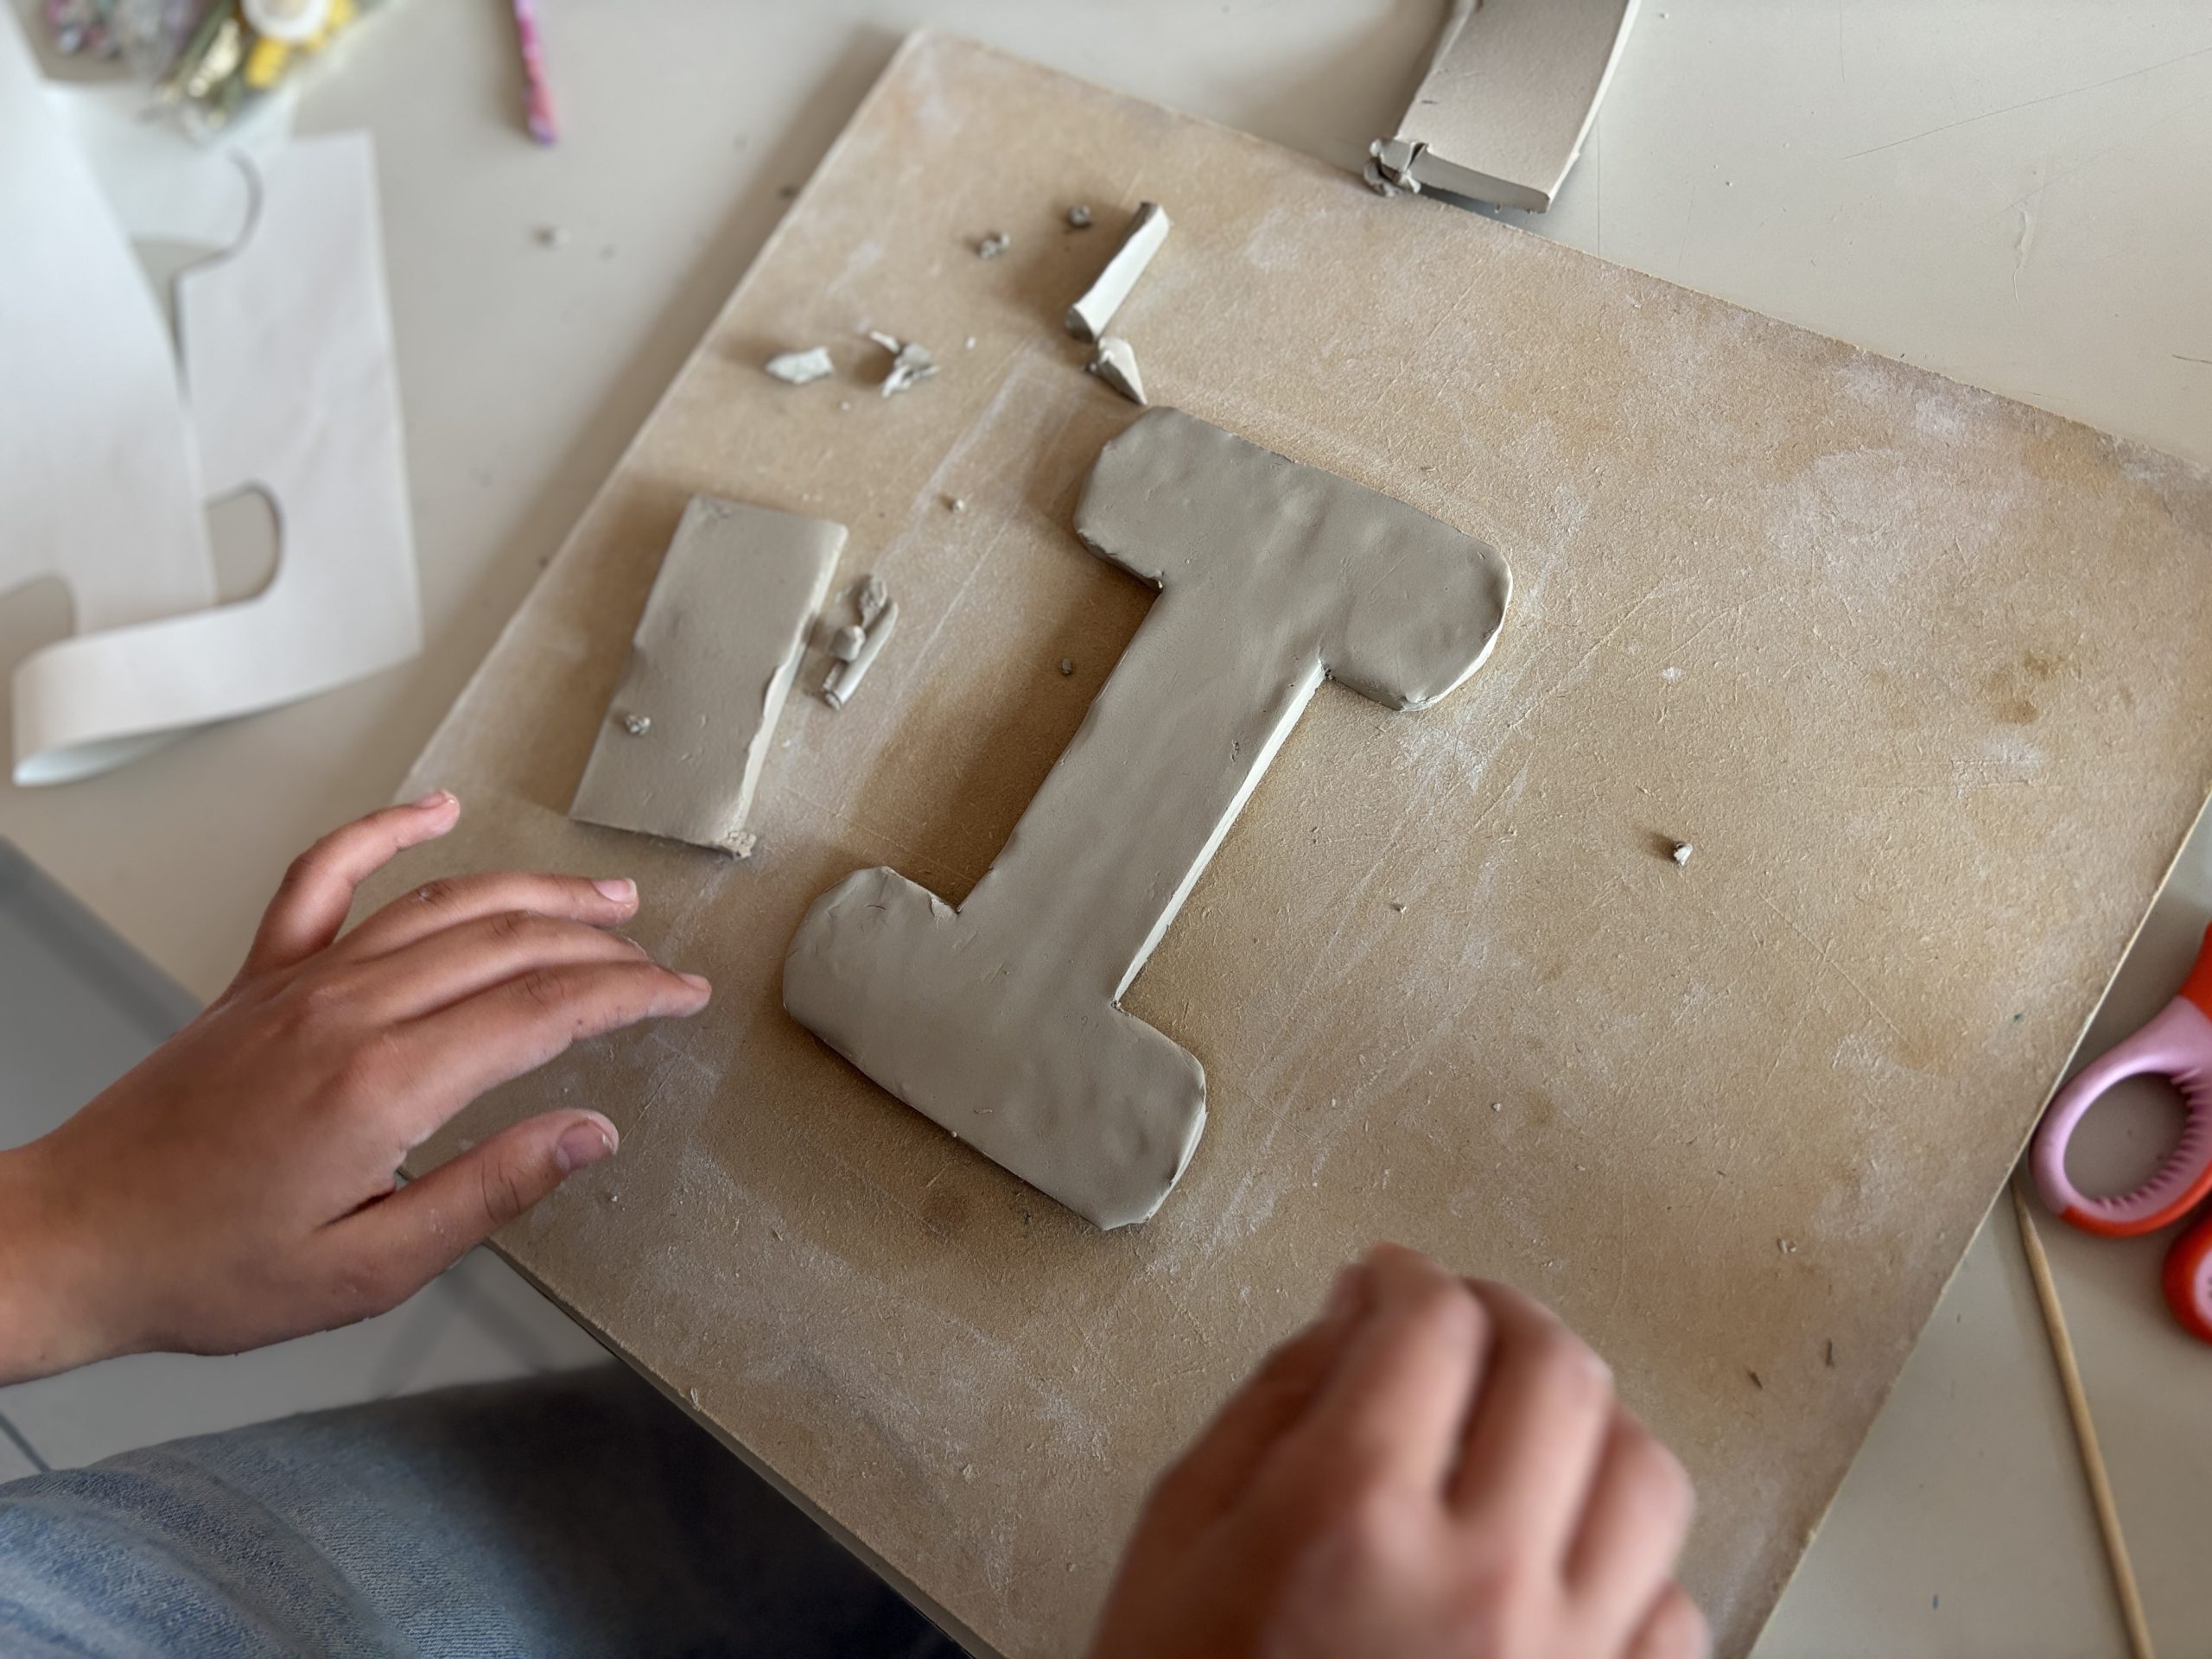
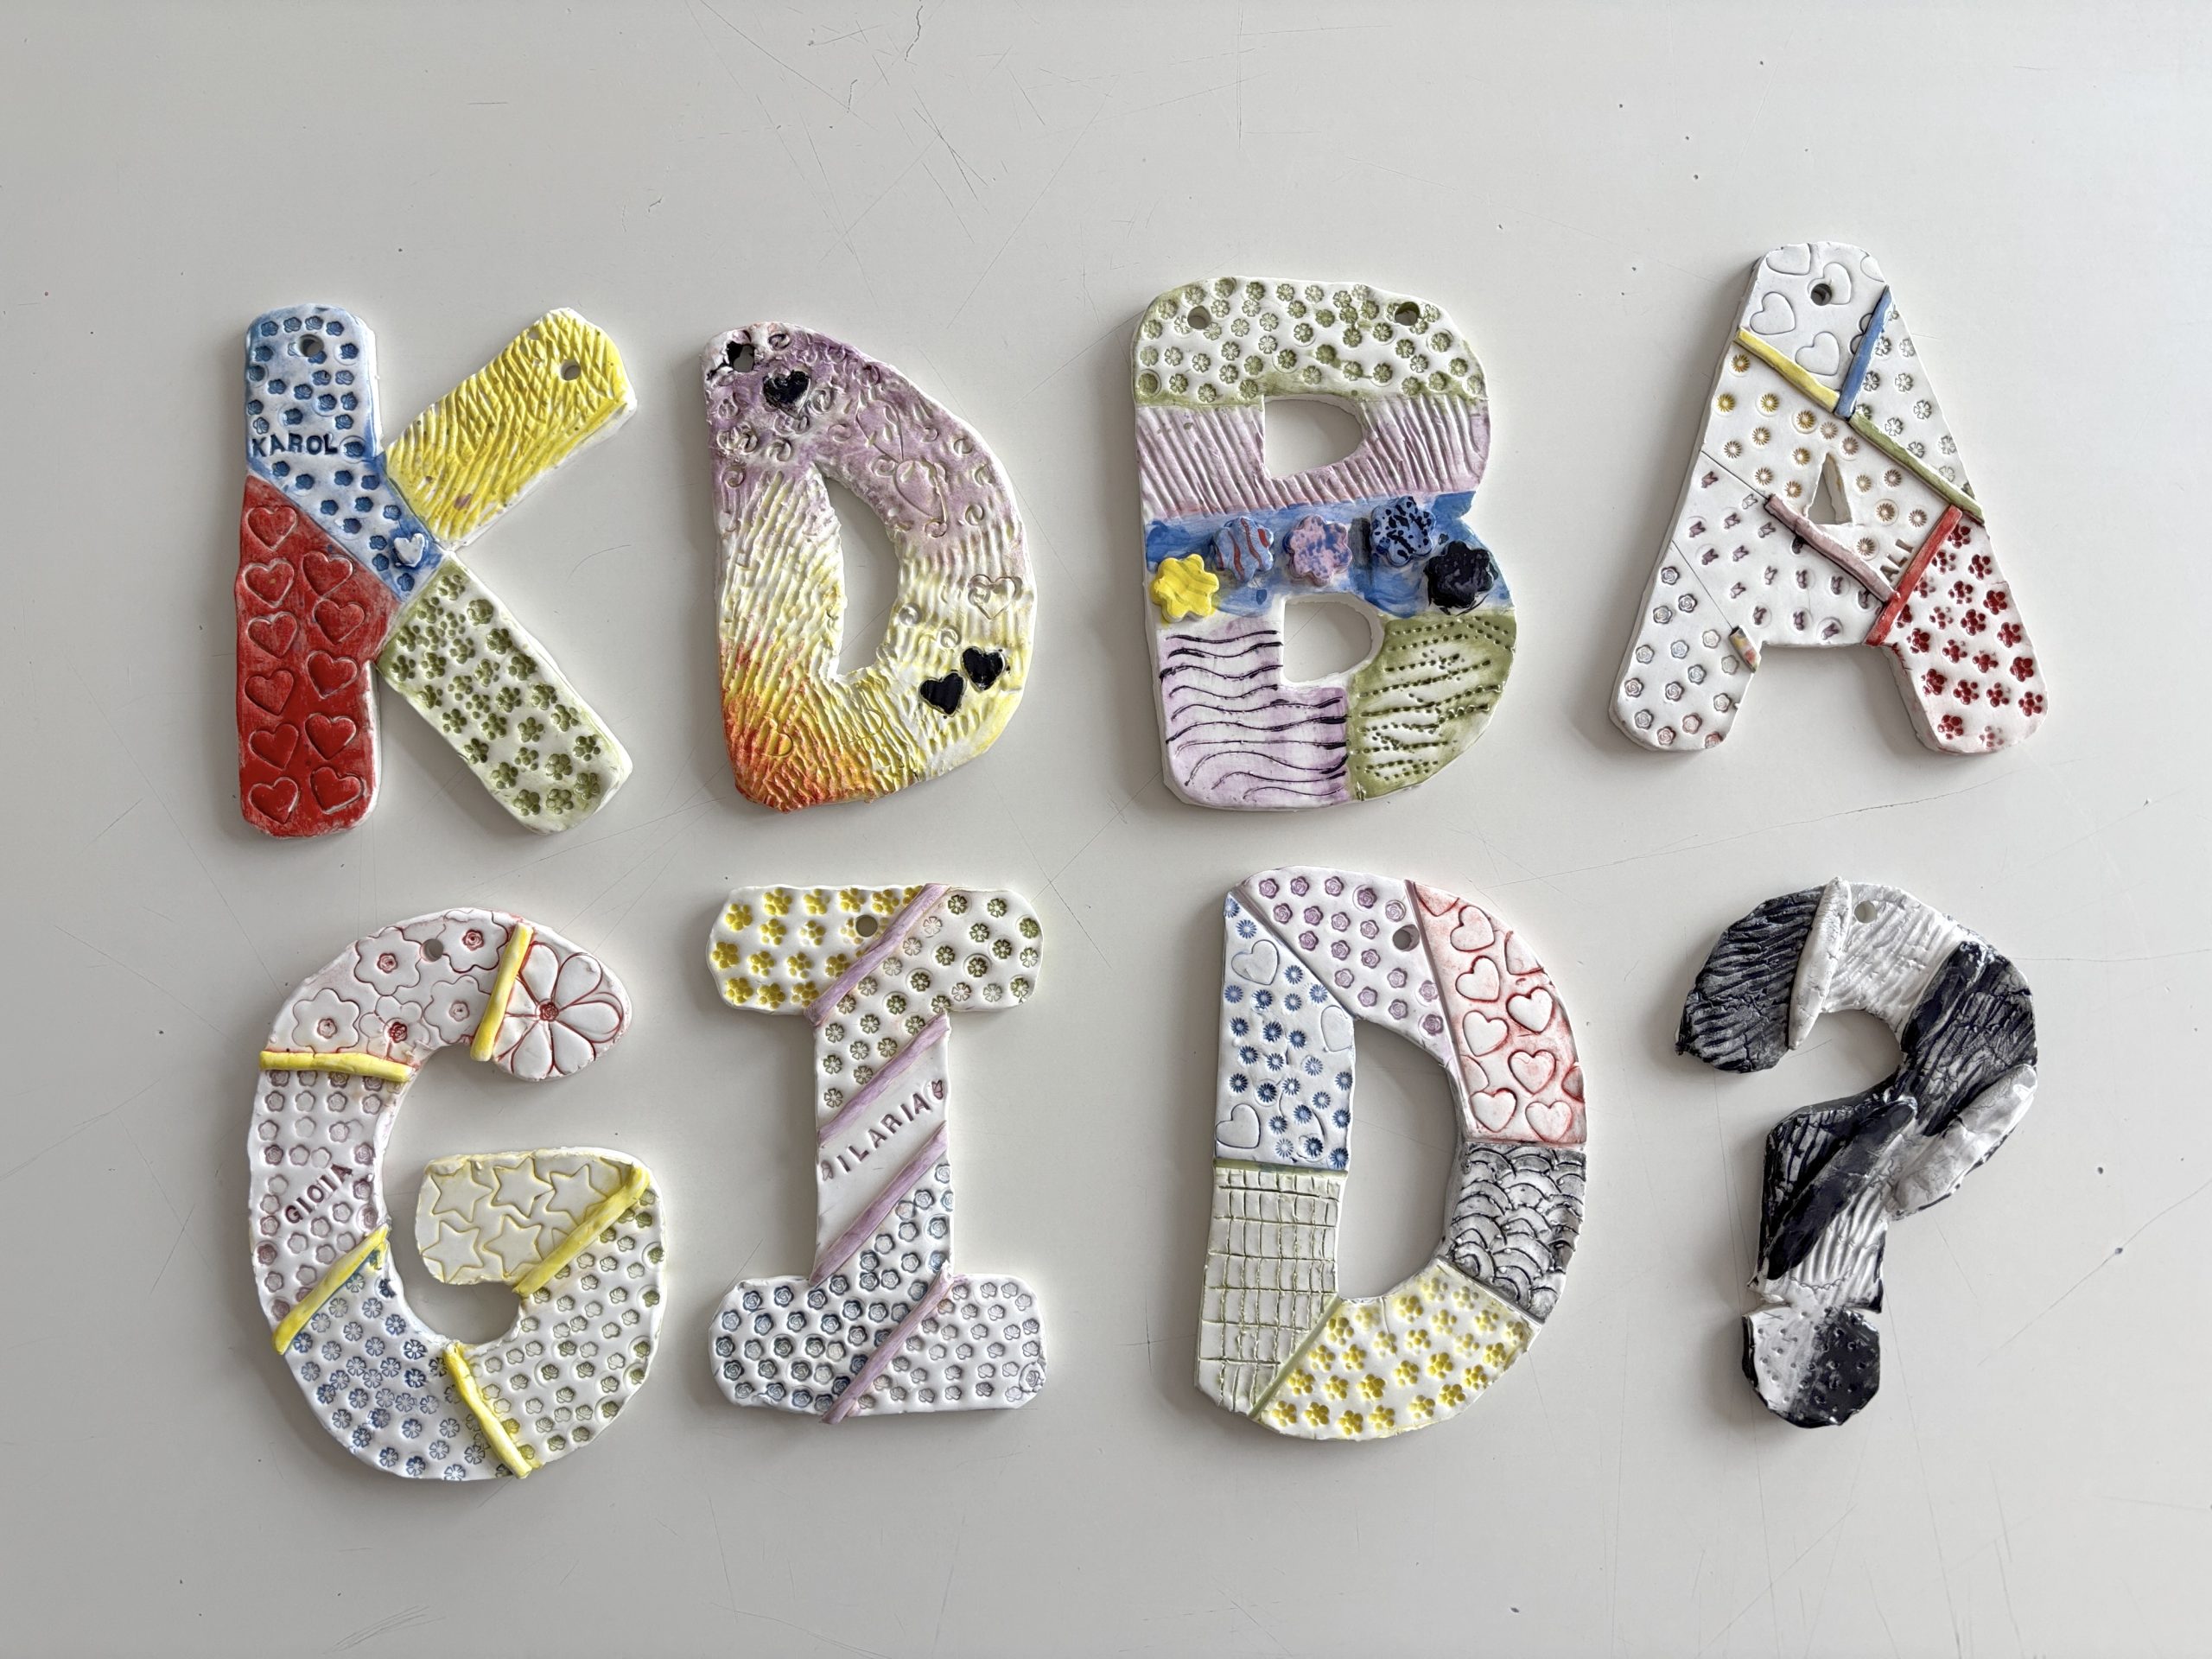
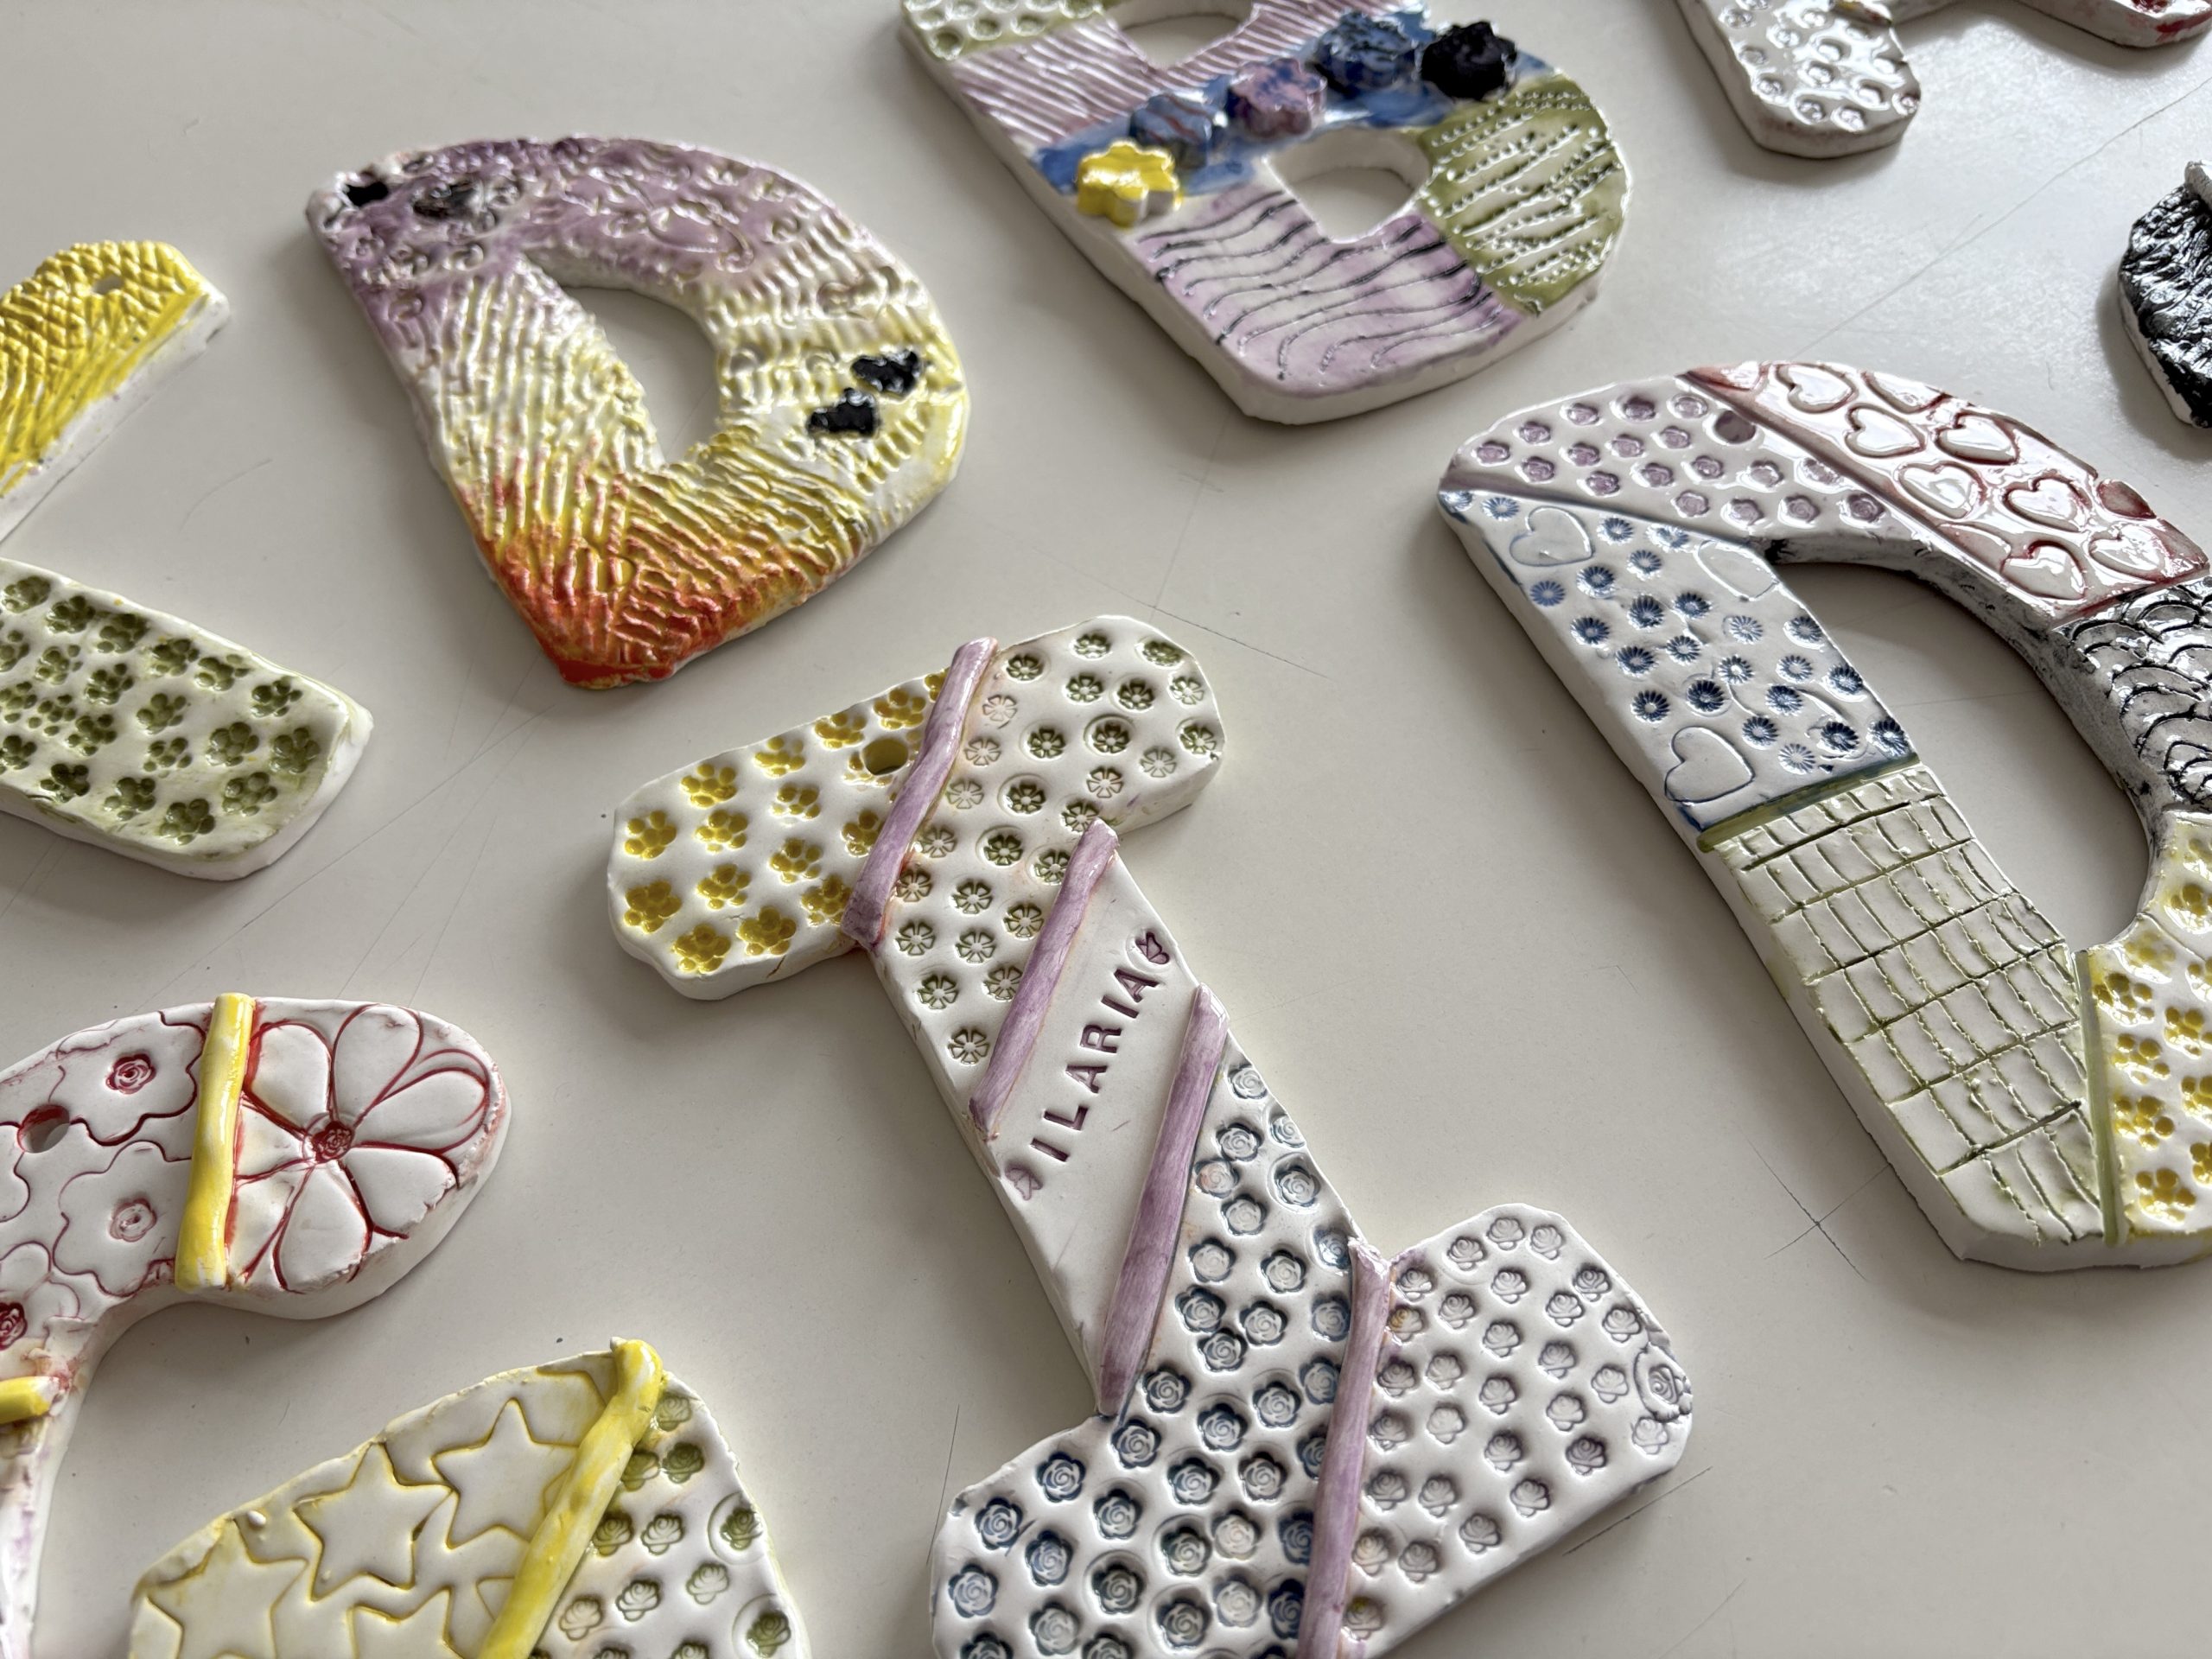
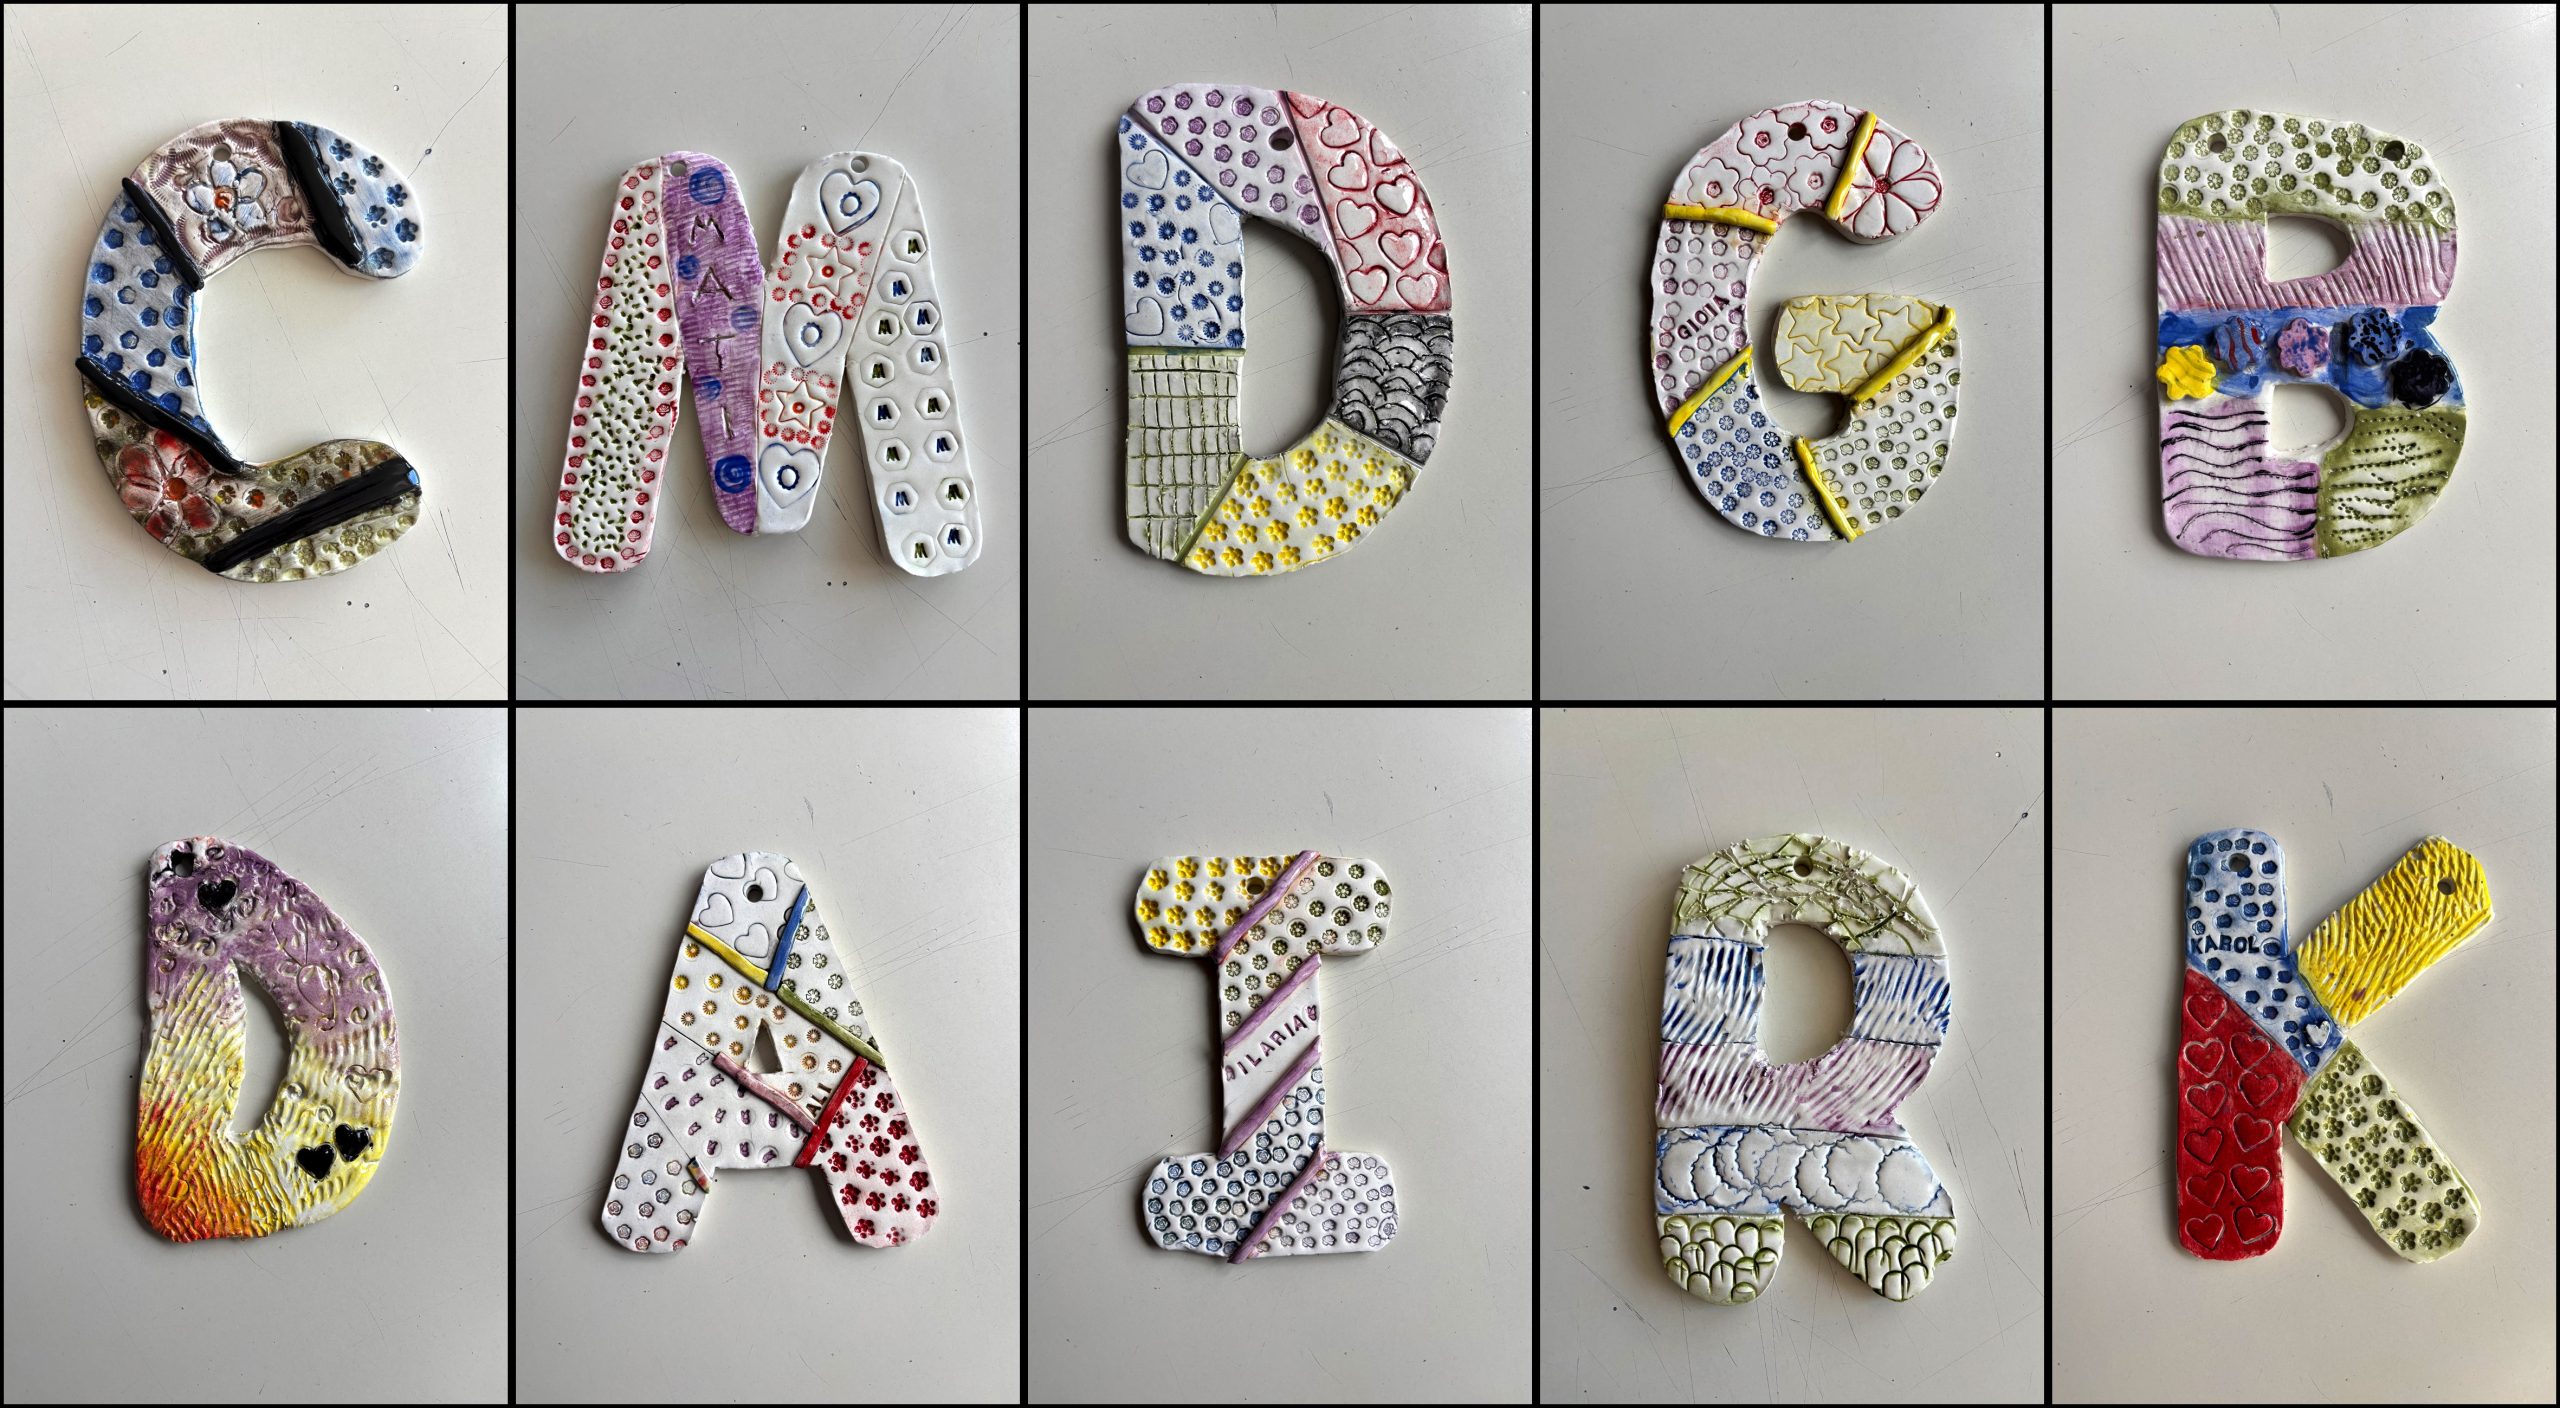
The most creative phase was personalizing the surface using textures. We enriched the letters with engravings, lettering, and shapes impressed or stamped directly onto the fresh clay. To organize the design, we drew demarcation lines to clearly separate the different textured areas.

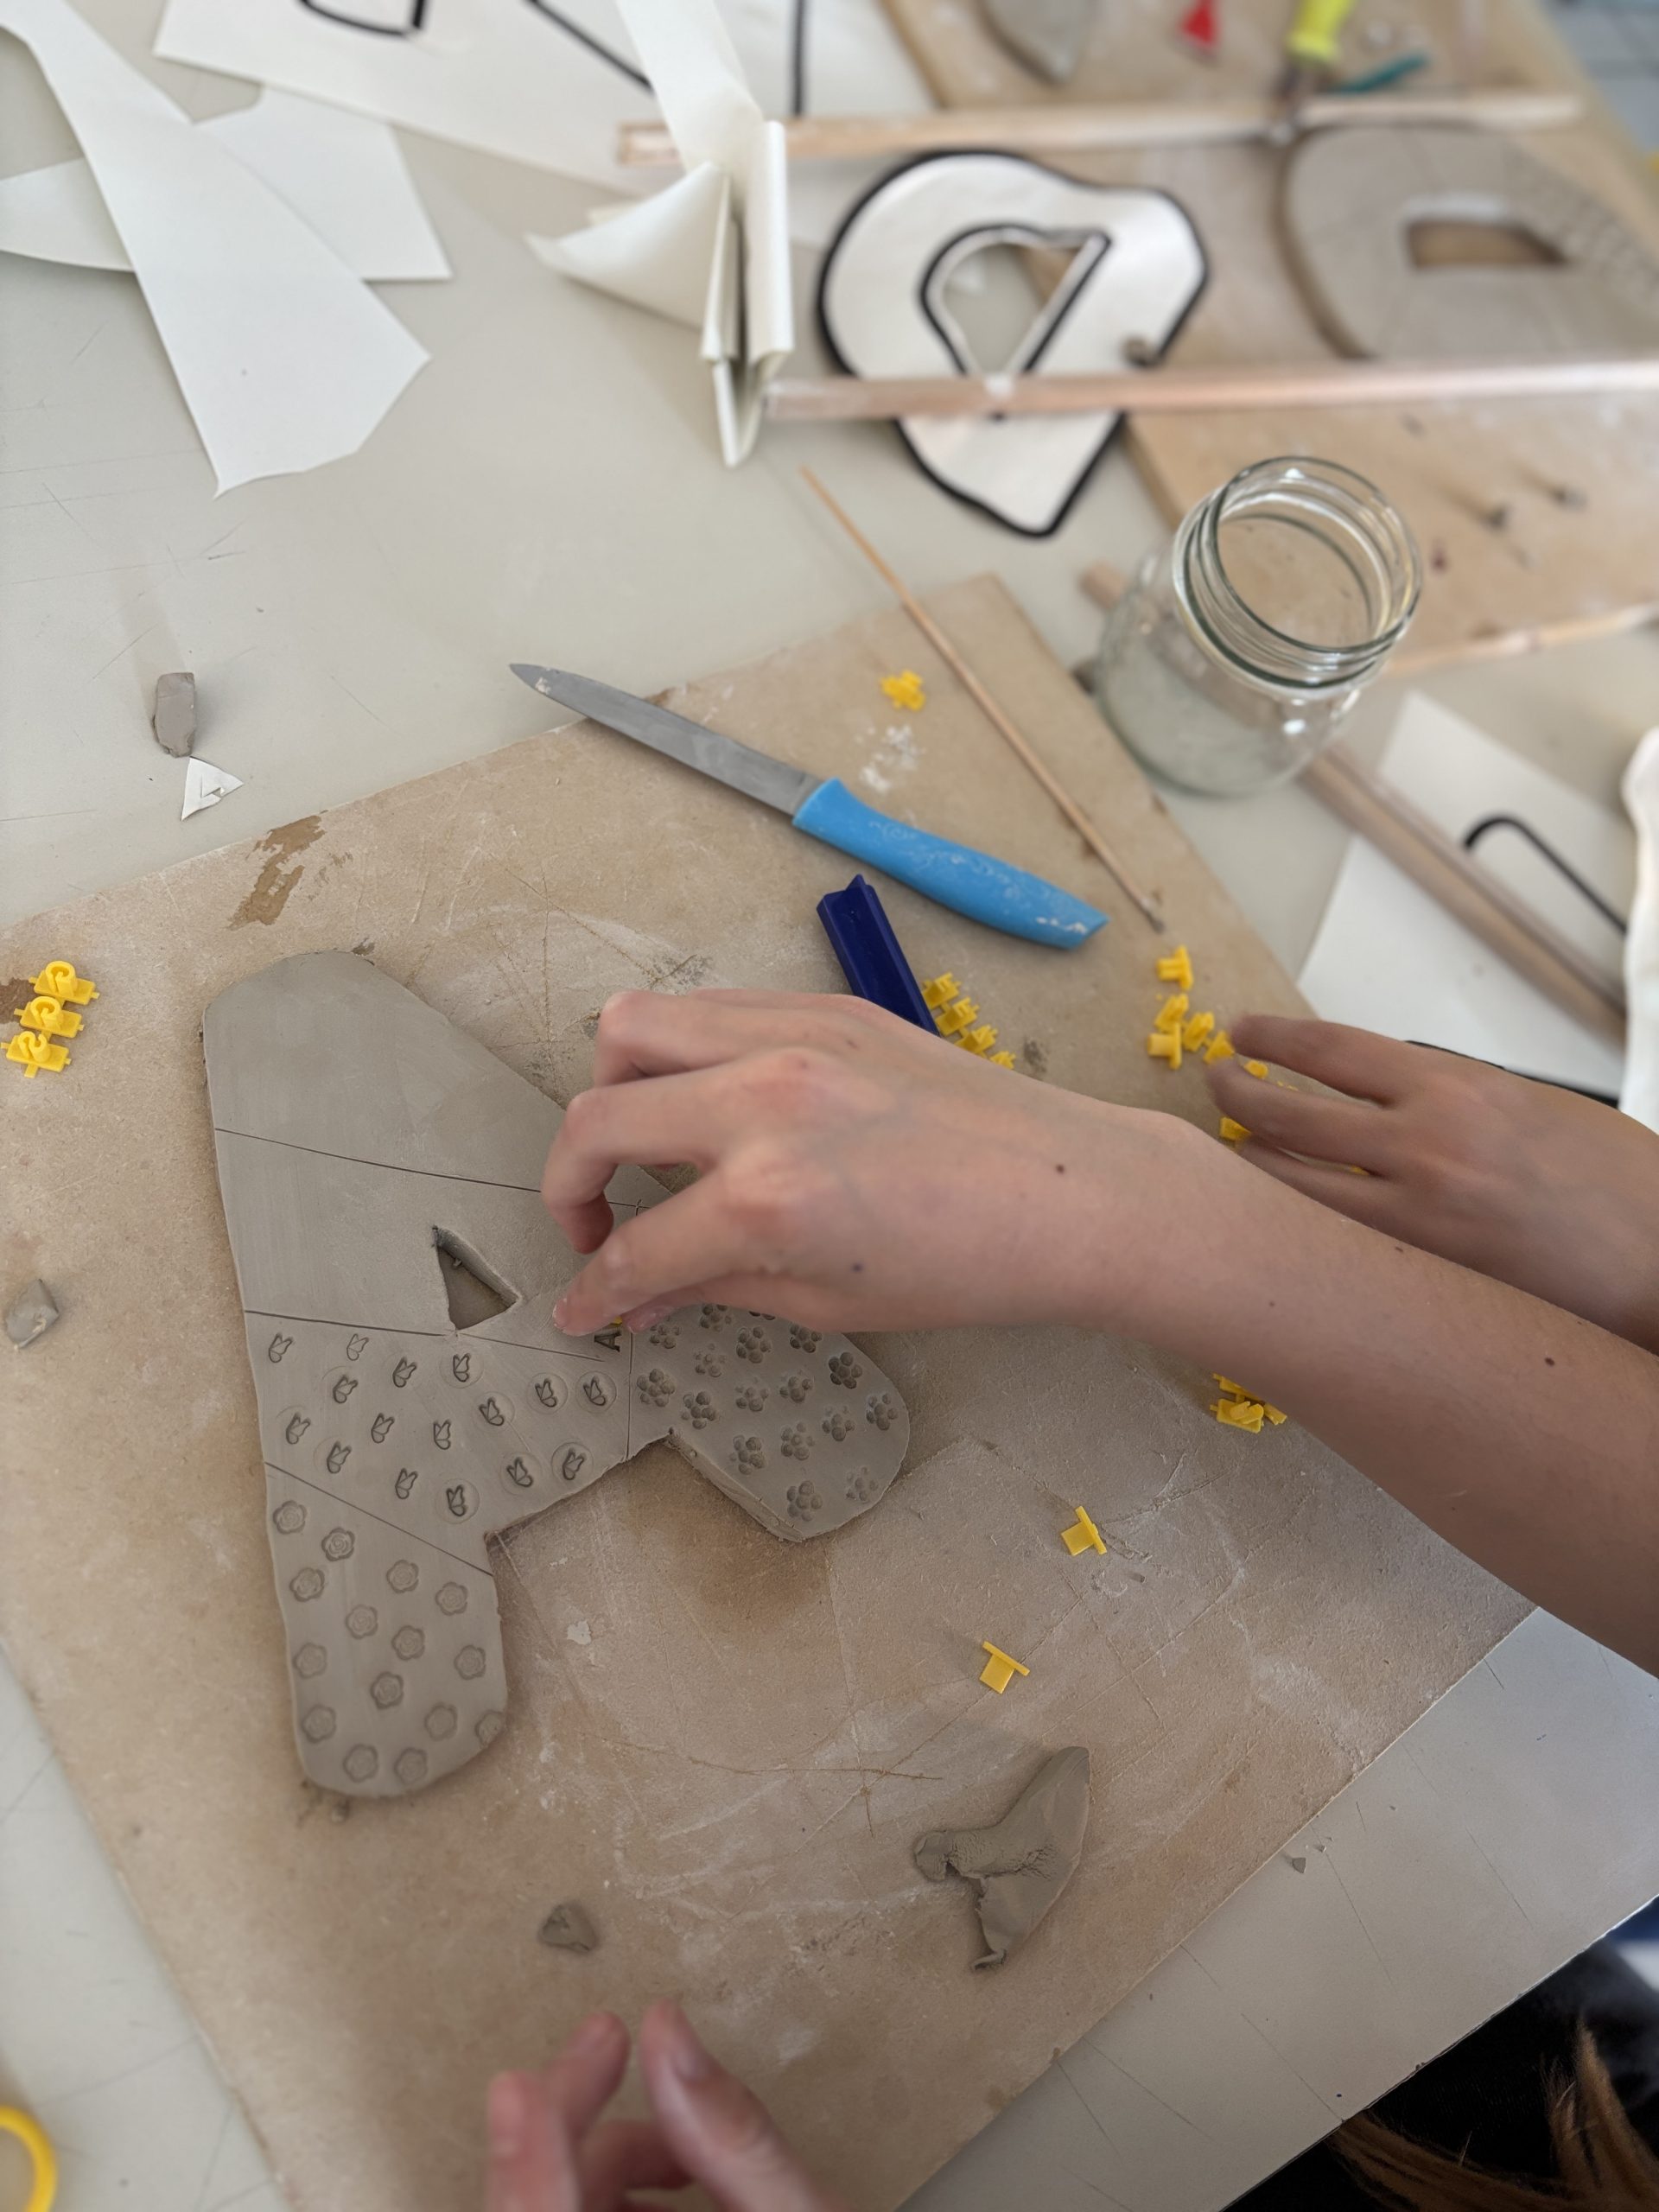
Before leaving the pieces to dry, we thought about how to hang them: with the help of a hollow-tip tool, we made one or two holes in the upper part of the letter, creating enough space to thread a ribbon through once the work was finished.
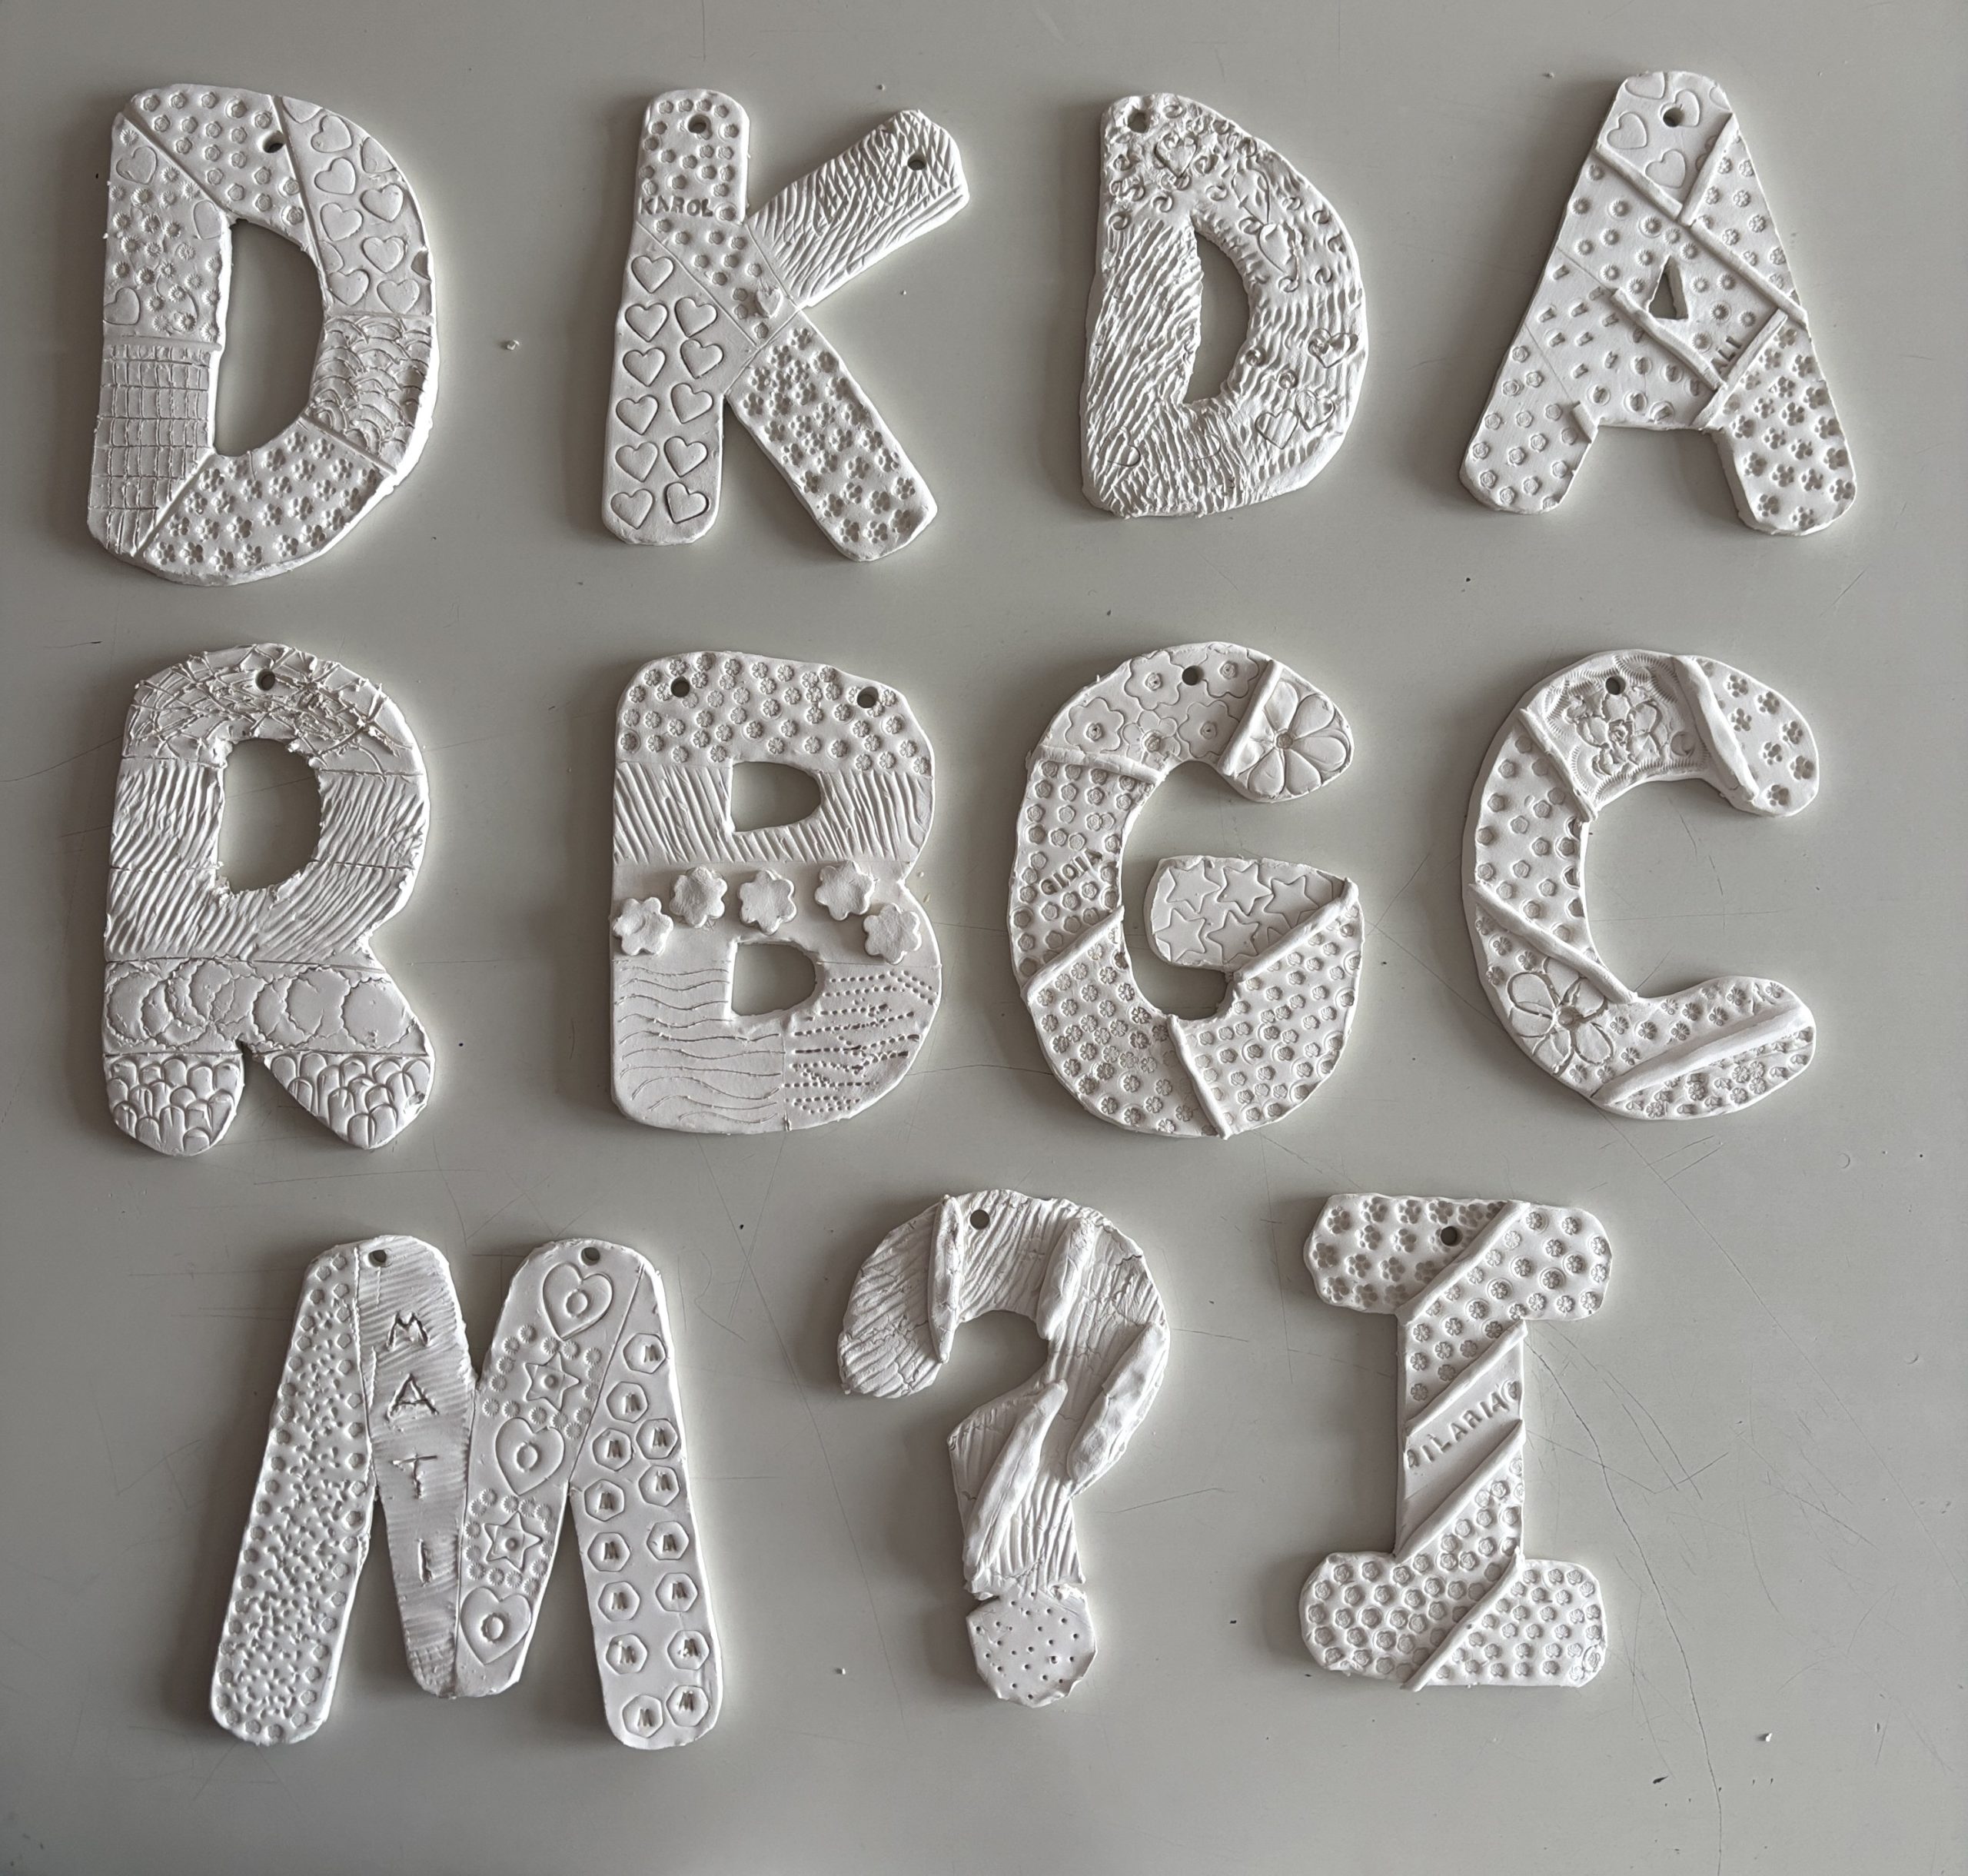
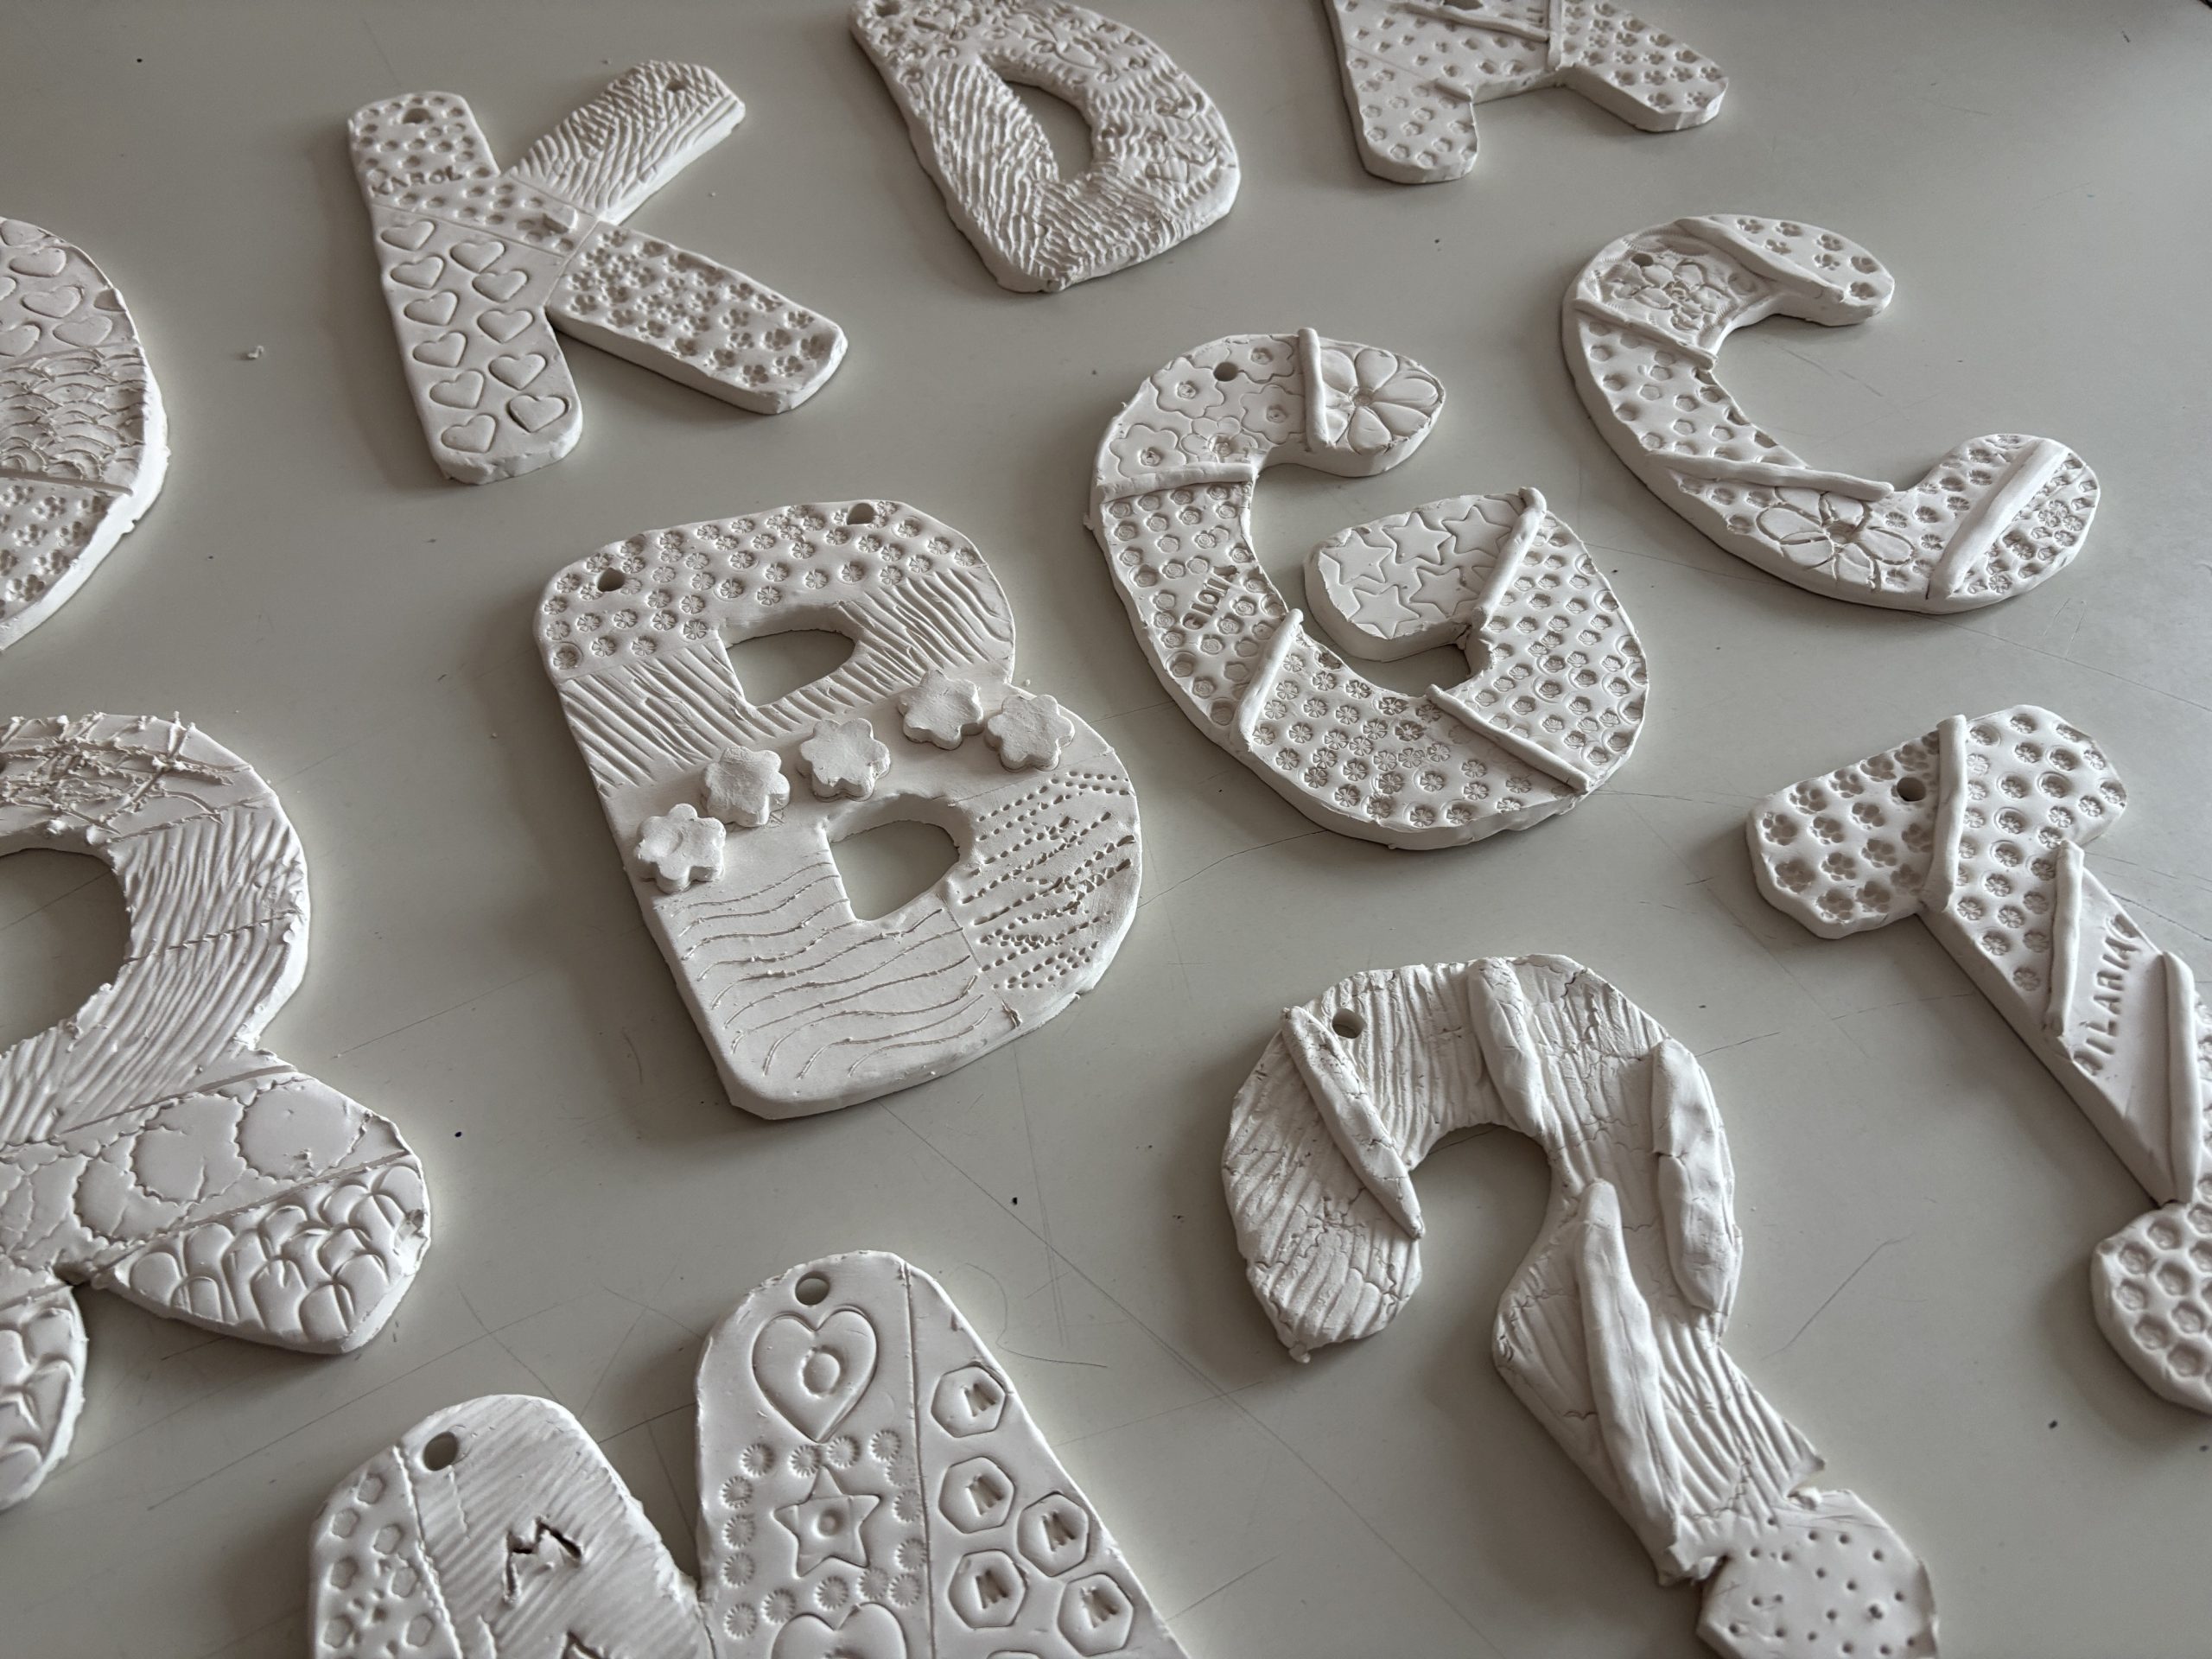
The pieces were then left to dry slowly in the air and placed in the kiln for the first bisque firing.
Once the bisque-fired pieces were taken out of the kiln, we moved on to decorating them with colored engobes. Many of us experimented with the wipe-off technique: we applied the color, making it penetrate deep into the carved textures, and immediately afterward, we cleaned the surface with a damp sponge. This way, the color remained only in the recessed areas, highlighting the relief details. Other students, instead, preferred to freely paint the solid areas with the engobe.
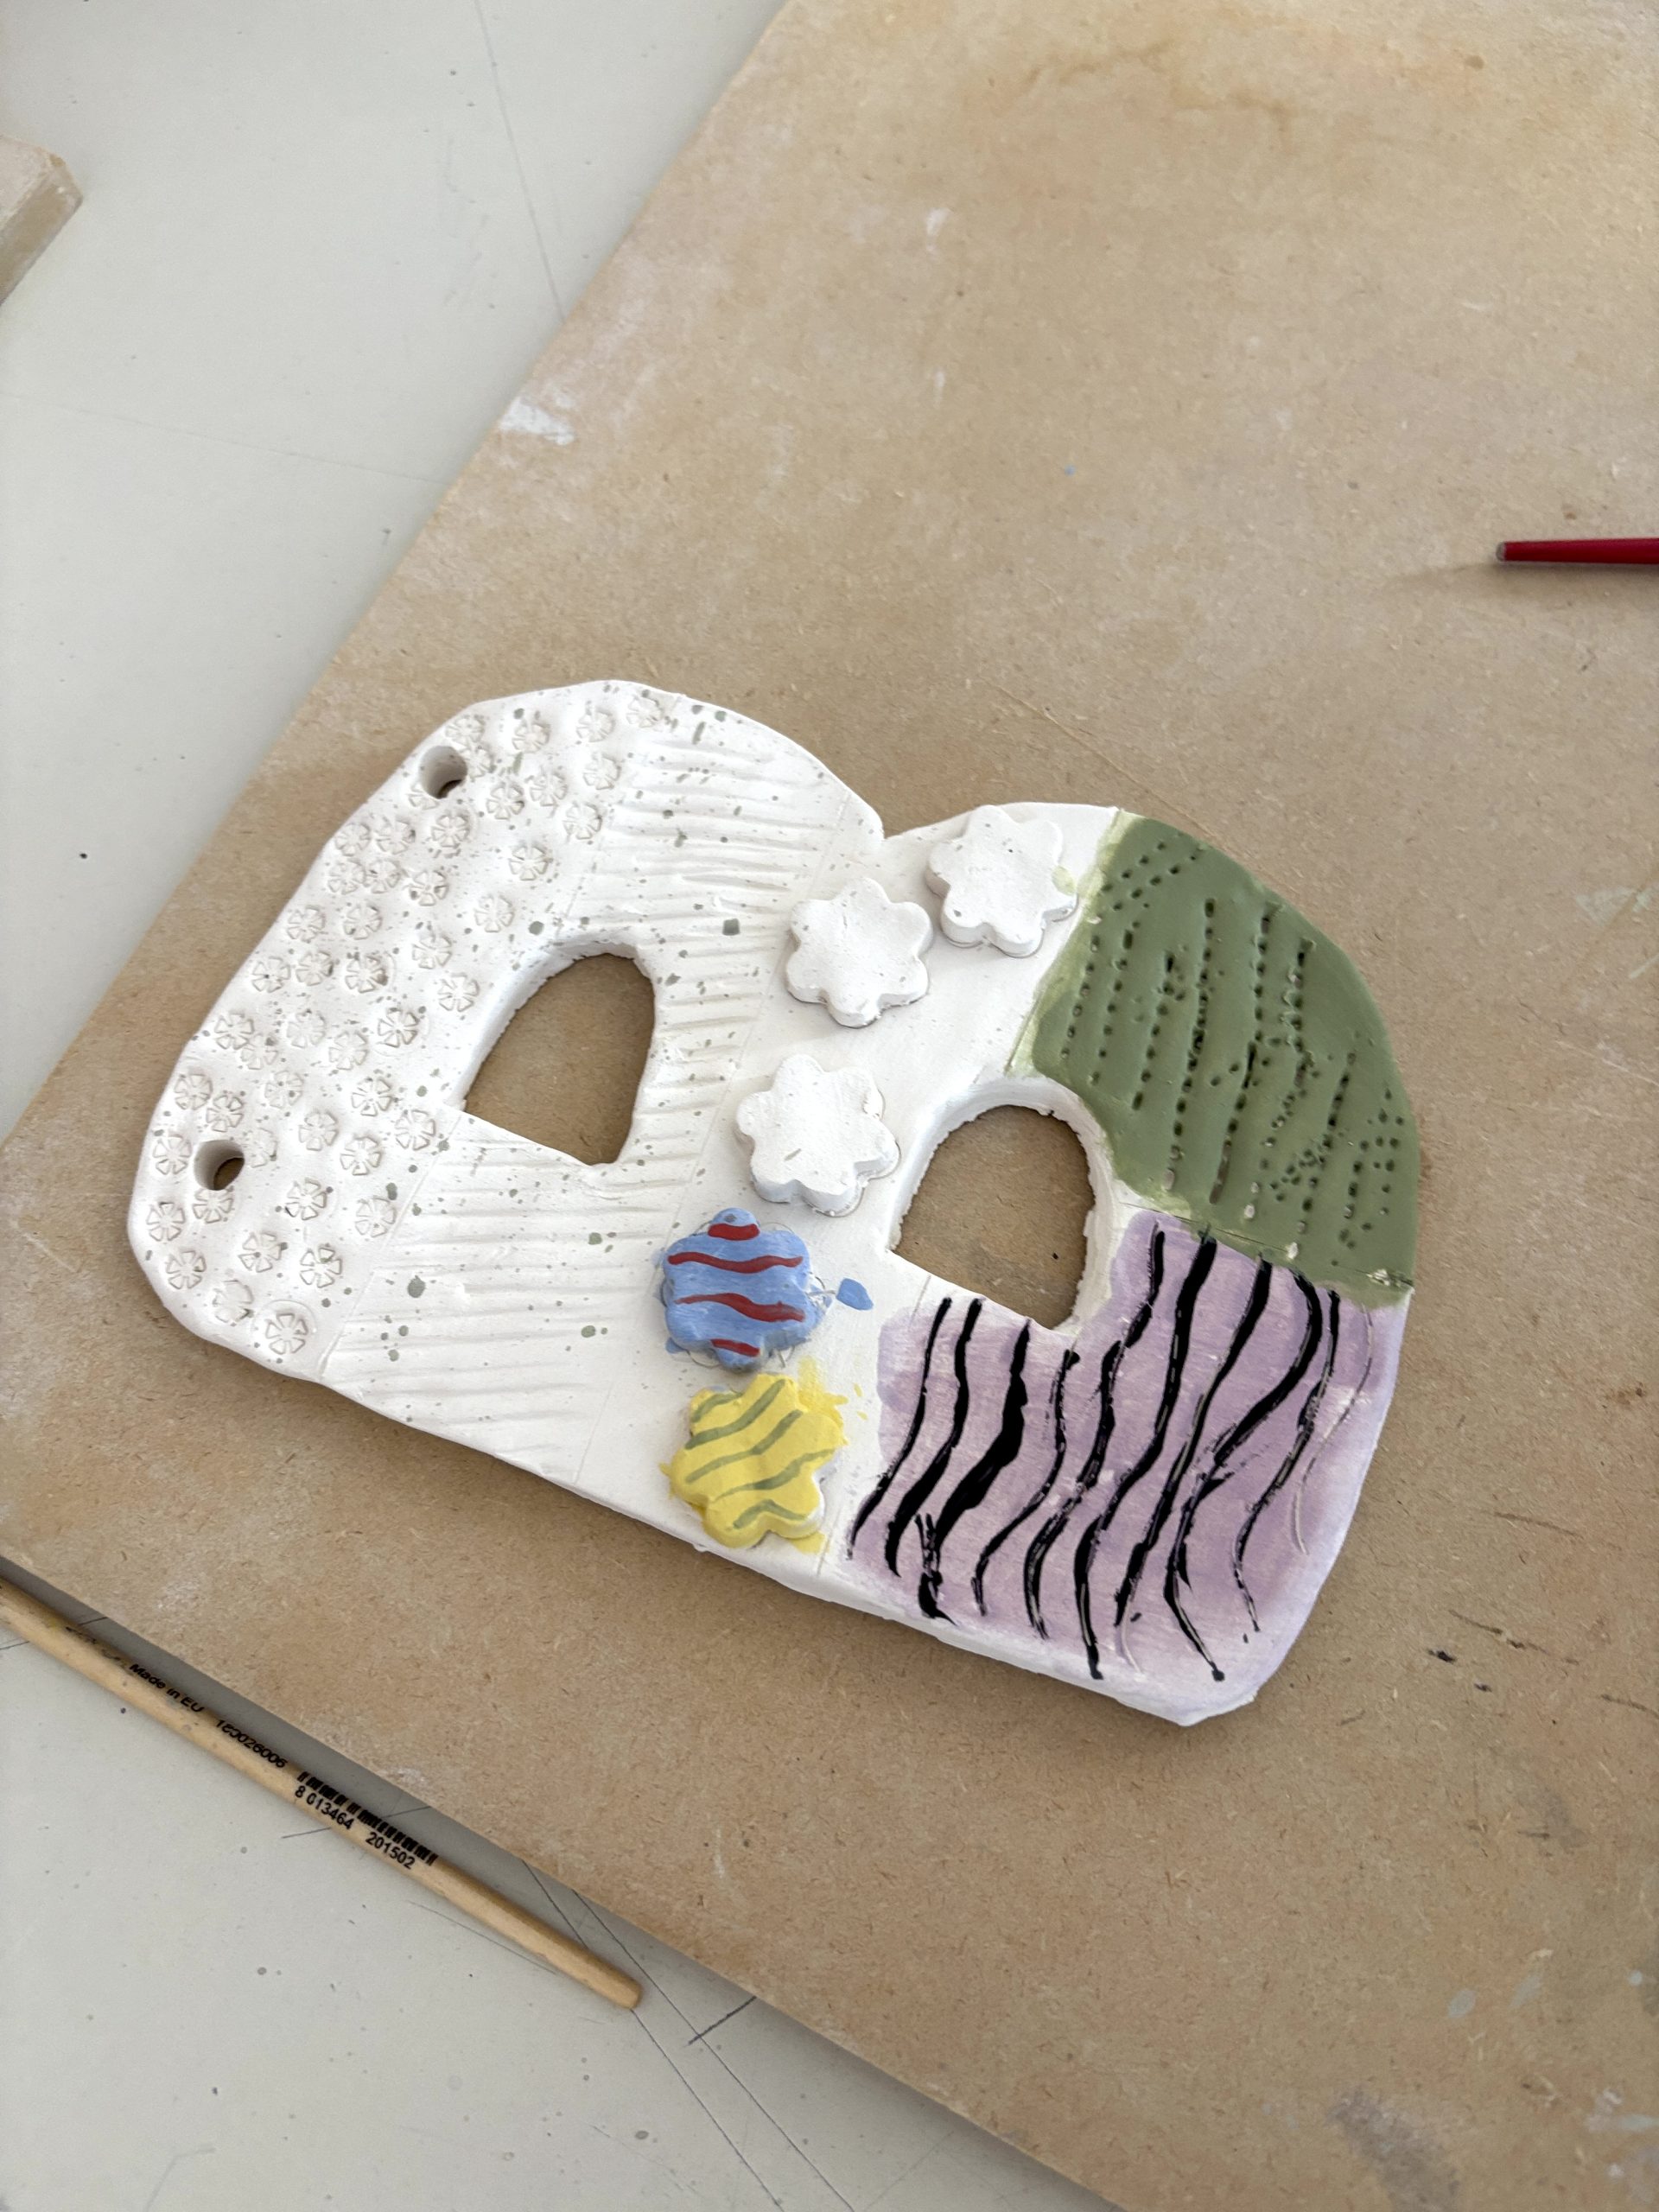
At the end of the workshop, after applying a layer of glossy transparent glaze over the entire surface to make it bright and waterproof, we ran the second firing. And here are our finished letters—shiny, colorful, and ready to hang!