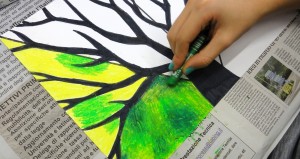
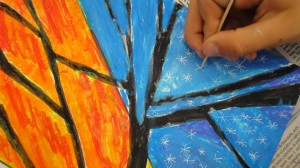
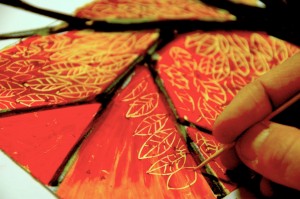
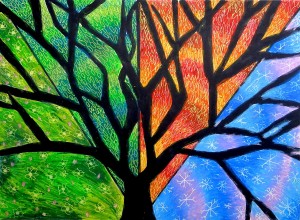
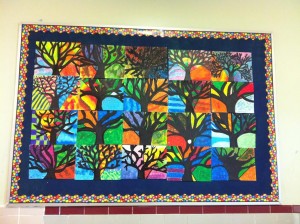
In the classes of the 7th Grade we are still working on the textures, but this time we are using oil pastels and discovering all the technical possibilities of these colors. After drawing a large tree with a black marker, we colored the four areas of the background with the colors of the four seasons. The oil pastels have been overlapped and blended to create nuanced color effects, and finally the surface of oil pastels has been engraved with a toothpick with small textures that evoke the four seasons. I find that the results are beautiful!
Here I publish the picture of the works realized to the students of St.B school in Canada, they followed the suggestion of this post about the 4 Season Tree, using permanent markers and oil pastels. The experience was shared from a great teacher, and I’m very glad to show the result! Thanks for sharing!

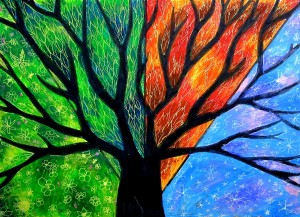

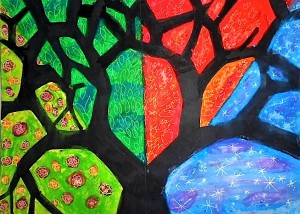
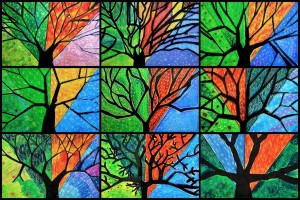
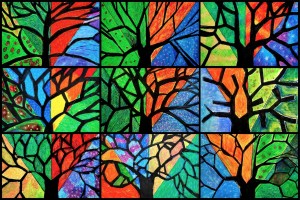
Splendidi… sembrano vetrate gotiche!!
ciao Miriam.
Ciao Elisa! Hai proprio ragione 😉
This peace of work is beautiful. I myself is trying a season’s tree
Hi Quilting! All instructions are clear I think, ready for your work of art? Show me the result on Facebook, send me a picture! https://www.facebook.com/pages/Arte-a-Scuola/608828355832232?ref=hl
bellissimii … 🙂 ….. prof ma non ci sono i nostri?!! quelli della 1D.. sono hamna…
Ciao! I vostri disegni non li ho ancora fotografati. Magari, visto che sei una assidua visitatrice del sito metterò almeno il tuo disegno 😉
ohh… graziee prof!… 🙂
Miriam!
Thanks for sharing the work that my class has completed! I have sent a link to administration for them to see the work and visit your blogs. I will continue to tell my colleagues to visit your blog for art ideas!
Grazie Mille, sono veramente contenta che ho scoperto il tuo bellissimo blog!
A dopo,
Vanessa
Thank you Vanessa! It’s an honor for me 🙂
Beautiful… But how can I get it’s tutorial
Hi Saruchi Sharma, the only tutorial I have are the pictures I took while working. Do you need some further information about the method?
Yesss.. please if you can…
I am eager to post my craft on ur blog.. I love your ideas
I am waiting for your response..
Hi Saruchi! How you can see in the pictures the first step is the drawing of the tree, we made it in pencil and then we colored it with a black permanent marker. Then we drew the three lines that separate the four seasons. Whit oil pastel we colored the background of every season with a first layer of solid color: White for Winter, yellow for Spring and Autumn, light green for summer. Over these layers we overlap a second layer of colors with oil pastels, drawing some value and gradations as well. For example: For the Autumn we colored the first layer with oil pastel in solid yellow, then we overlap the second layer of red, orange, brown oil pastels. At the end we engrave the surface using a toothpick with different textures.
Thank youuuuuu so much..
Will share it soon.. 🙂
😉 I look forward too see your works!
My 8 yo is working on this project right now! Thank you for sharing!
Hi Marion! I’m sure they enjoy the project! Send me a picture when you finish it!
Thanks for your comment! 🙂
Hi really enjoy your website. what kind of paper do you use for this?
thank you
Hi Kamelia! I use normal white drawings sheets, the weight of the paper is around 200grams.
I am curious as to what would be an artist that you could refer to as inspiration for this lesson plan. Was there a list or some artists that inspired this lesson plan? That way students can reference the application of color and forms in other works of art? It’s a delightful idea. I believe it would be more founded if it had artist exemplars.
Hi Mary!
I realized this idea by myself, but if I think about artists that could be a visual reference, I remind Mondrian and his series of trees. For kids I think of Karla Gerard as well. What’s your idea? 🙂
Hi Miriam,
I also was thinking along the lines of Karla Gerard and T R Mack who works similarly to her. This lesson plan has inspired me to work with bubble art and watercolor (for background) in a monochromatic way, for example blue. And students will use the inspiration of a season of their choosing. The leaves of the tree will be the complimentary colored pair of their choosing. For instance, if the background color is blue then the details on the tree and foreground would be variations of orange. At the moment my students are exploring different outlines of trees they might want to draw from.
It’s all fun!
HI,
I have a question if i using this technic?
Hi Joyce! Ask me any question please, I’ll be happy to help you! 🙂
Hey! Thank you for this great idea. I made the “Seasons-Trees” in the 9th grade of a special school in western Germany and they got very beautiful. The kids were absolutly motivated and liked the project a lot.
Anne
Hi anne, nice to meet you! I’m happy to spread my ideas around the world! Thanks for you come t, I hope your kids do more drawings inspired by arteascuola. Keep in touch! 😉
hey nice project , i have try this and it was very nice and i got a great appreciation for it . please share more.
Hello everyone,
I am feeling very glade to write this blog on shree sarvottam. Please visit this website.
http://www.shreesarvottam.in/index.php
Thanks for your suggestion Raj! 🙂