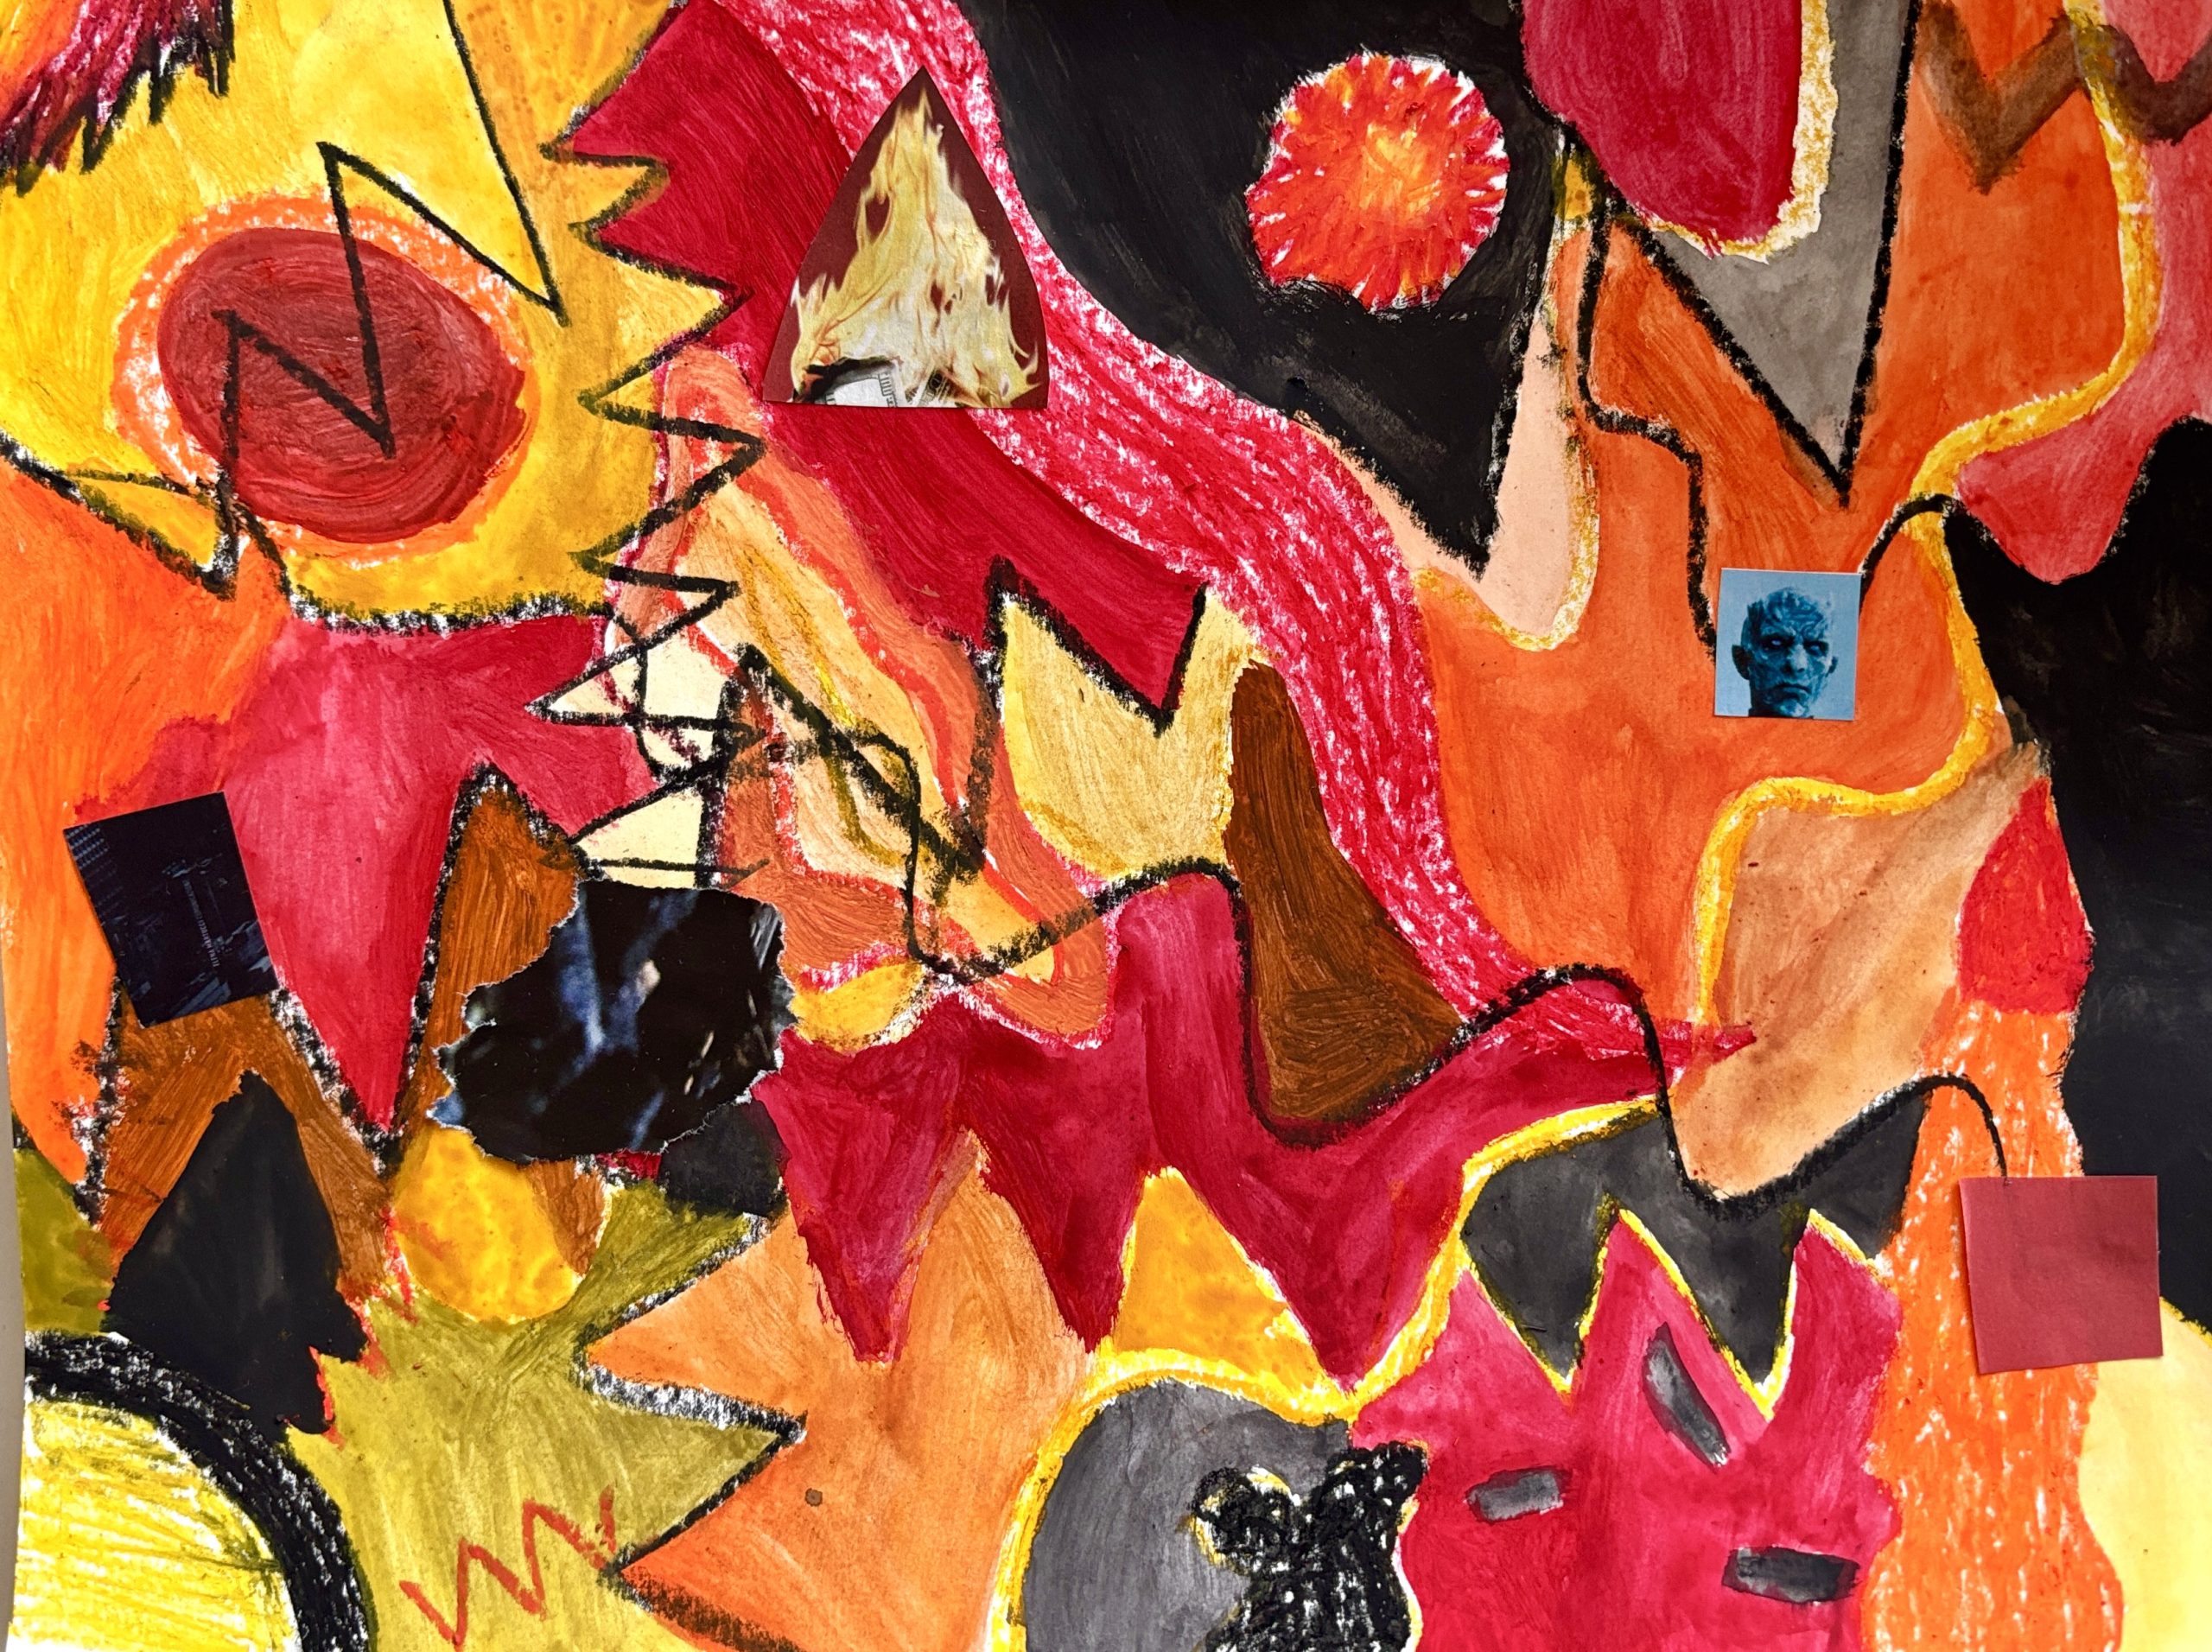
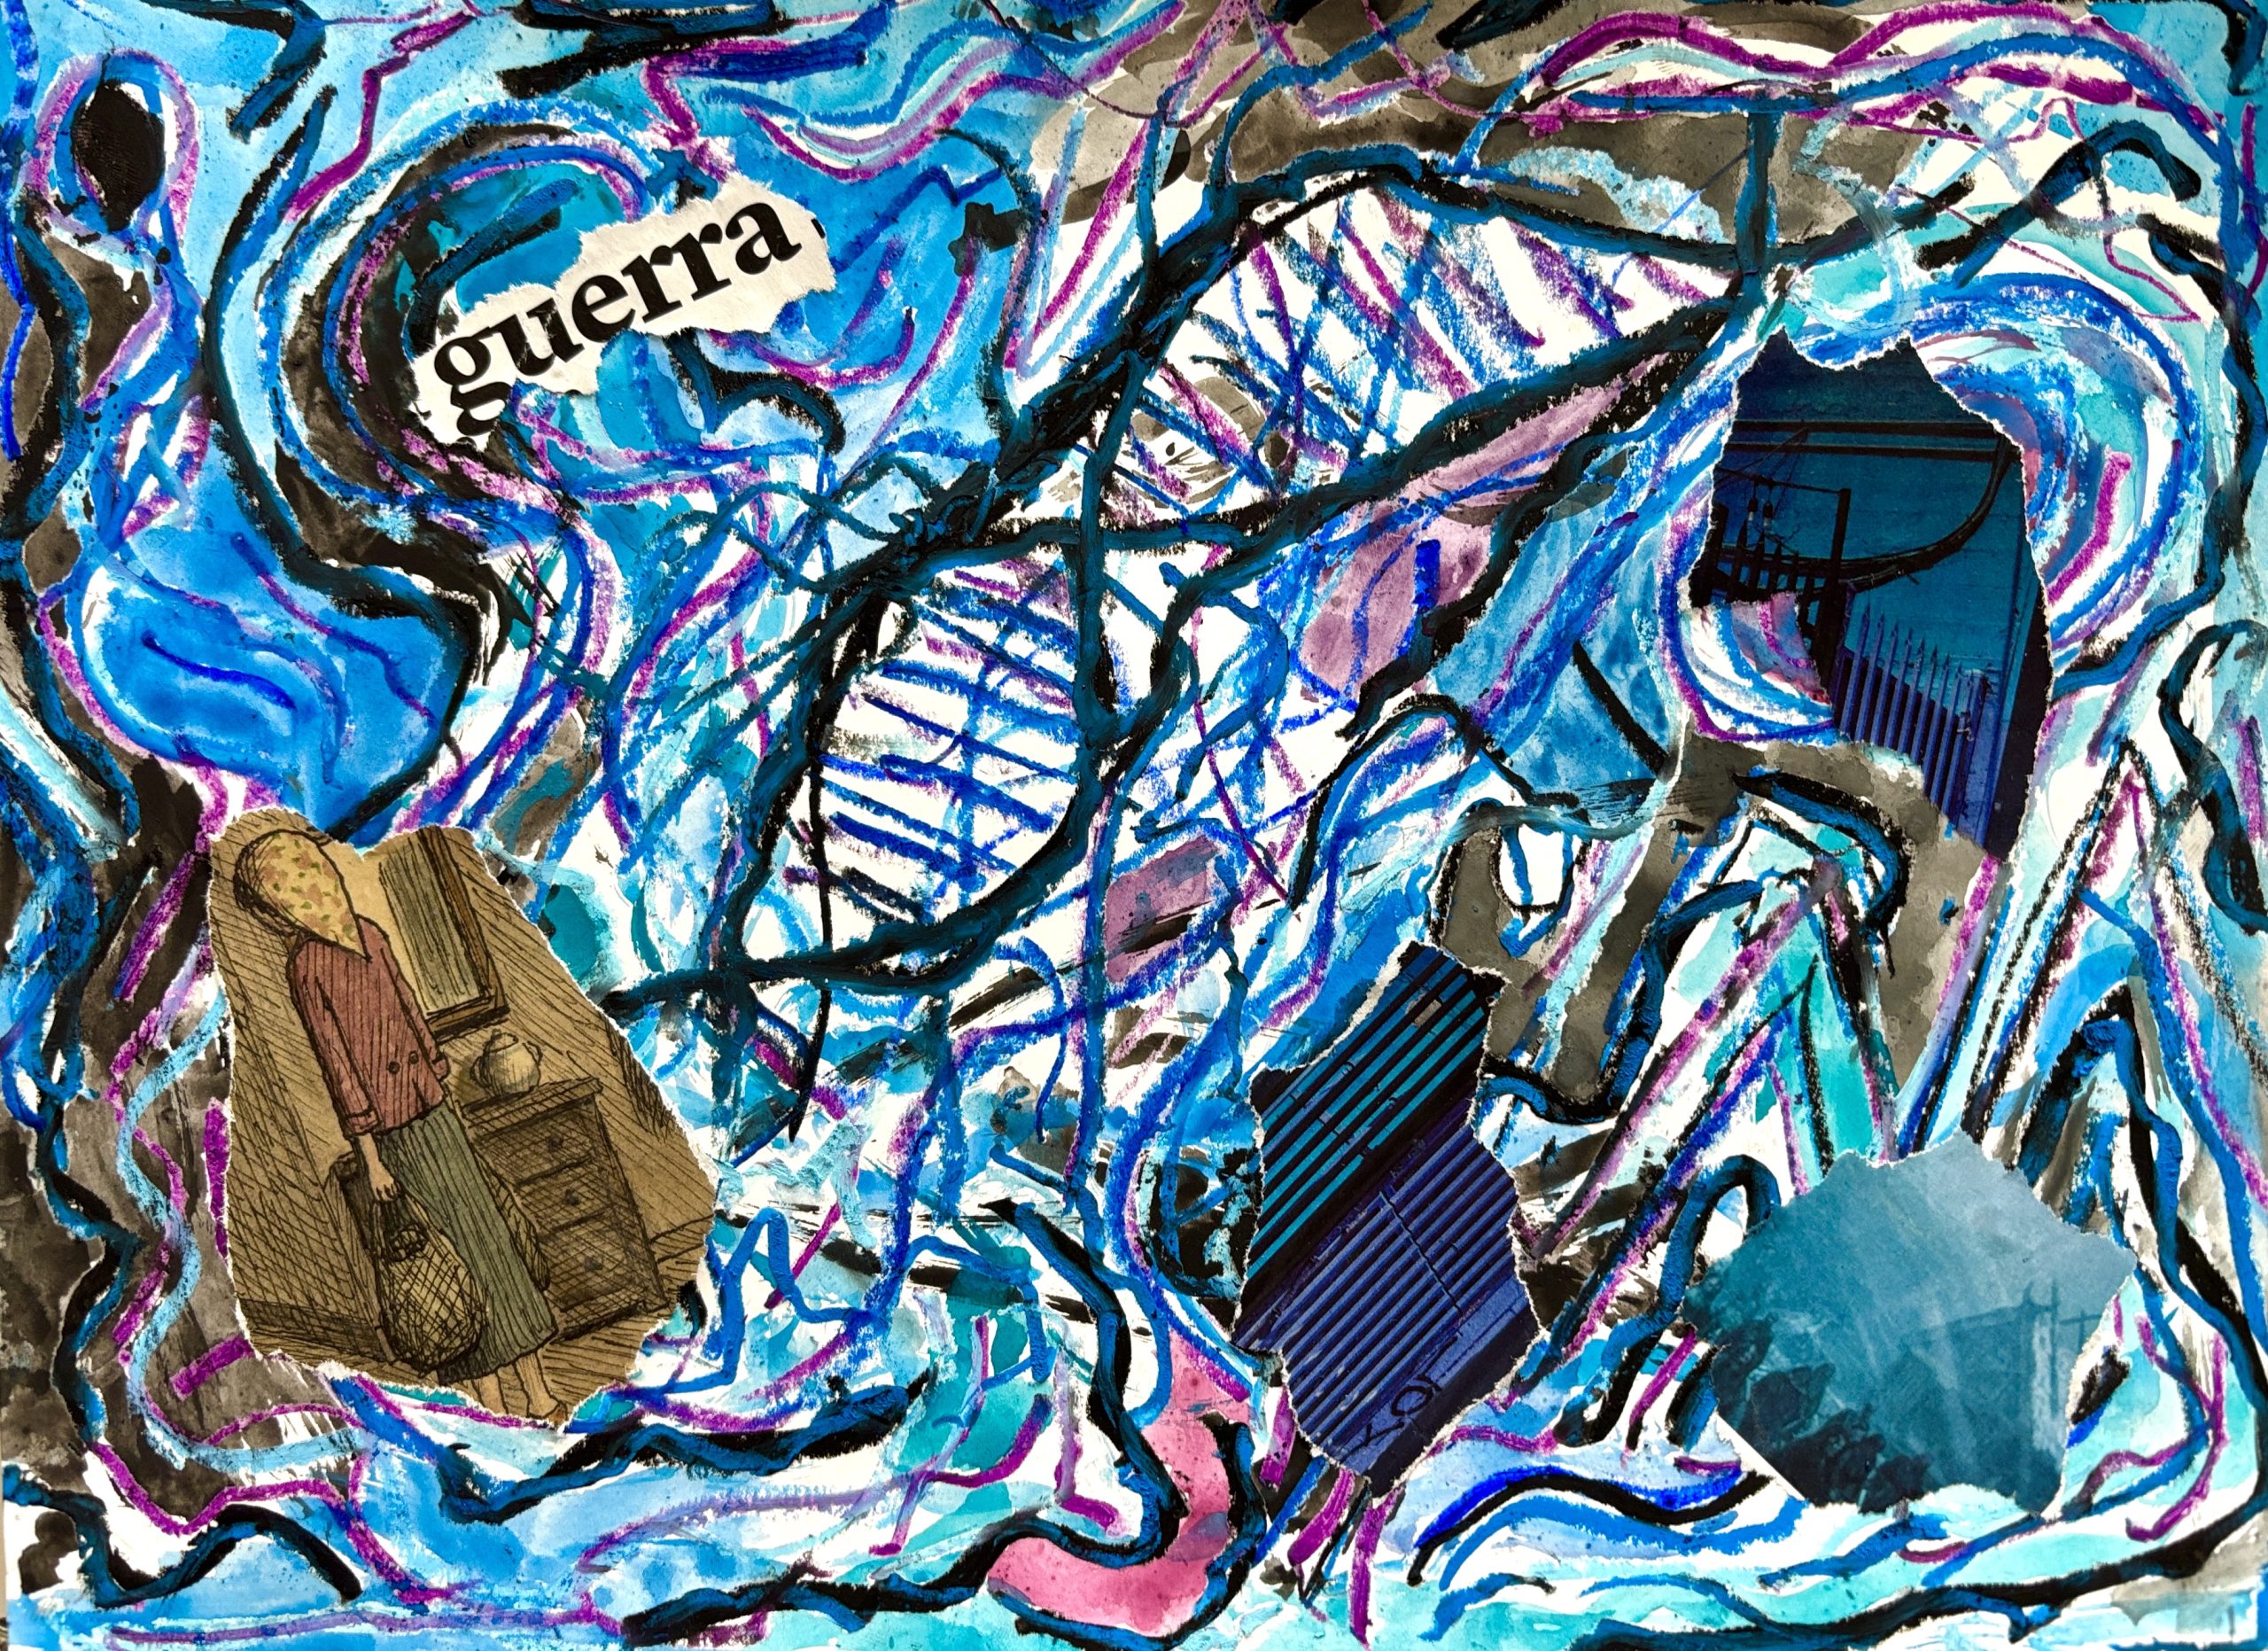
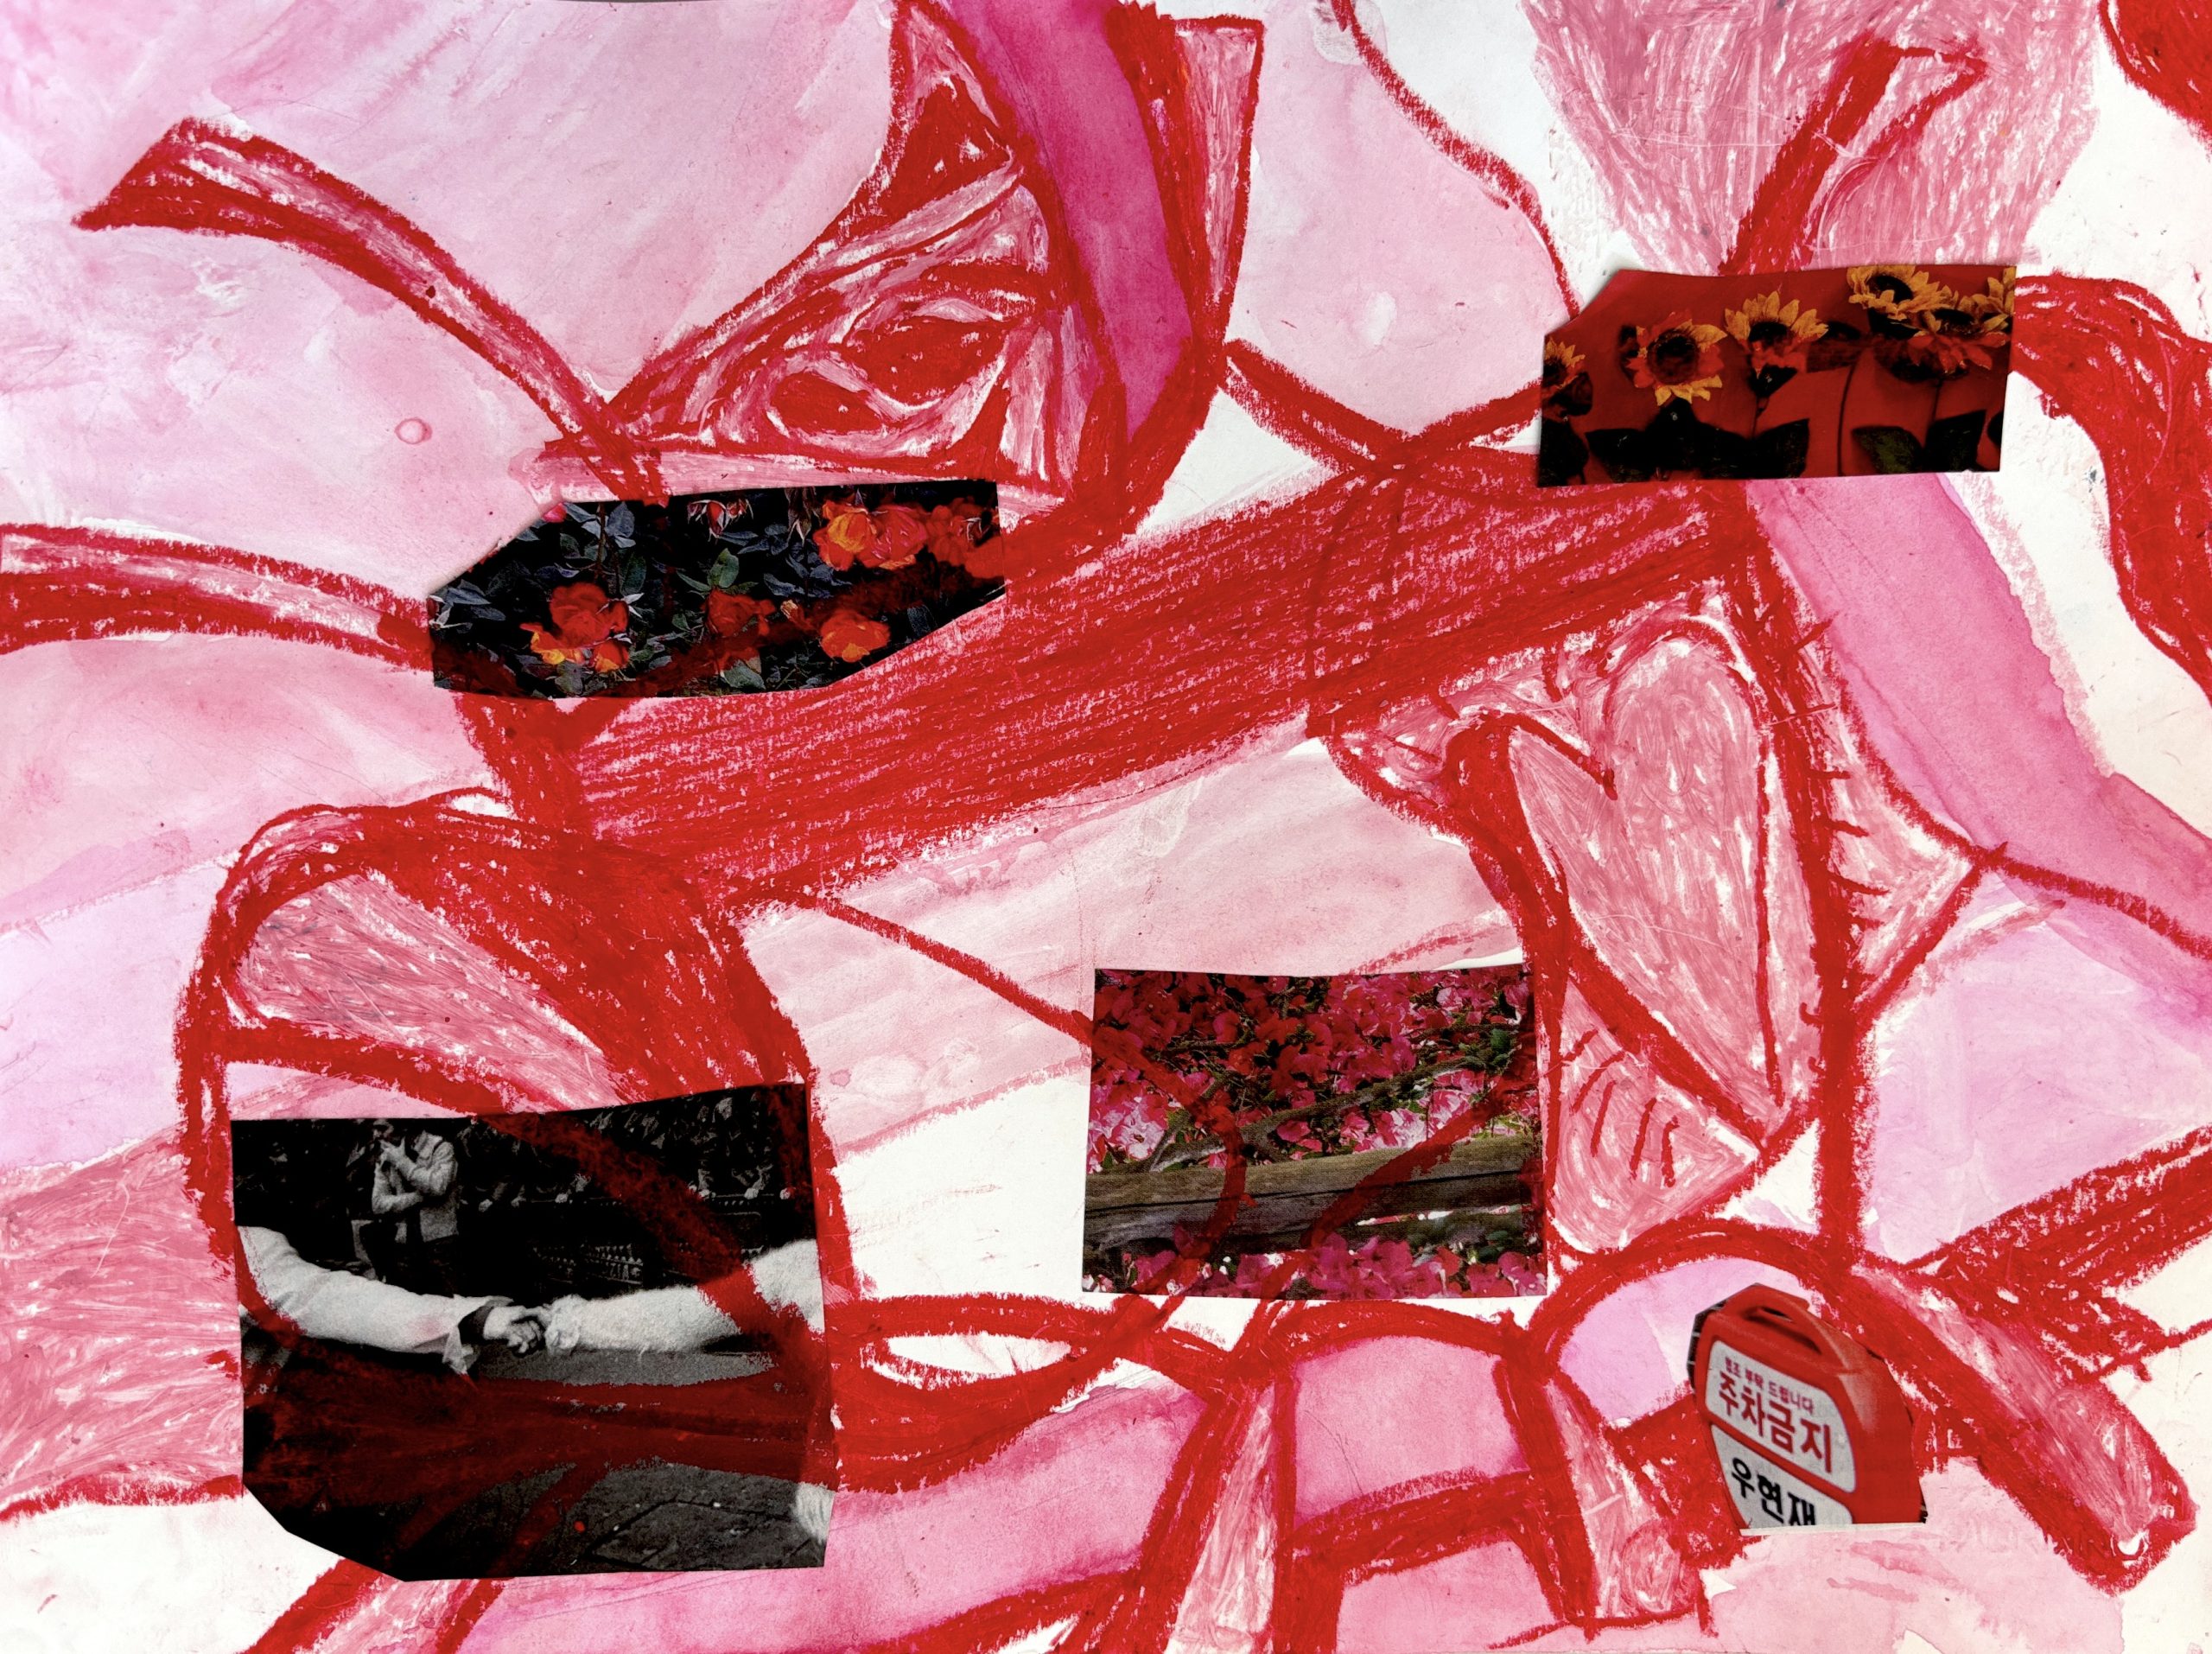
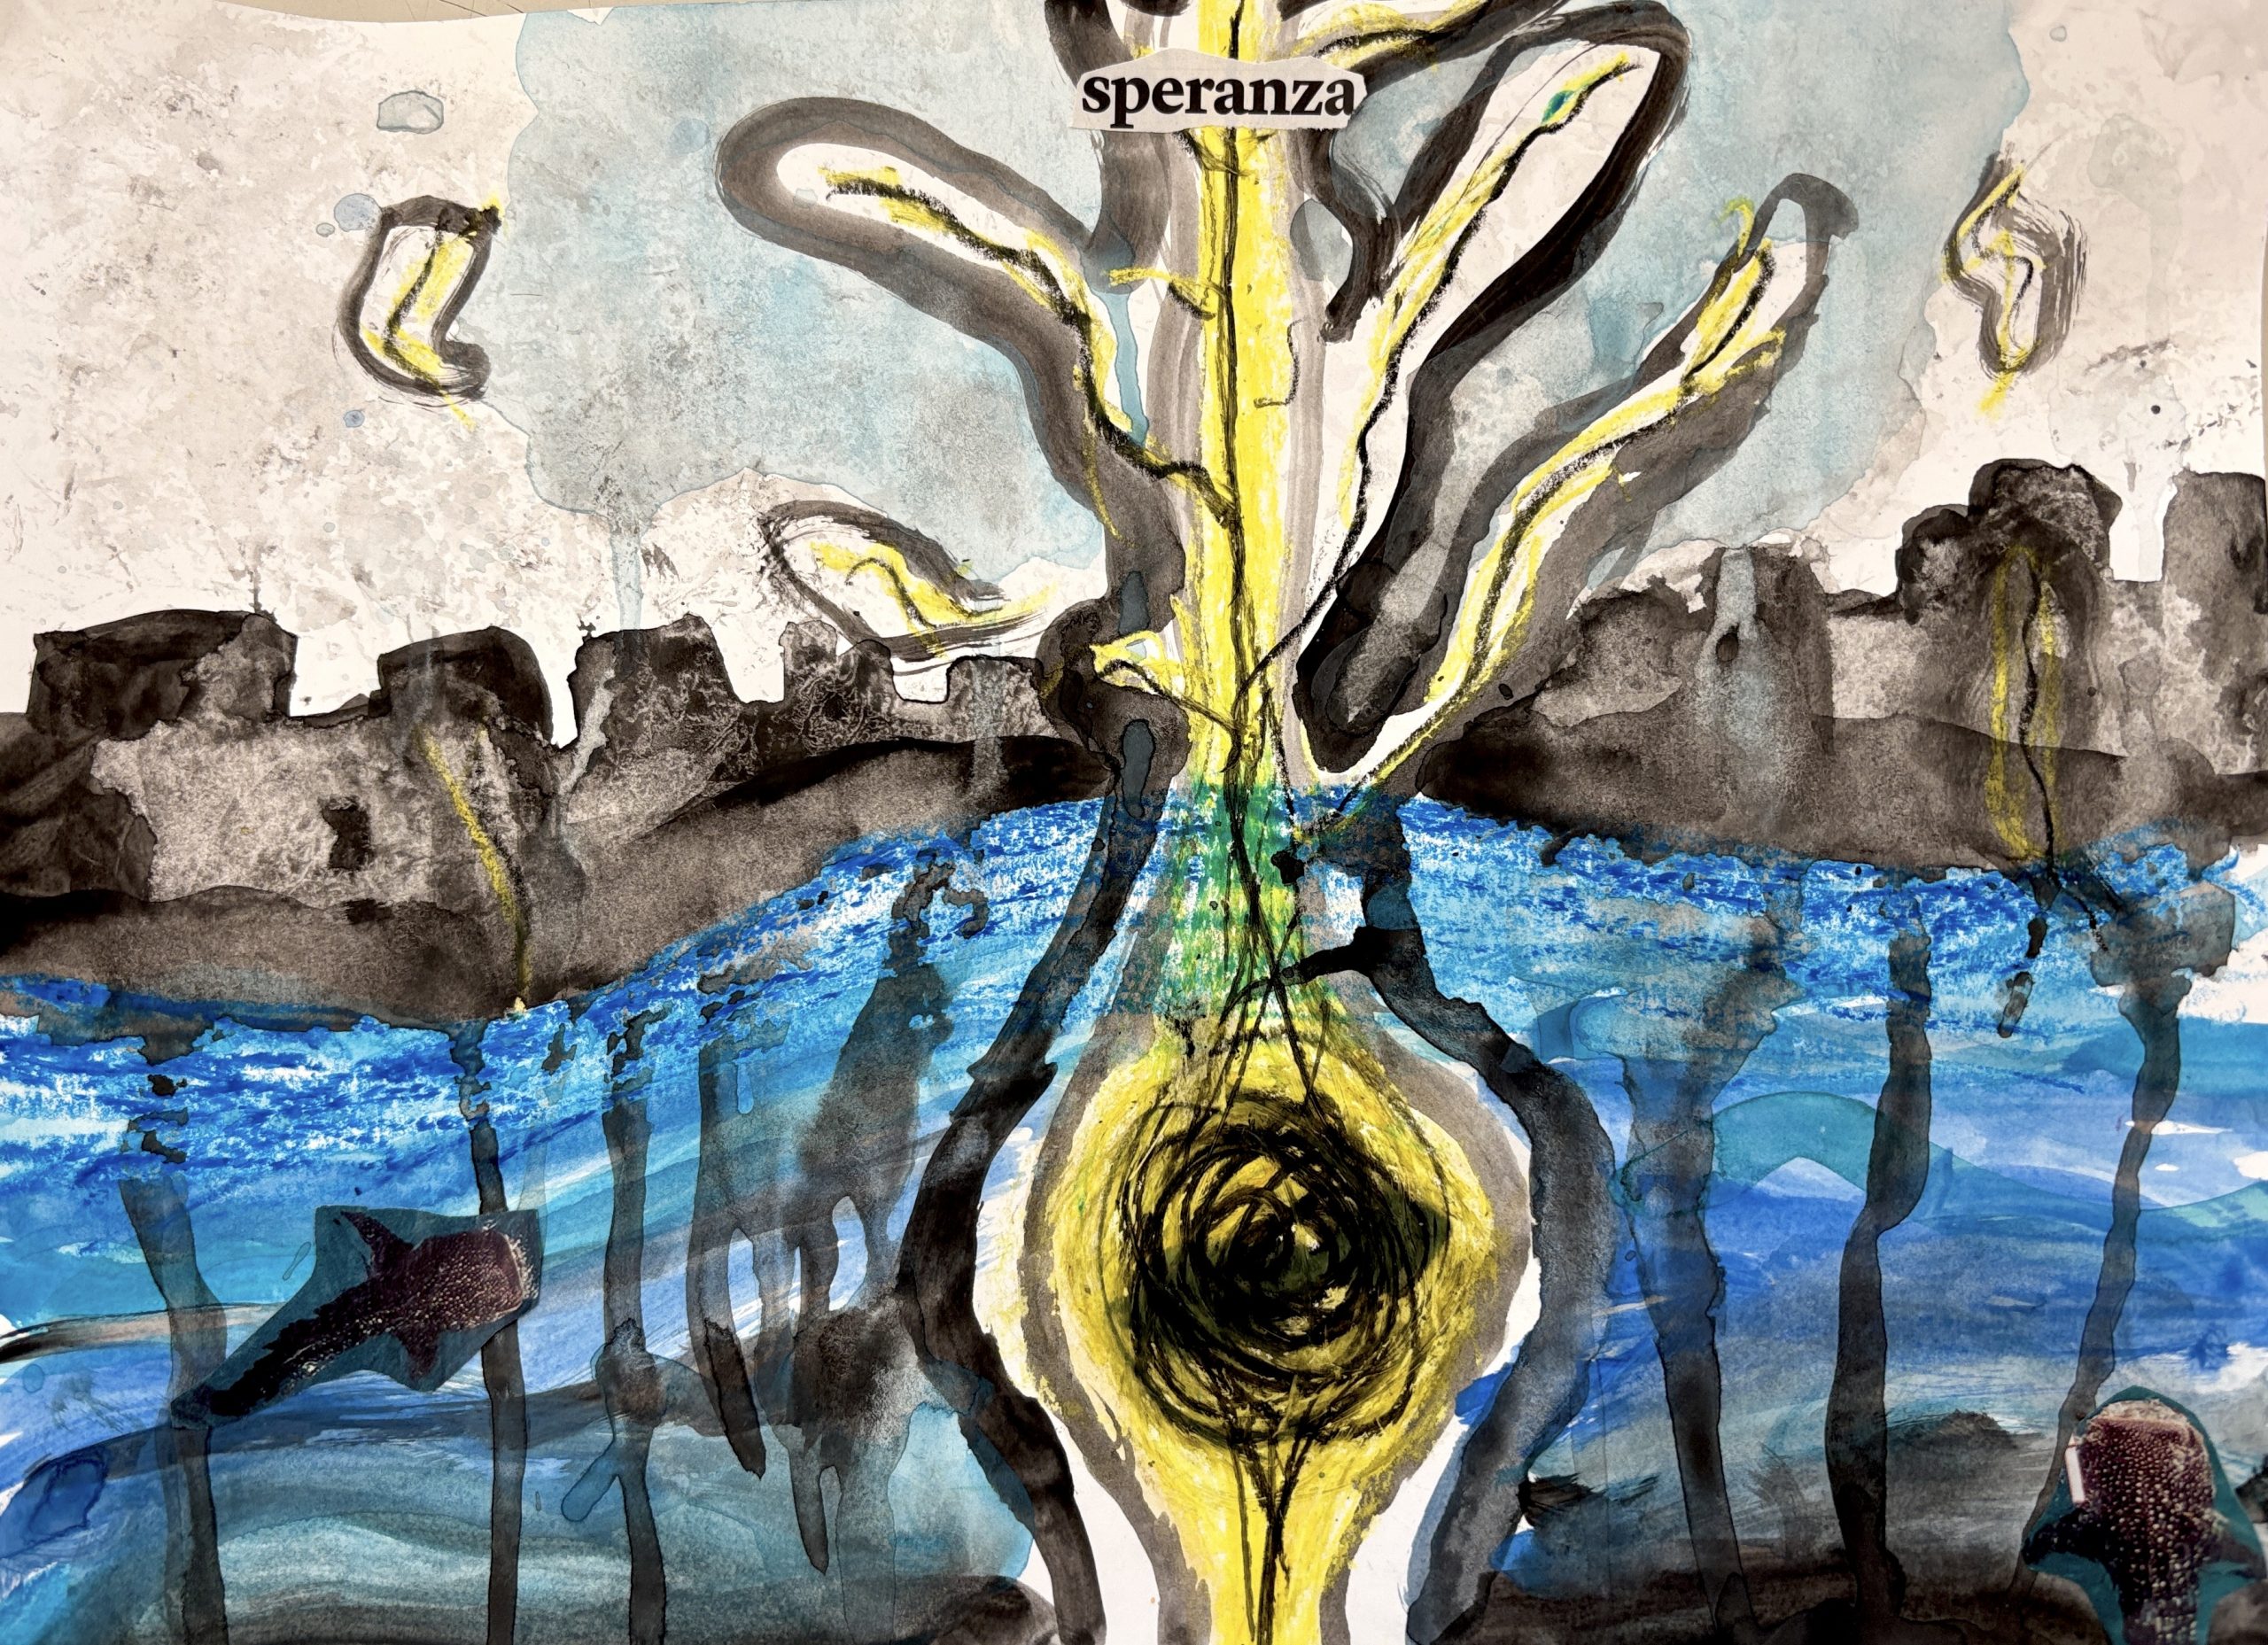
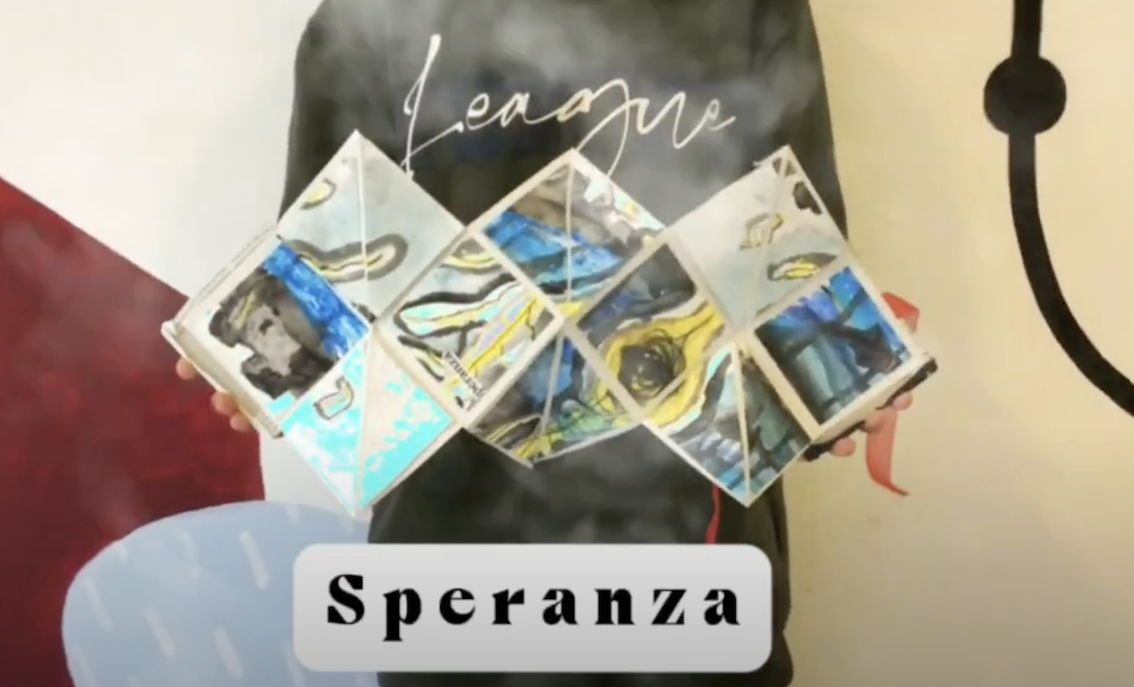
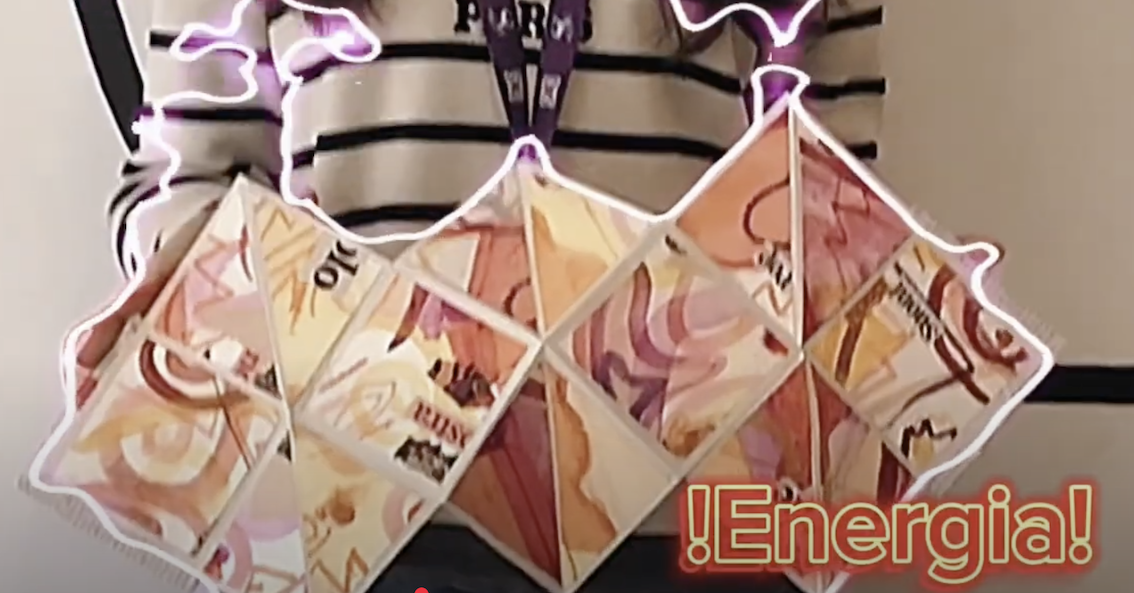
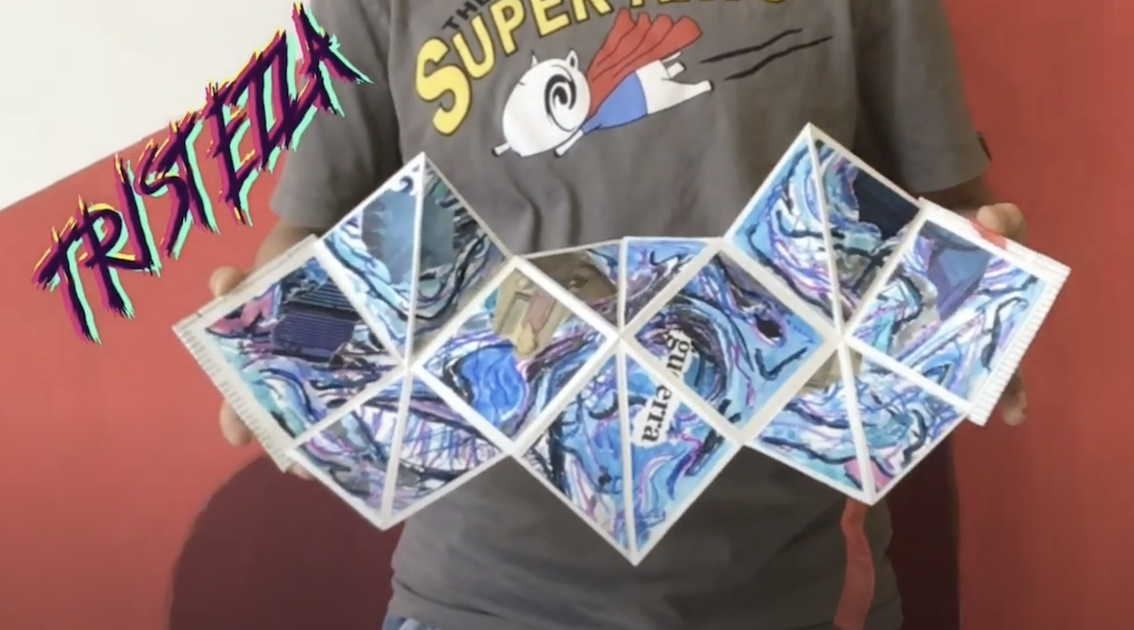
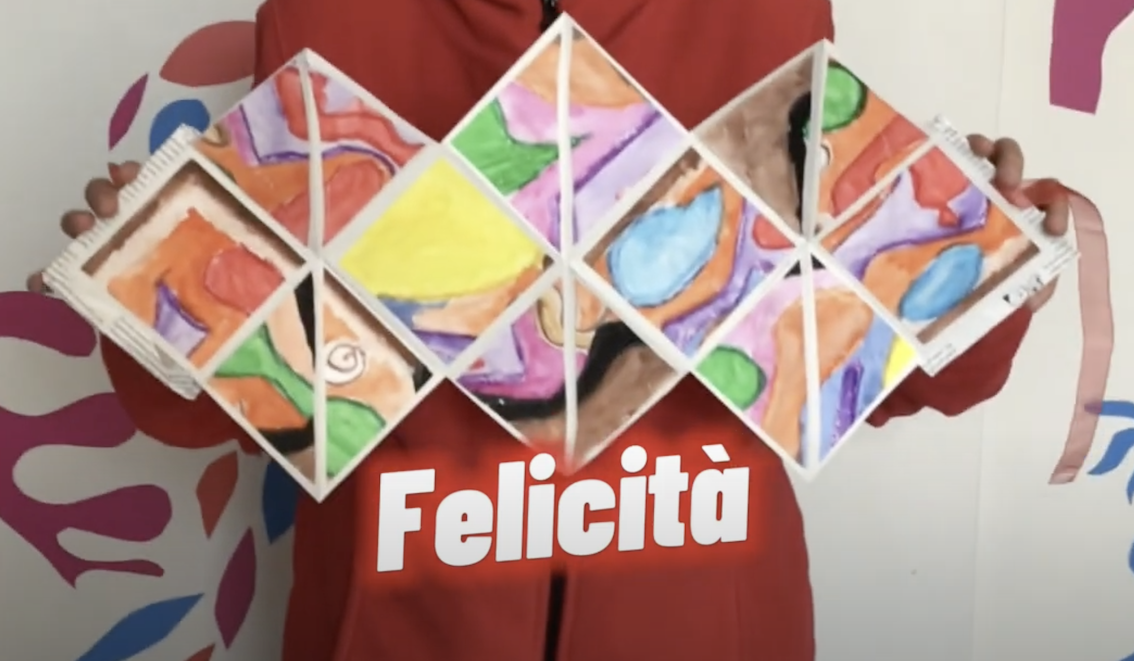
To create this “EXPLOSION BOOK” with the 6th grade students we reflected on our emotions asking ourselves if it is possible to REPRESENT an emotion graphically. With the help of some artists such as Kandinskij, Pollock, Klee and by reading illustrated books on the theme of emotions we concluded that each of us can learn to express our emotions, verbally and also through art.
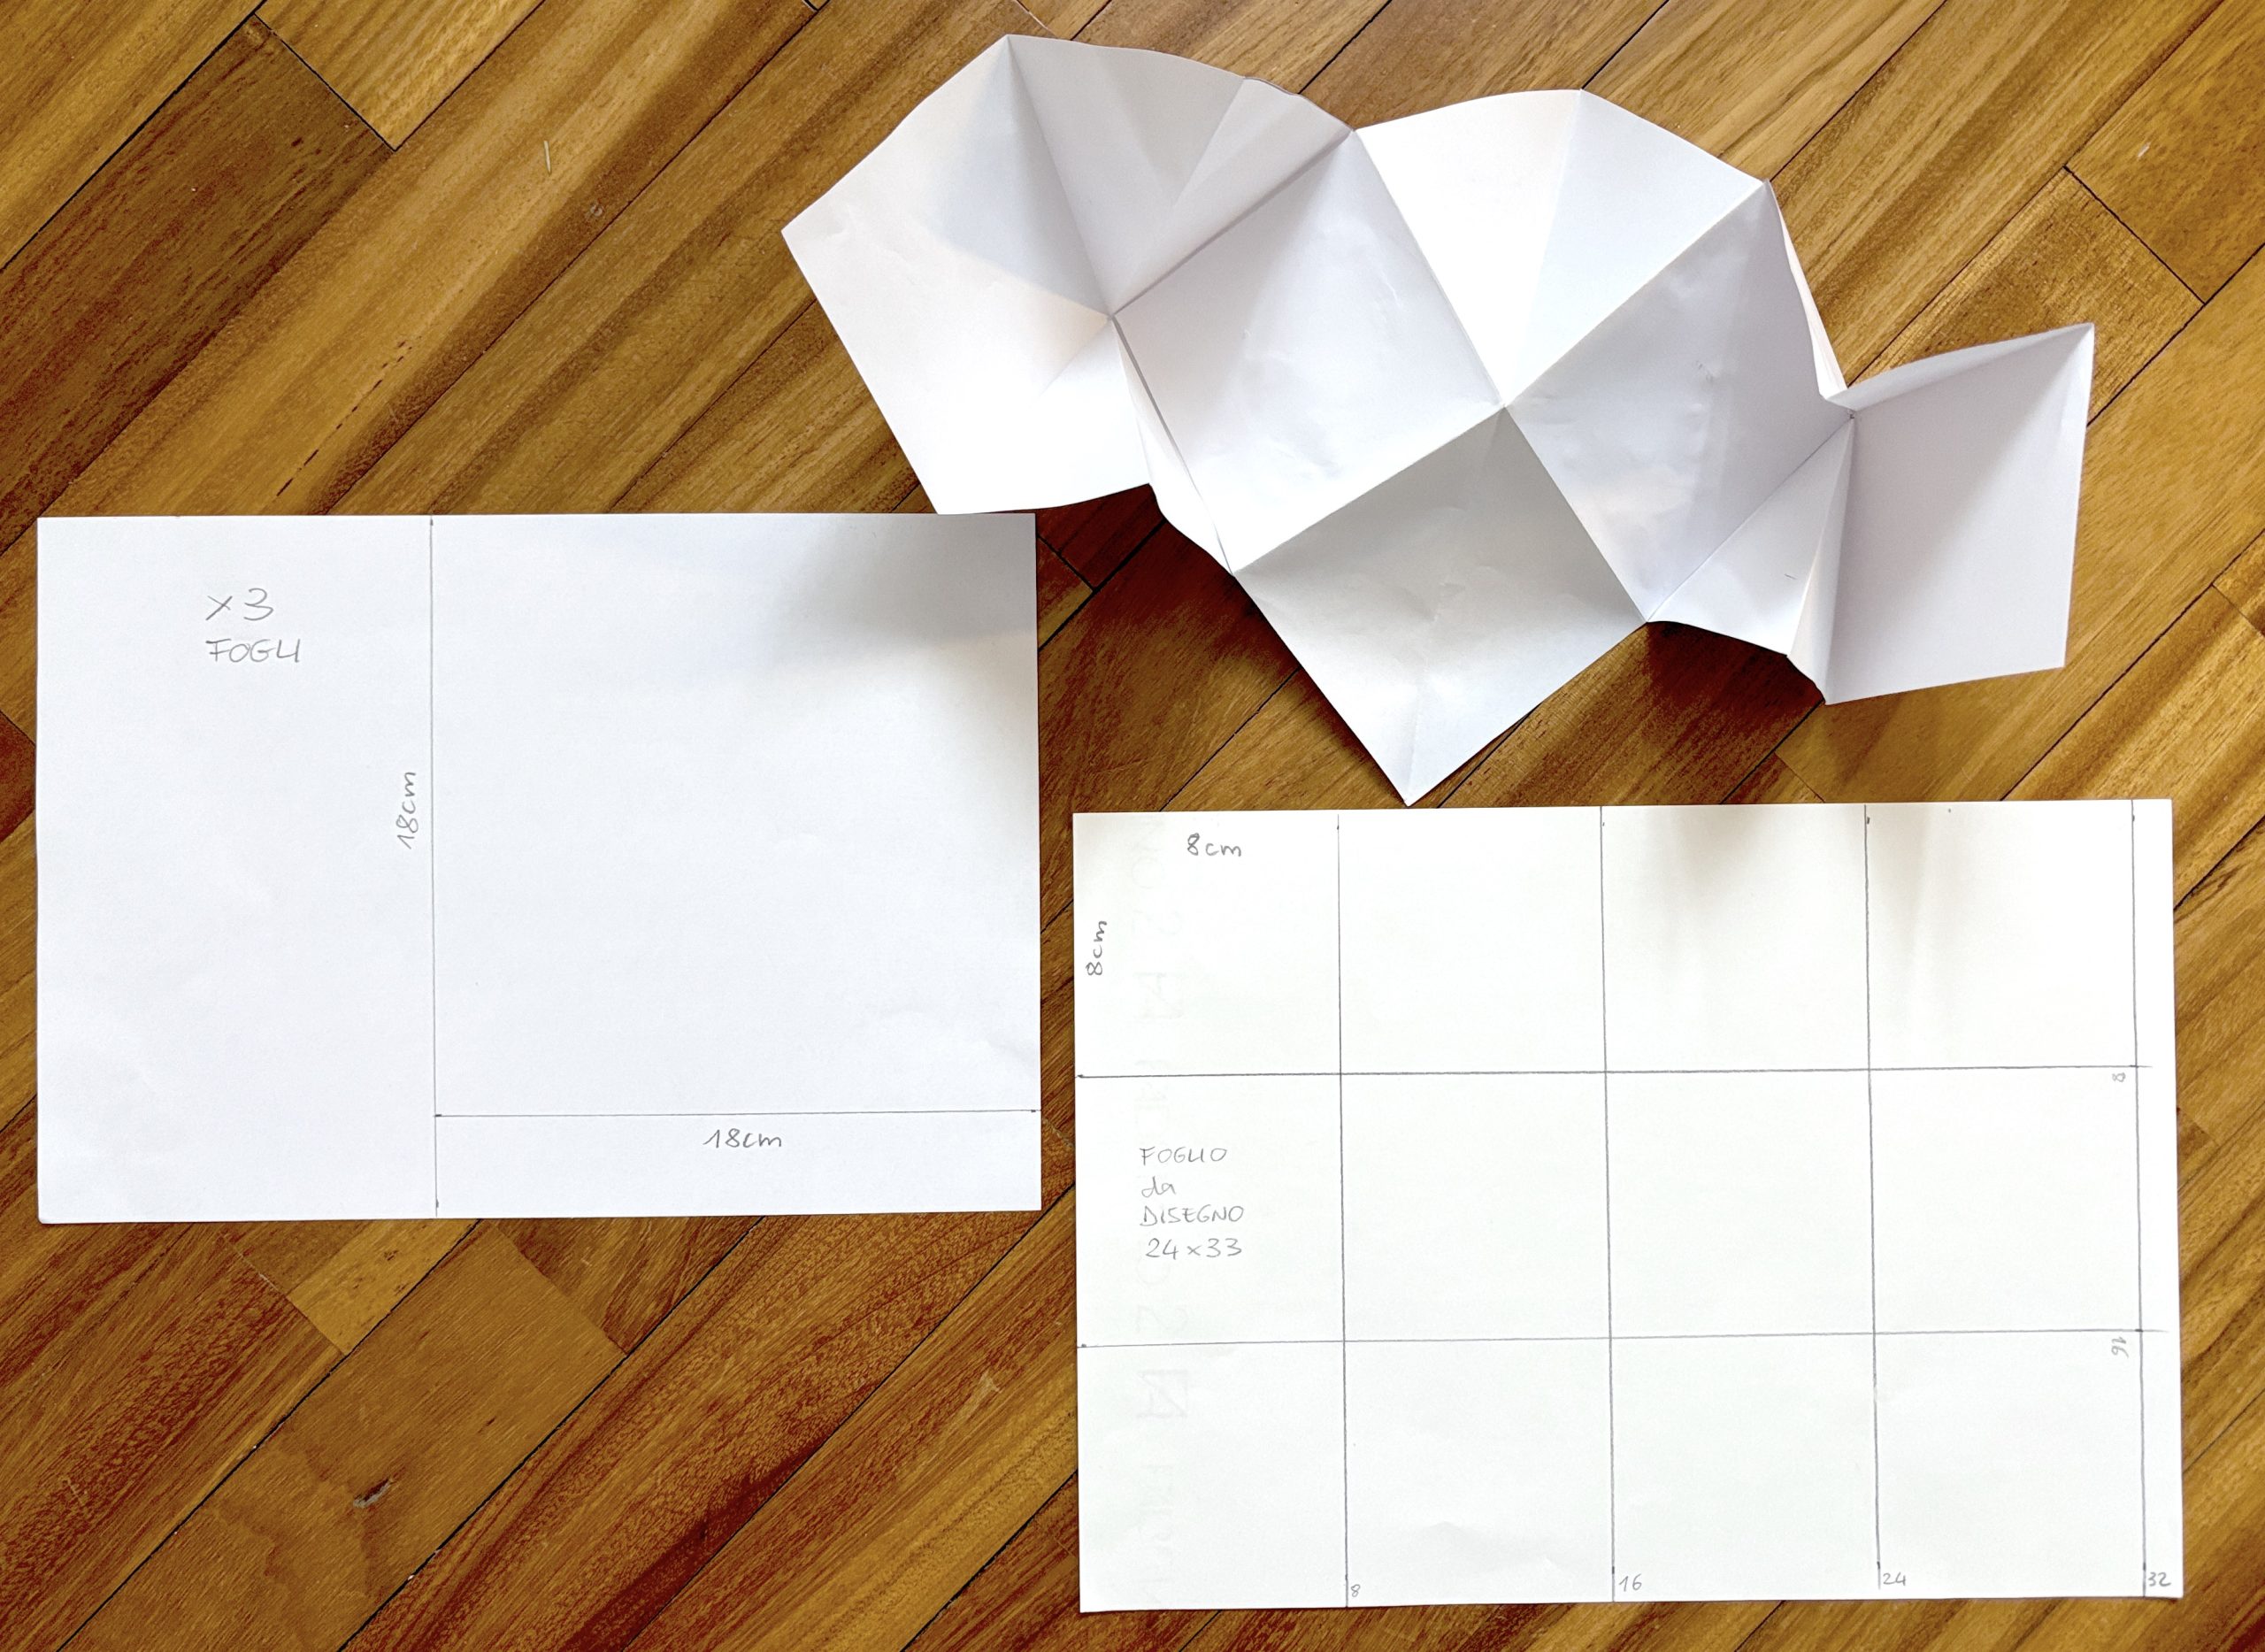
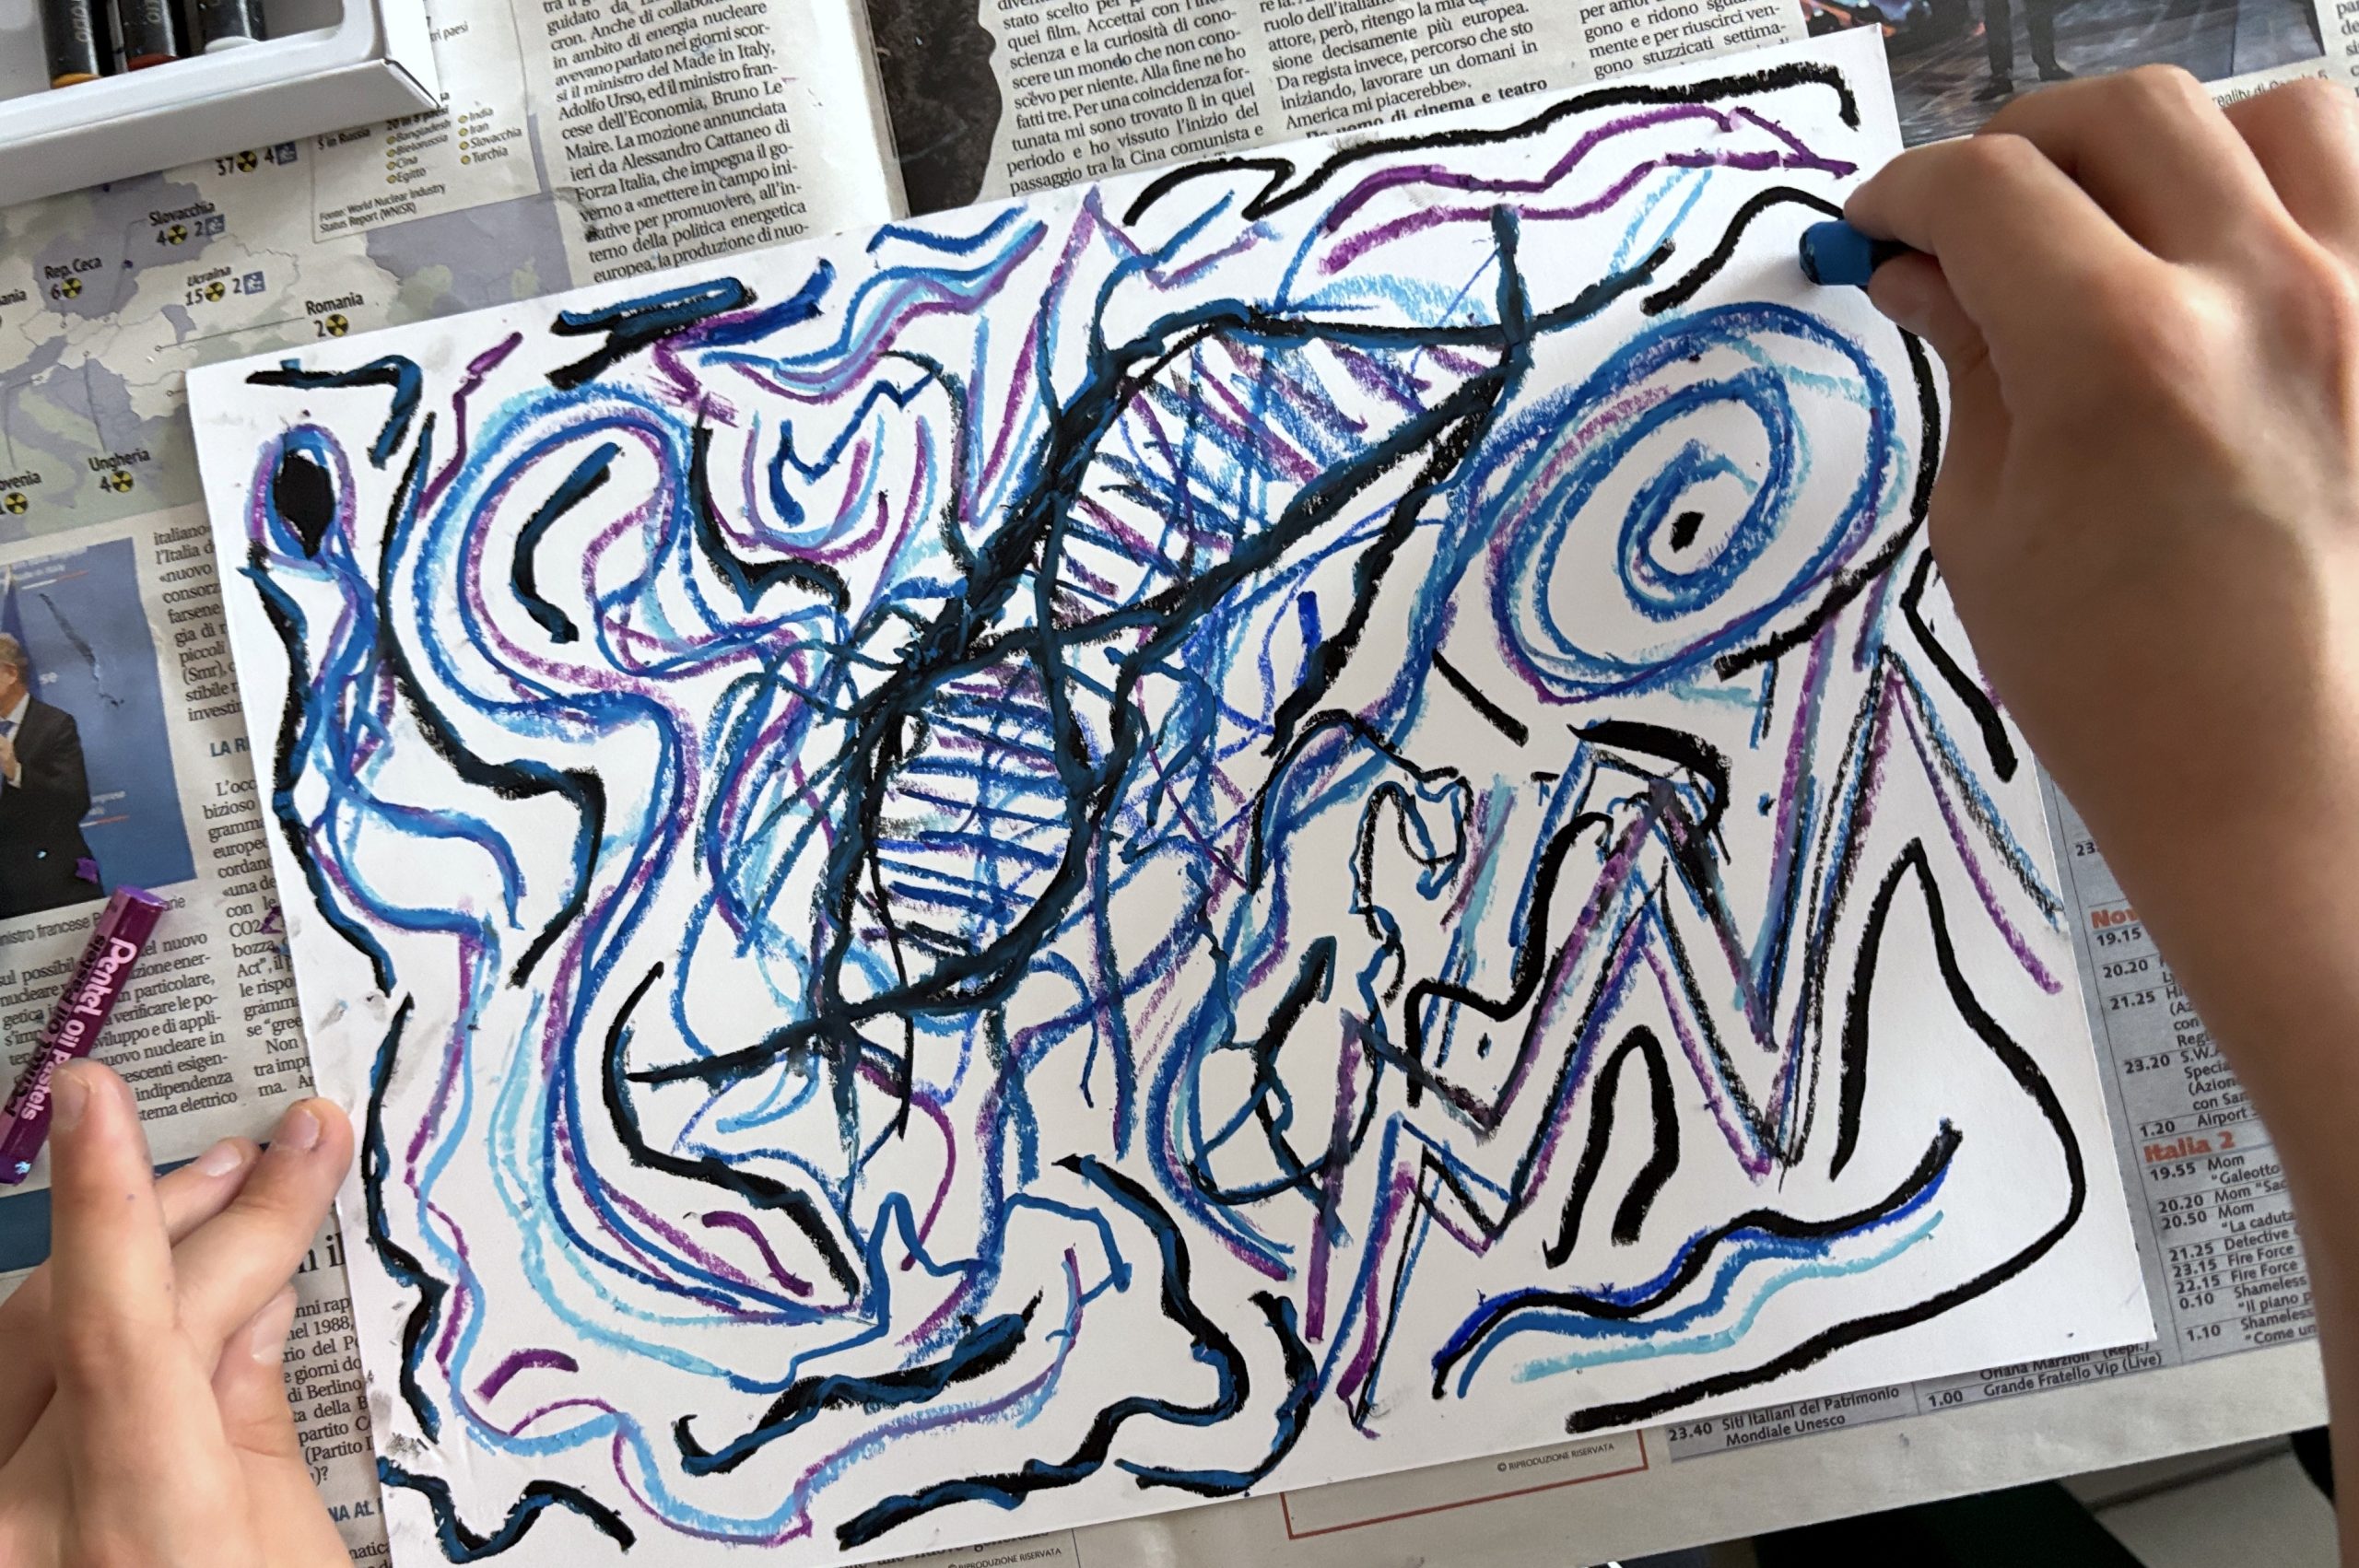
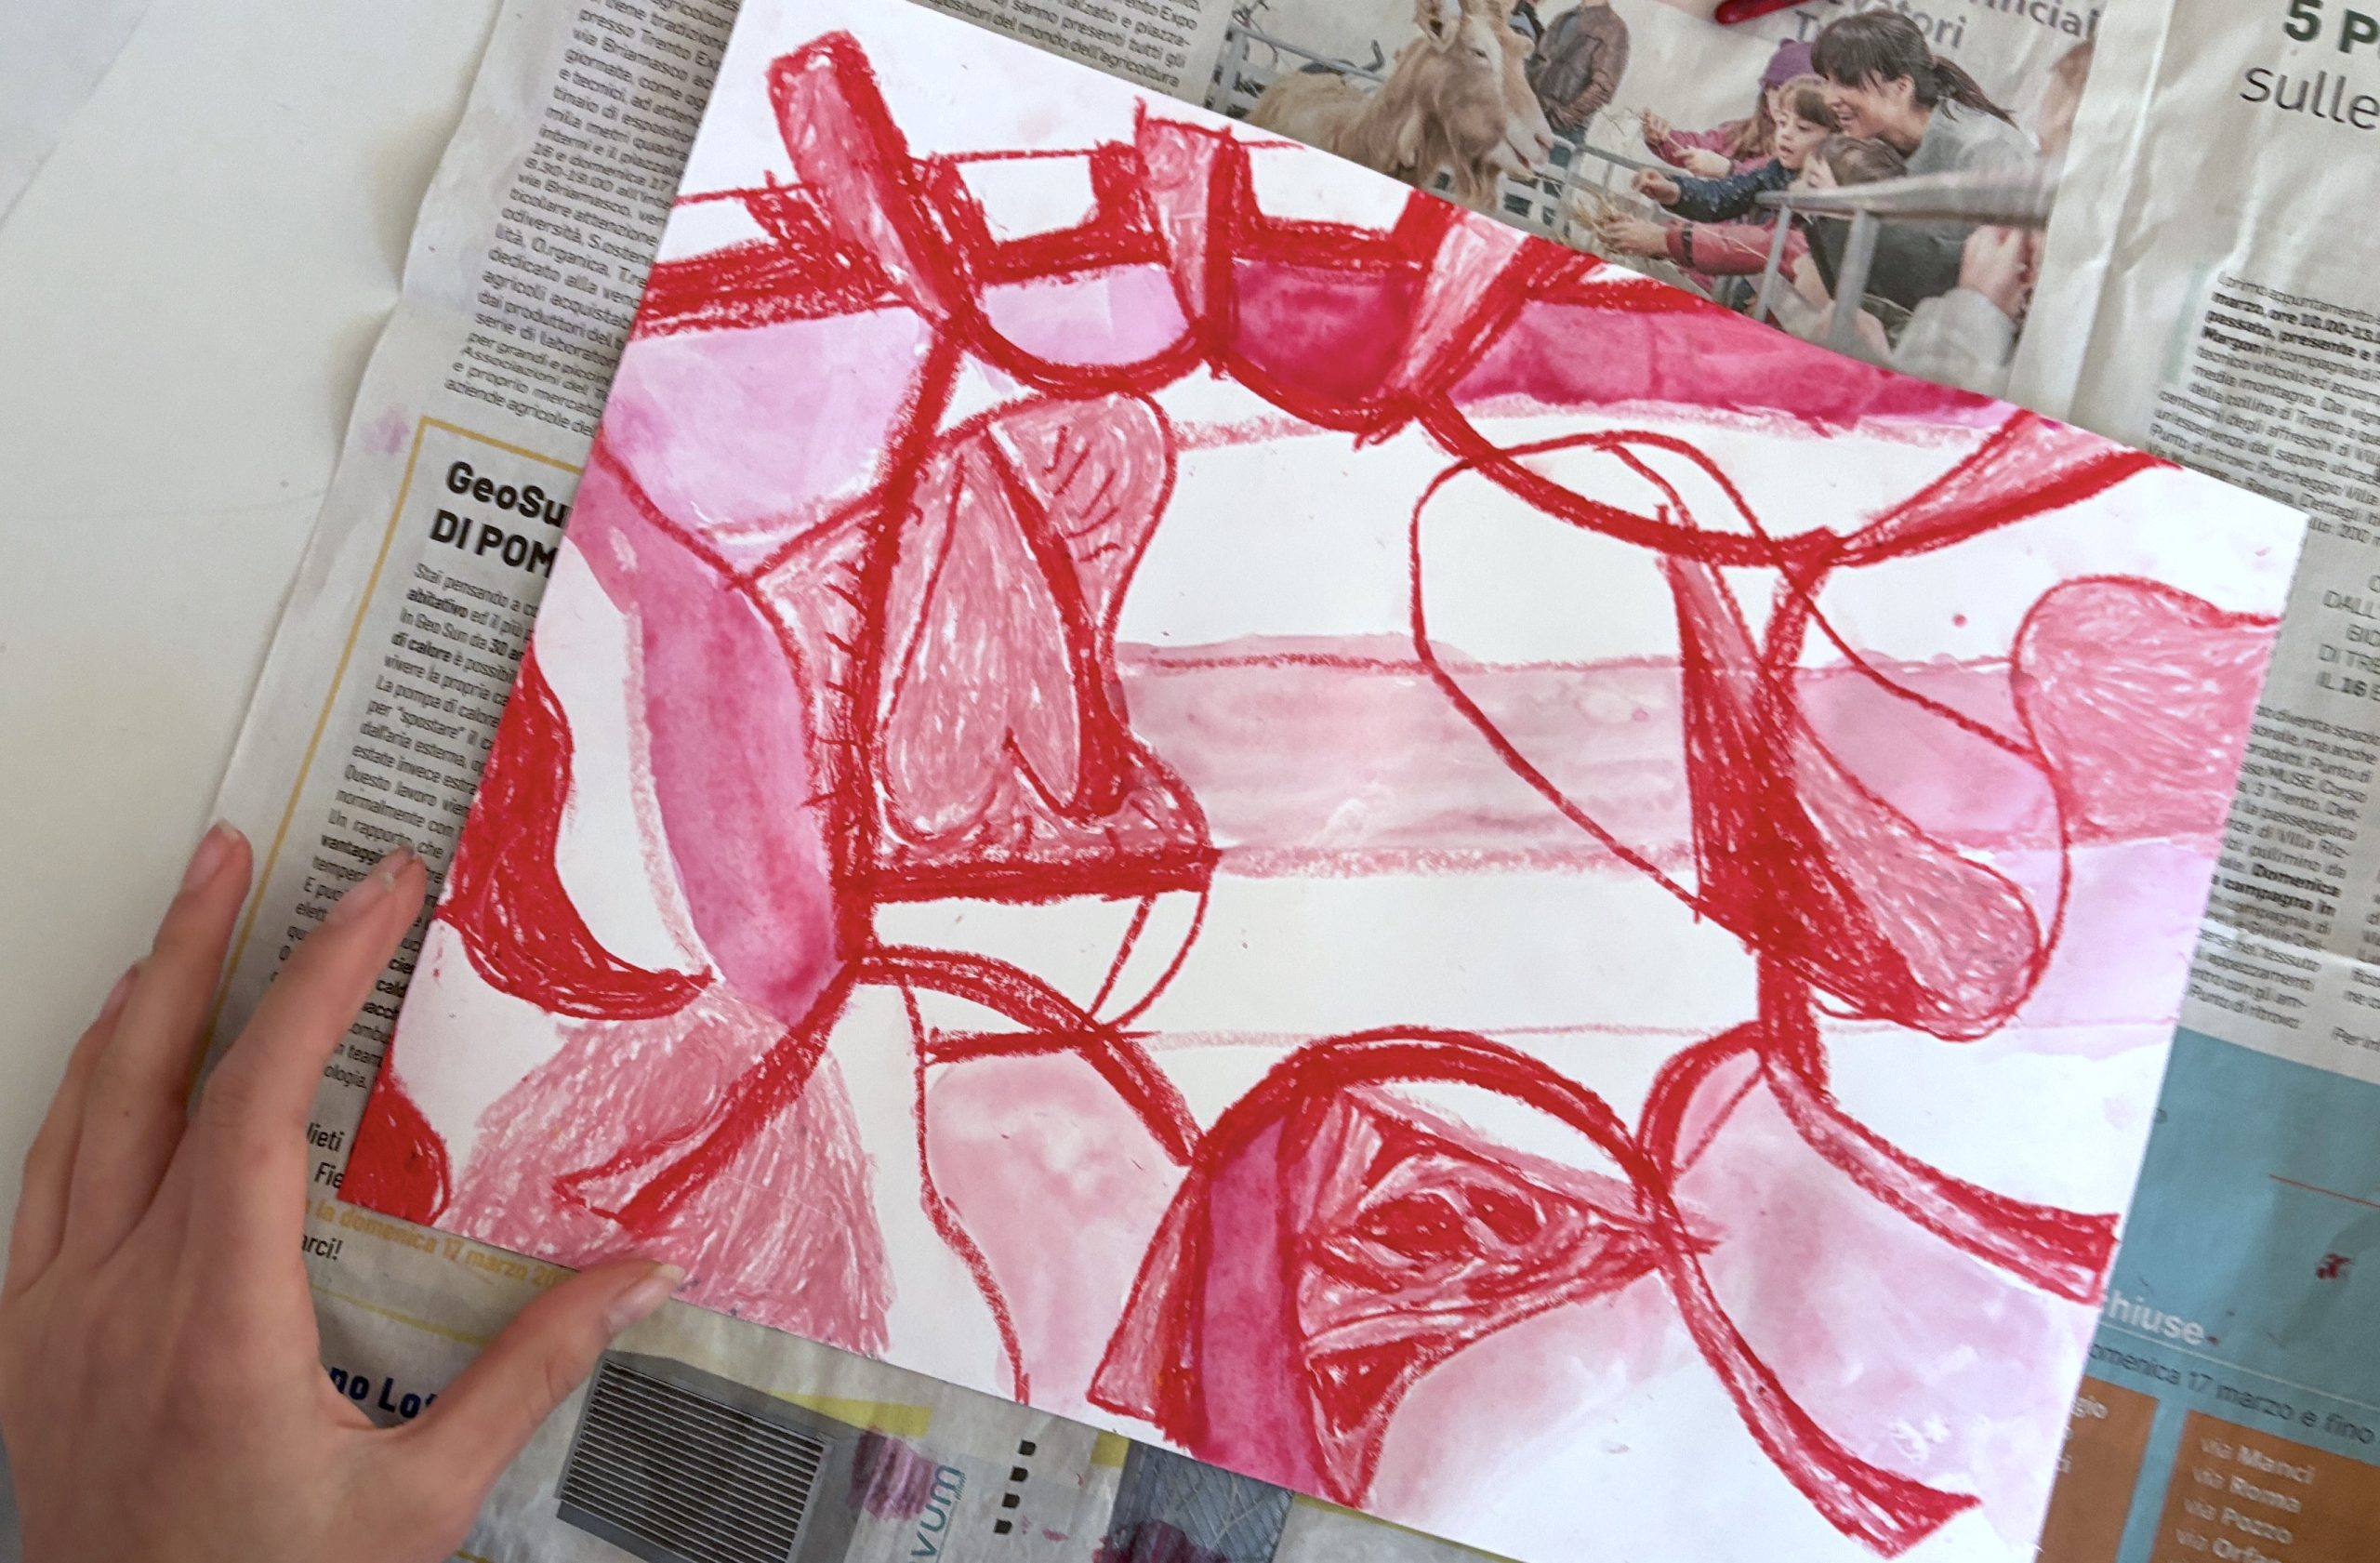
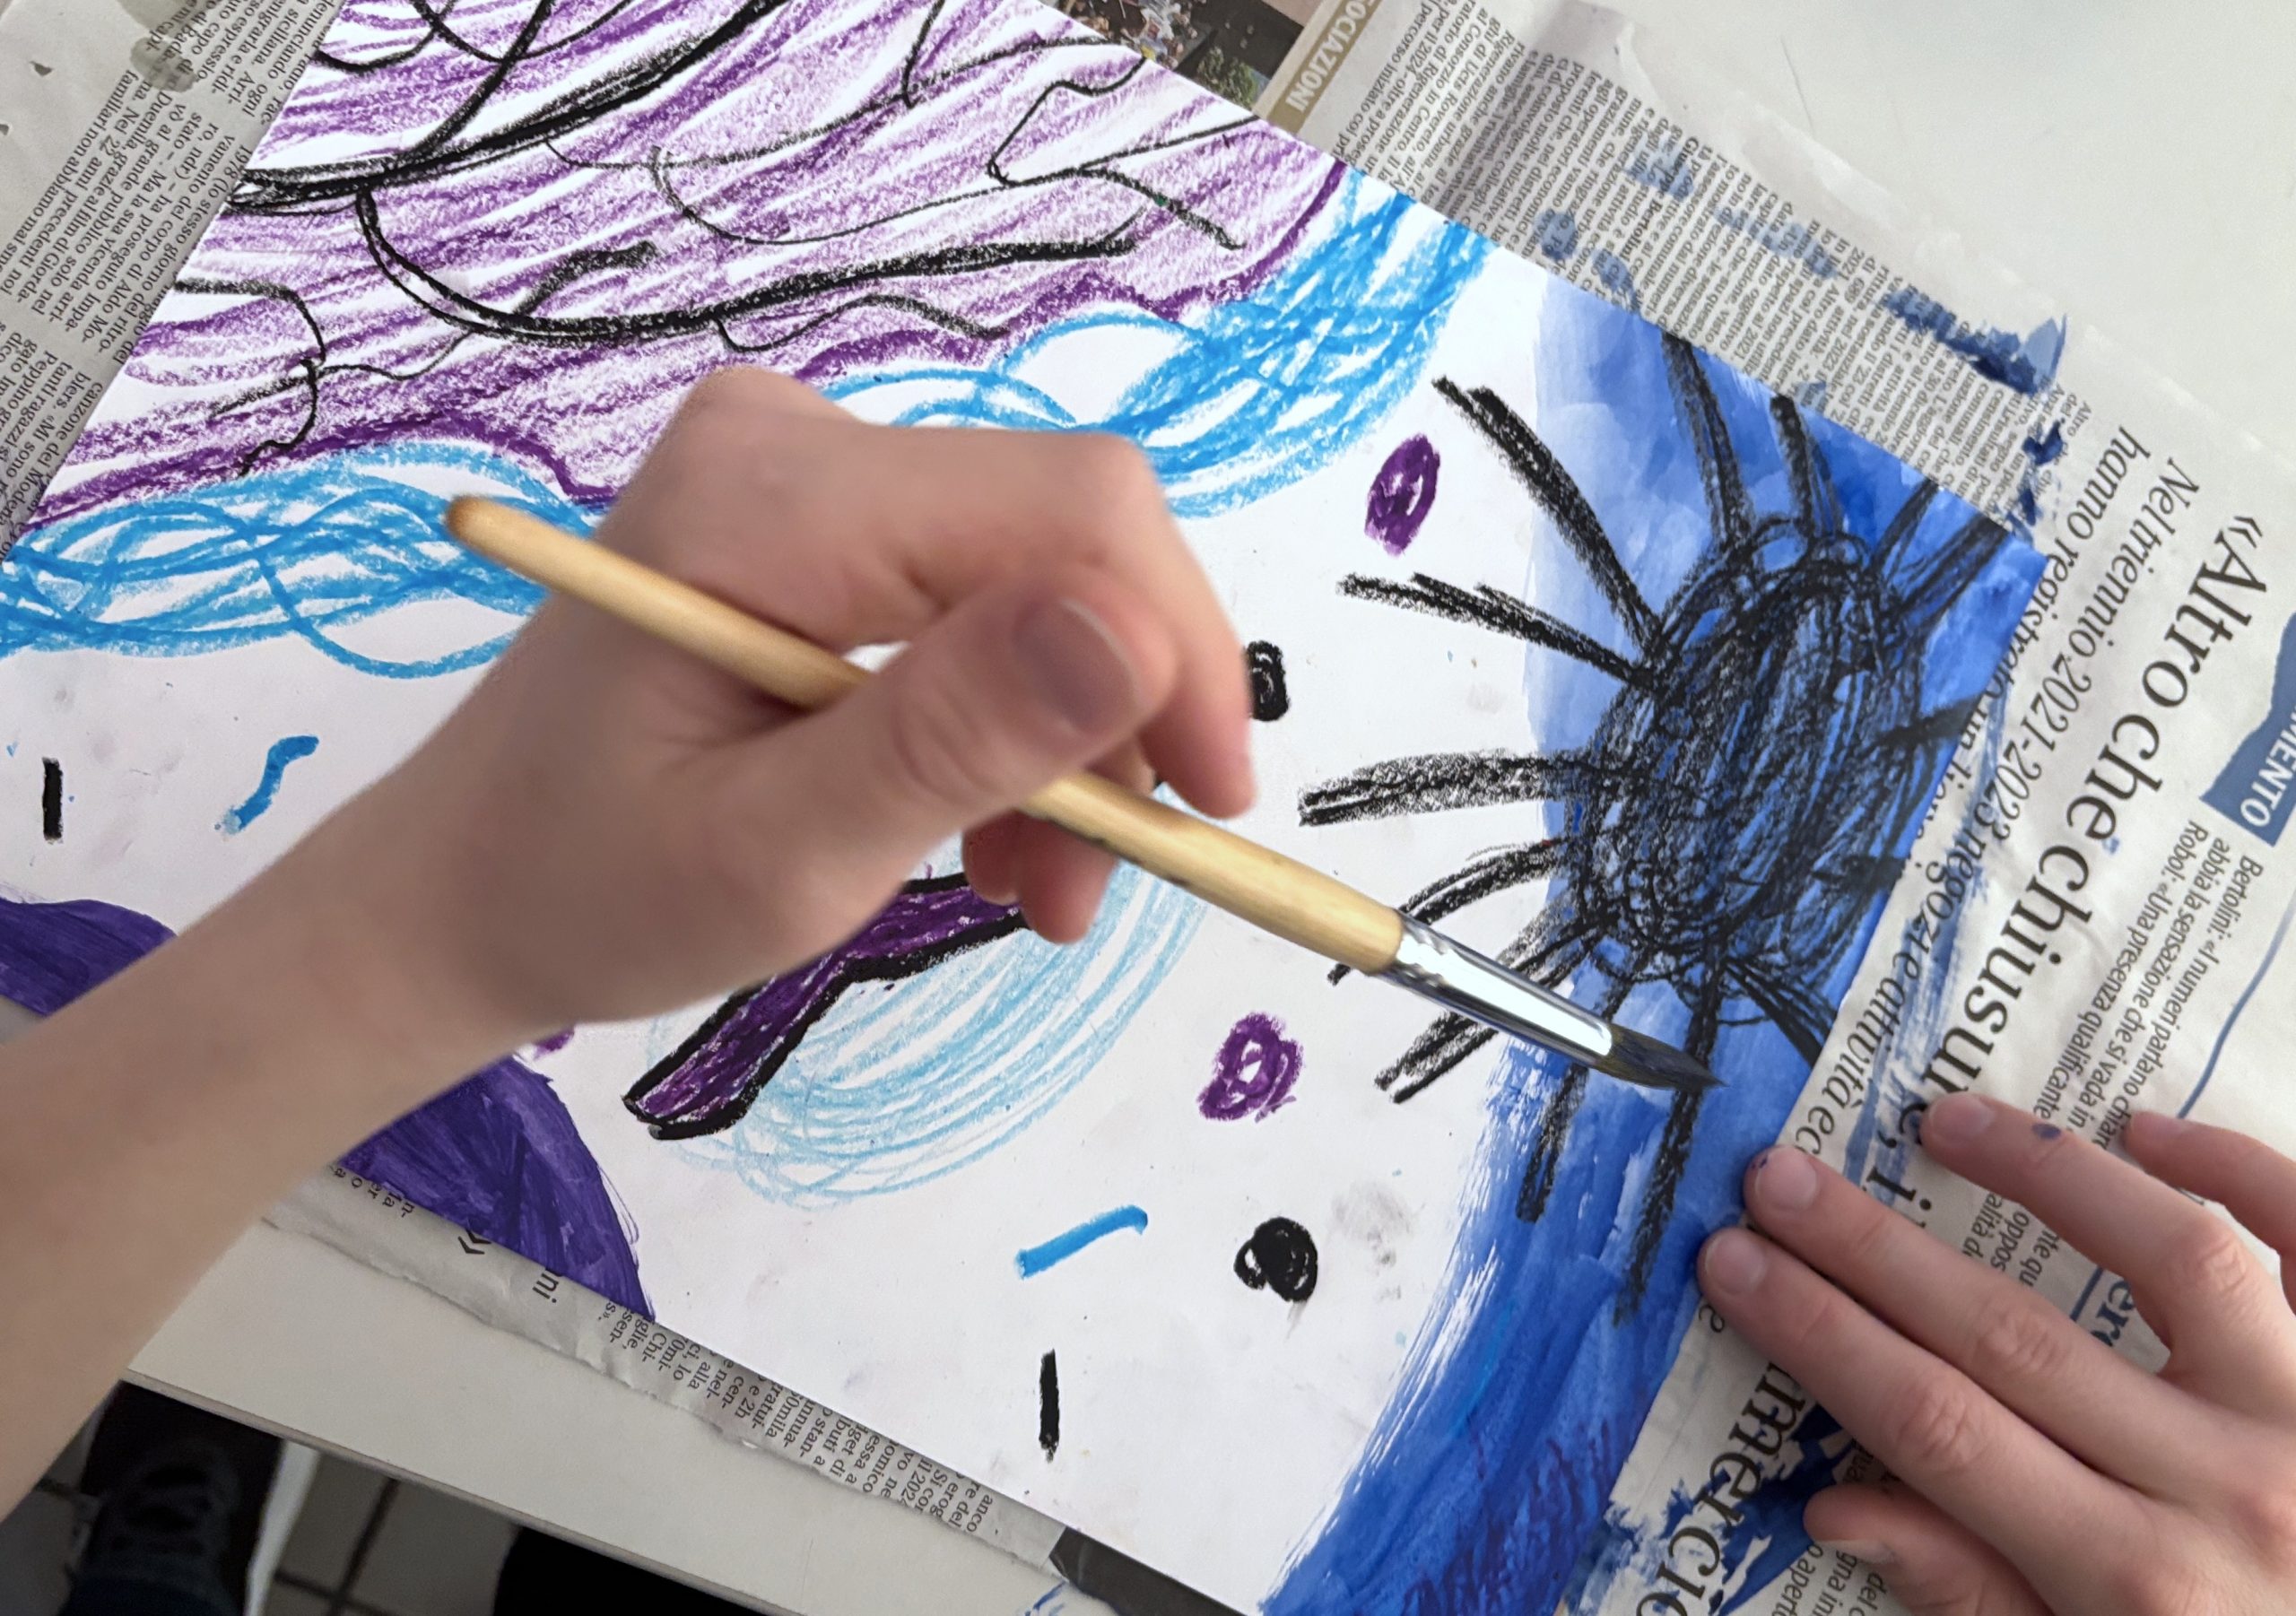
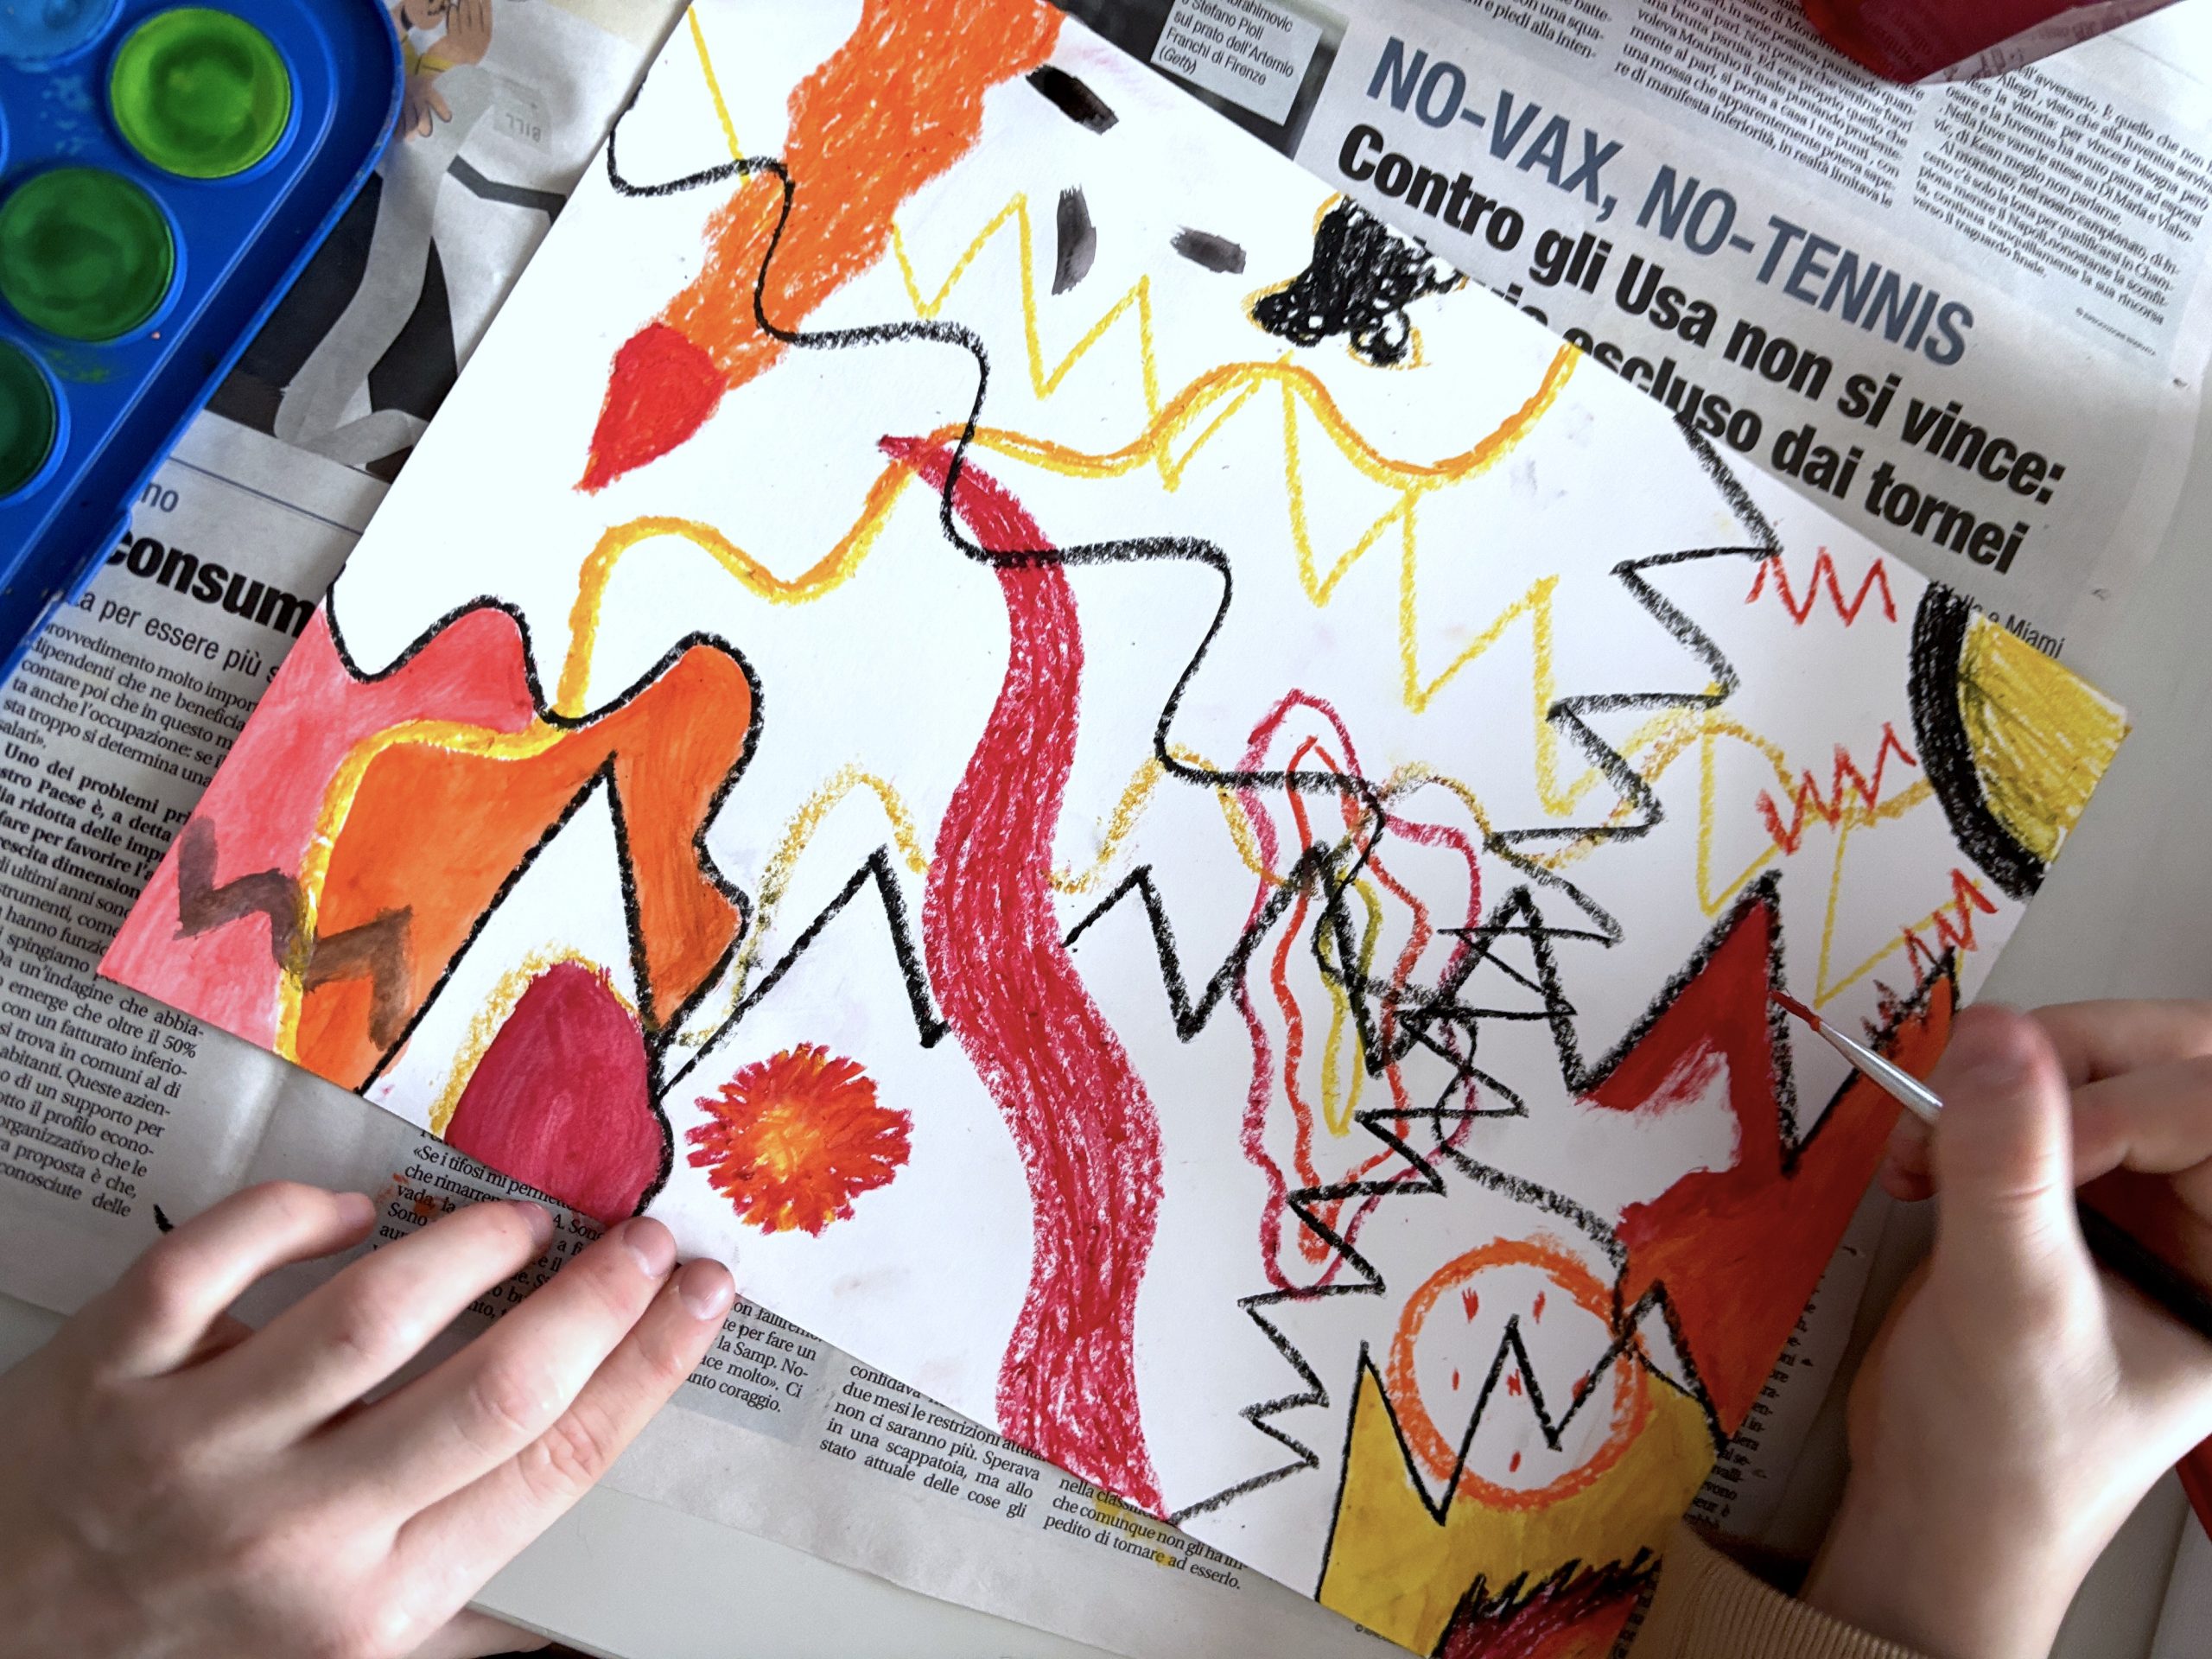
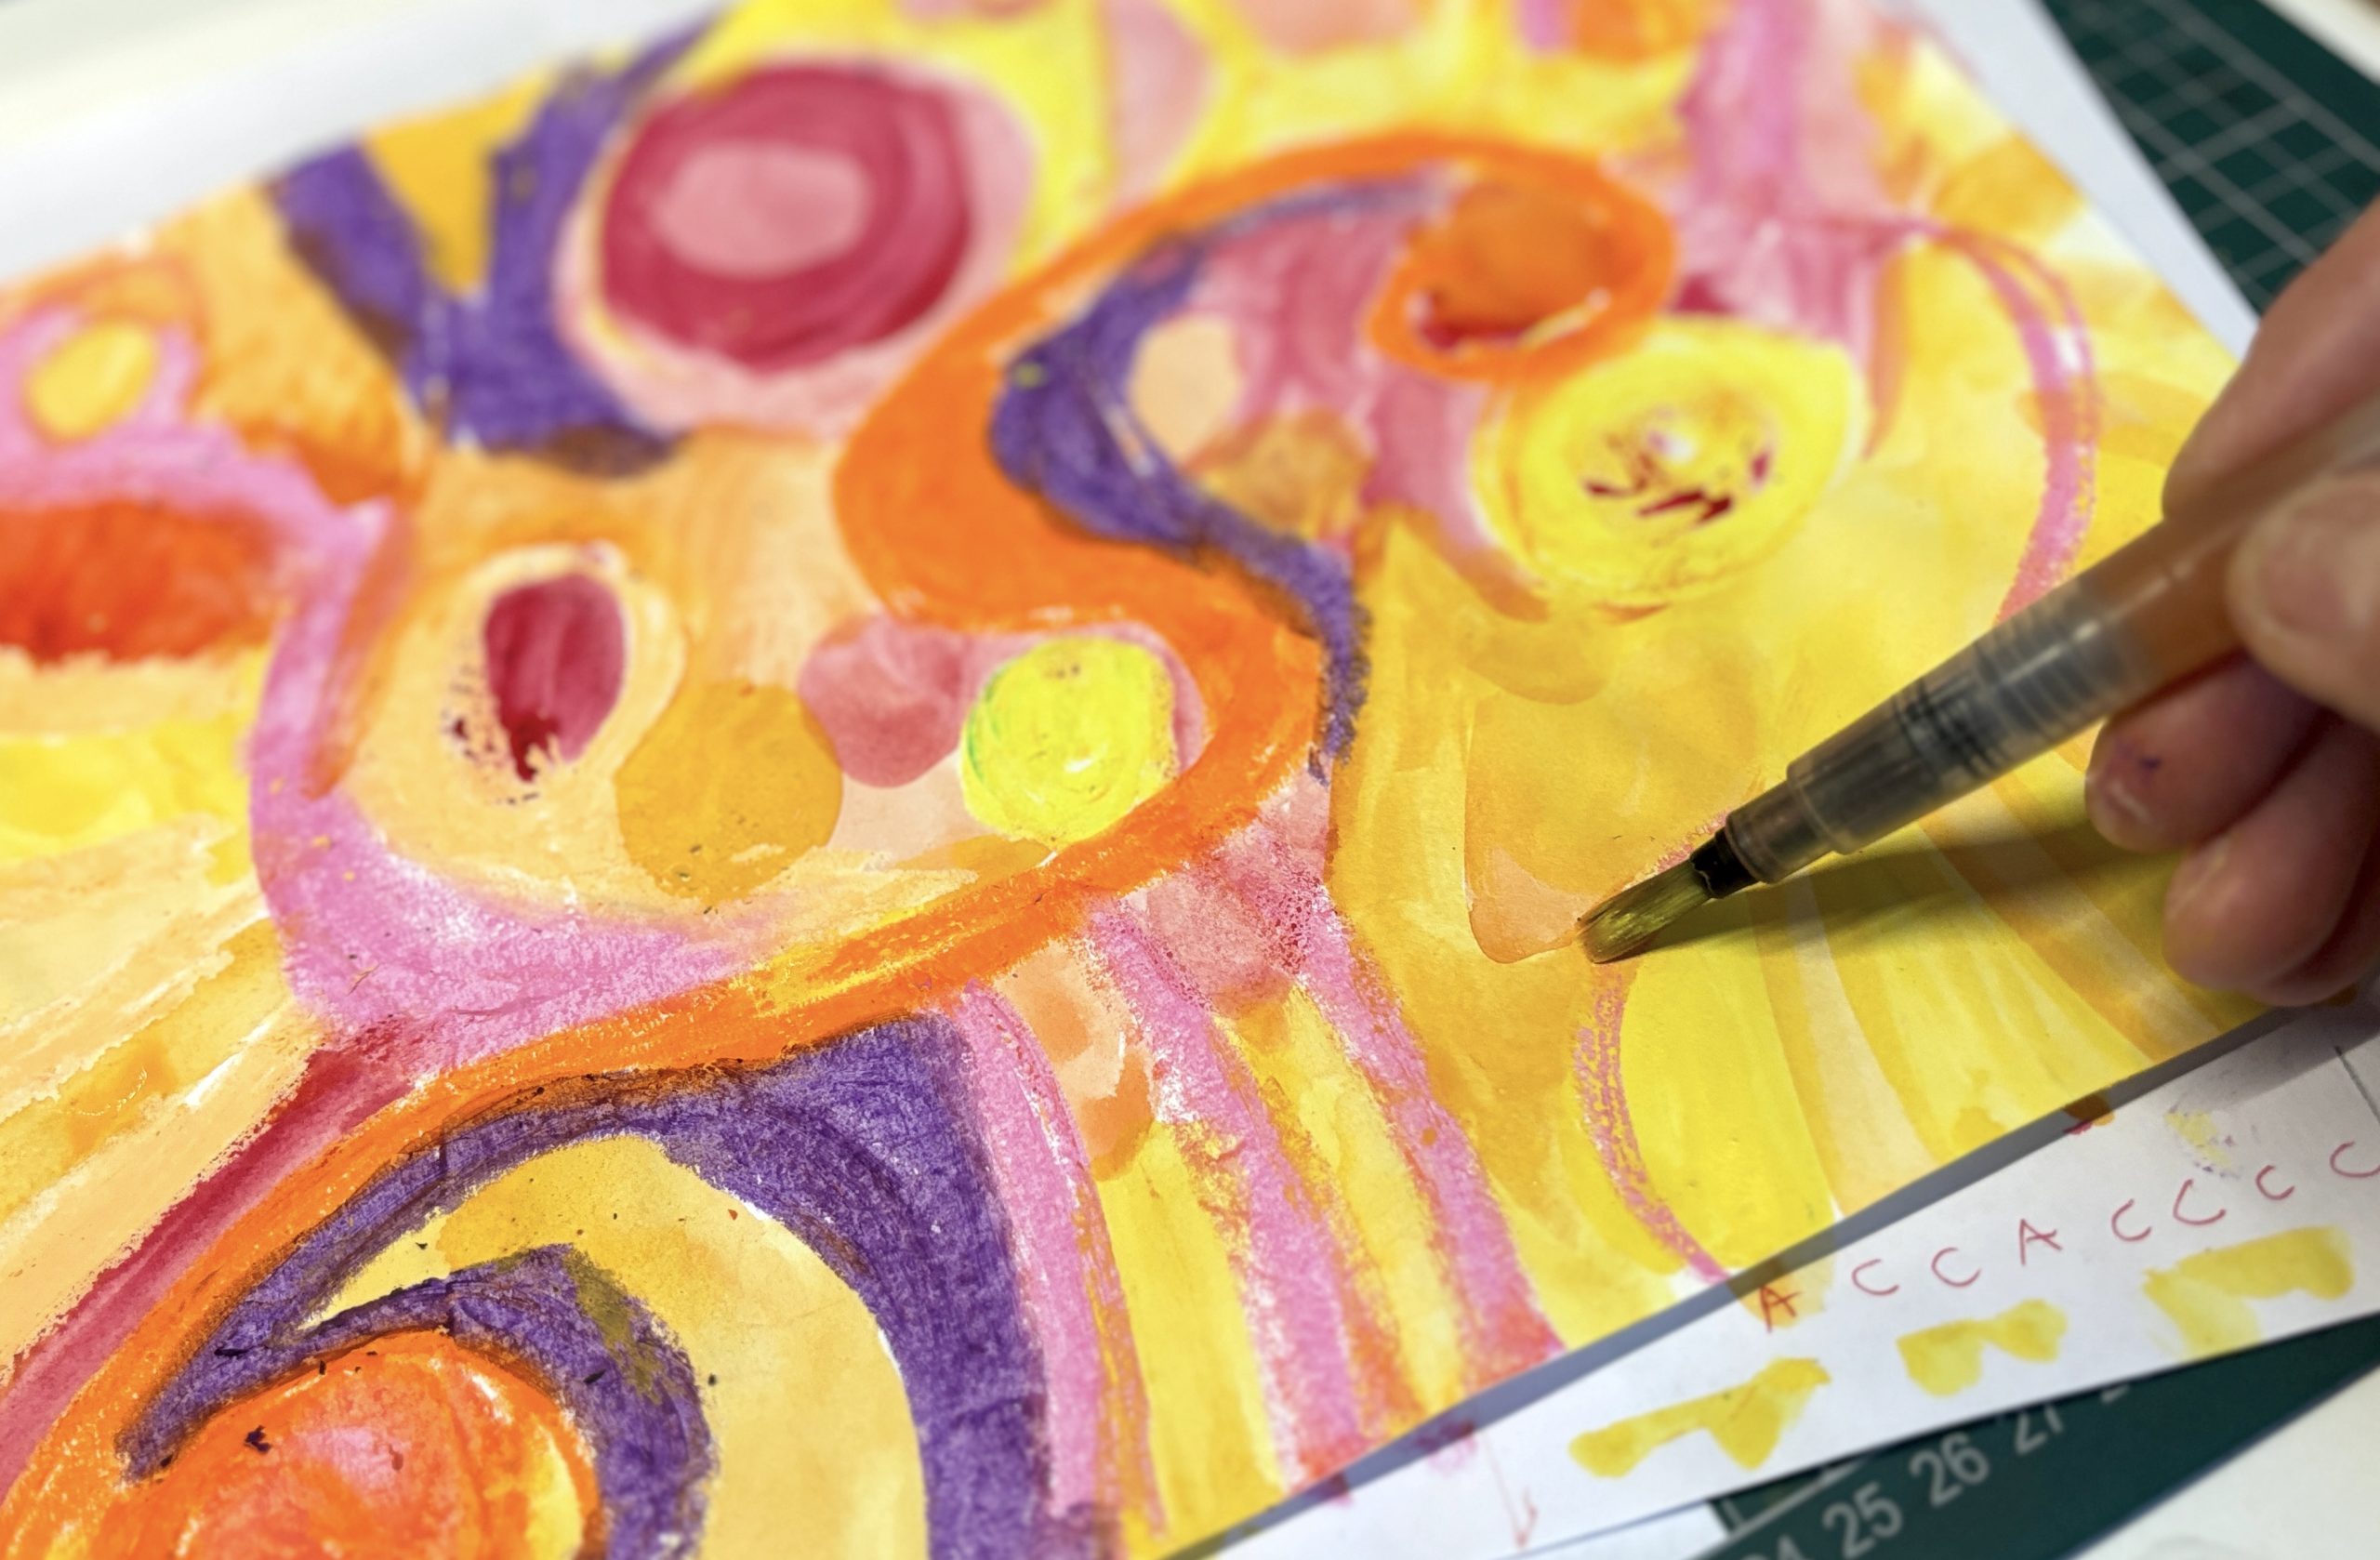
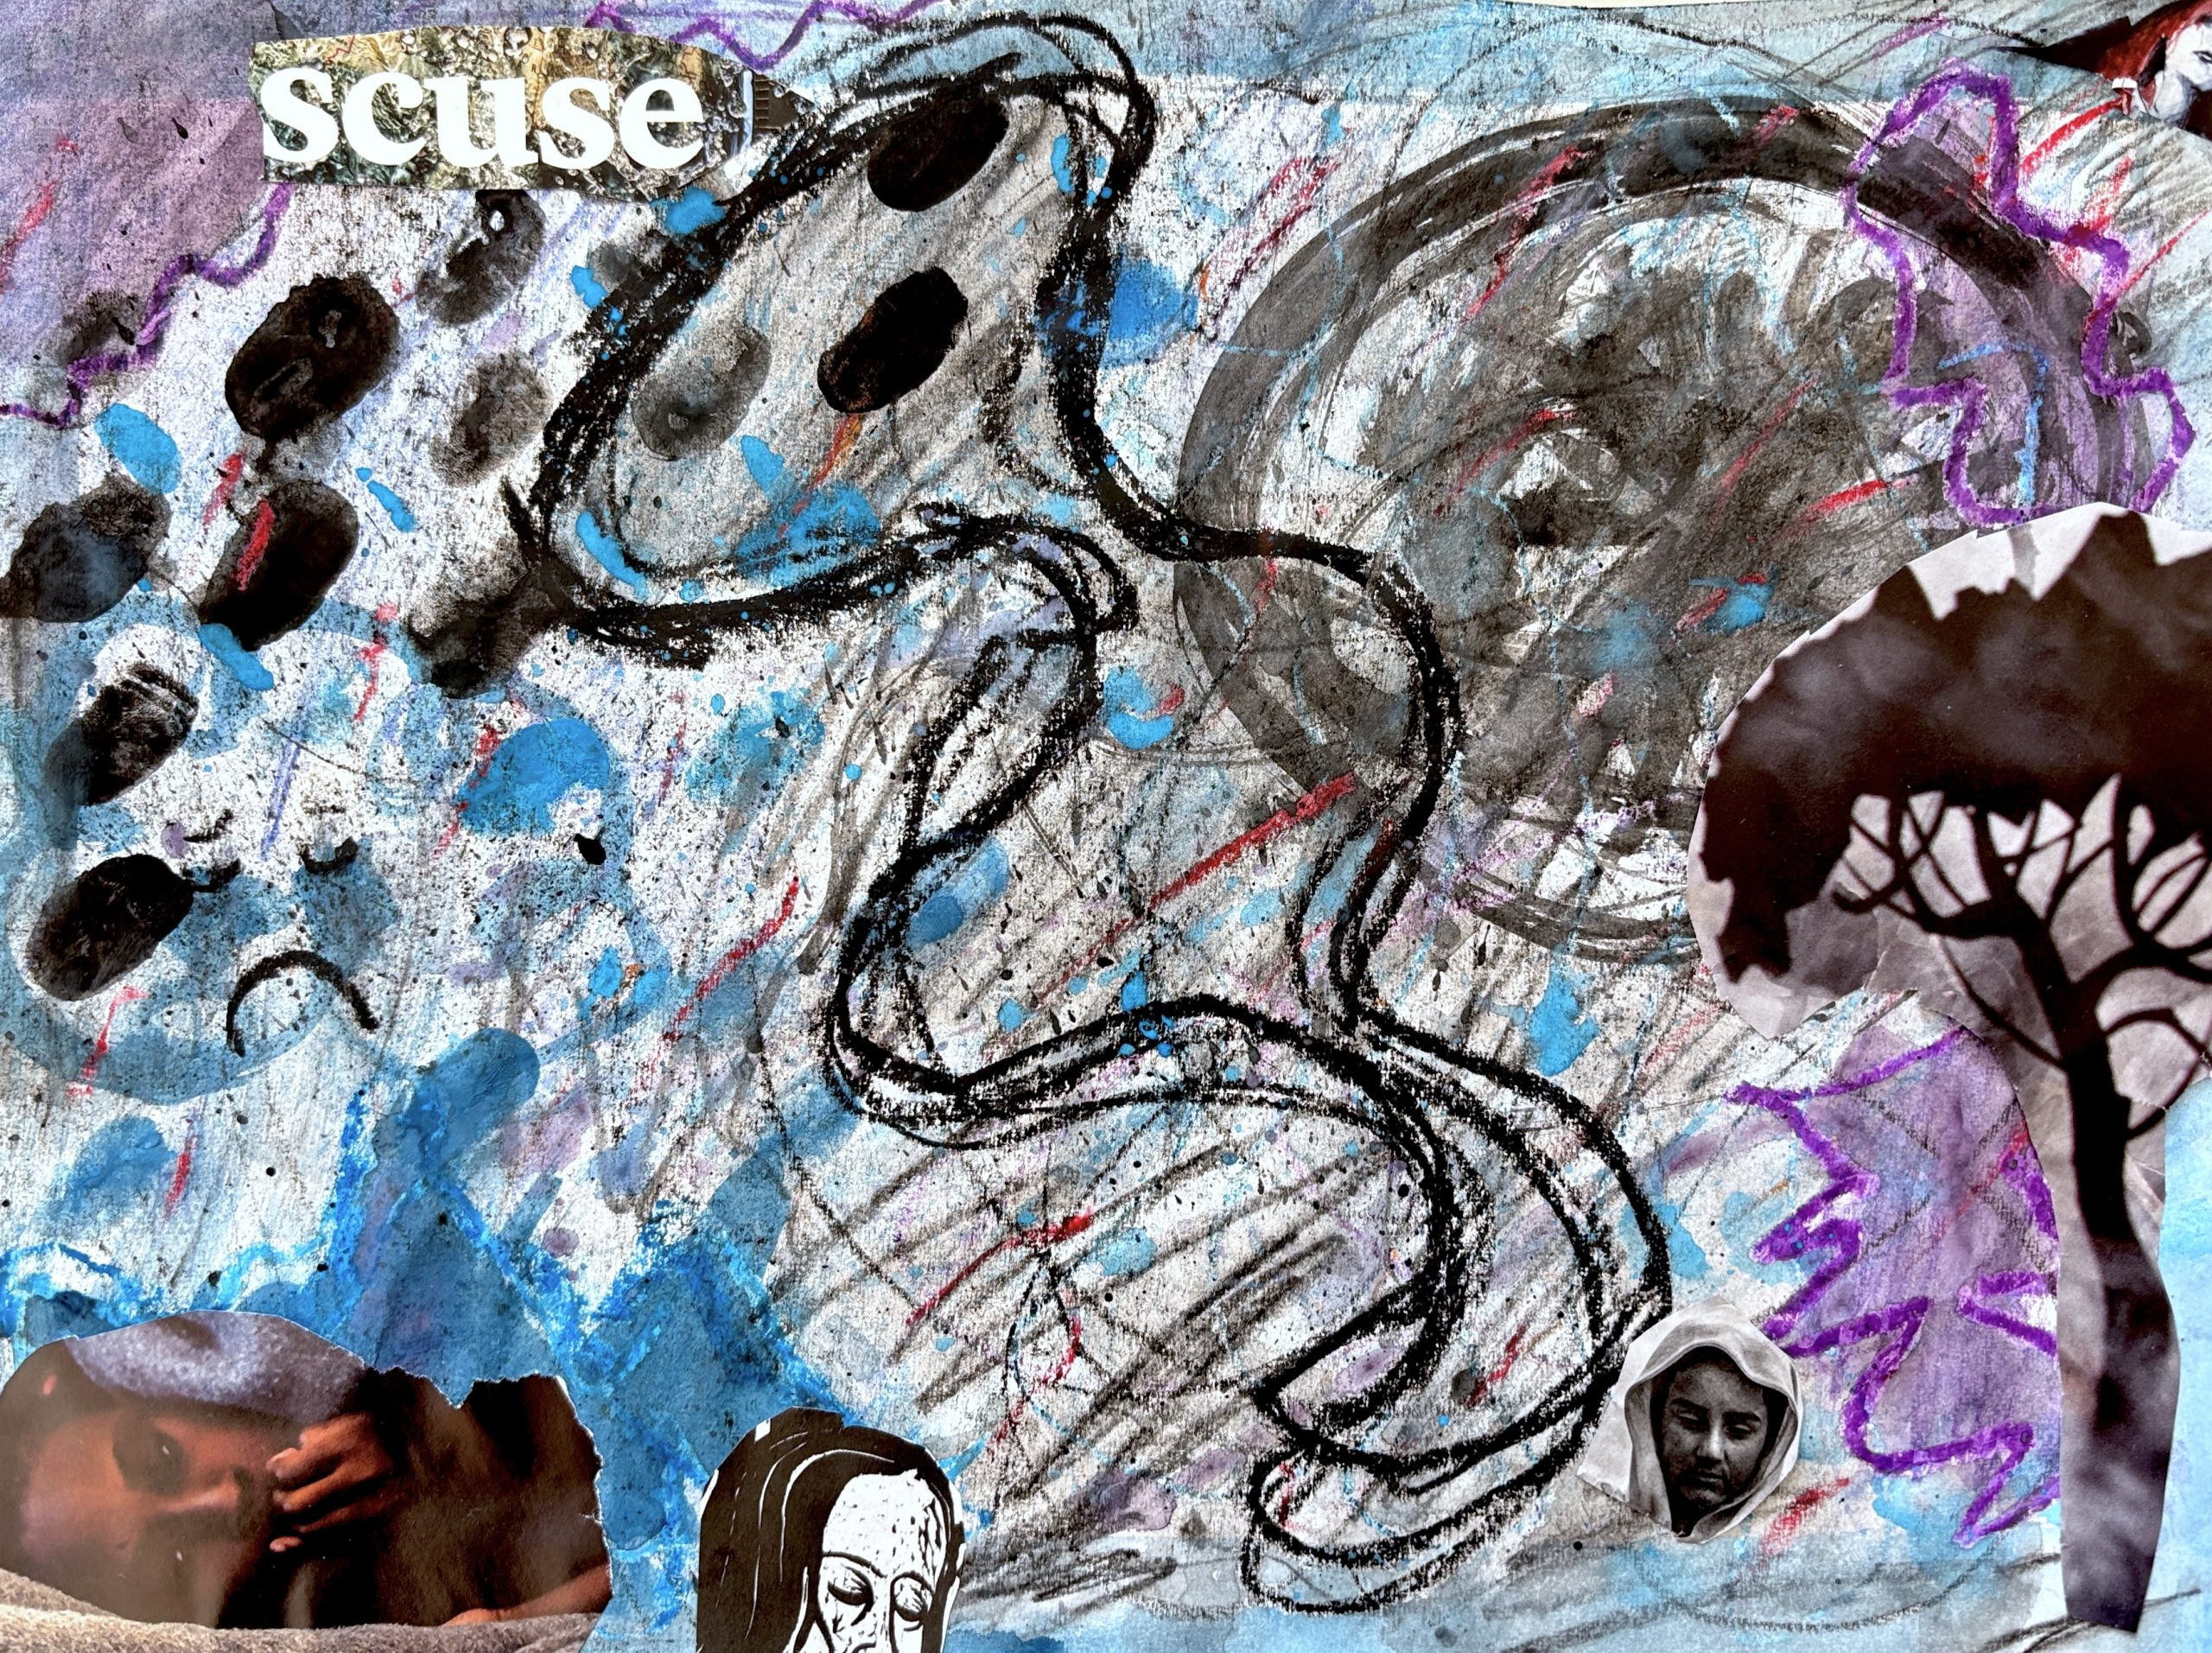
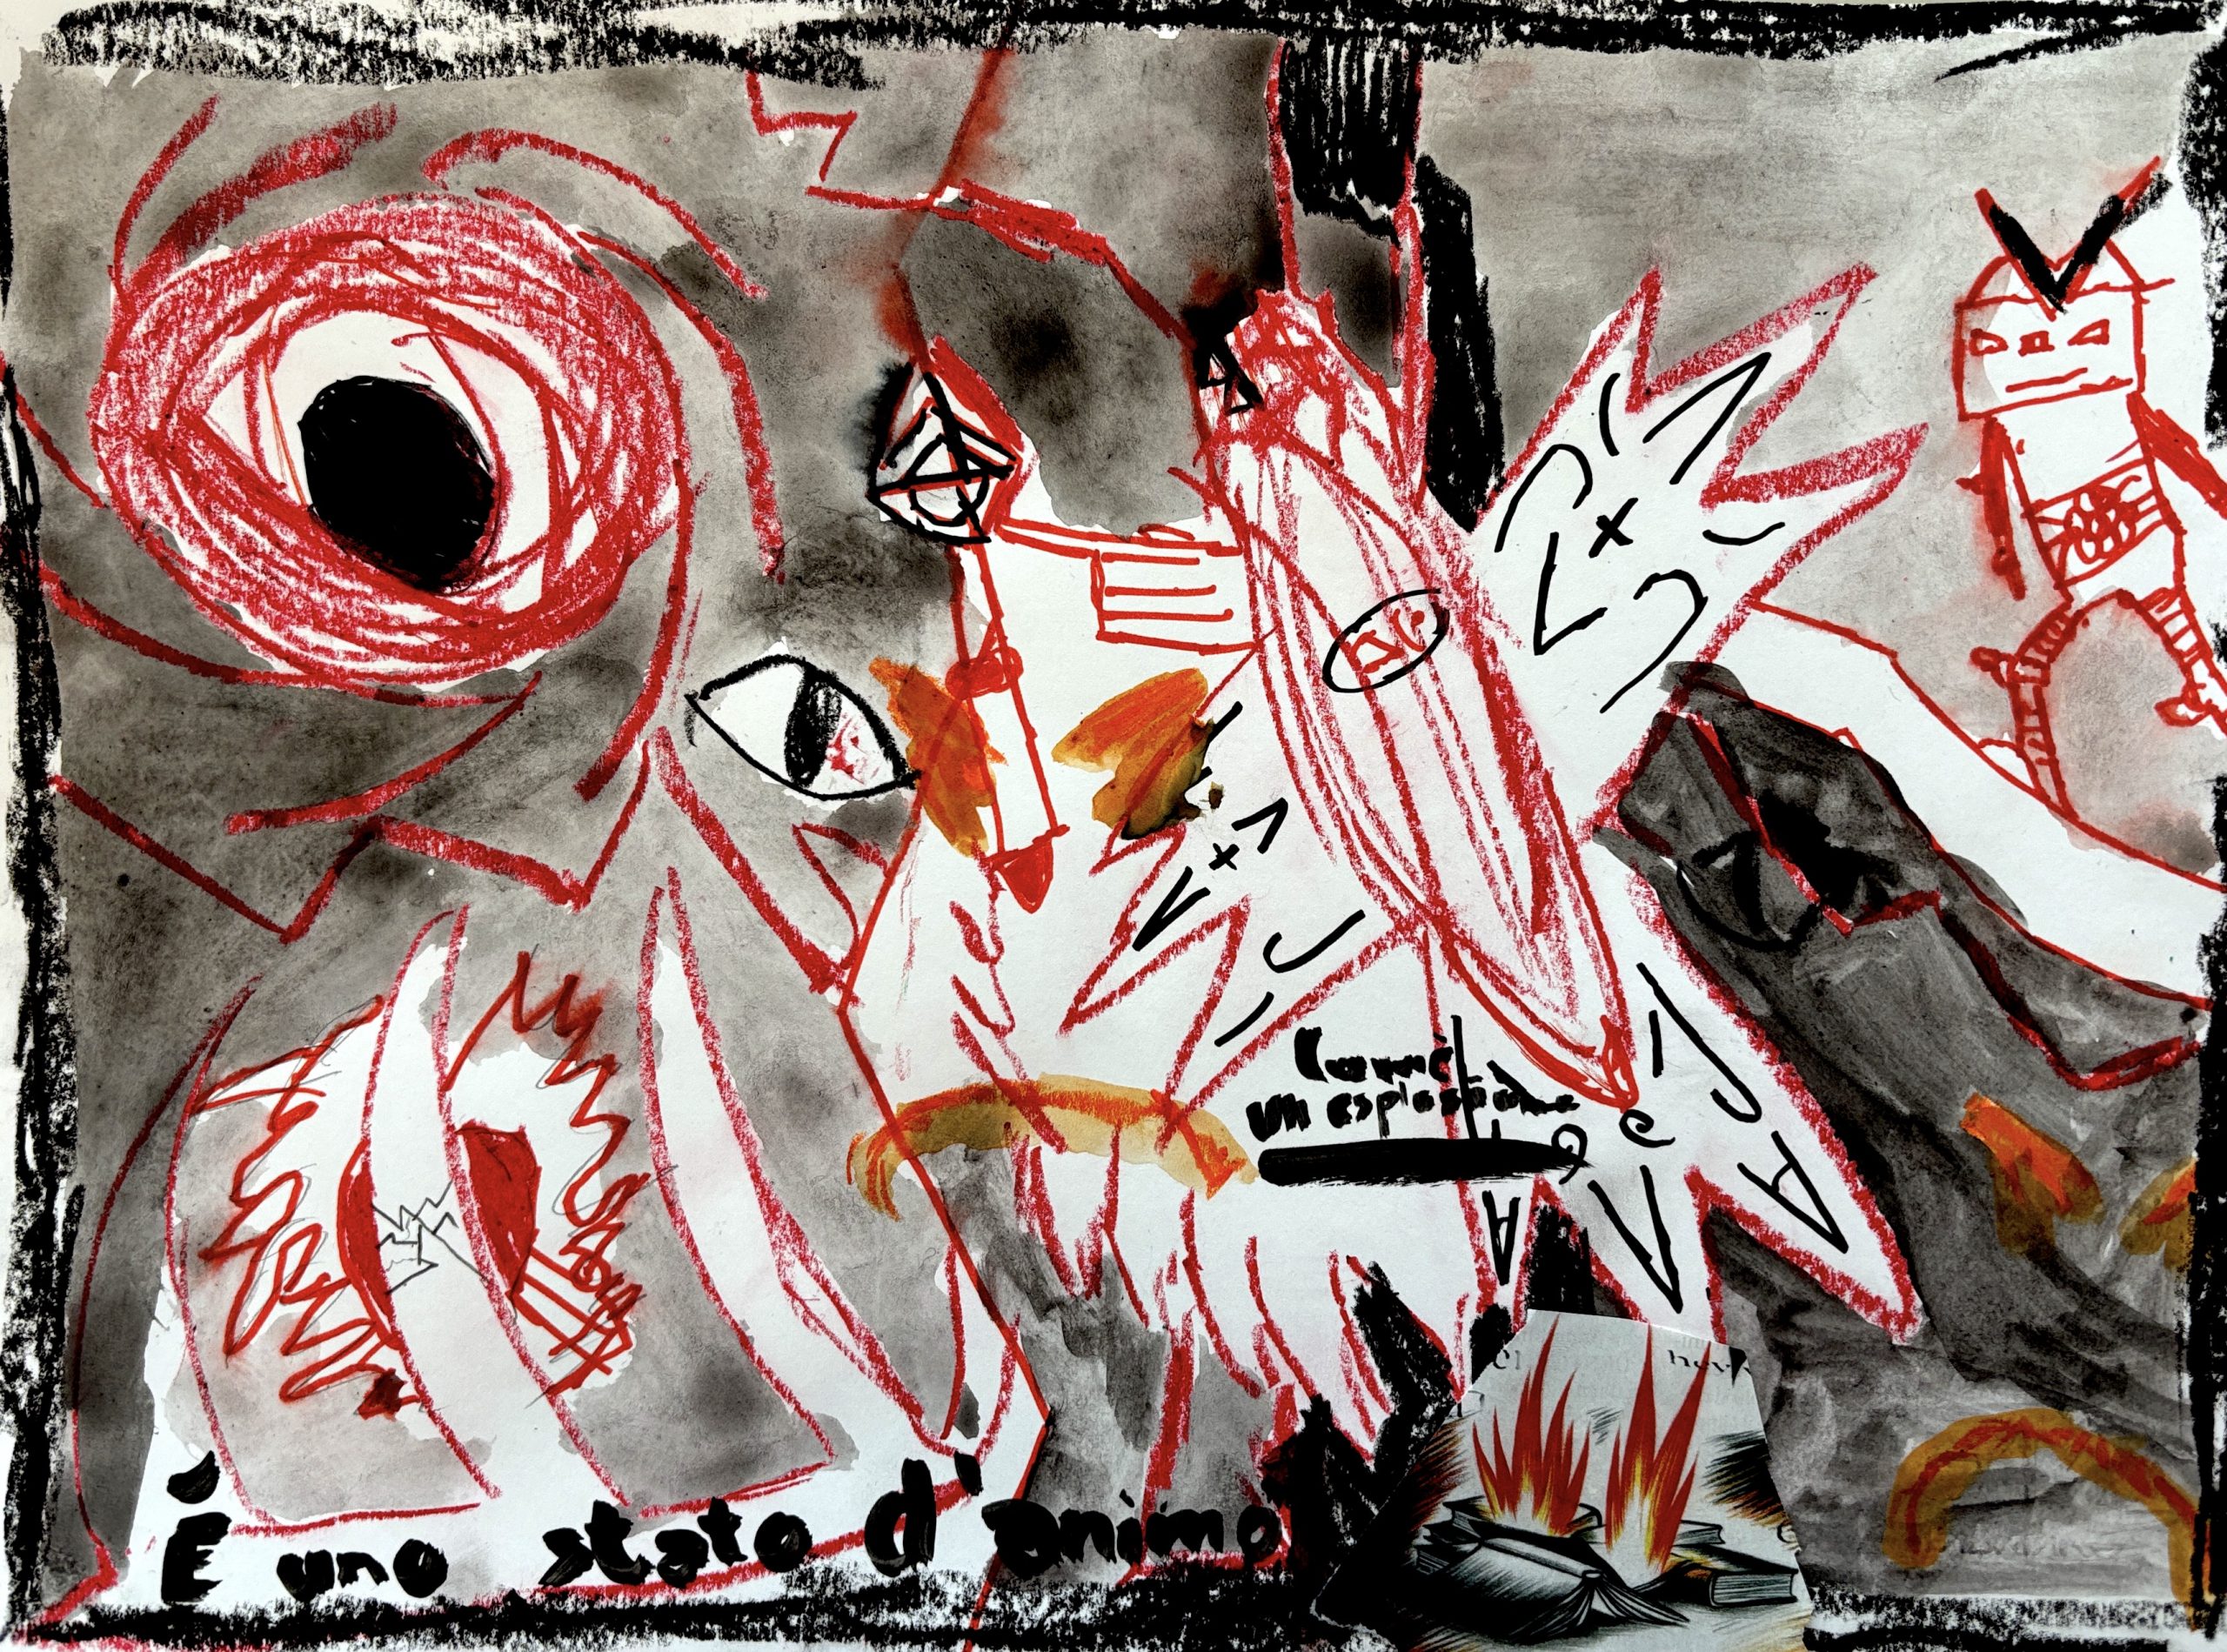
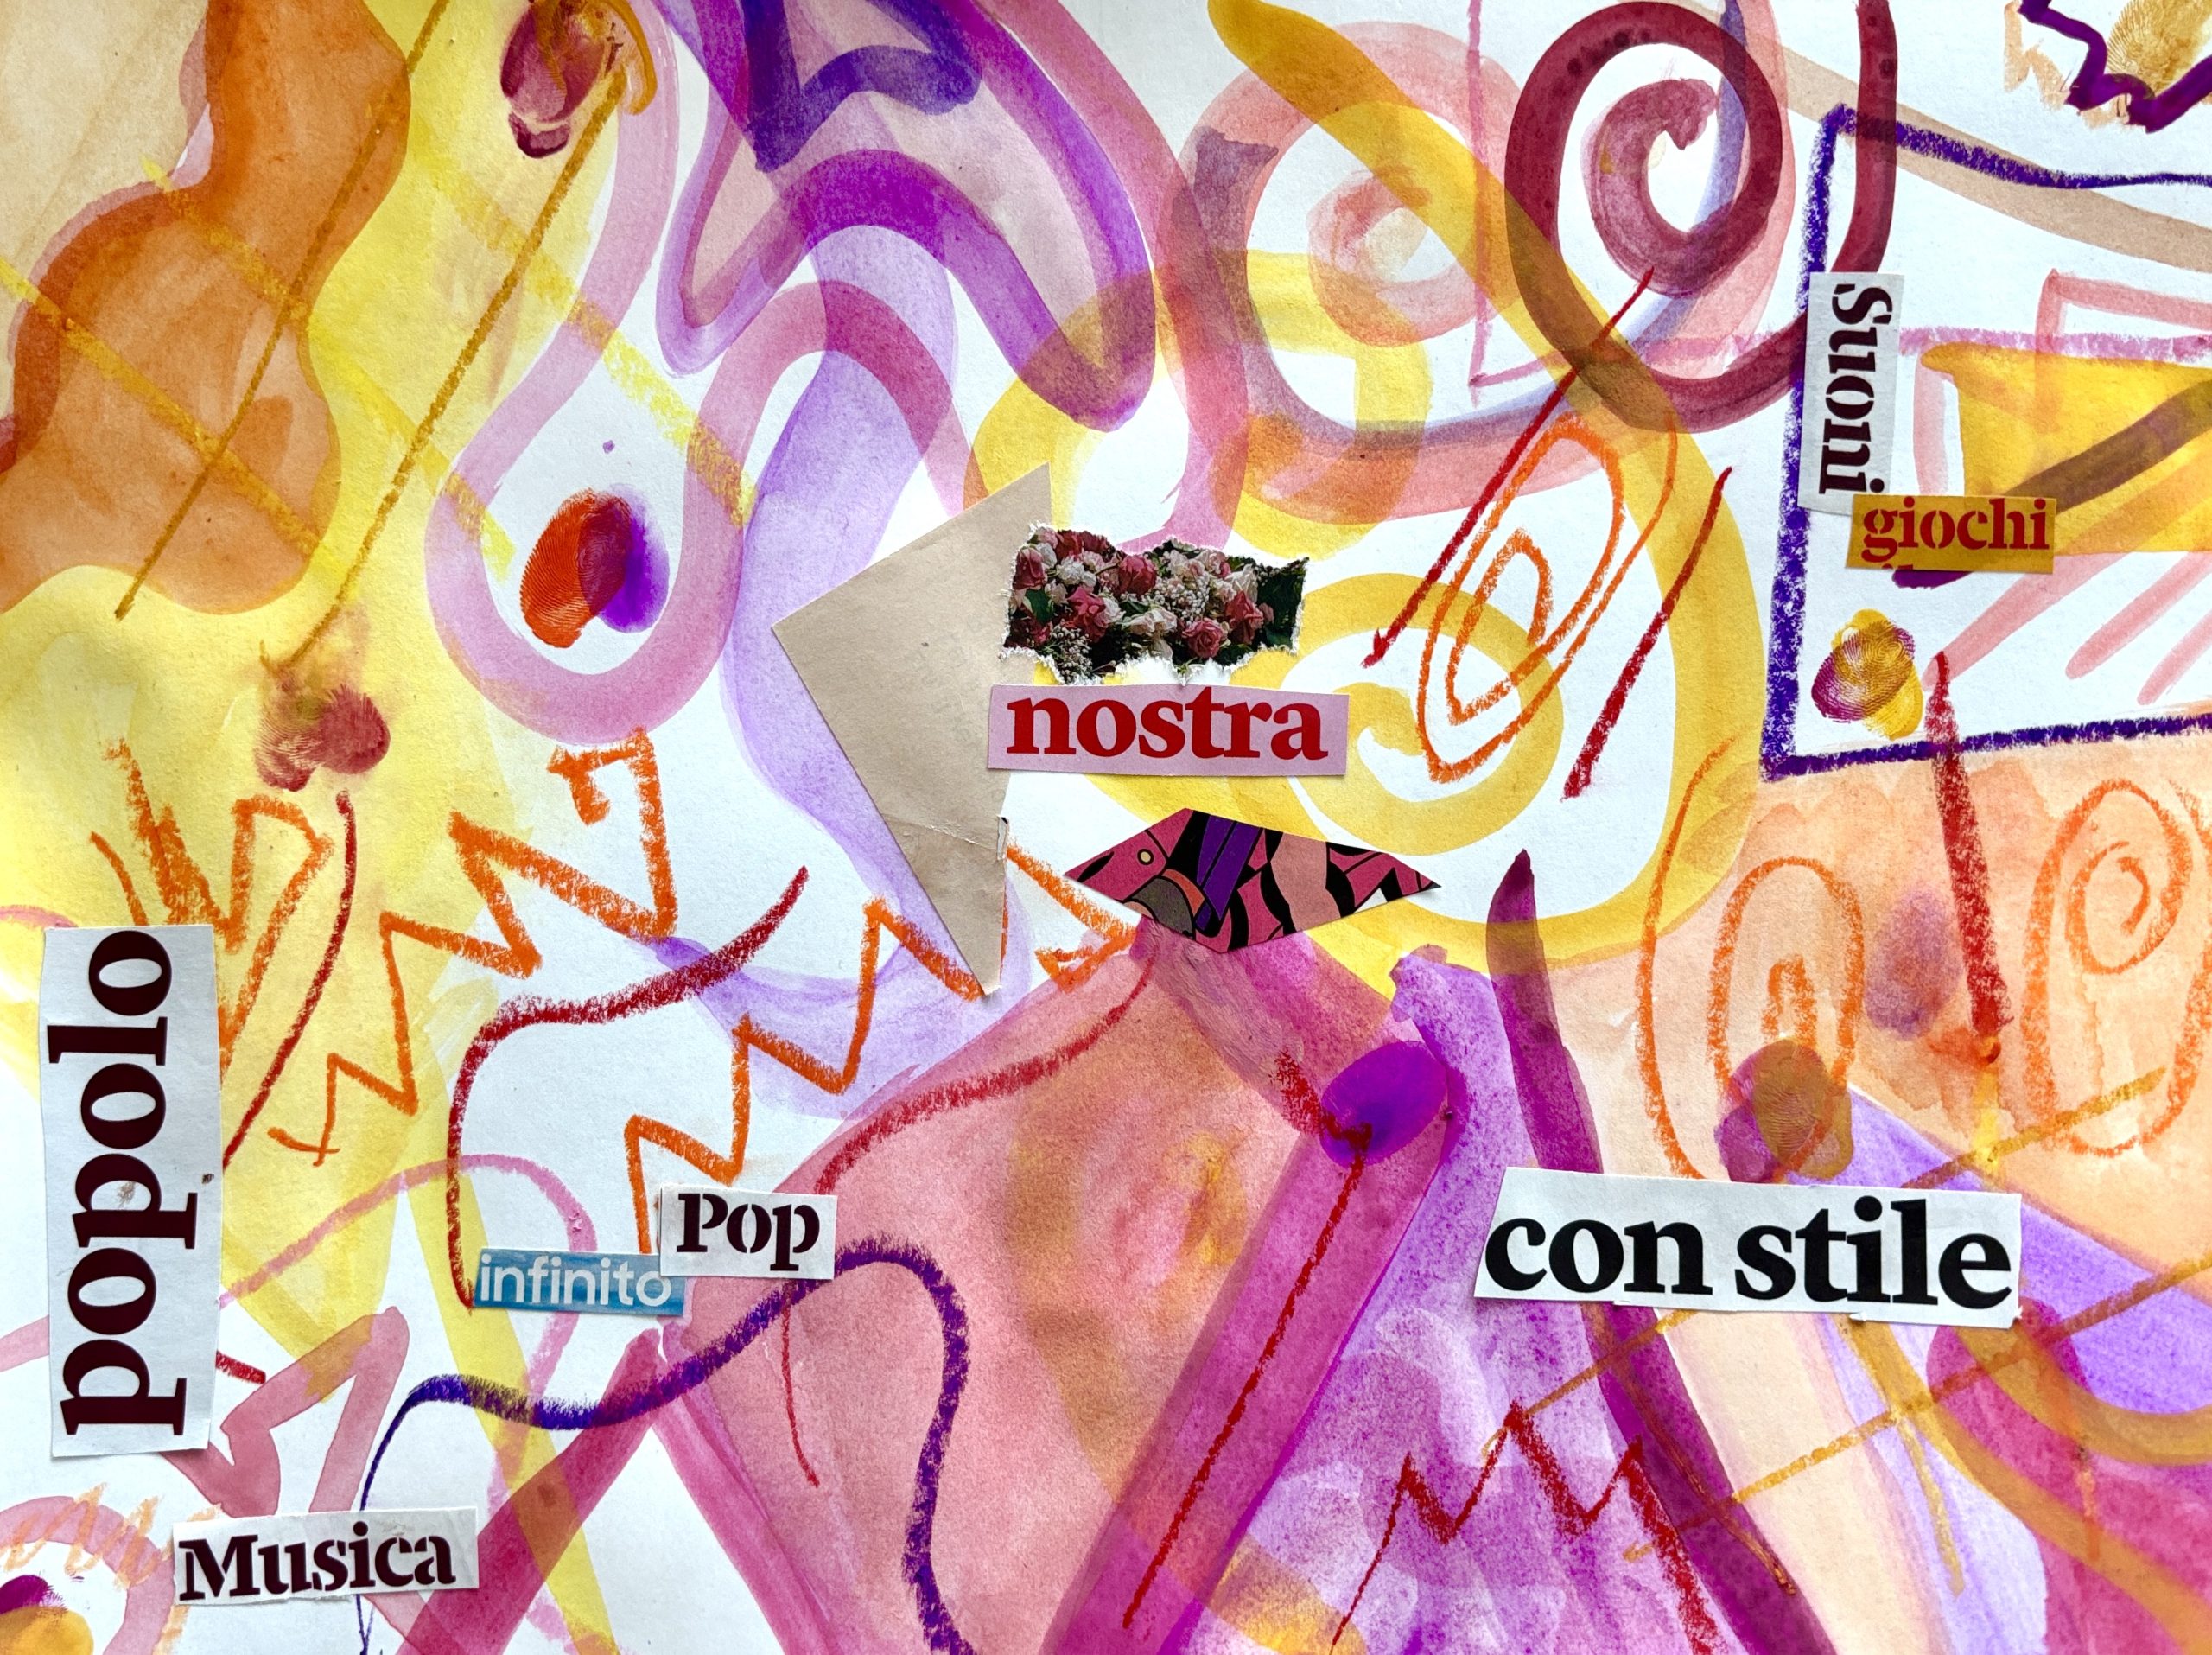
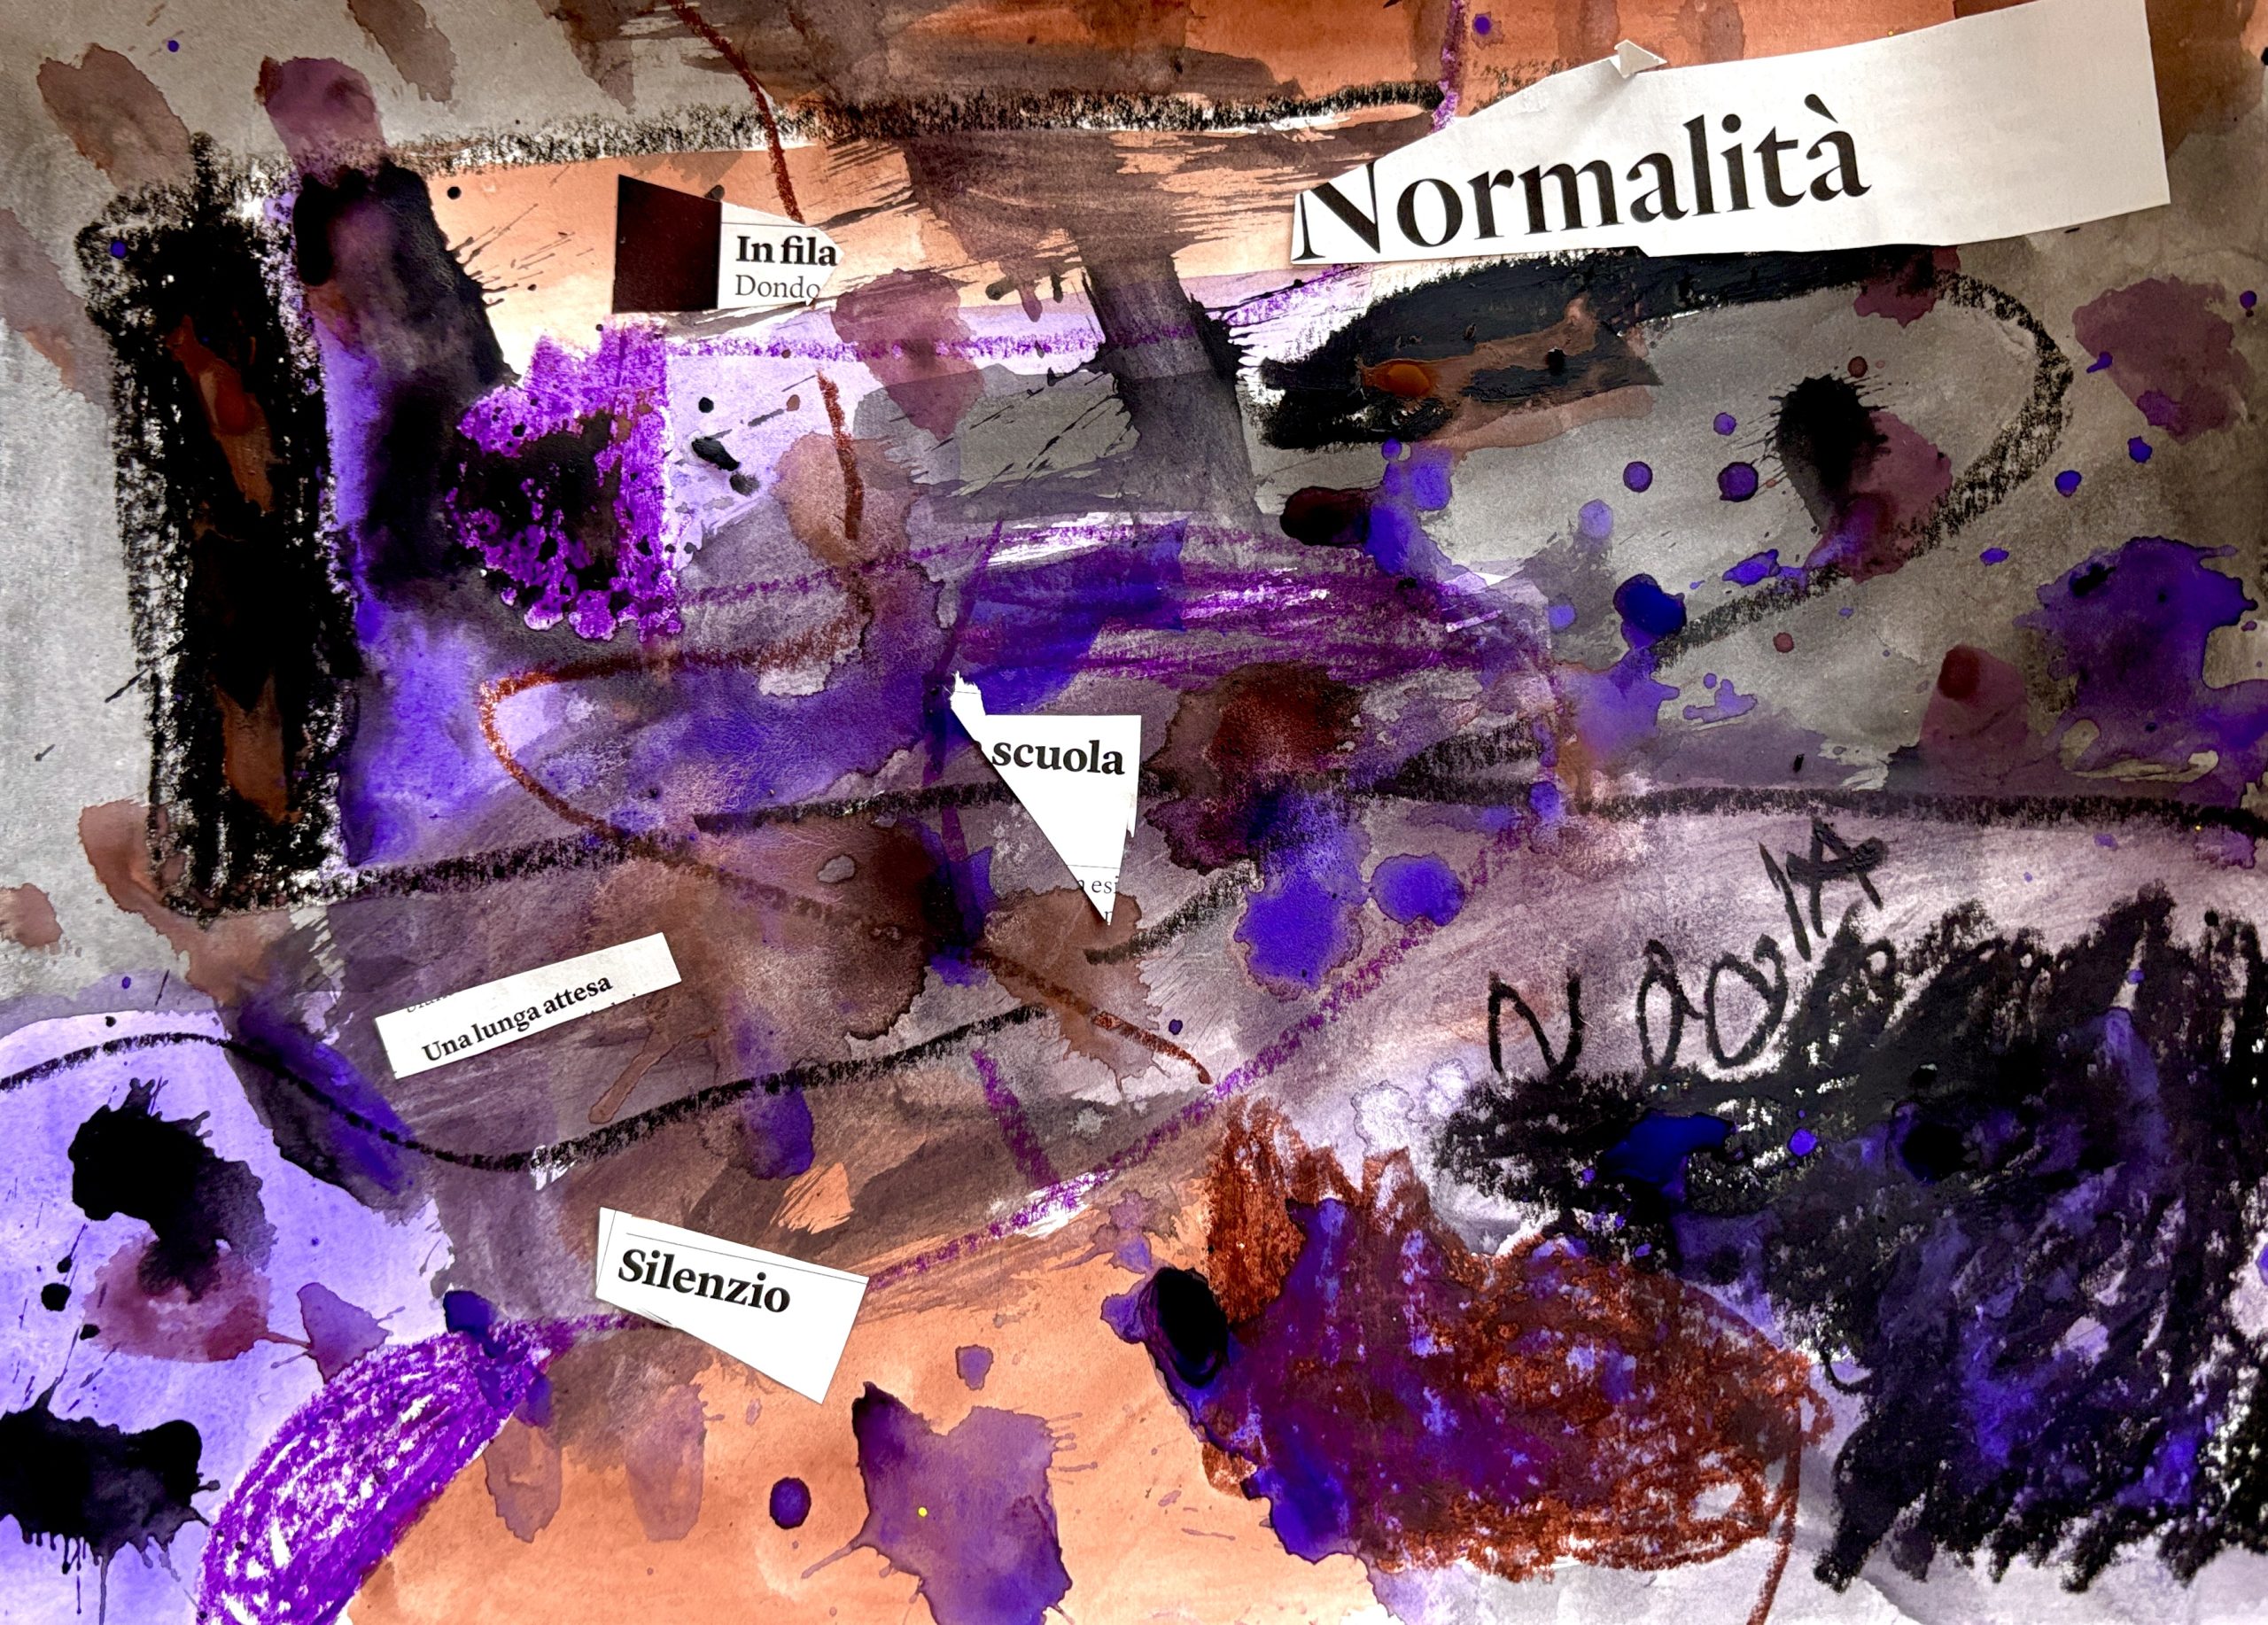
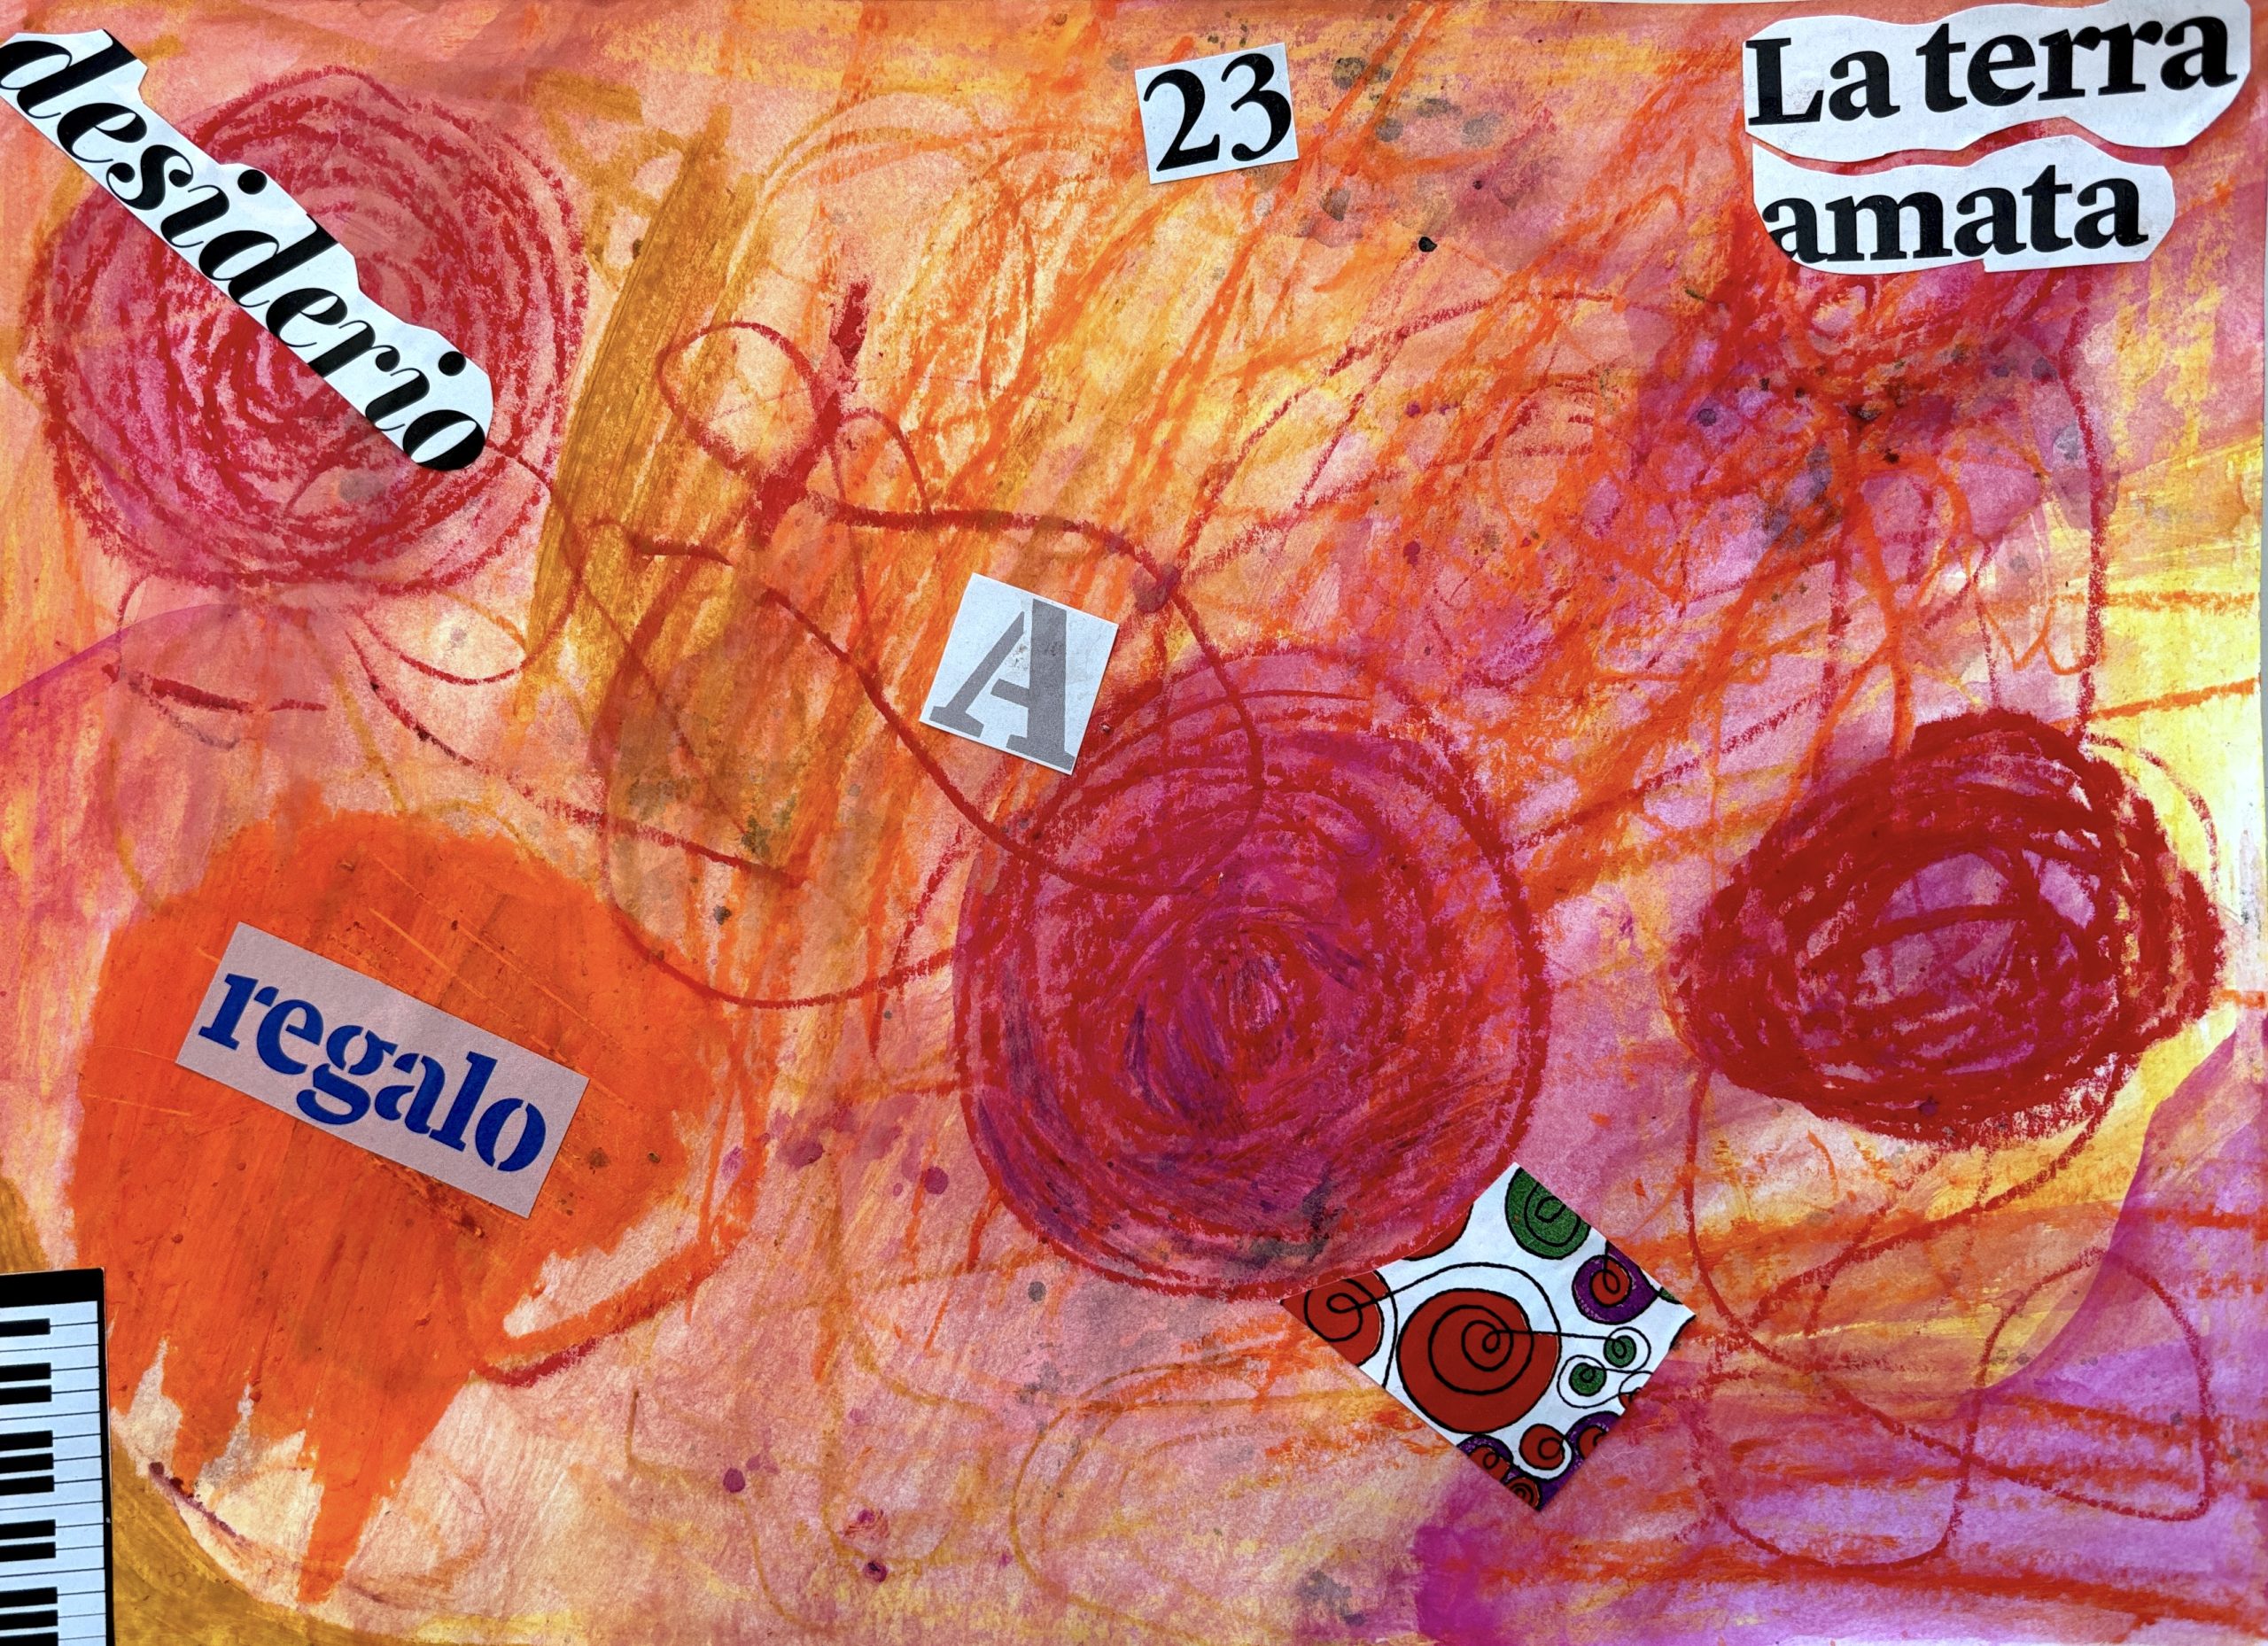
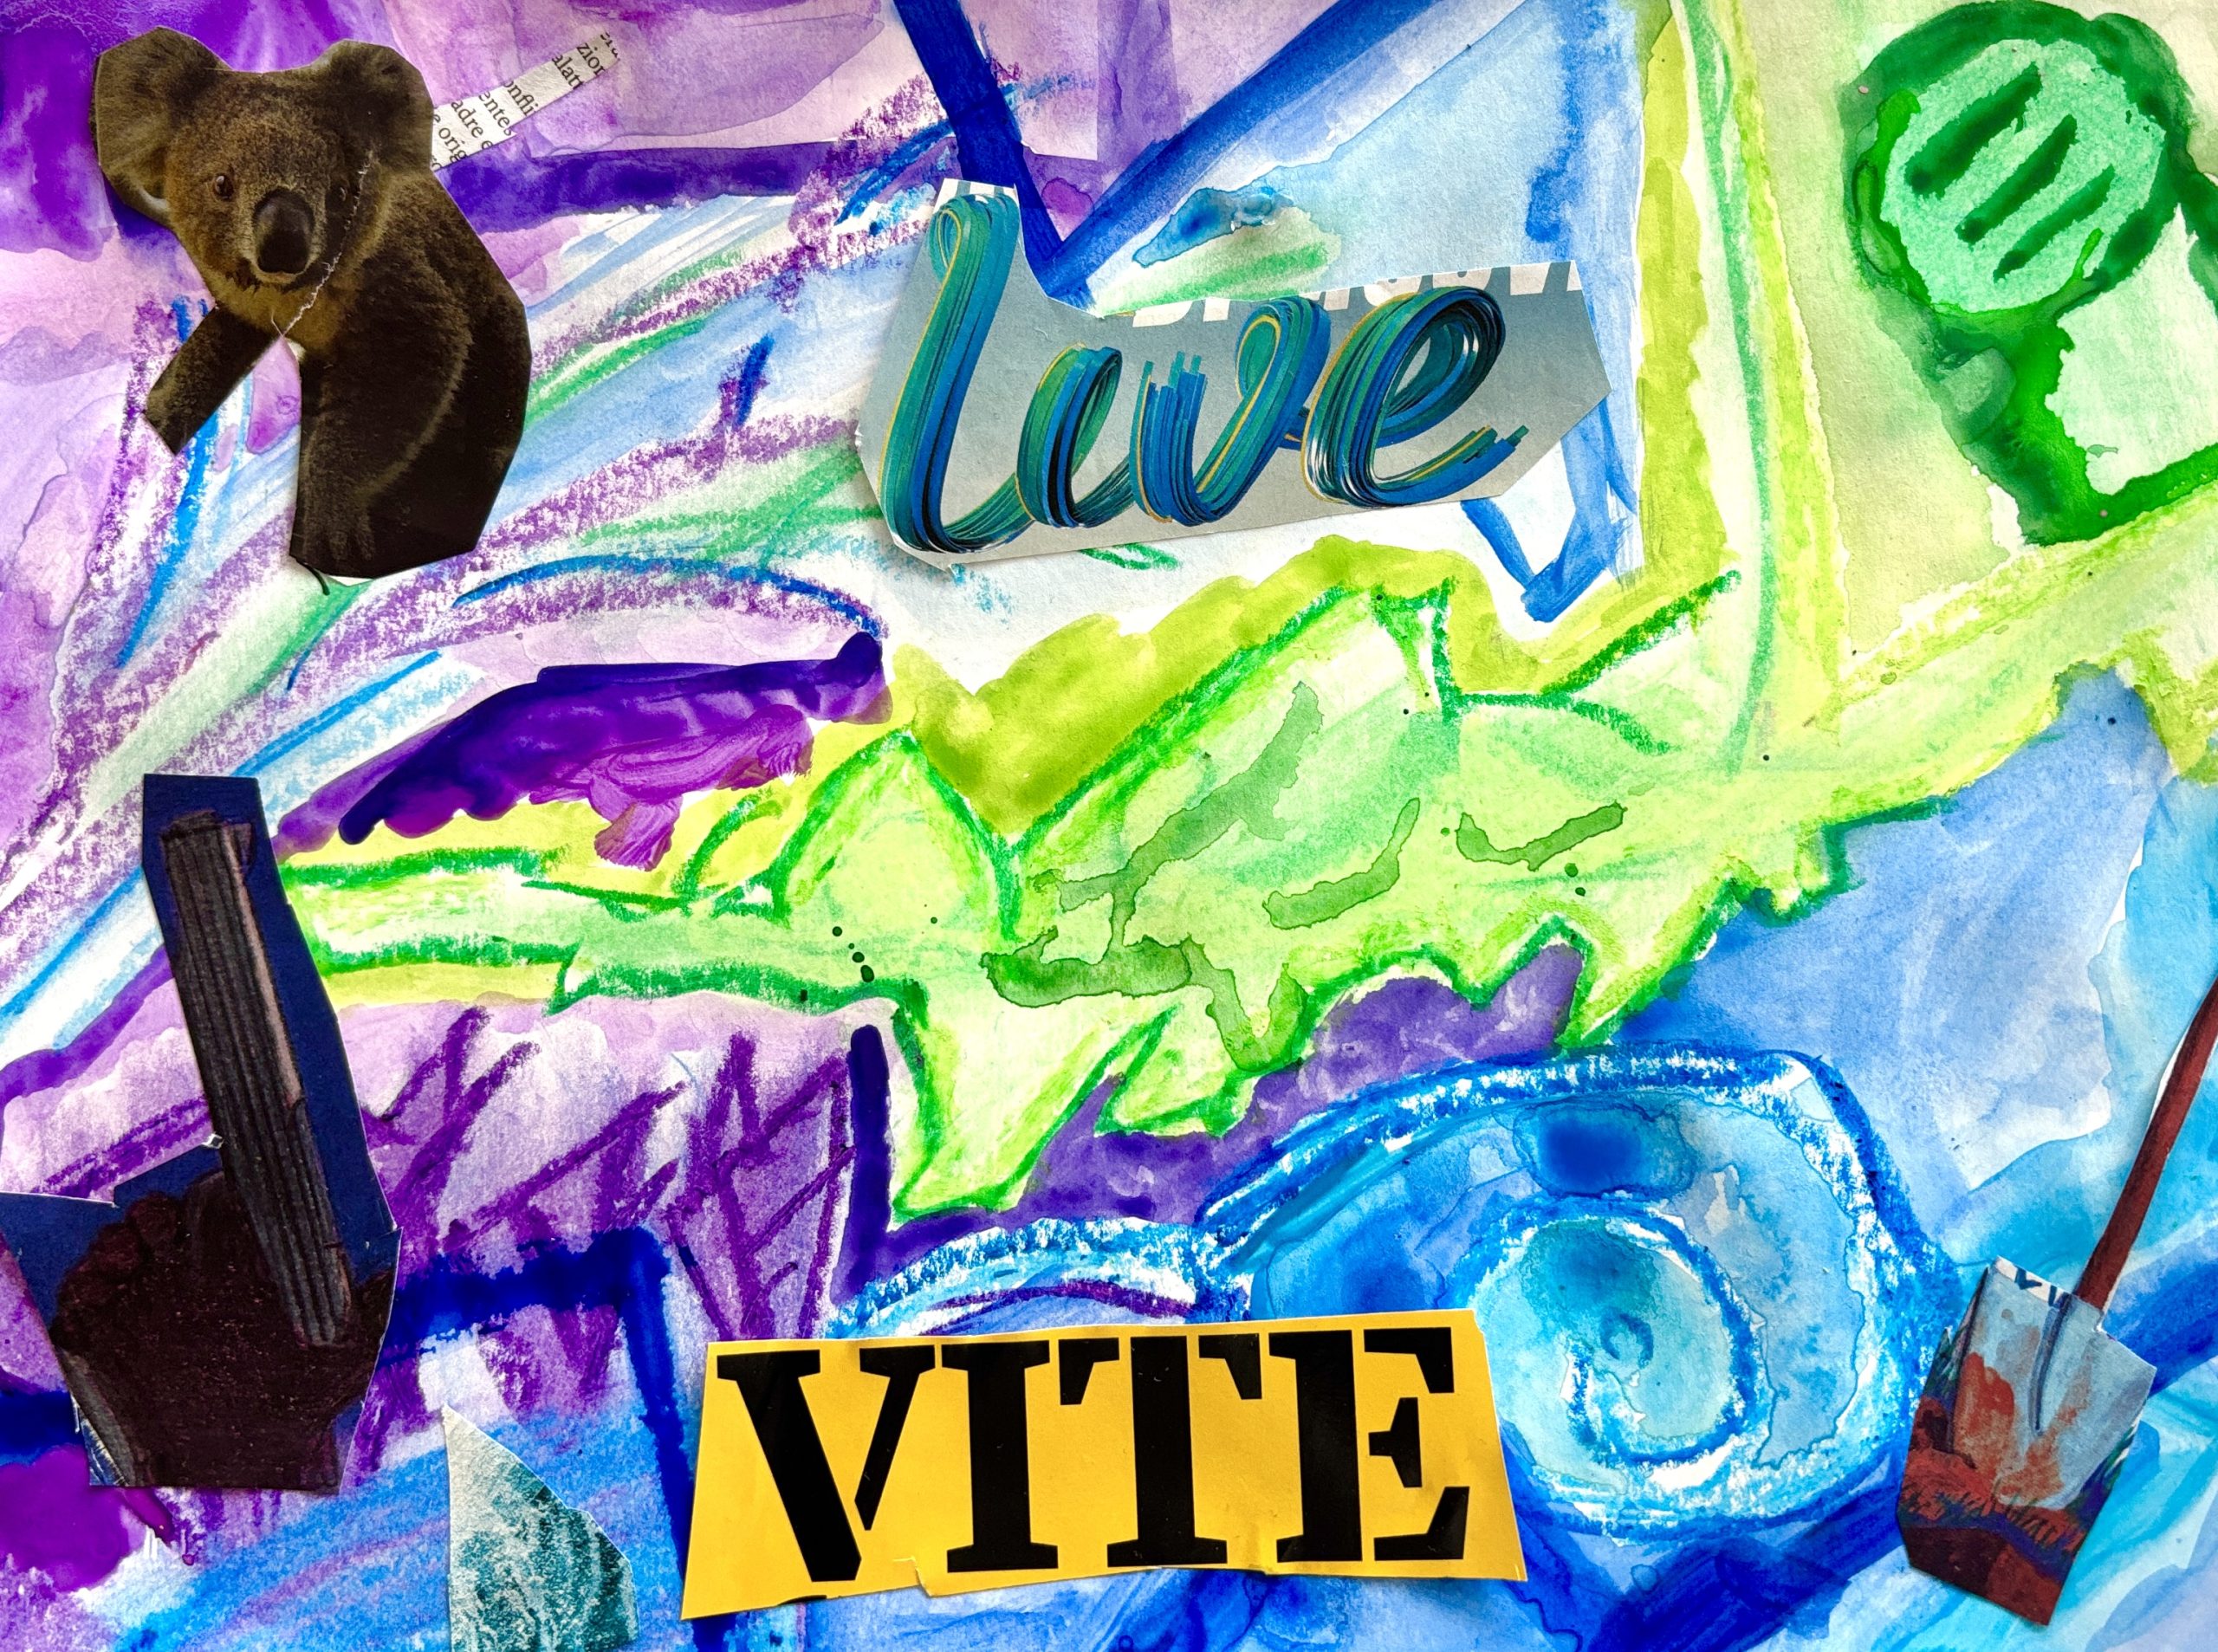
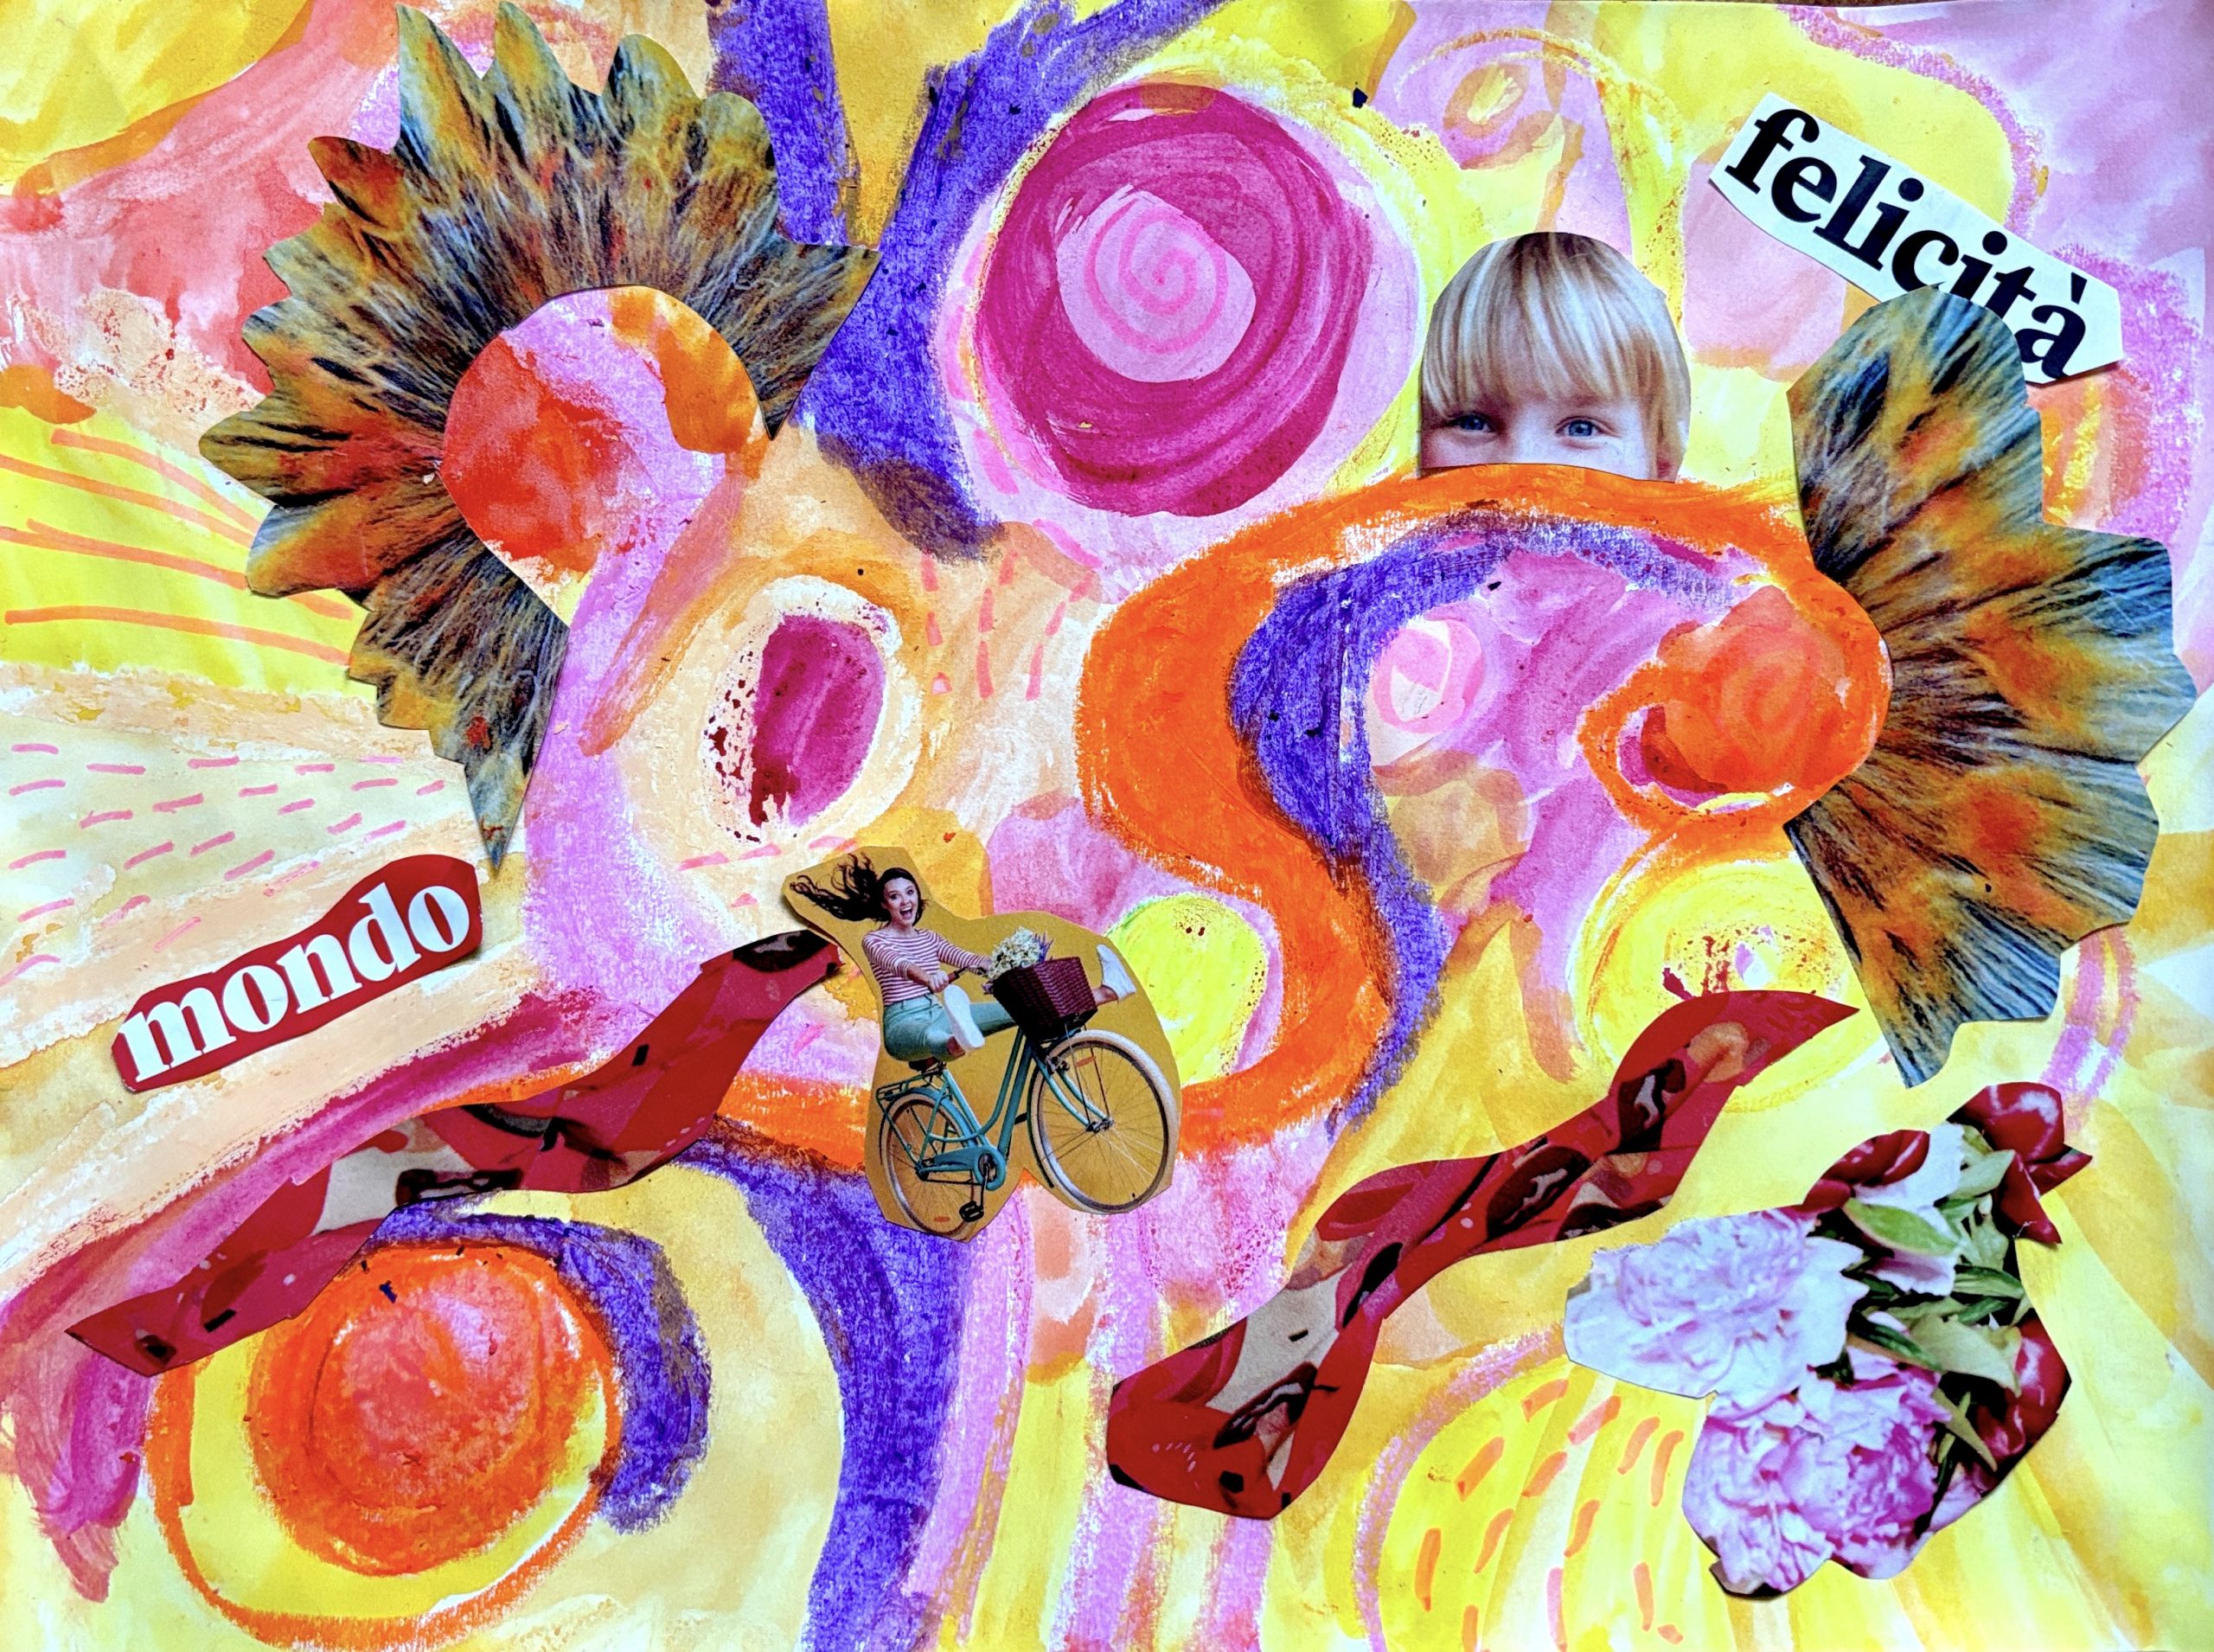
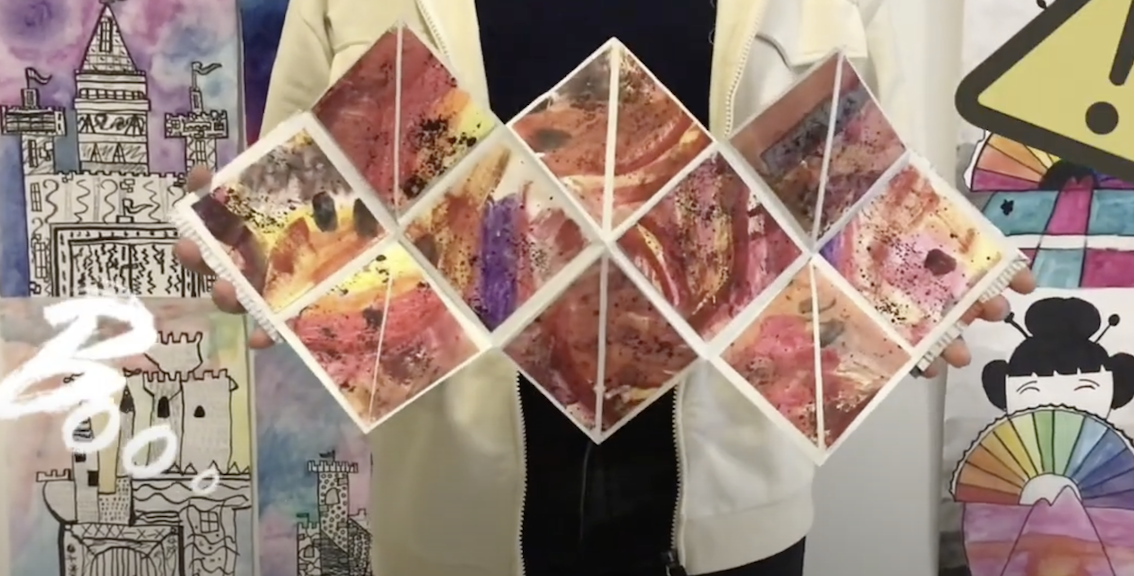
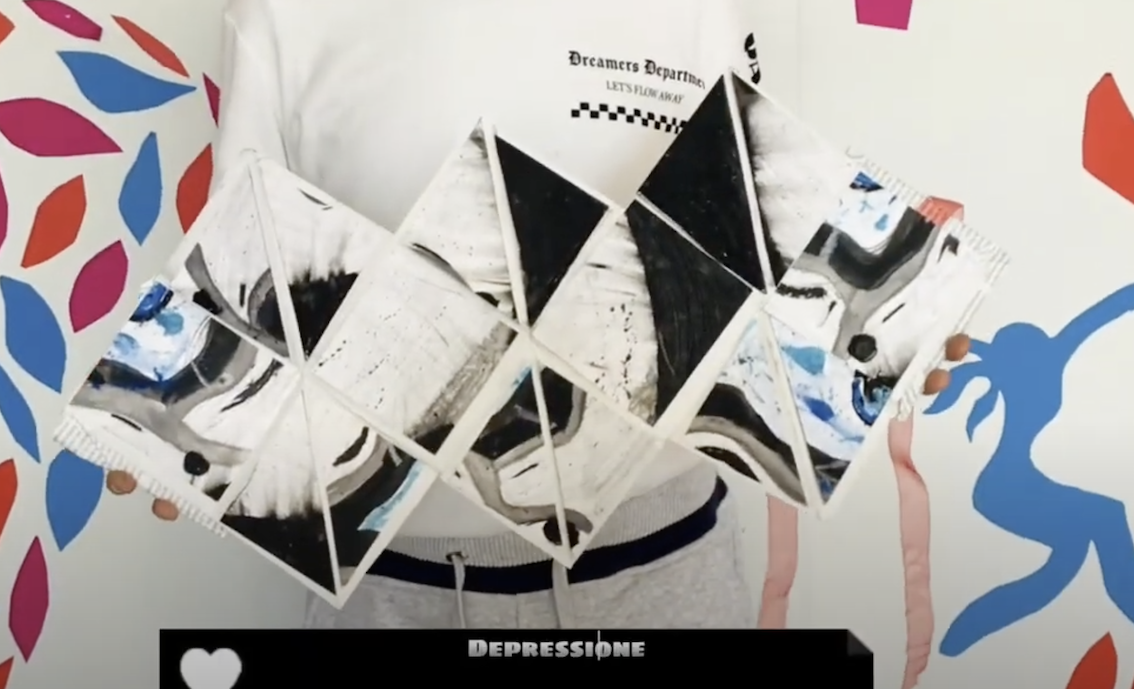
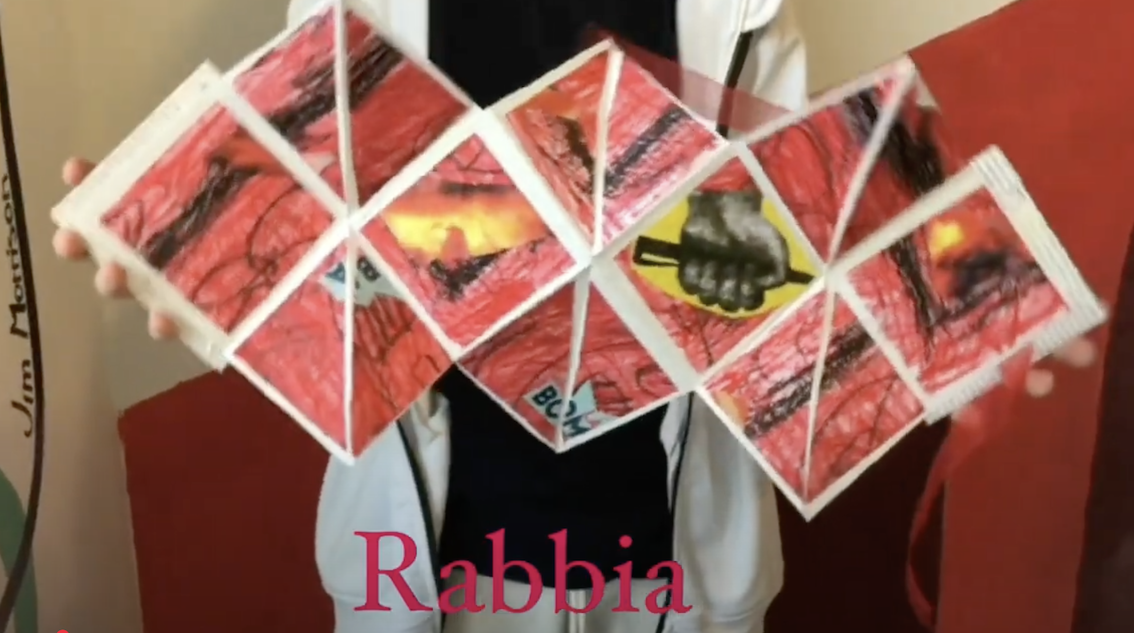
To create this book, first of all we thought of a specific emotion, focusing on what we feel, on the sensations, colors and images that this feeling evokes in us. On the back of a 24x33cm drawing sheet we drew a grid with 12 squares measuring 8x8cm. After turning the sheet over we began to draw freely, thinking about the emotion we wanted to represent. We focused above all on the COLORS that we think best evoke the chosen emotion.
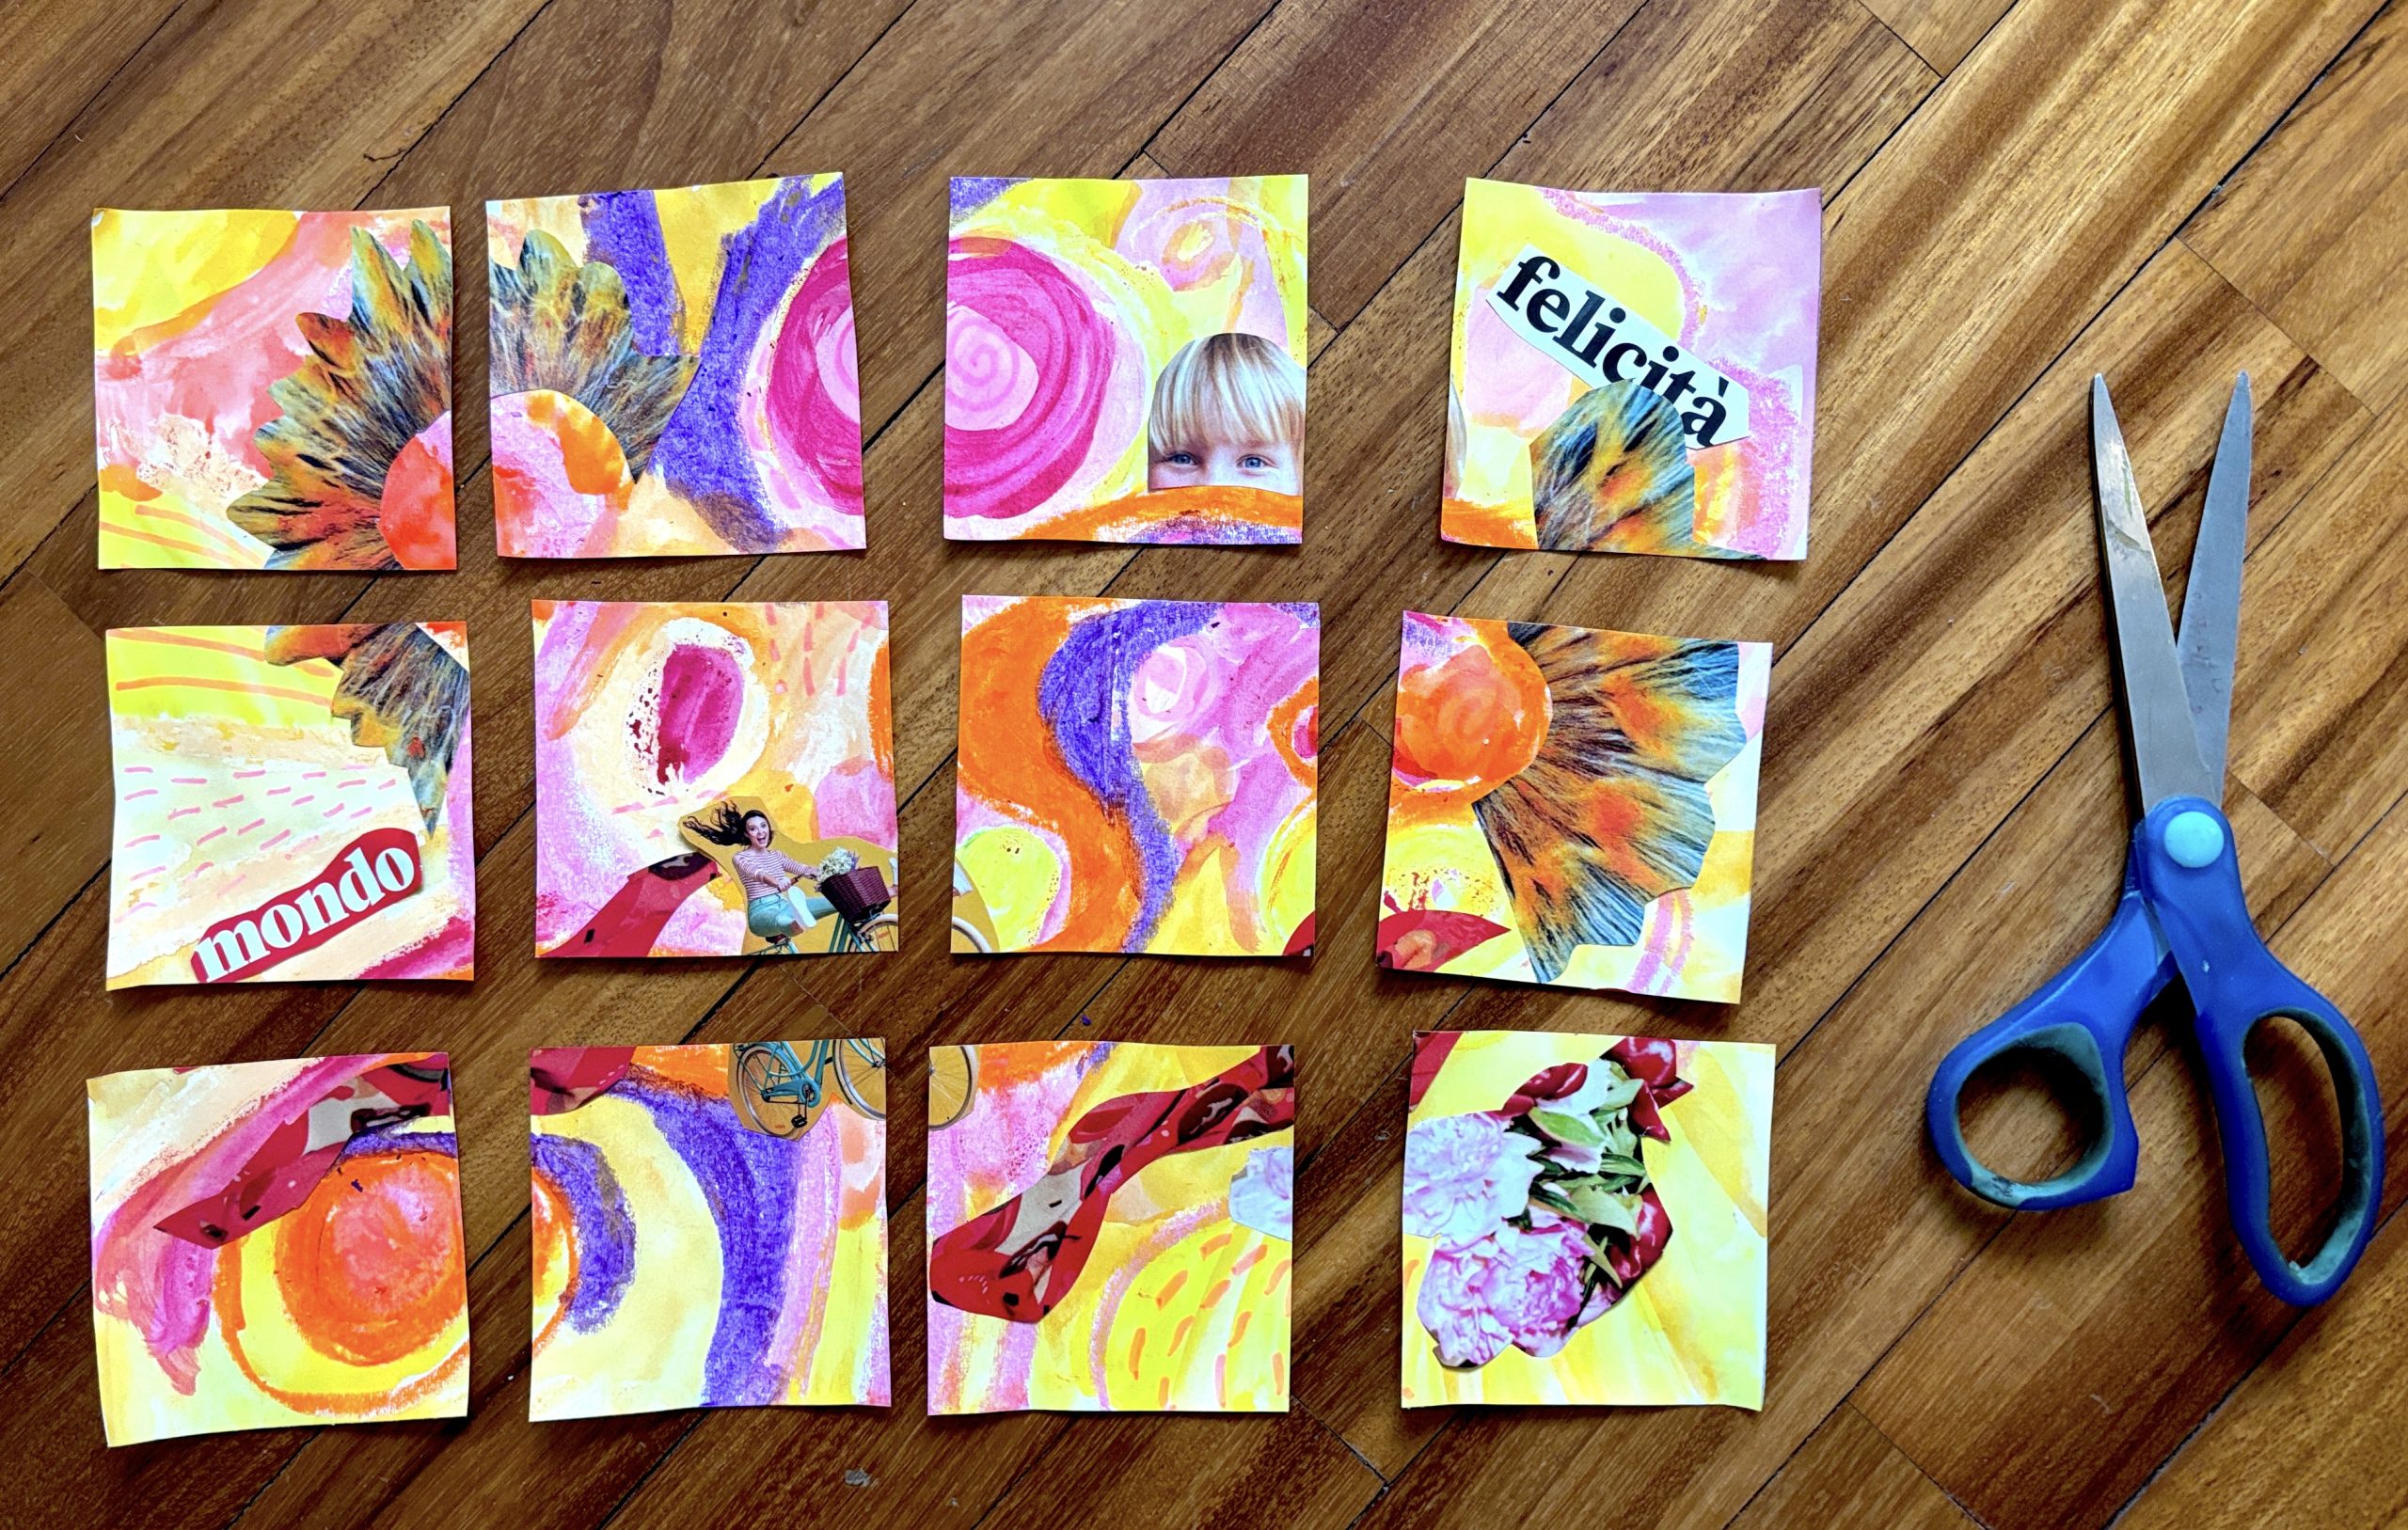
In addition to the sheet for the main drawing, we prepared 3 photocopy sheets (size A4) cut into a square format of 18x18cm: these will be used later to assemble the book.
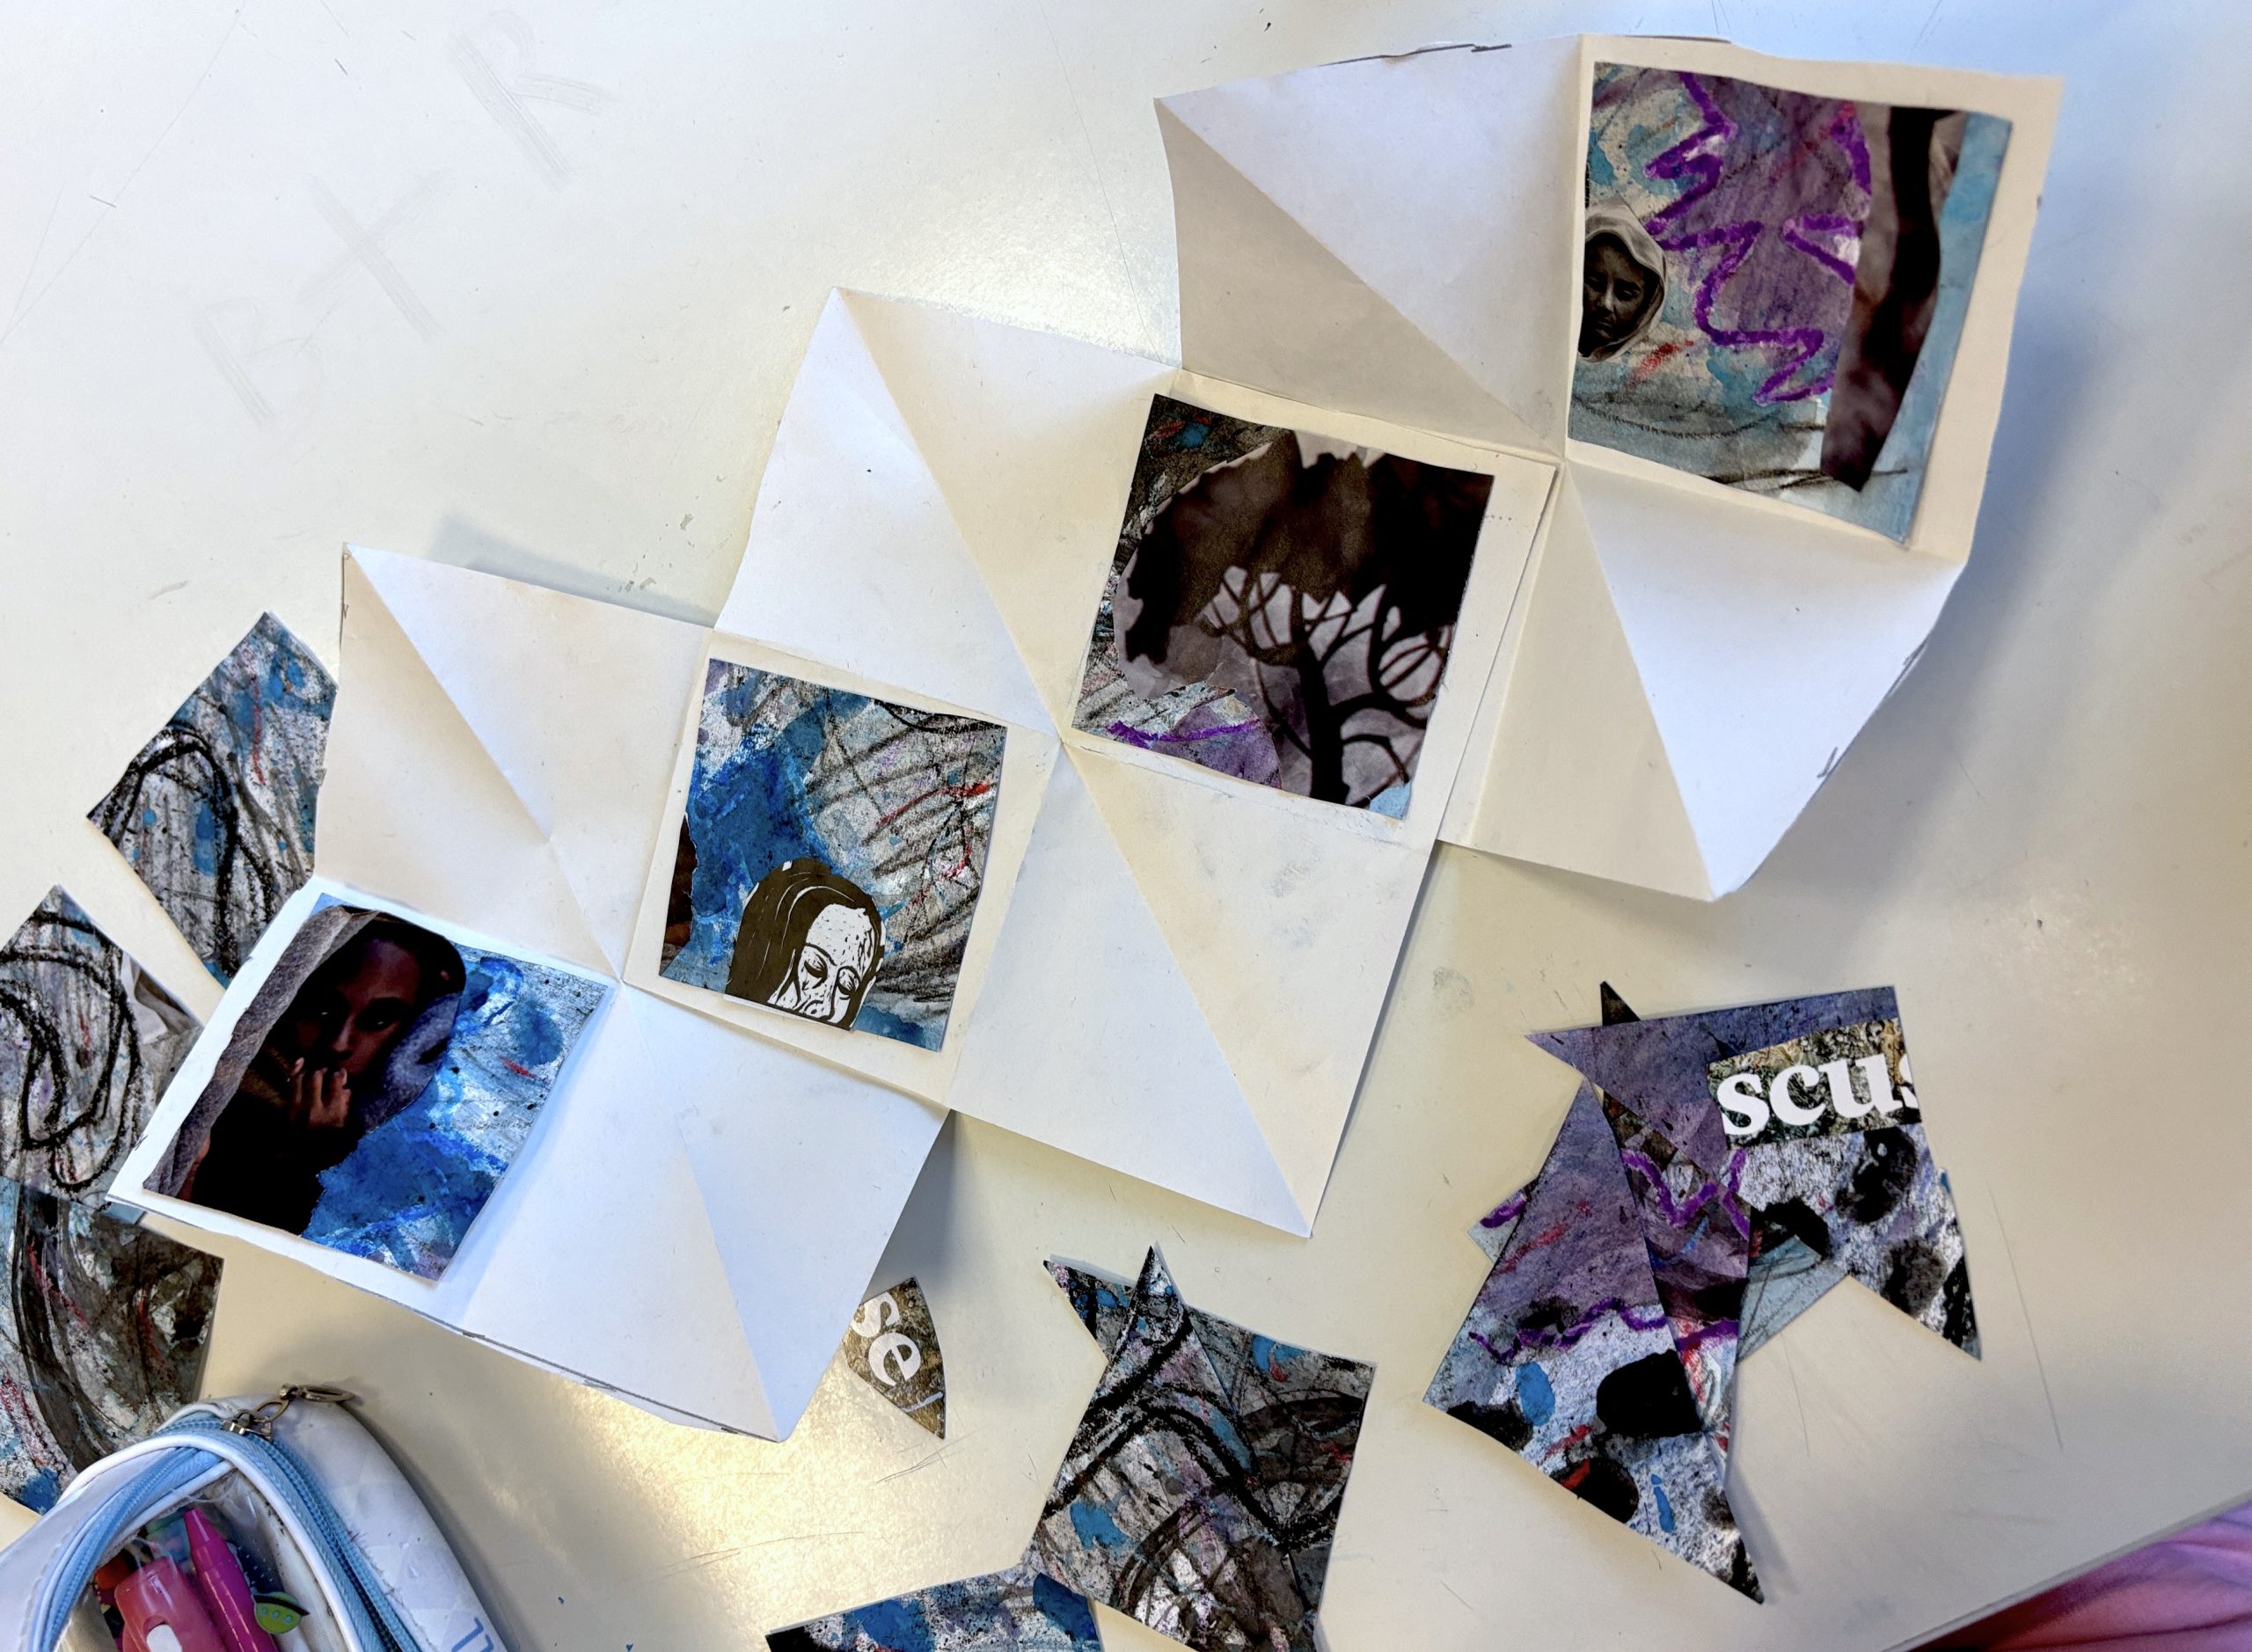
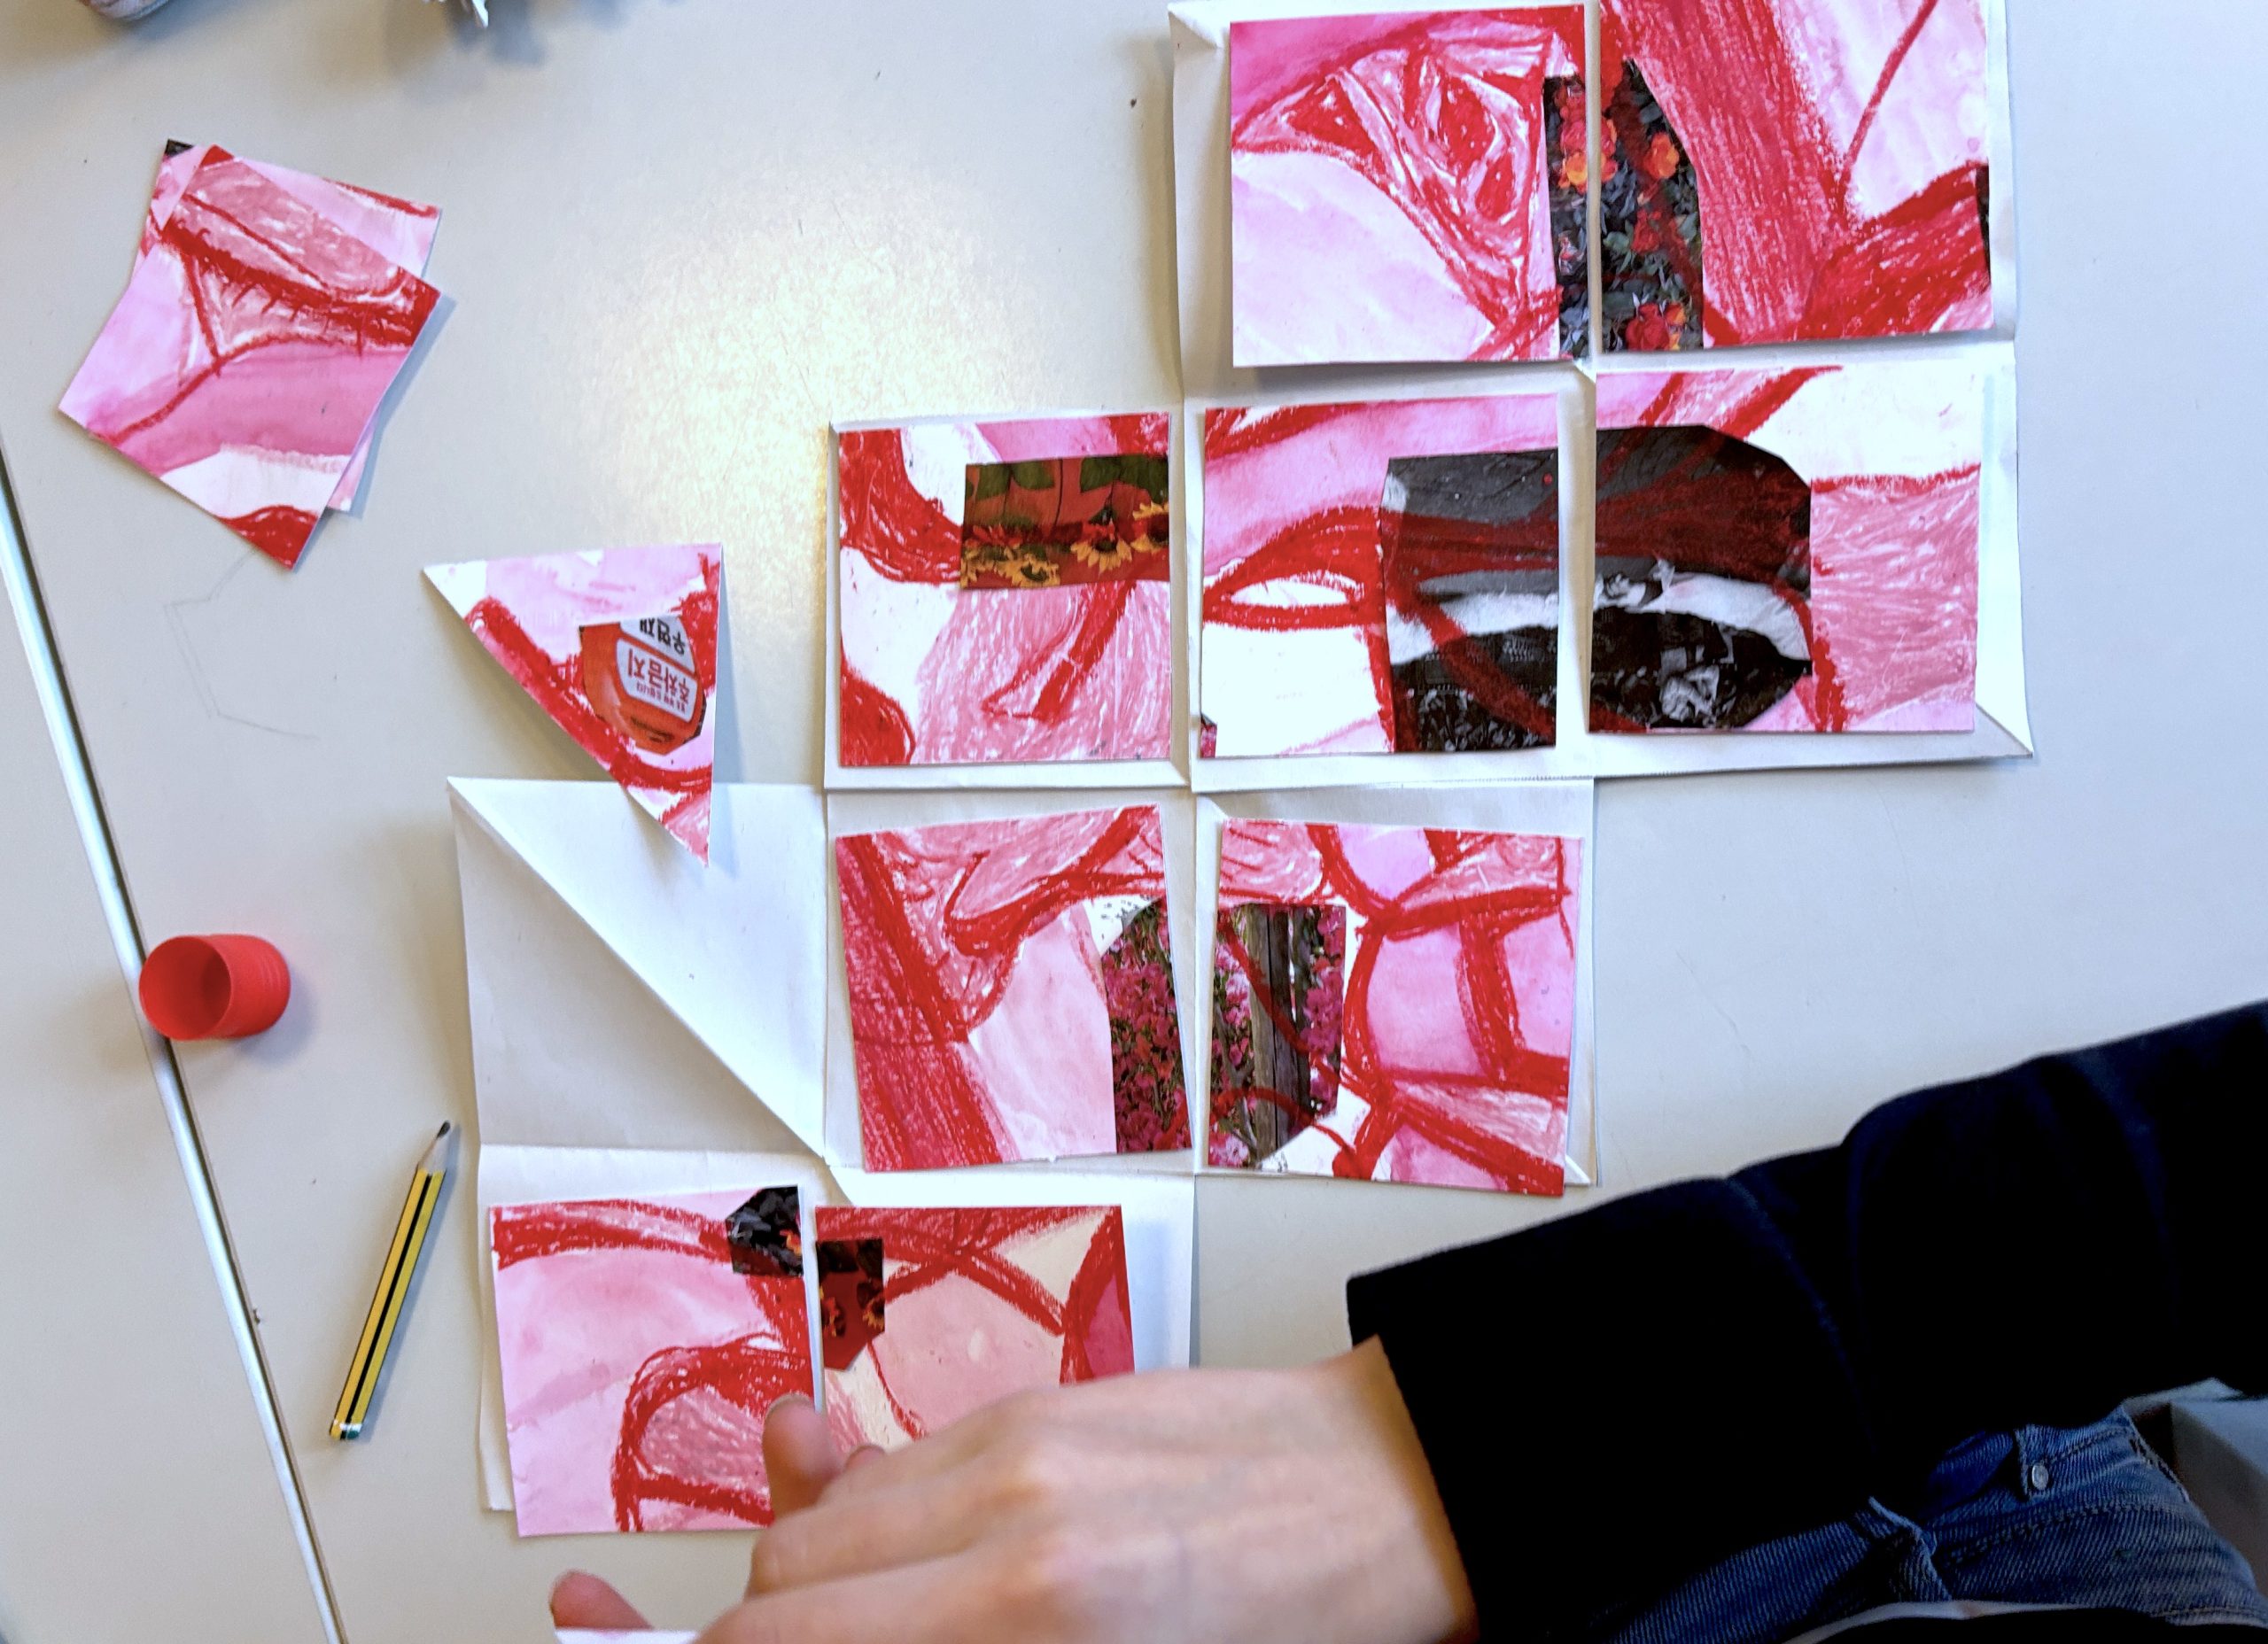
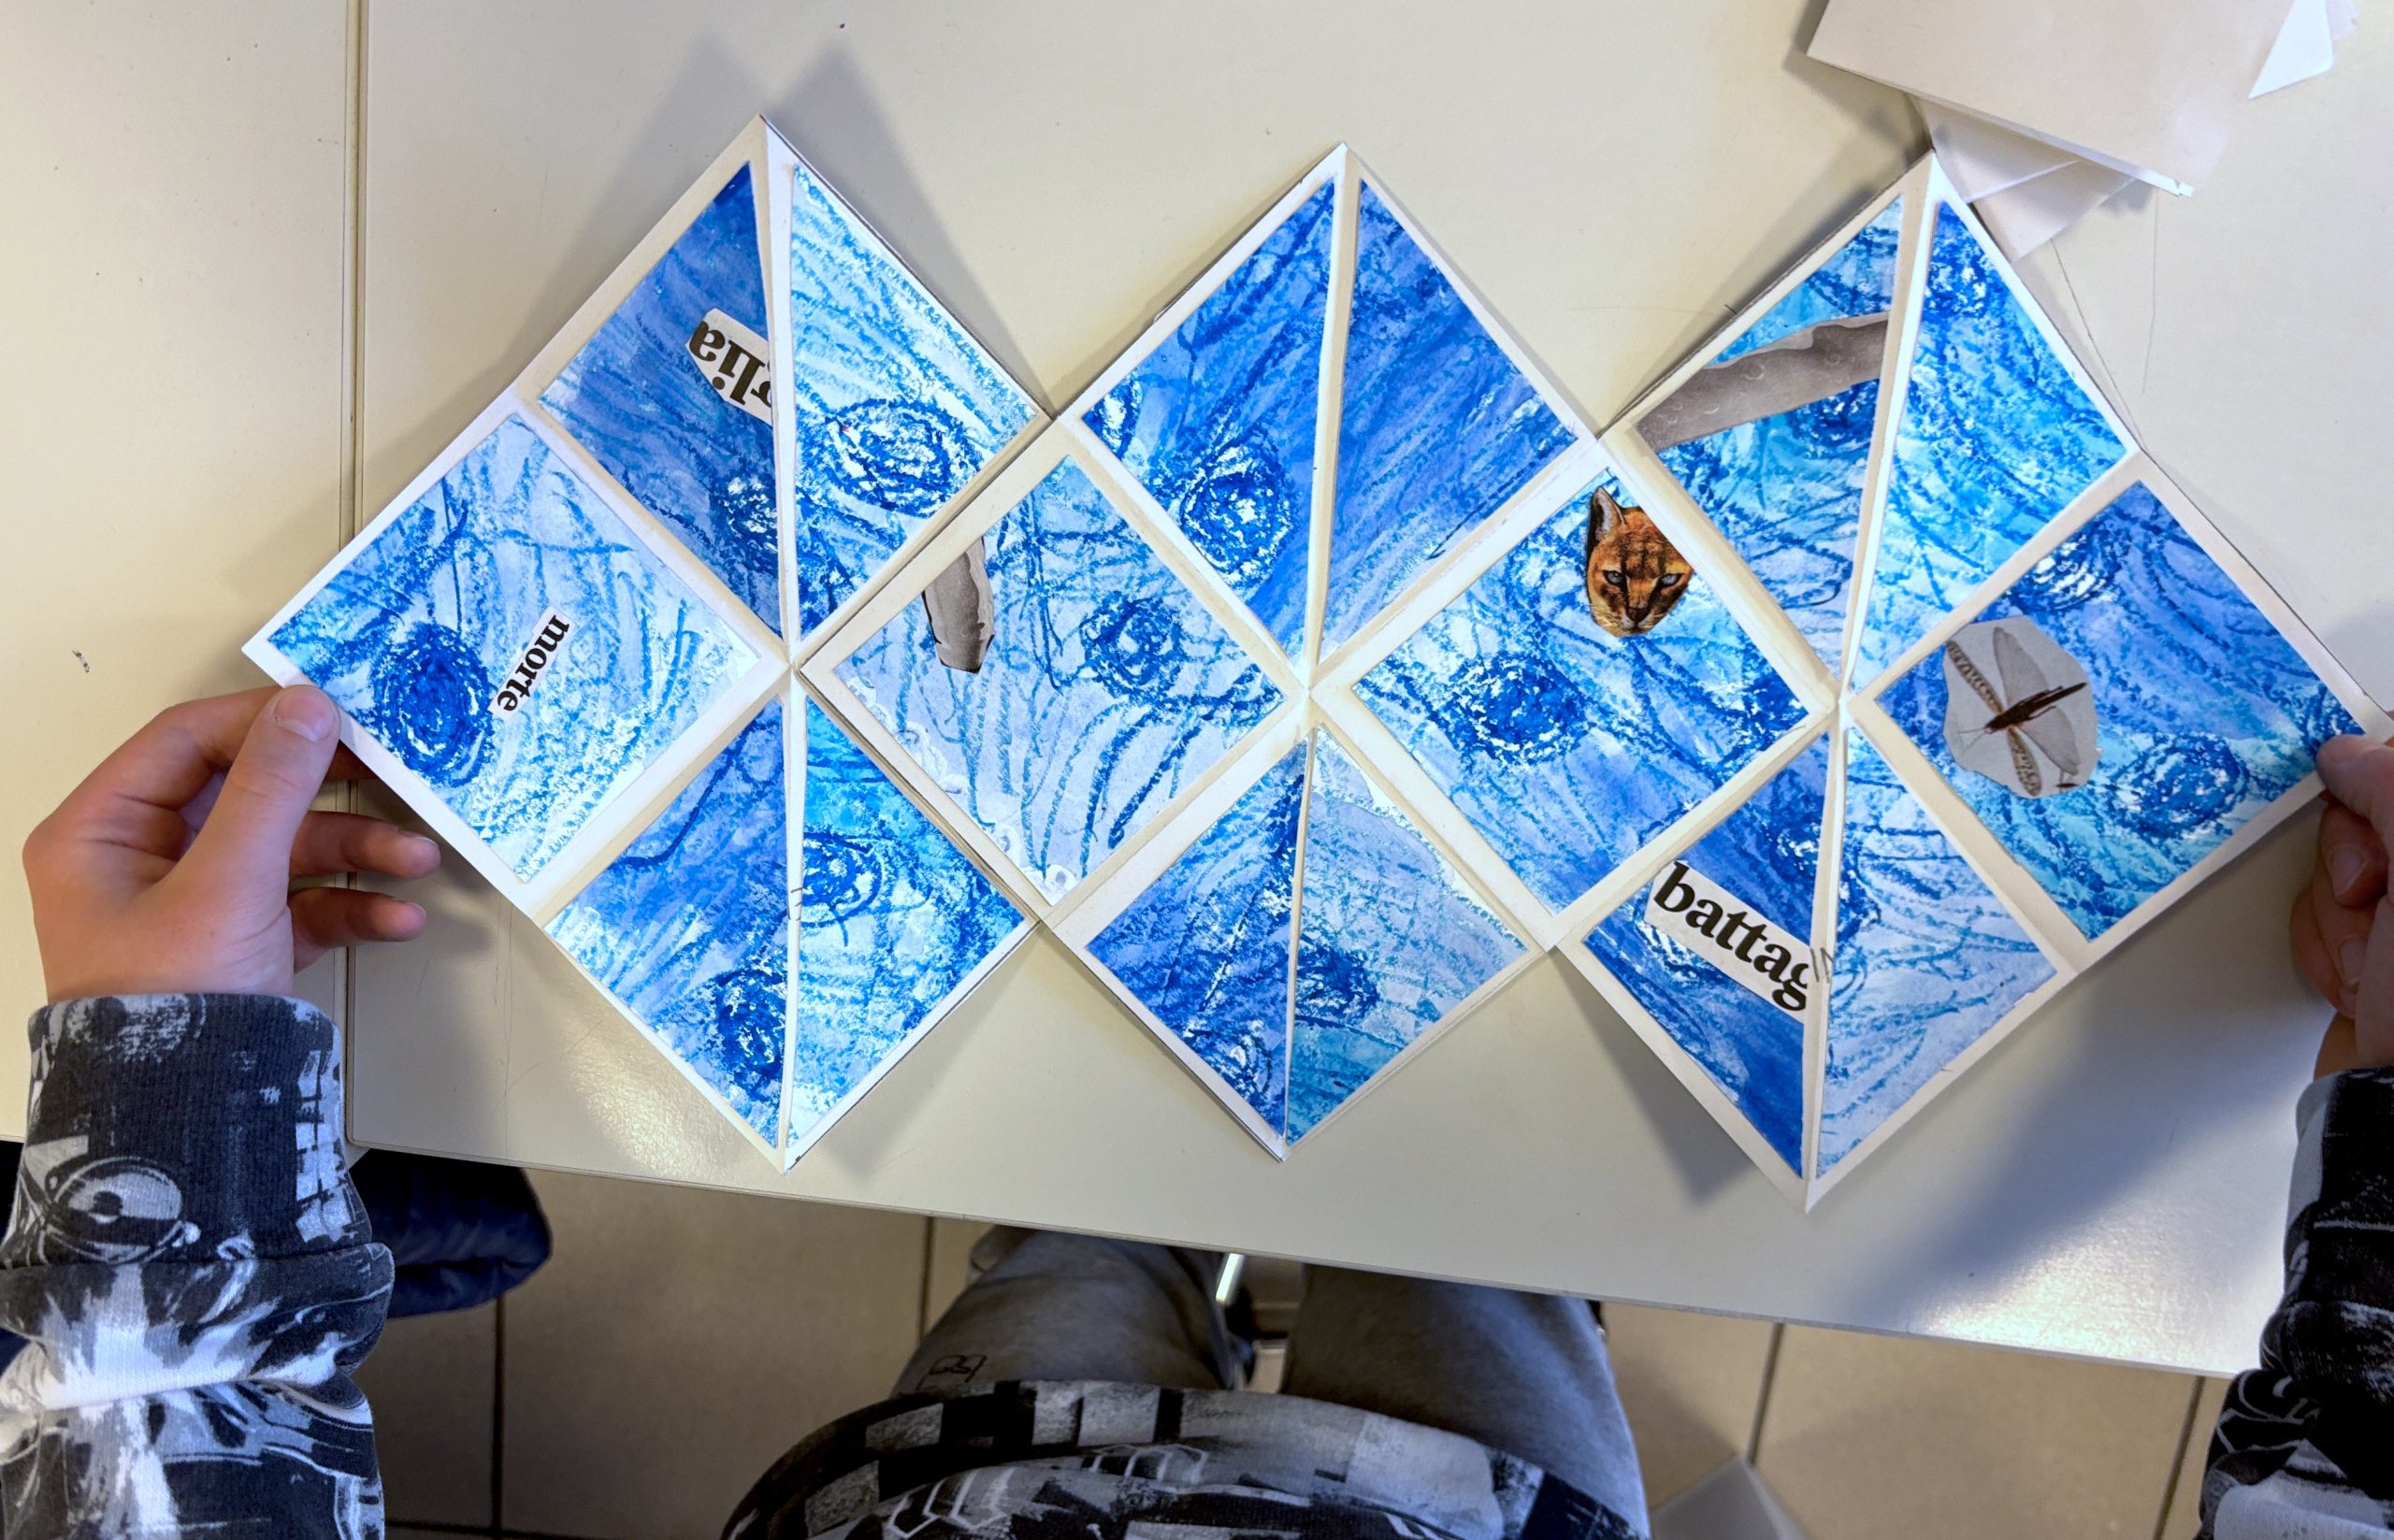
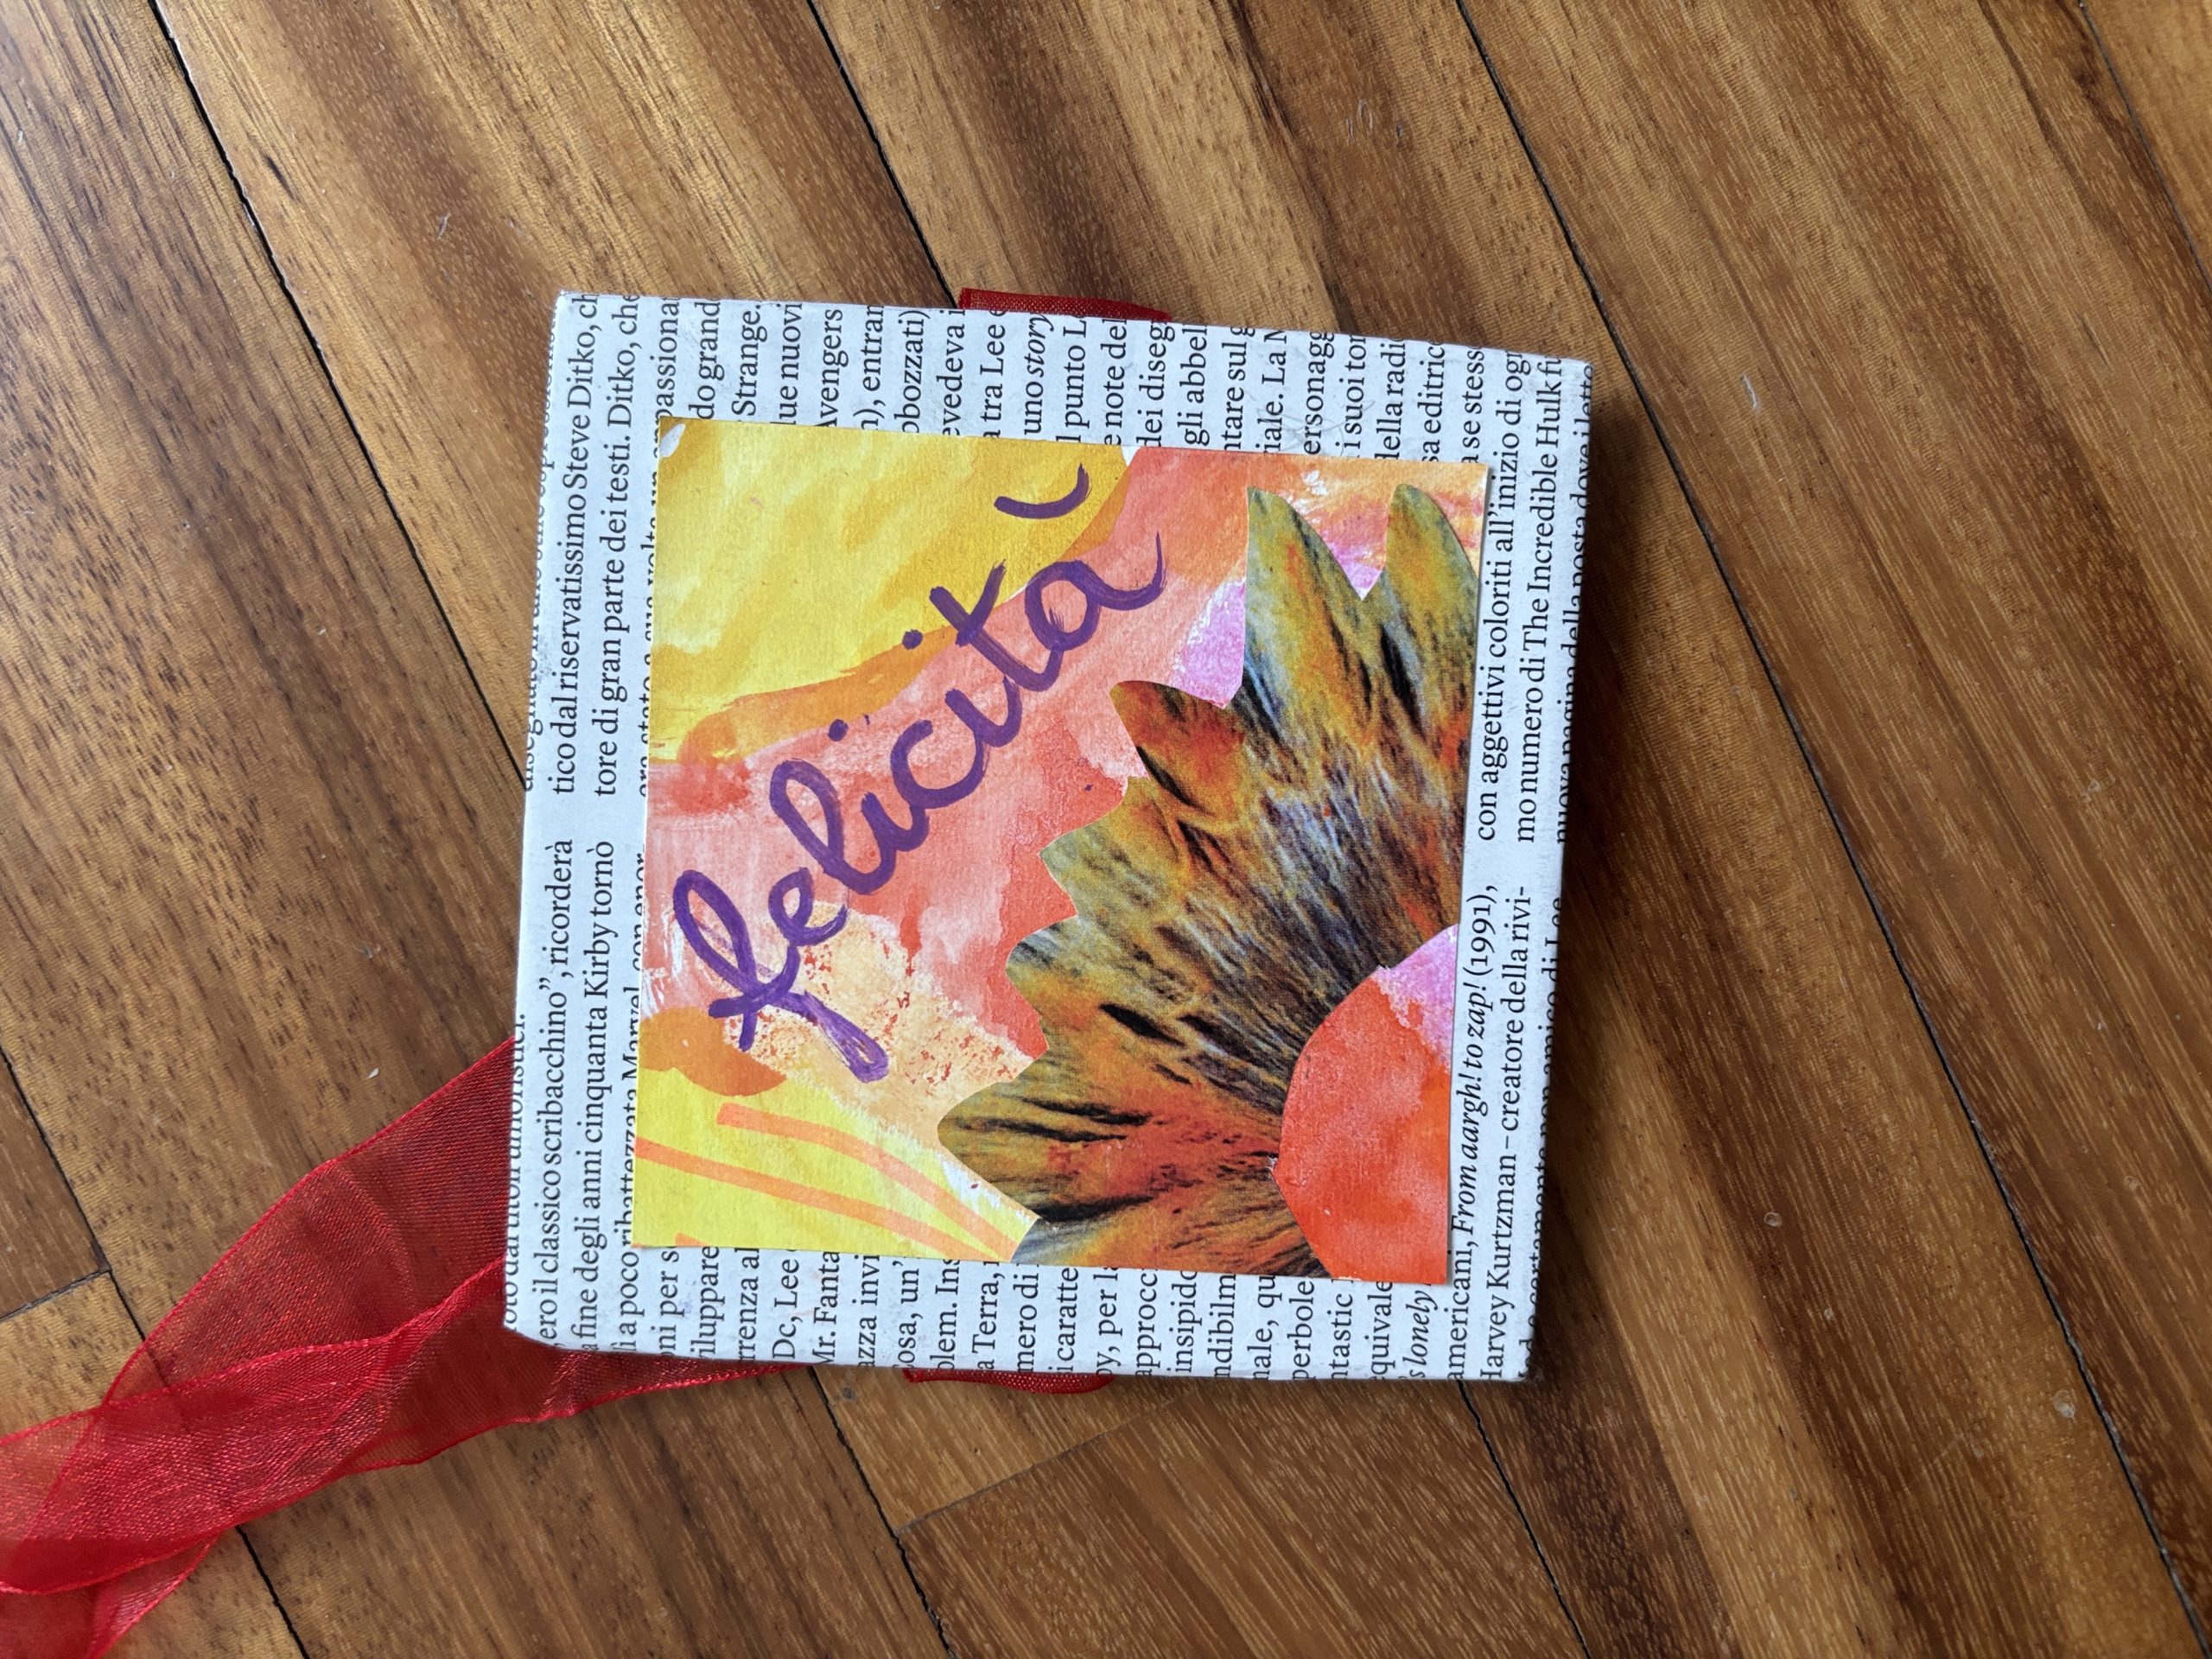
For this representation we used a MIXED TECHNIQUE, starting to draw with OIL PASTELS lines and shapes that want to evoke our emotion. After the pastels we used WATERCOLOURS, taking advantage of the differences in absorption of the various surfaces to create different effects. Subsequently we added parts to COLLAGE, with shapes, images or even evocative words.
The task involves FILL THE WHOLE SHEET with shapes and colors, without leaving any borders or white spaces. Below we see the drawing work:

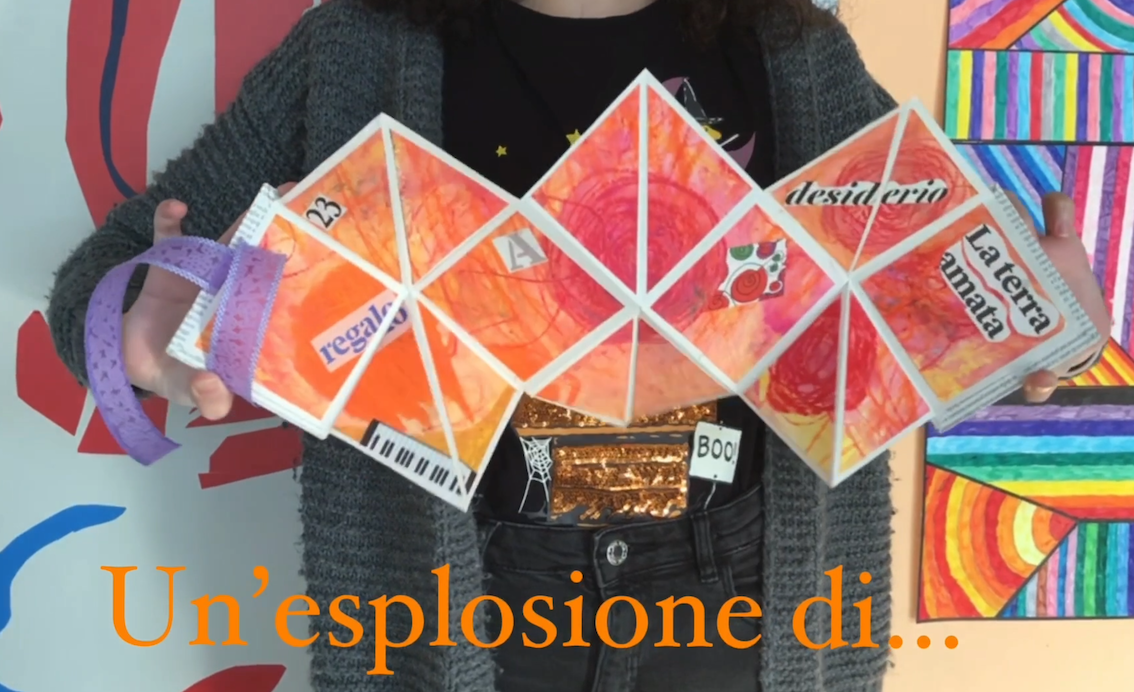
After creating the mixed media drawing, we built the “origami” explosive book following the instructions in this video tutorial, where it is explained very carefully how to fold the paper and how to glue the three sheets together:
The next step was to prepare our paper booklets: first we cut out the drawing of the emotions following the grid drawn on the back and then we glued the pieces in random order on the “pages” of the booklet. You need to cut 6 squares along the diagonal, to allow for easy folding of the booklet.
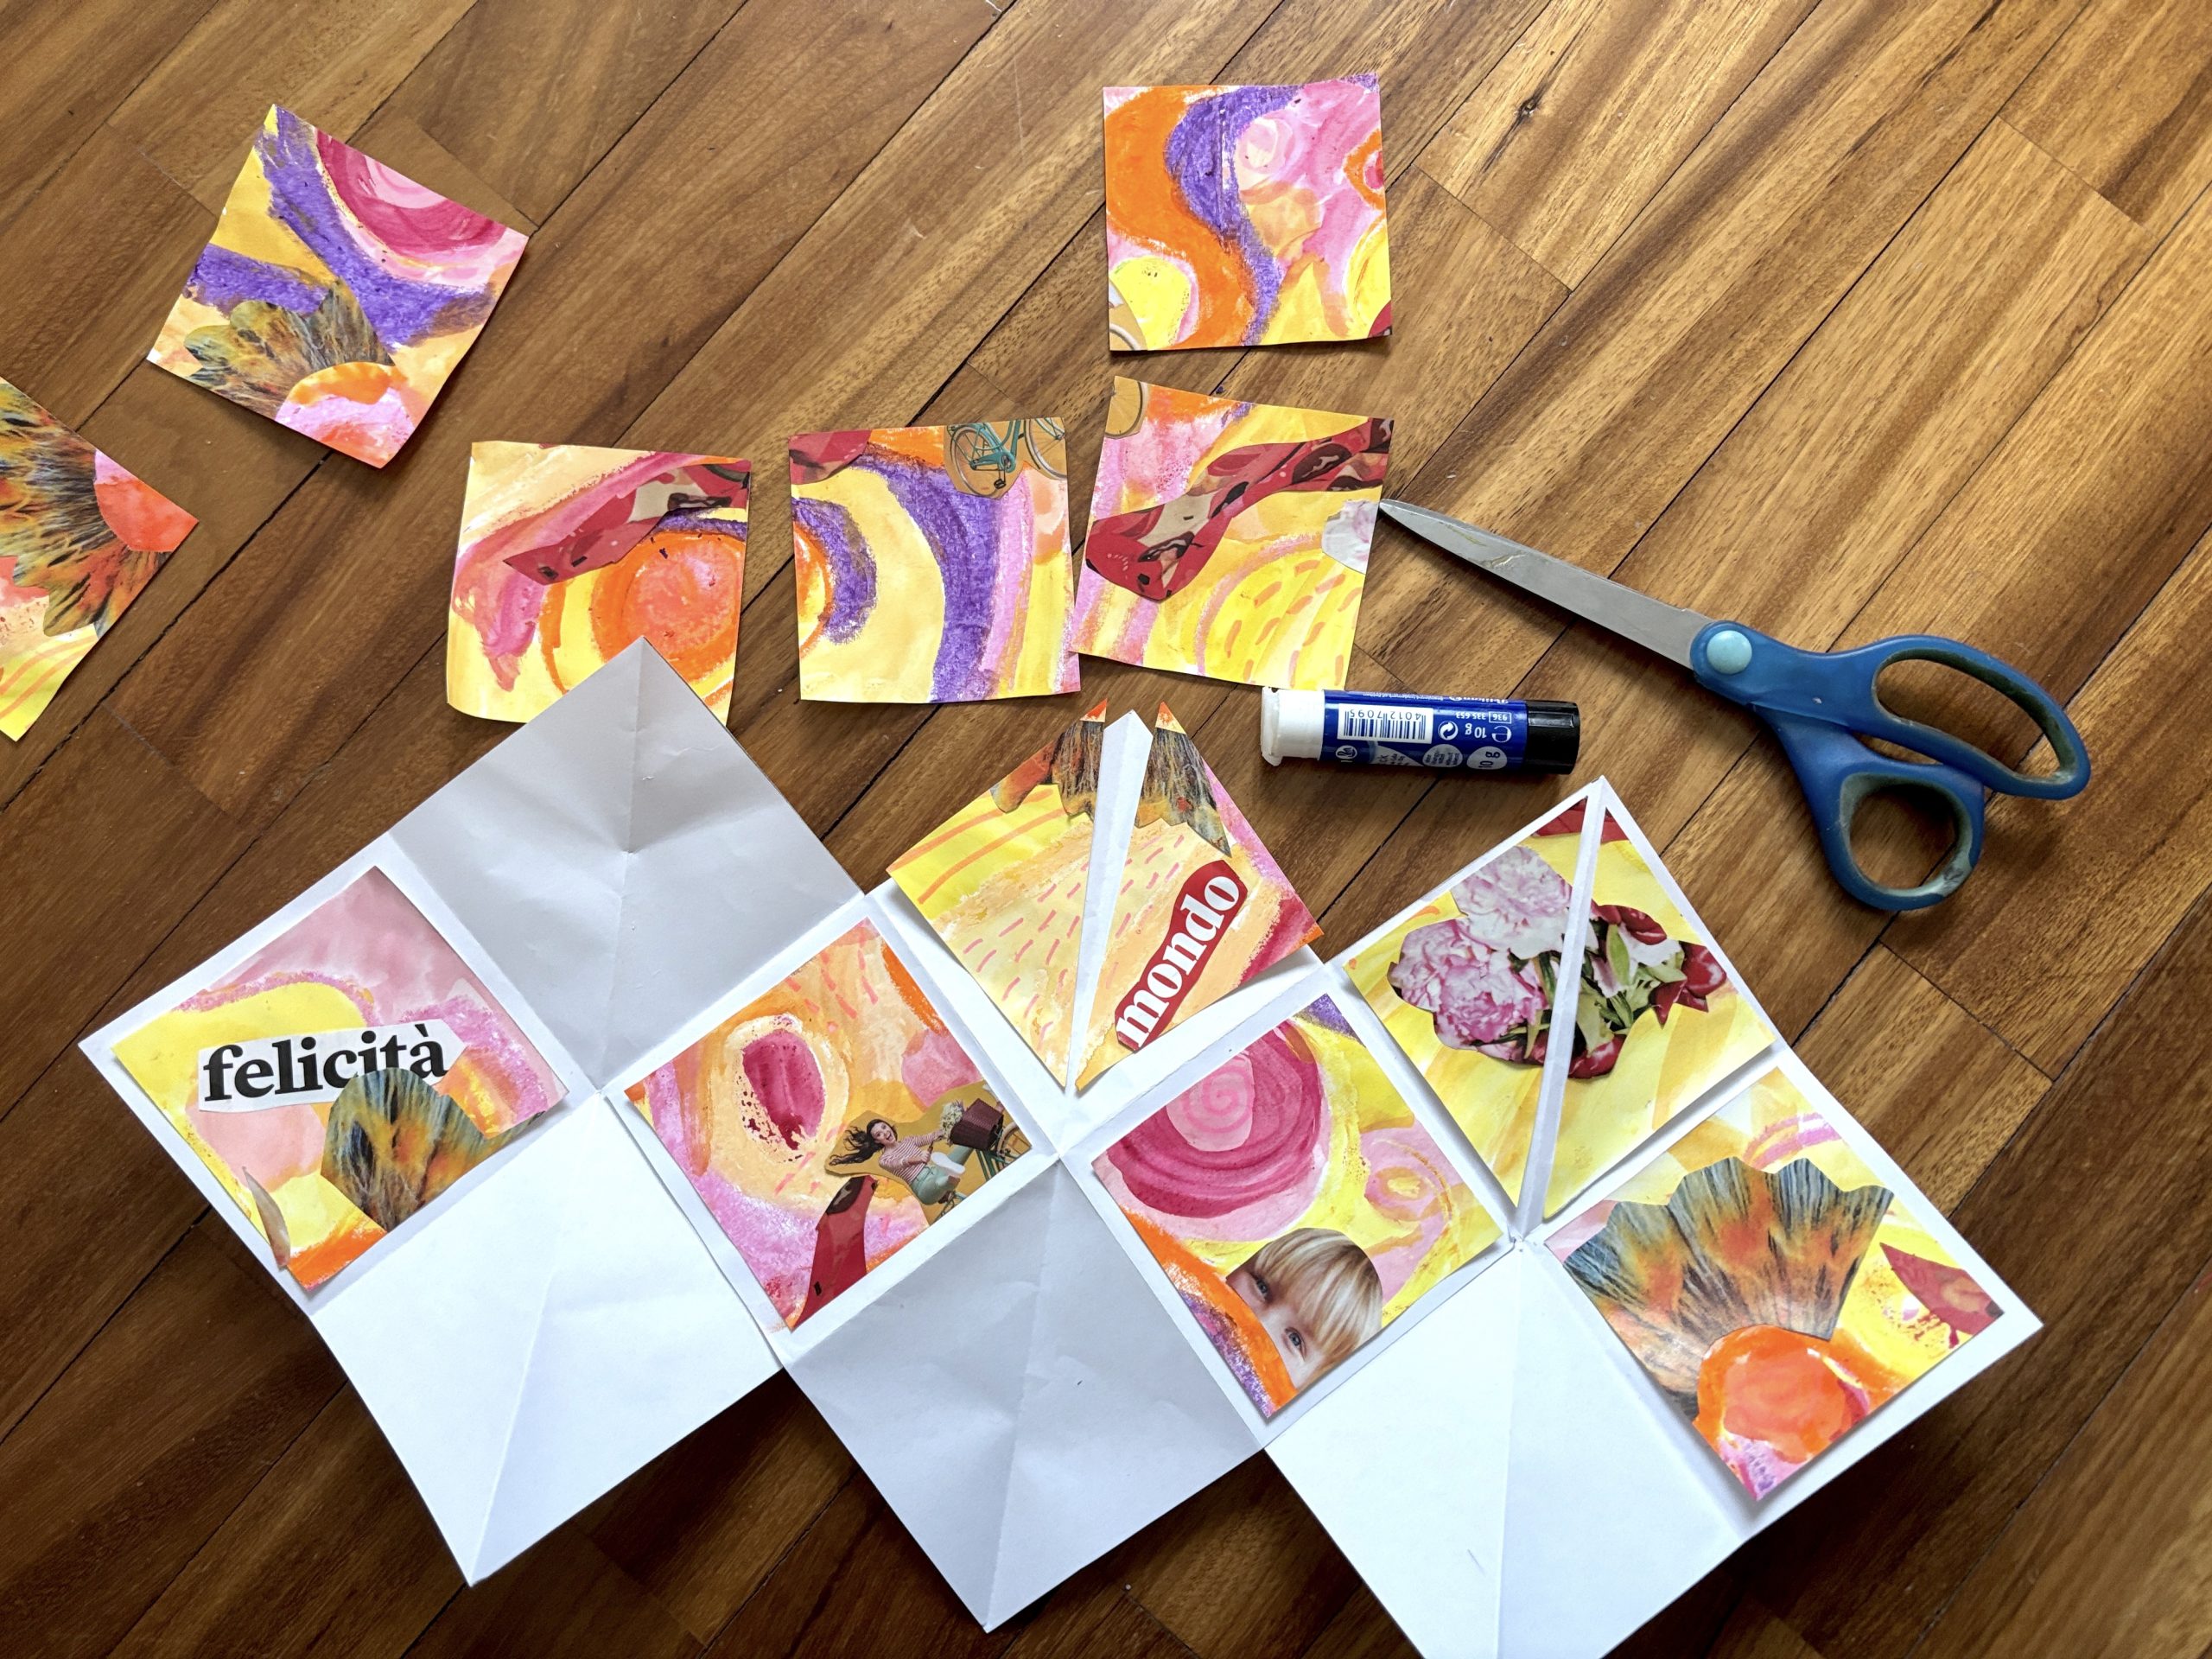
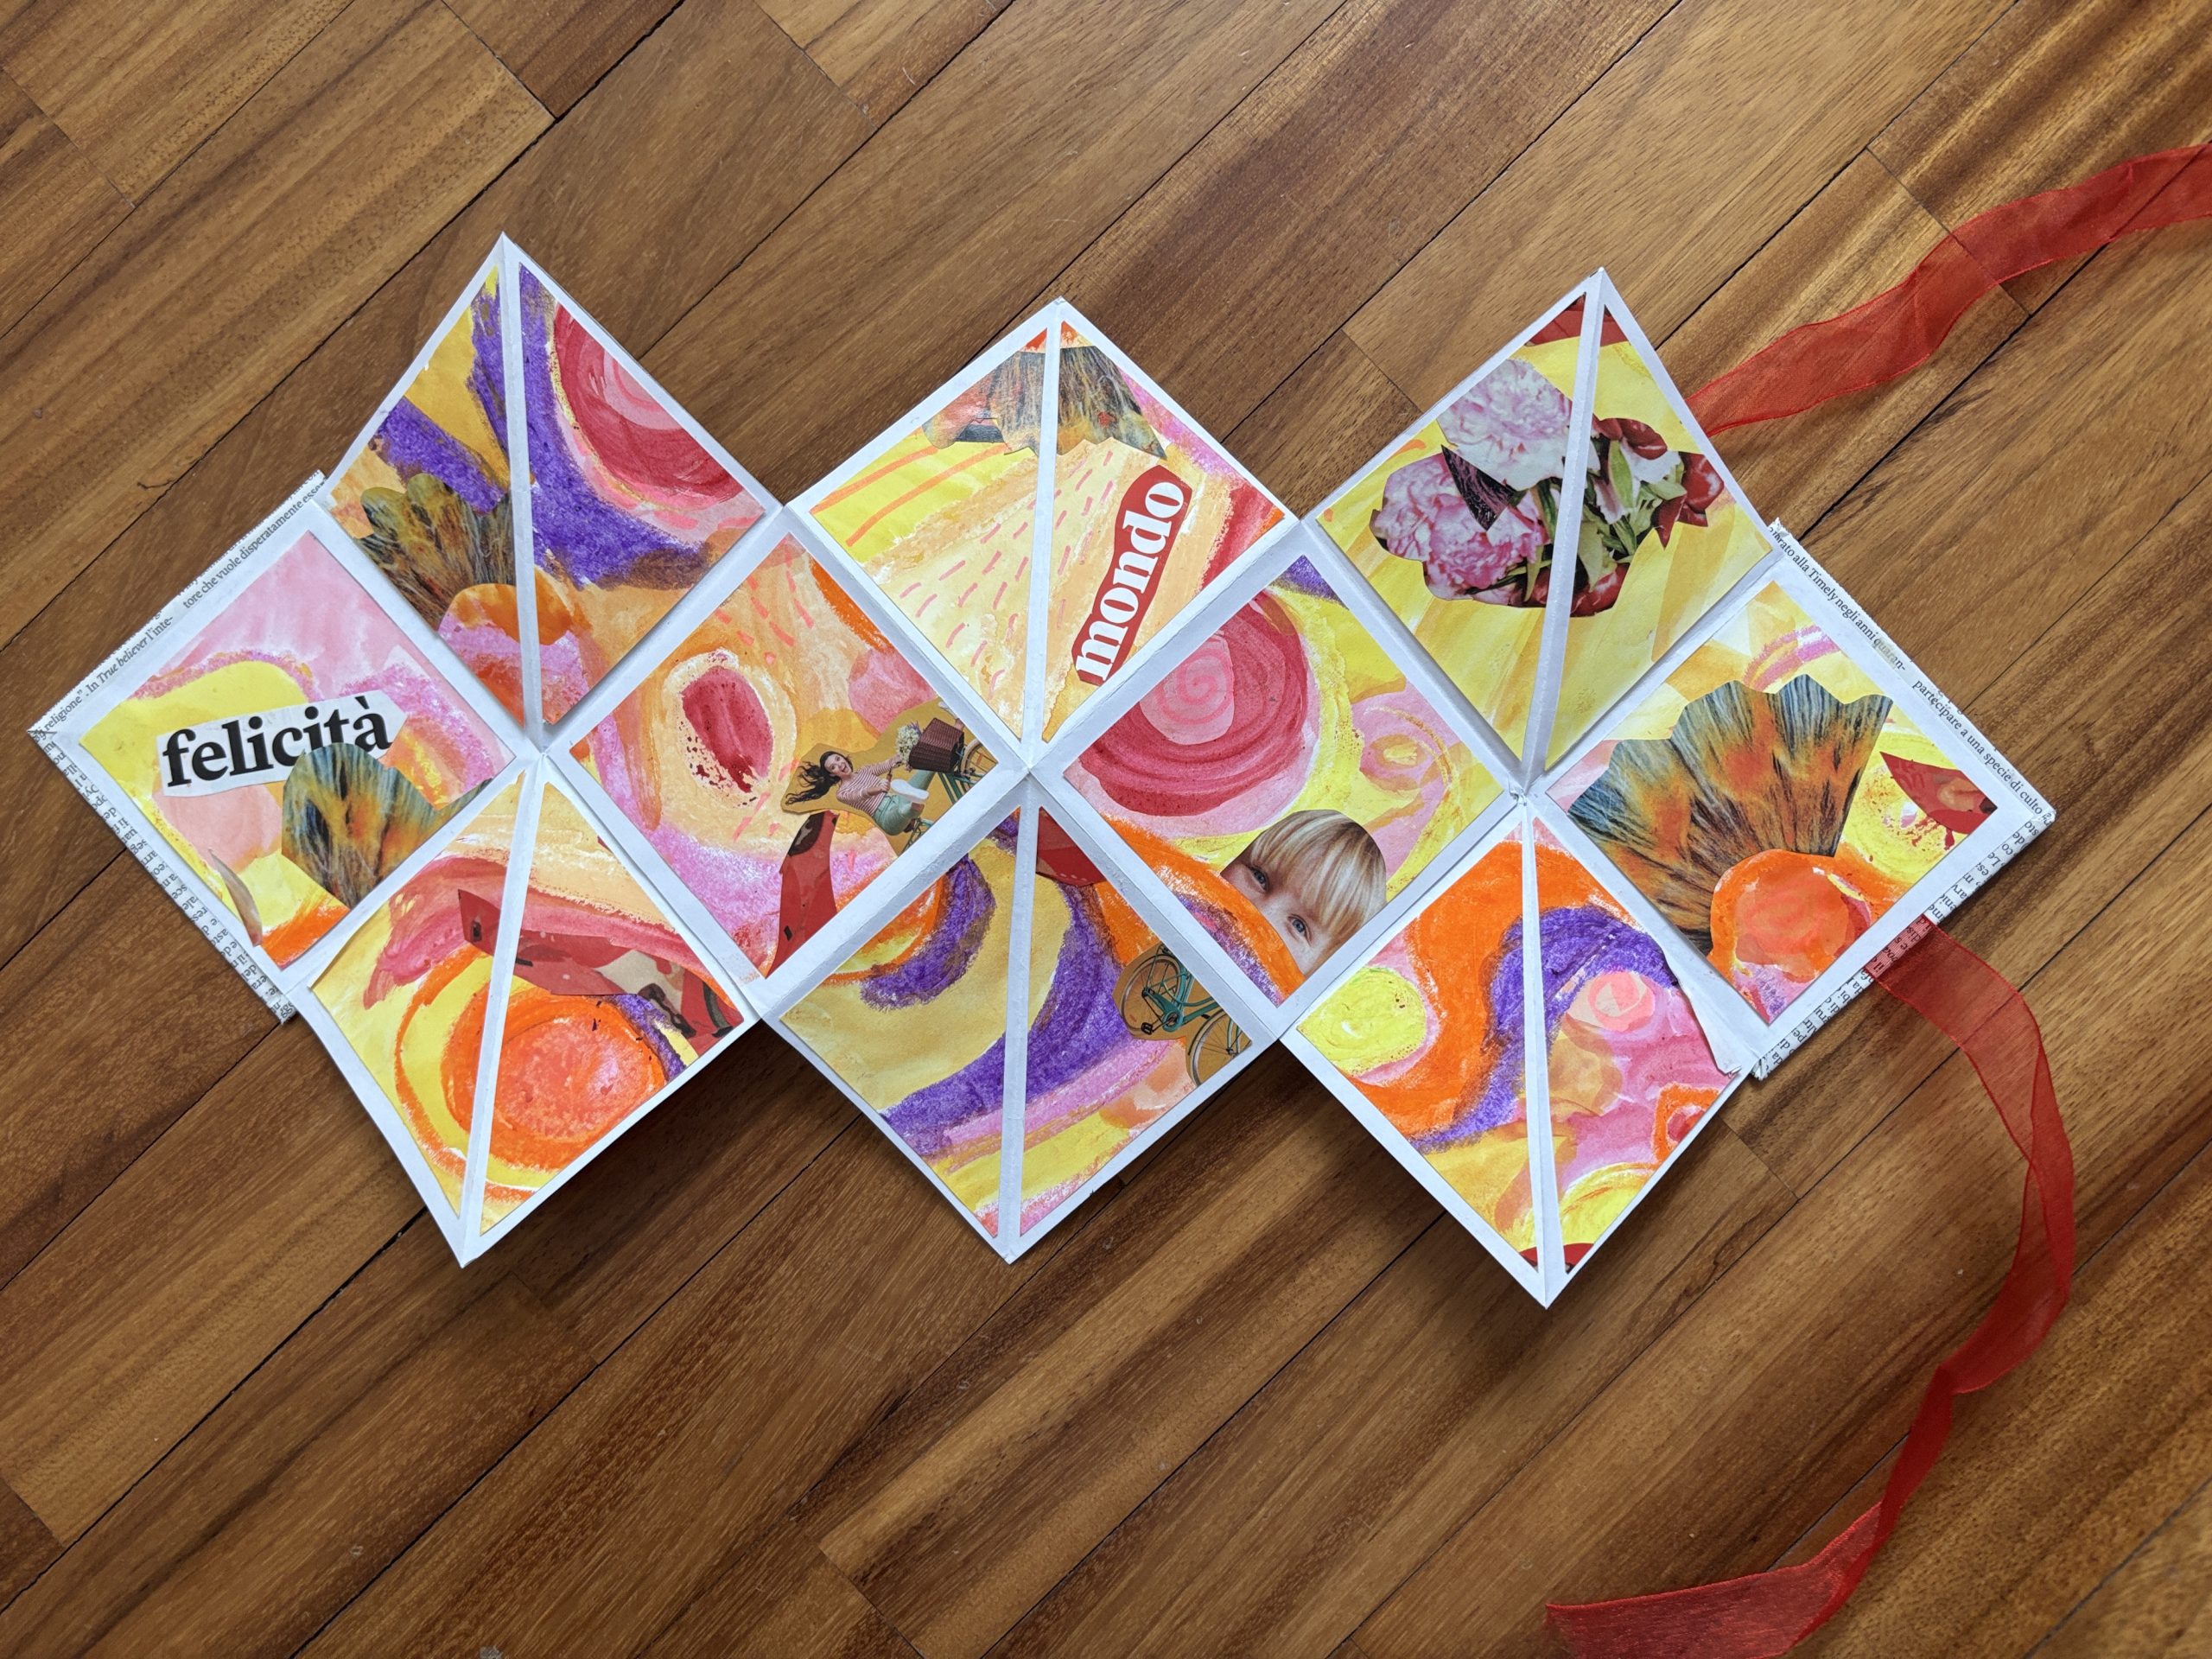
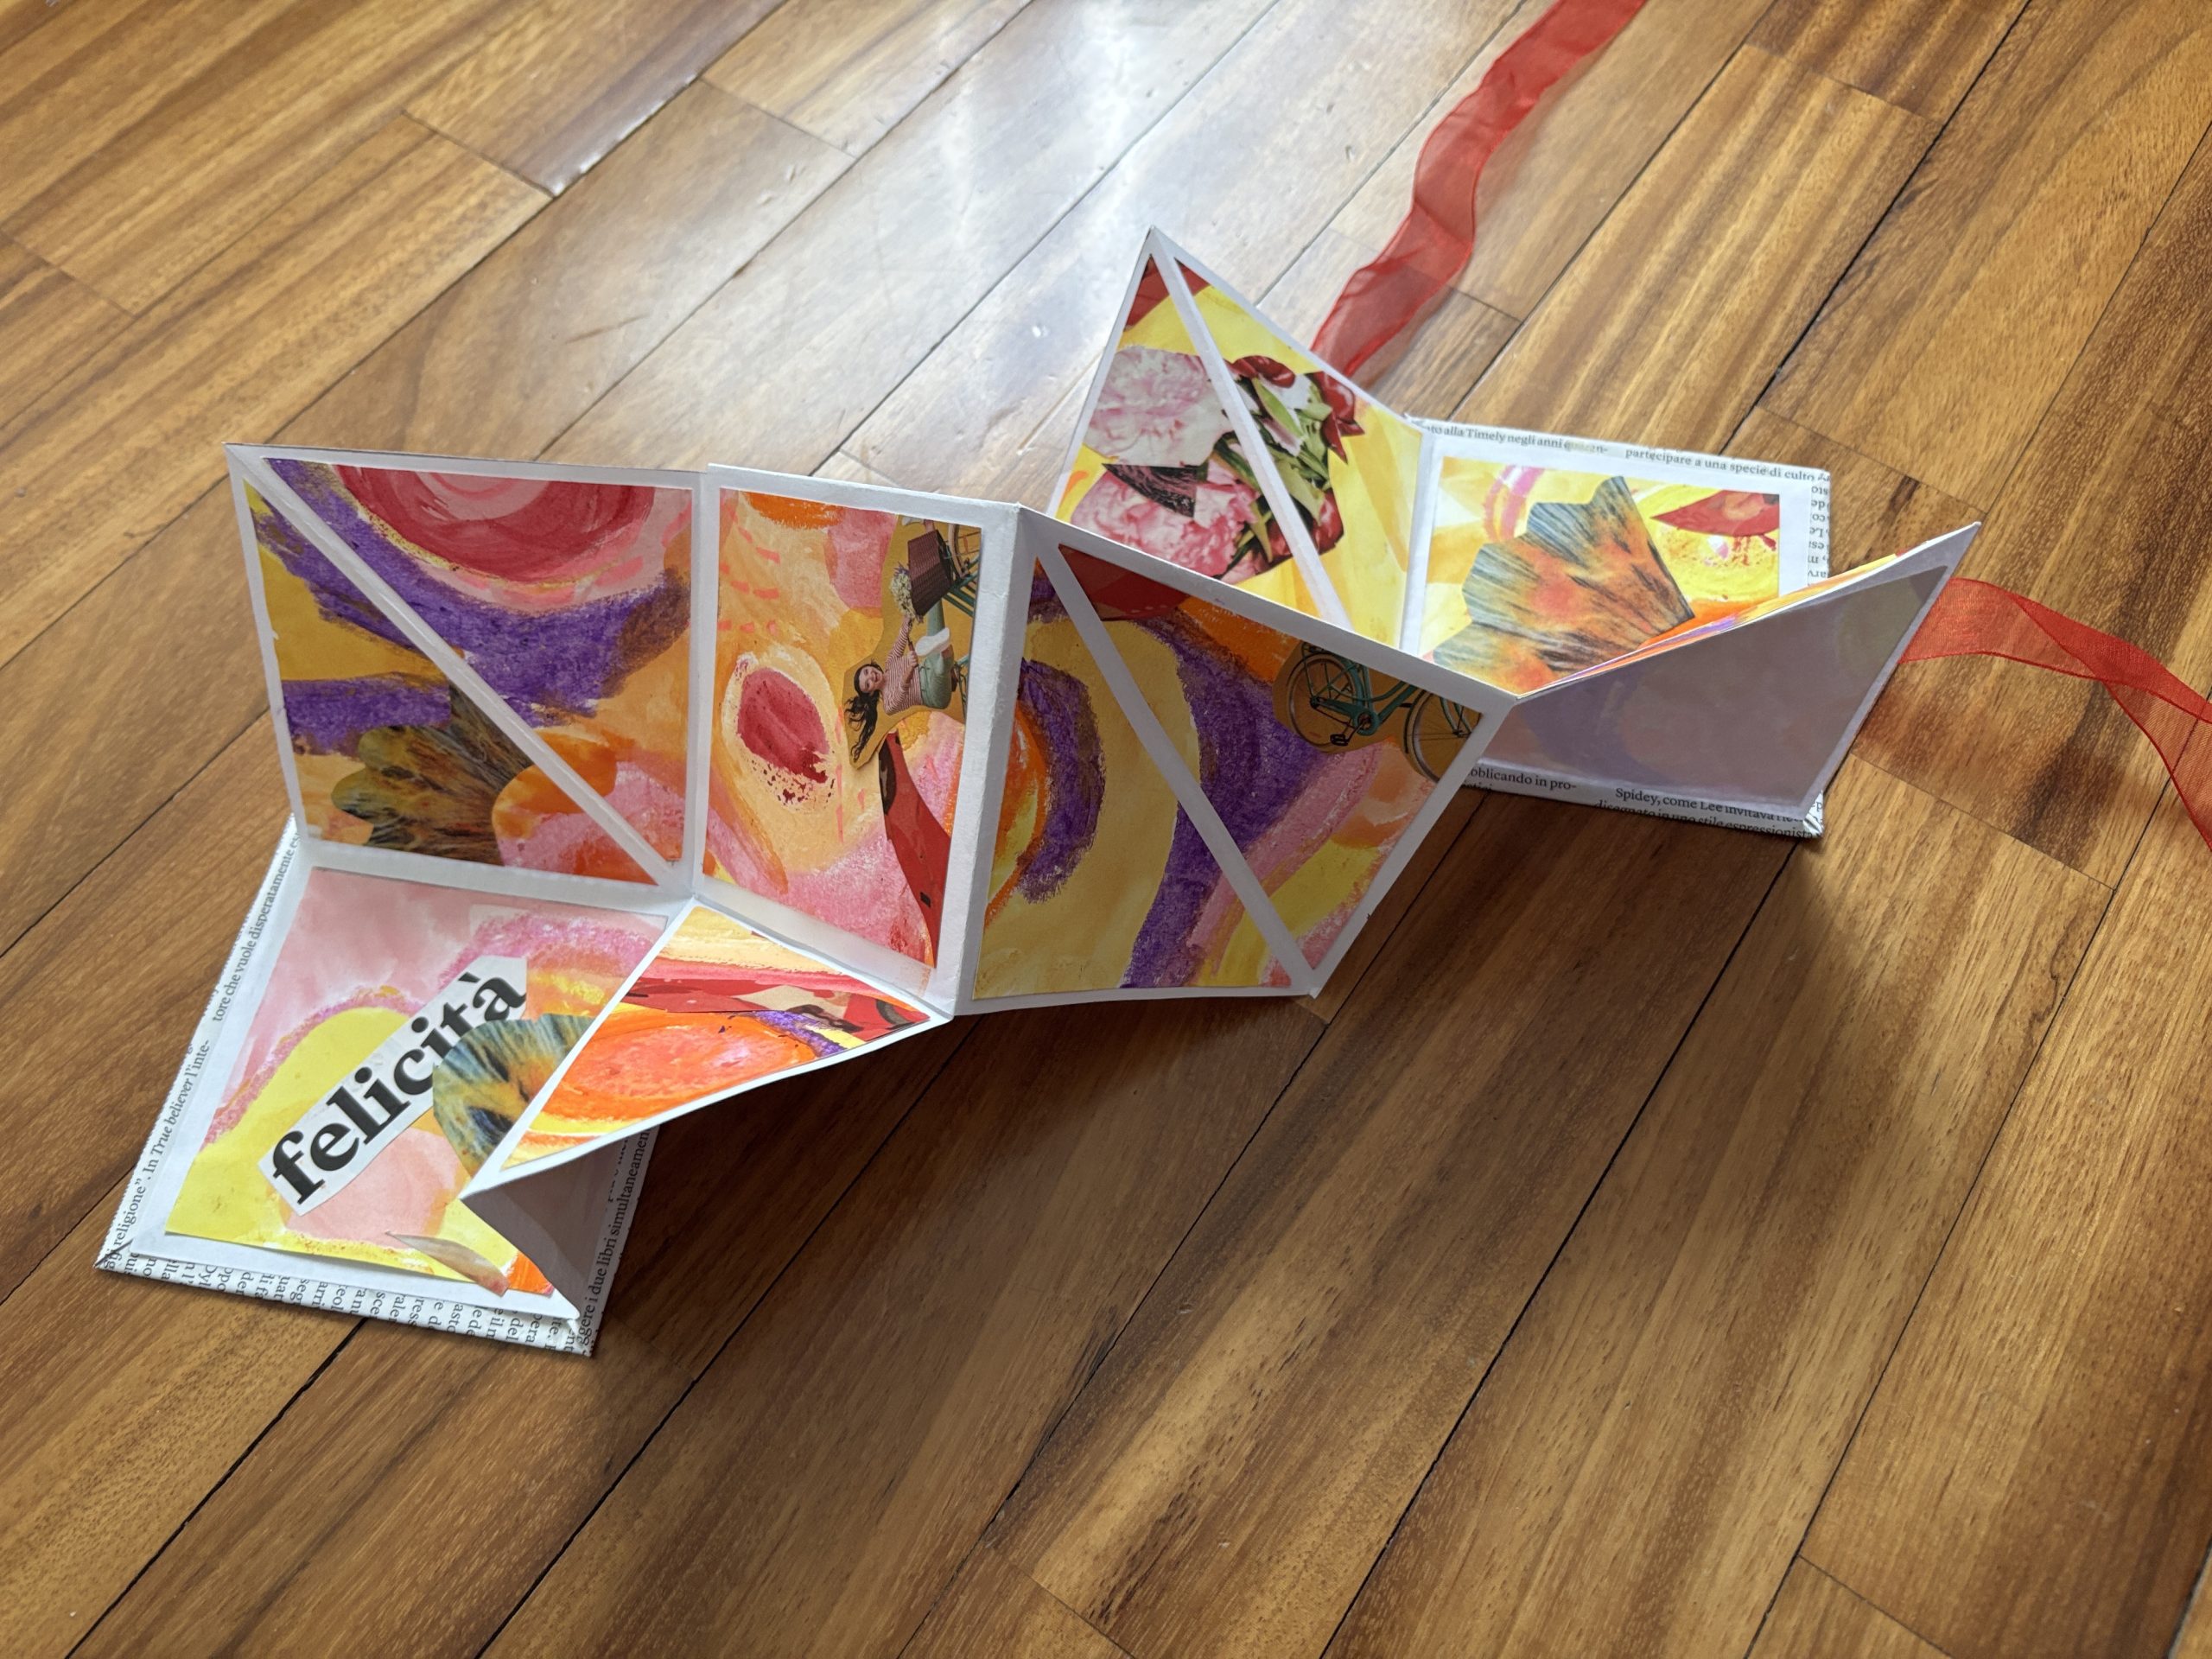
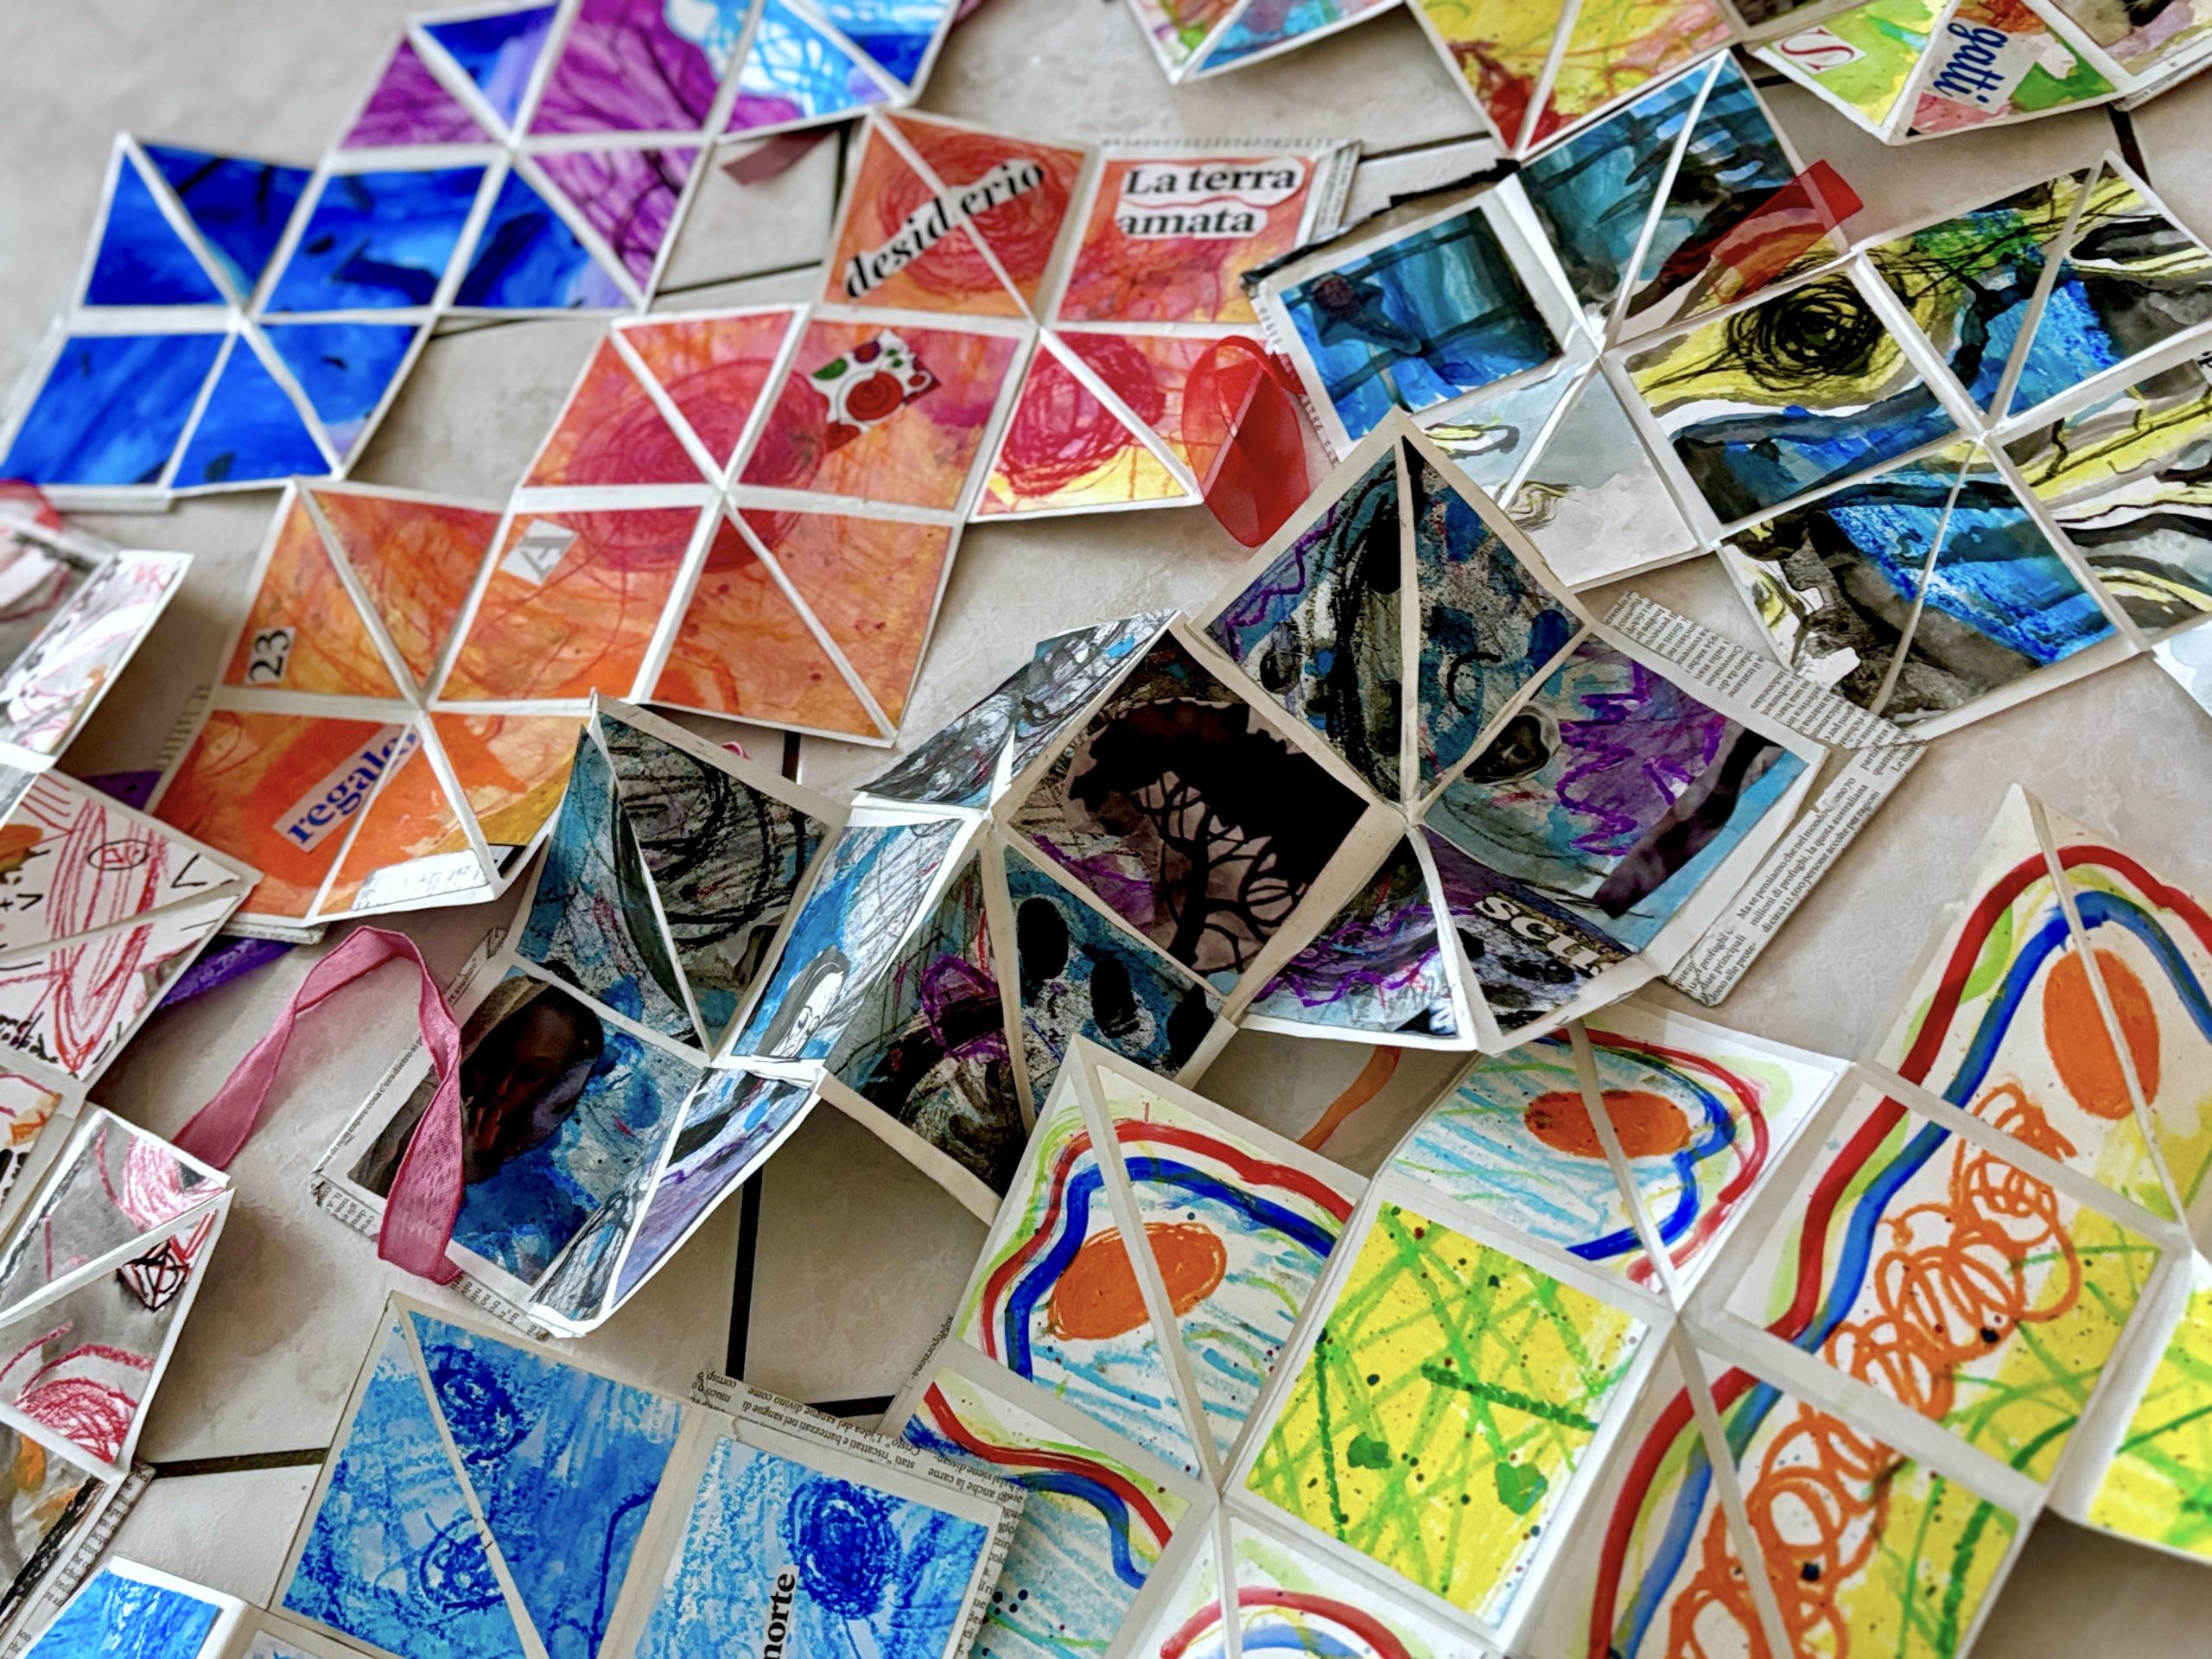
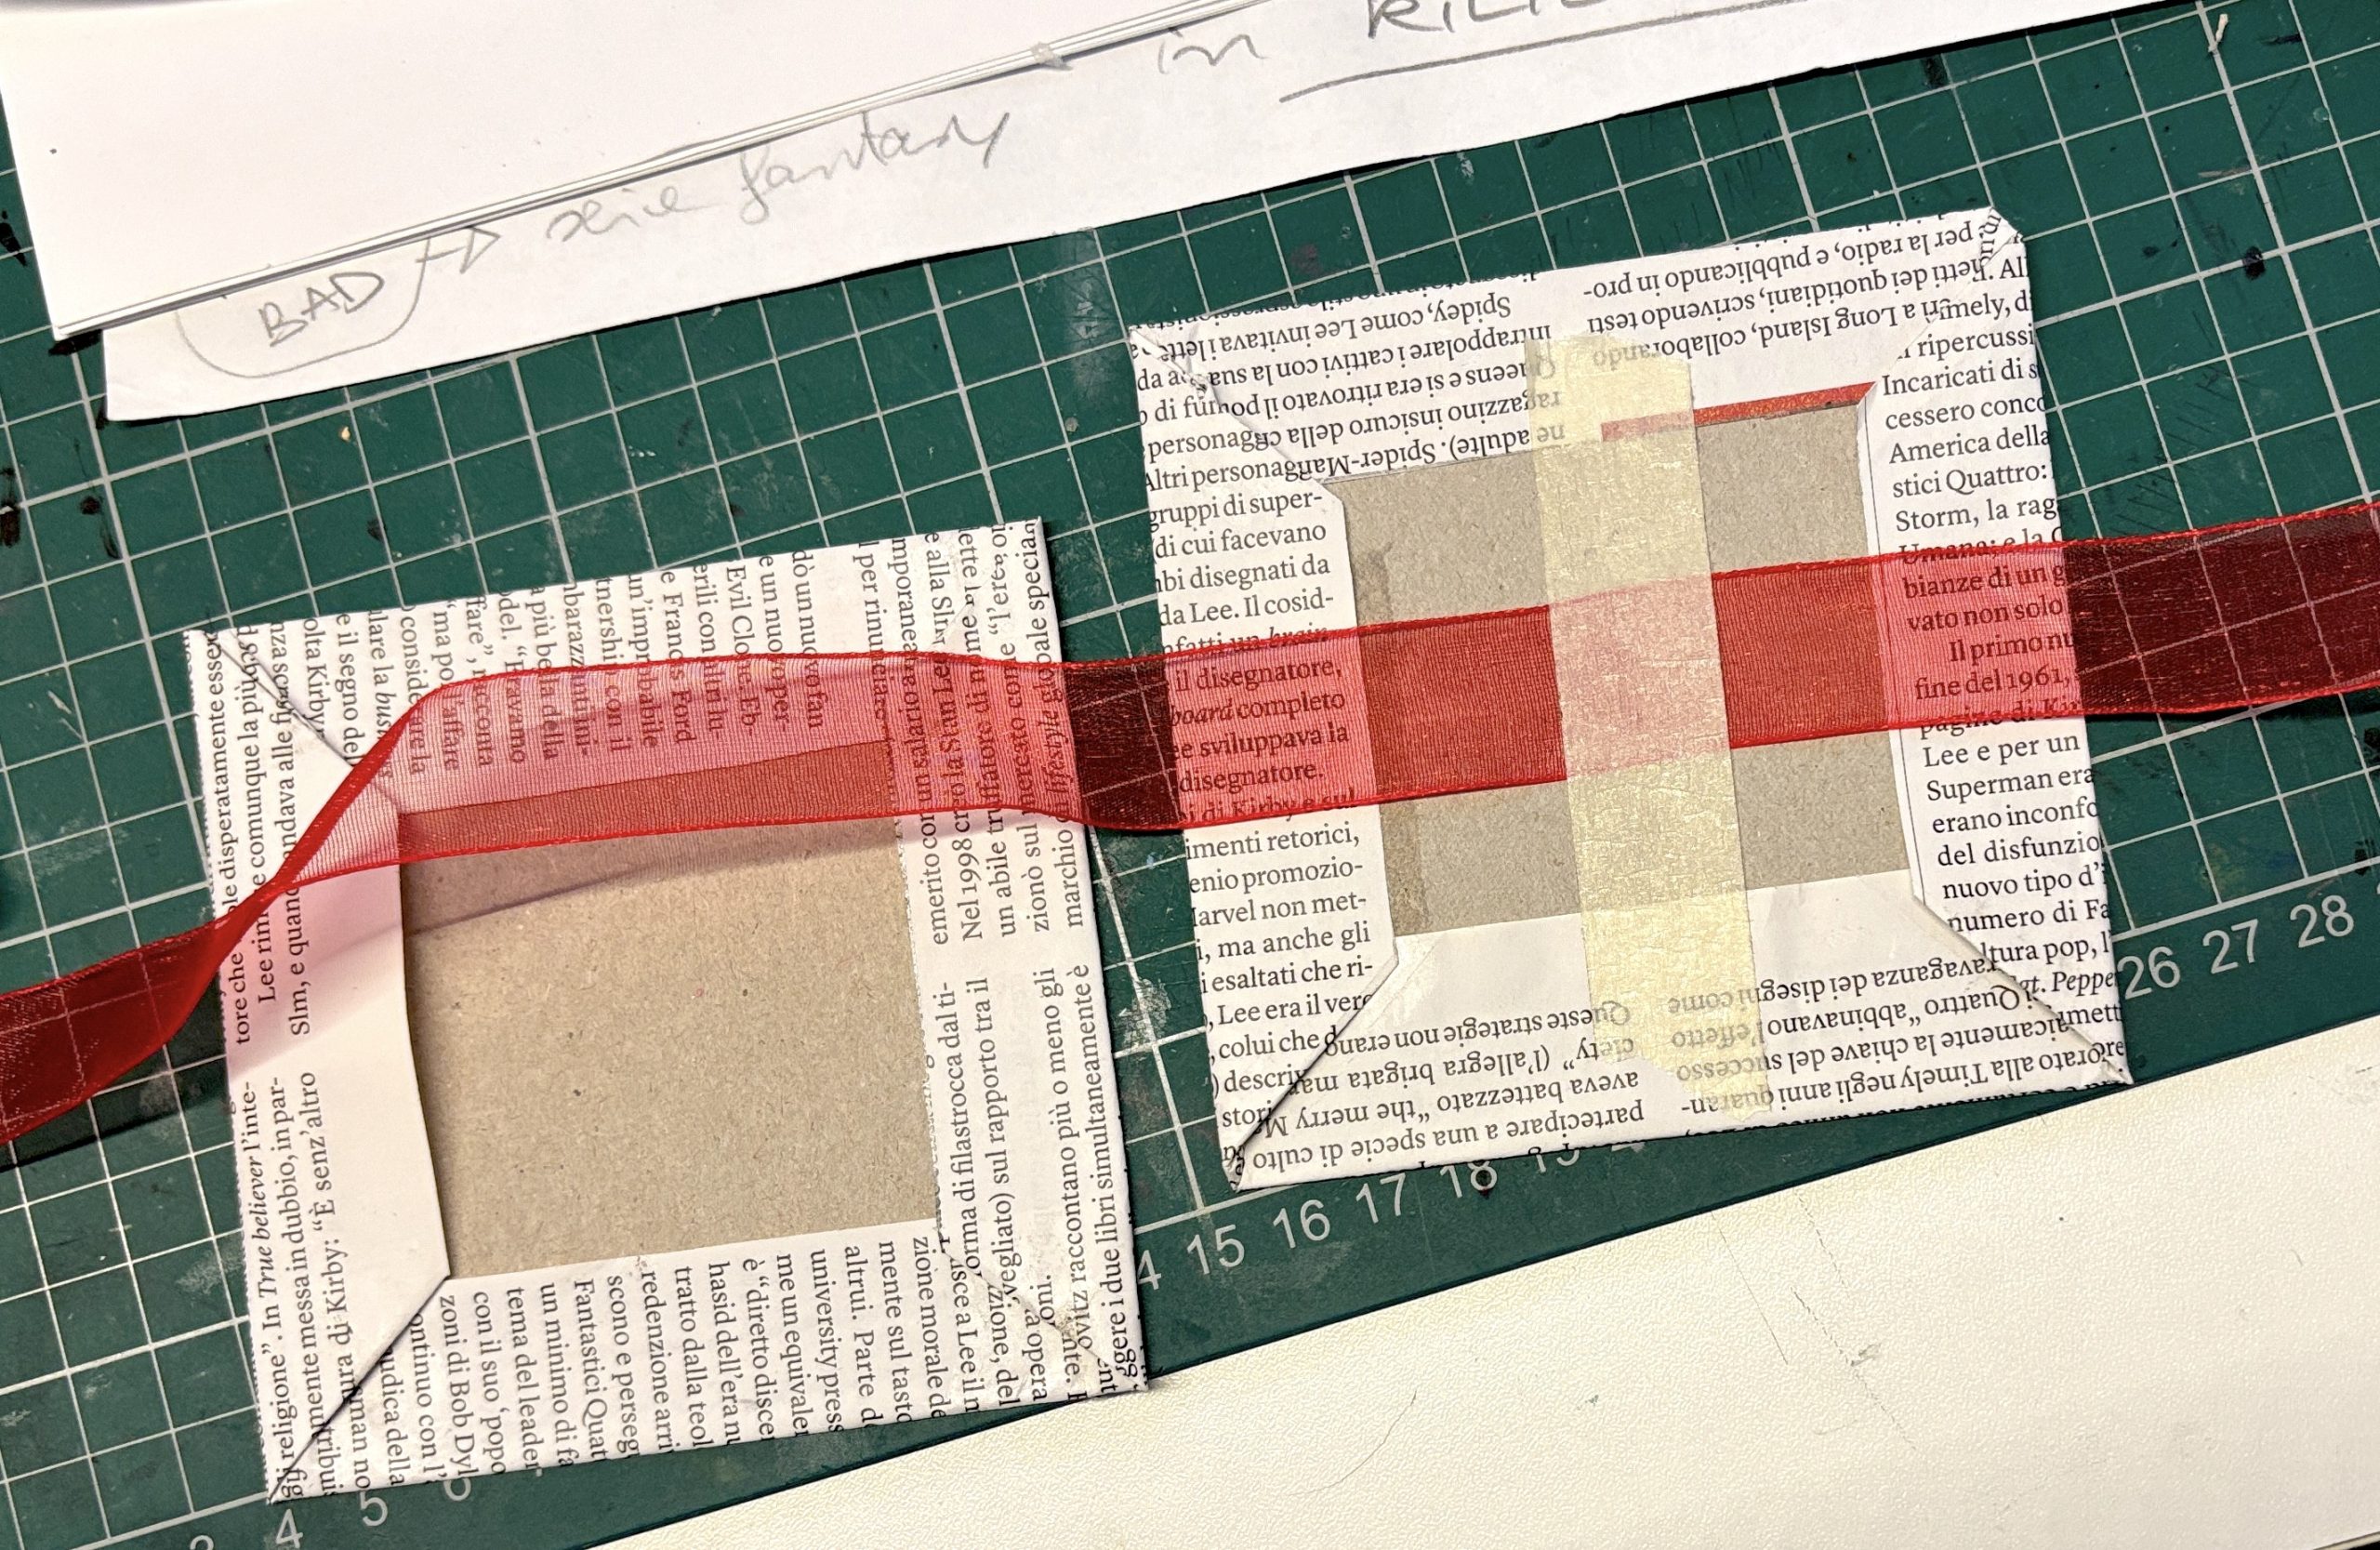
Always following the instructions of the video tutorial we also created a “cover” with two squared cards (10x10cm) lined with magazine pages. A ribbon was glued to one of the cards to close the booklet with a bow. From each drawing a small square was left, all the leftover squares were glued on the poster of our emotions. To finish the work each student created a small video with the CapCut App on iPad, and then the various clips were joined into a single video that you can see at the beginning of this post.


Bom dia, seus trabalhos são maravilhosos. Fiz um trabalho com azulejos e usei a base do artista brasileiro Athos Bulcão.
thank you Claudio!